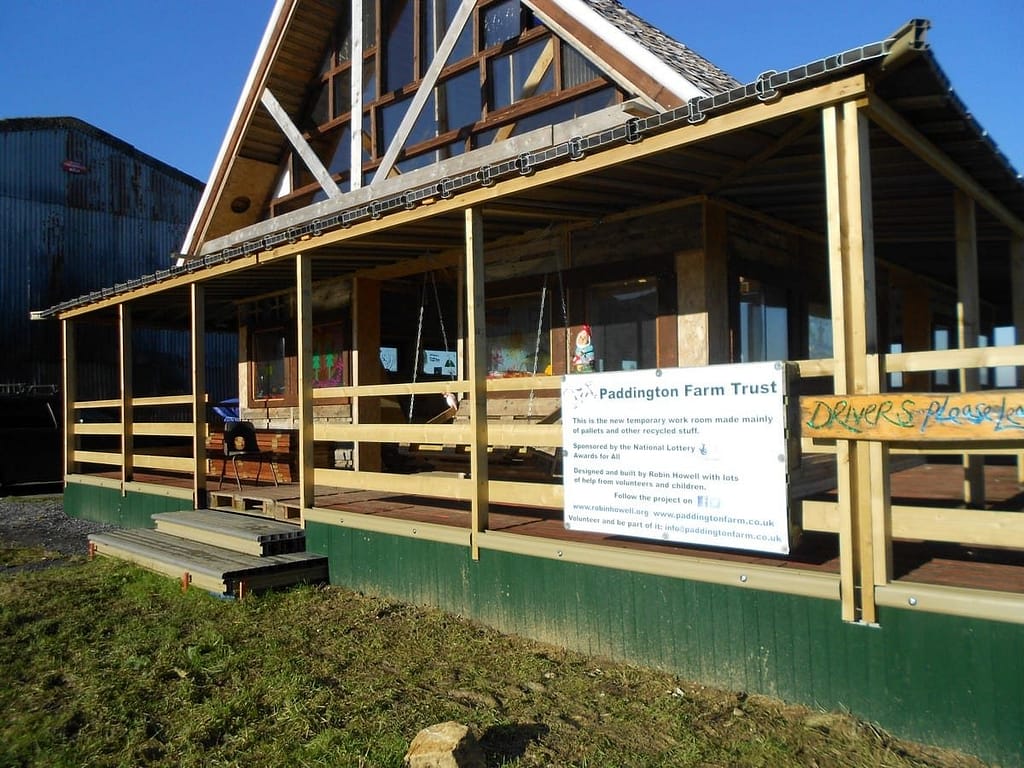
Paddington Farm Trust

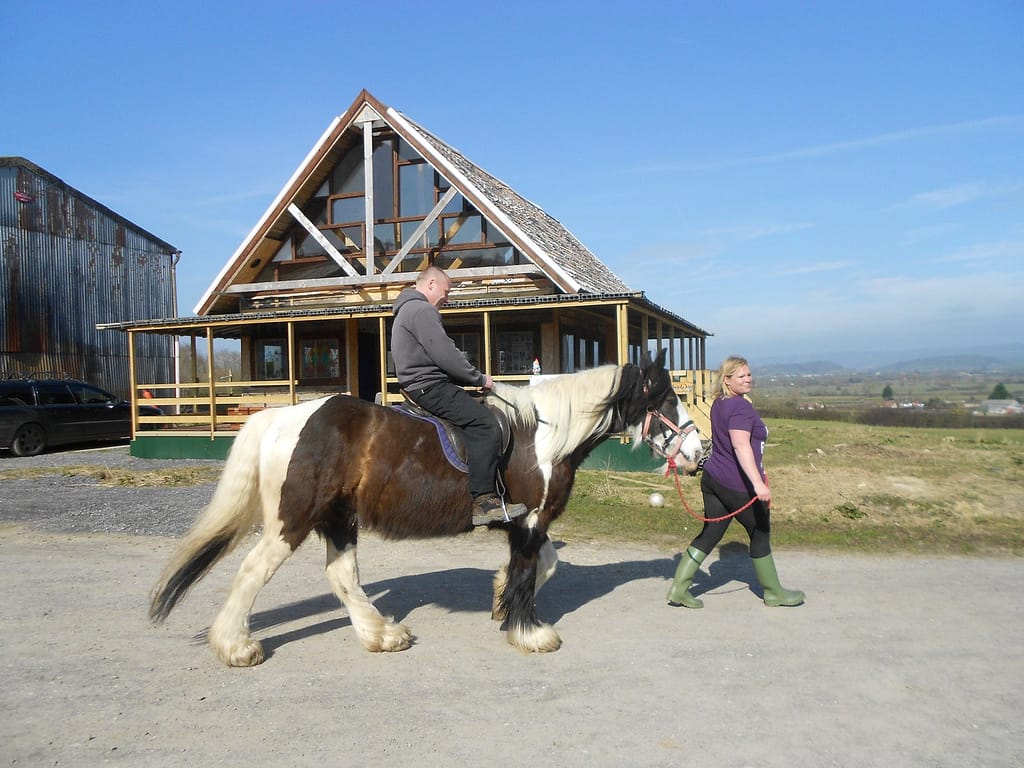
Paddington Farm is a working 43 acre organic farm at the foot of Glastonbury Tor. It provides accommodation for children and families to experience life on a working farm.
October 17th 2013
I love this little video , and you can find out more about the Paddington Farm Trust on their website. This page is about my small contribution to being part of it.
I came across Paddington Farm while I was doing stuff at the Red Brick Project. When I knew that my time at Red Brick was coming to an end, PFT (Paddington Farm Trust) invited me to see if I could come up with some ideas or a plan to convert the main barn into more useful spaces including some small workshop units.
We did, but reckoned that it might cost around £100K to do. That kind of money might take a bit of raising which could take two or three years.
It was now around August 2013.
In the meantime I needed to build something because that is what I do. I suggested we might build a temporary space to be used for teaching or whatever PFT would like to do with it. We could build it out of pallets and other recycled stuff, and involve as many volunteers, children and grannies as would care to help.
This seemed like a good idea.
Tiff and Holly instantly insisted that it should have a veranda all round it, and especially where we could sit on it and look at the view whilst sipping cocktails. So that took care of the design.
The next thing was how to pay for it. We made an application to The Lottery Awards for All fund (Tiff did most of the work) and after a bit of tweaking we got an award of about £10K which was pretty good.
The original plan was to start at Easter 2014 but Awards for All were changing their system or something and by the time they confirmed the award it was too late to start without having the very messy bits happening right in the middle of the busy season so we postponed the start until the autumn. In fact this turned out to be a blessing in disguise, partly because I would have been seriously in the way of the new sewage system, and partly because it gave me a chance to get the Paddington Farm Metal Recycling Scheme up and running.
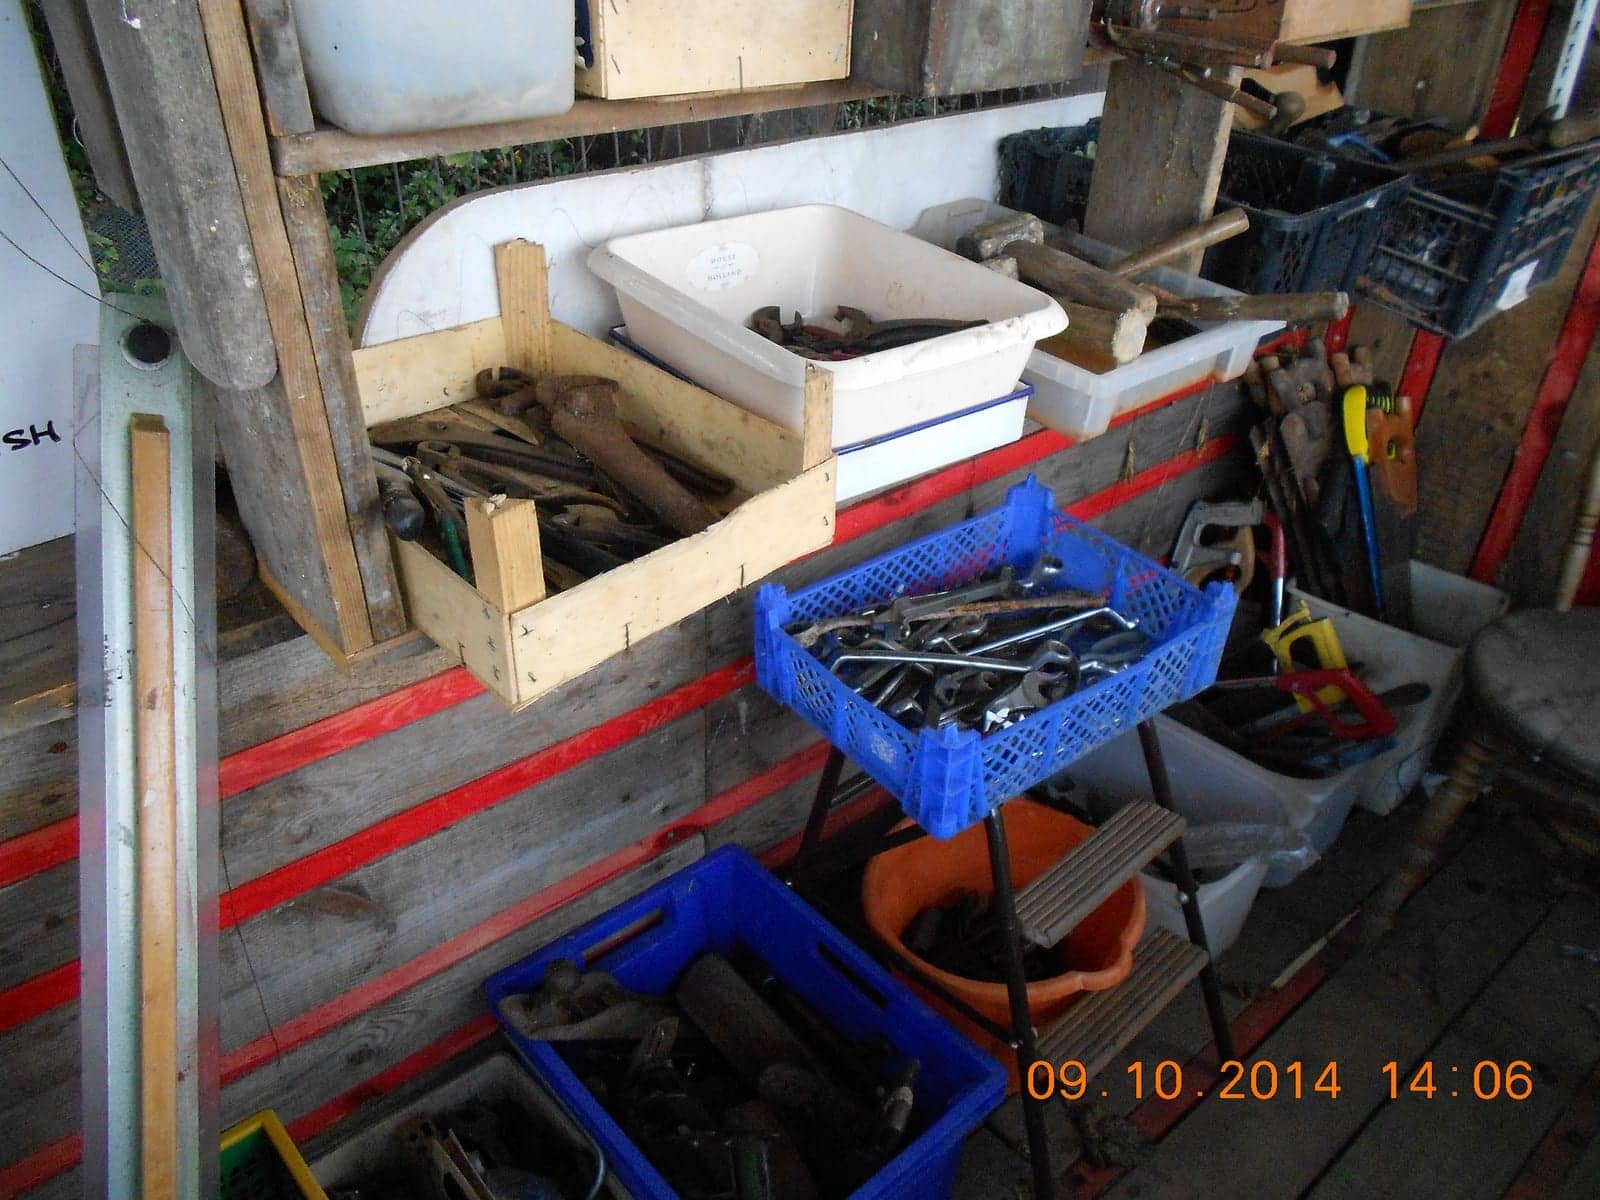
THE PFT METAL RECYCLING SCHEME
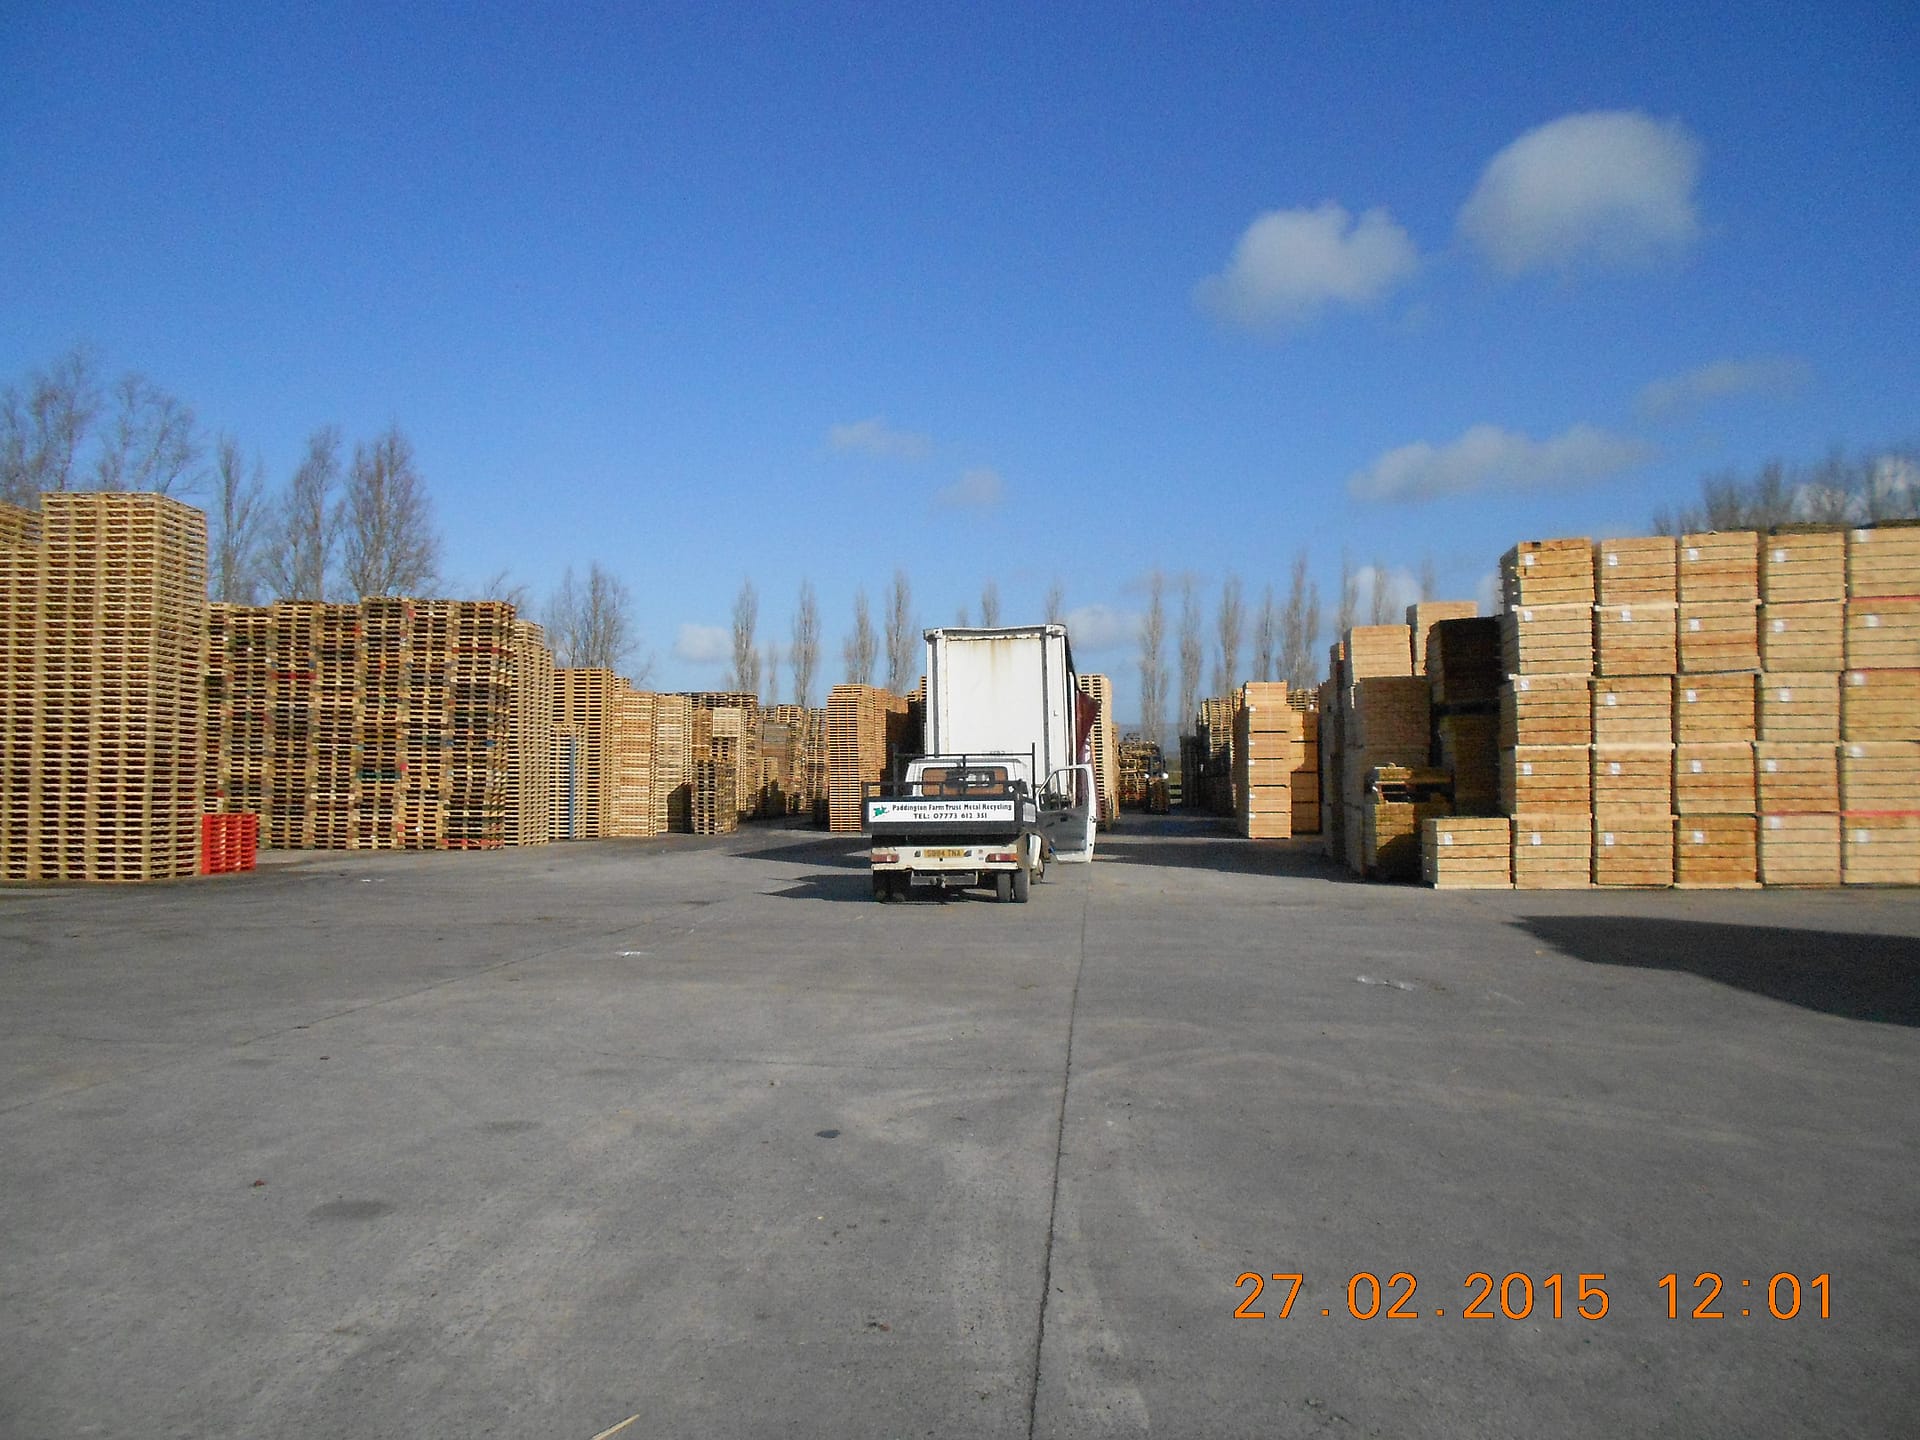
I had started the scrap metal scheme at the Red Brick. In early 2011 RBB (Red Brick Building) issued a community share scheme at £100 a share to raise funds for the project. There was a huge amount of local goodwill towards it but not everyone had £100 to buy a share. We set the scrap scheme up and suggested that those who didn’t have that kind of money could give us any old metal stuff they had because it would all help. Not exactly saucepans into Spitfires but pretty much the same principle. Thomas’s, the local scrap dealers provided us with a skip and paid us for what we weighed in. In about six weeks we raised £2,500.00!
When the share issue closed I stopped the scrap scheme but it wouldn’t die! People just kept bringing stuff in. And, what’s more it wasn’t just scrap metal. There were tools, and things that were not even broken but just not wanted, so we started selling them stupidly cheaply as long as they made more money than throwing them away, and just weighing them in.
And then we found that if people brought us manual Singer sewing machines or nice hand tools, we could donate those to TFSR (Tools for Self Reliance) and they could go off to Africa for a whole new life! So, these things formed the principles of the scrap scheme, and when RBB was up and running and didn’t really need the scrap scheme any more, I brought it up to PFT to raise funds for them.
The principles have remained the same but PFT has brought a whole new dimension to the way it works.
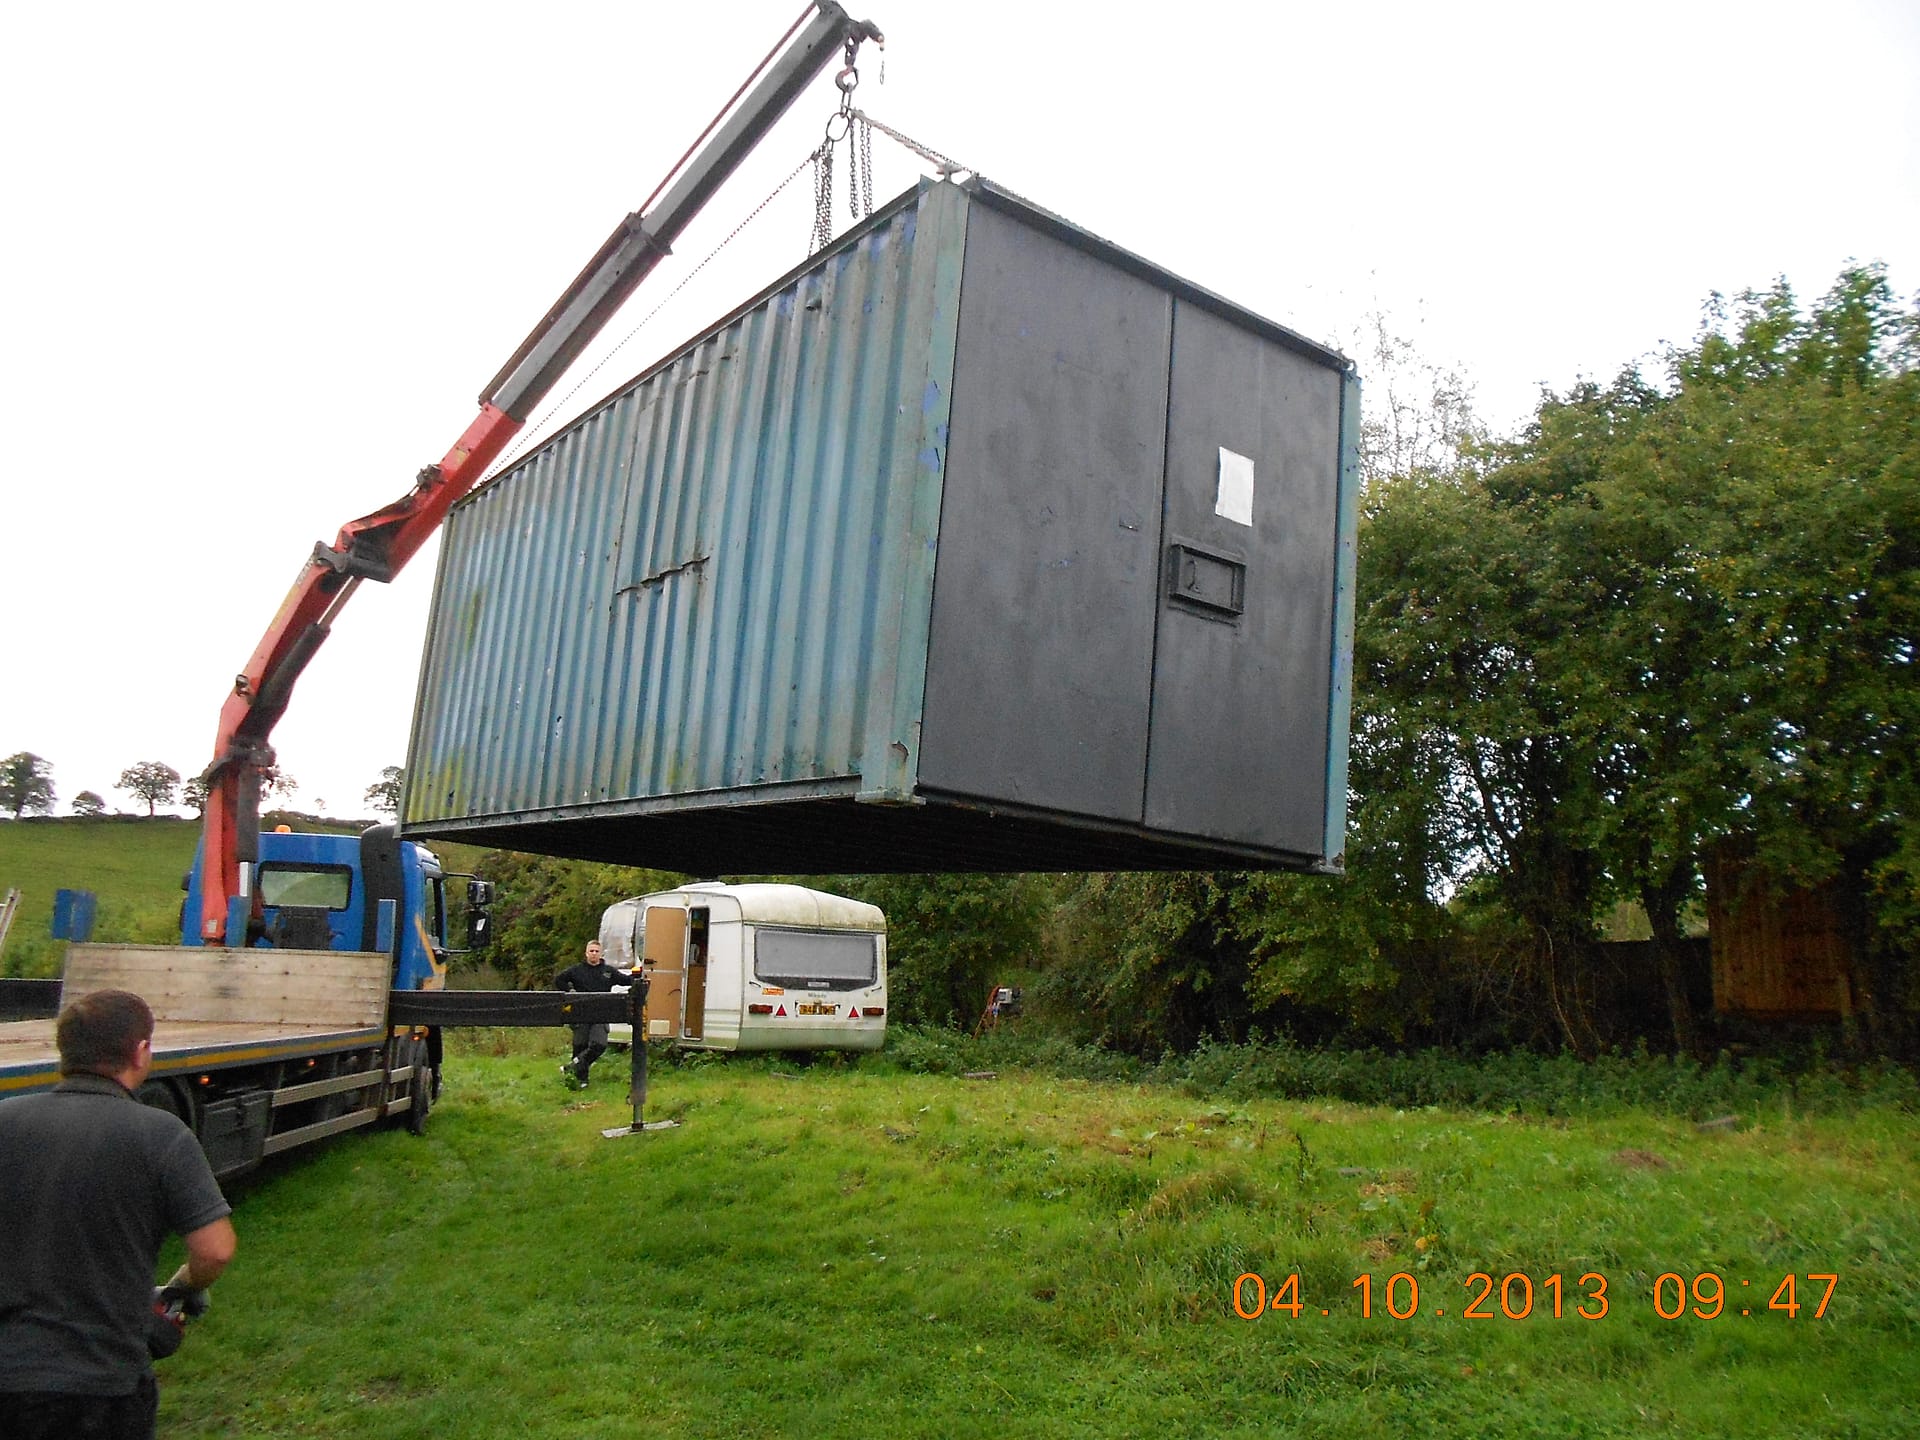
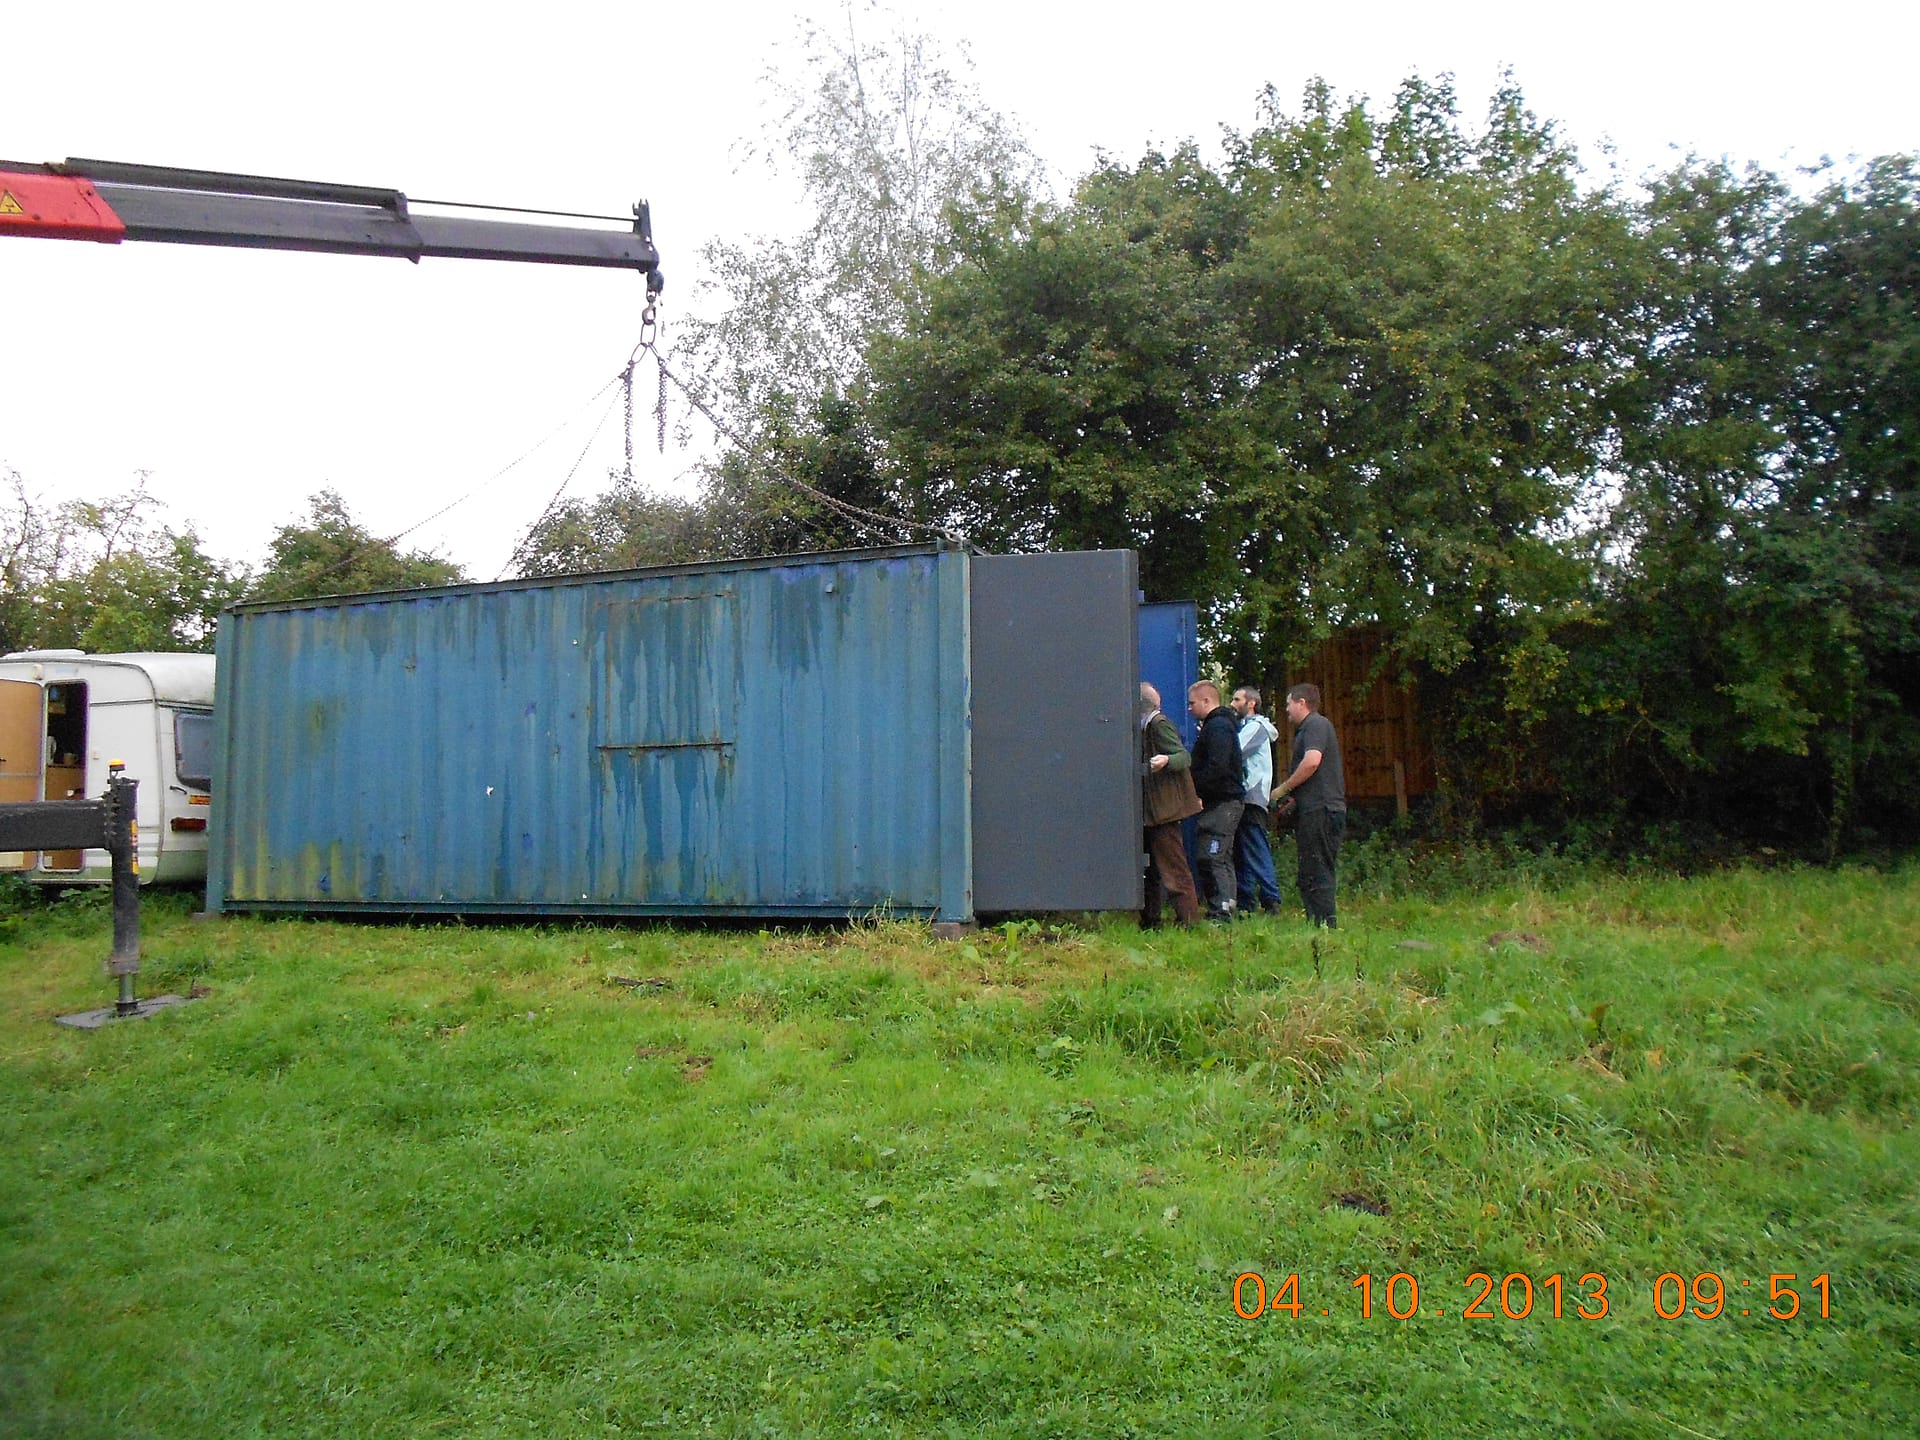
We bought the scrap container from RBB and brought it up to Paddington Farm.
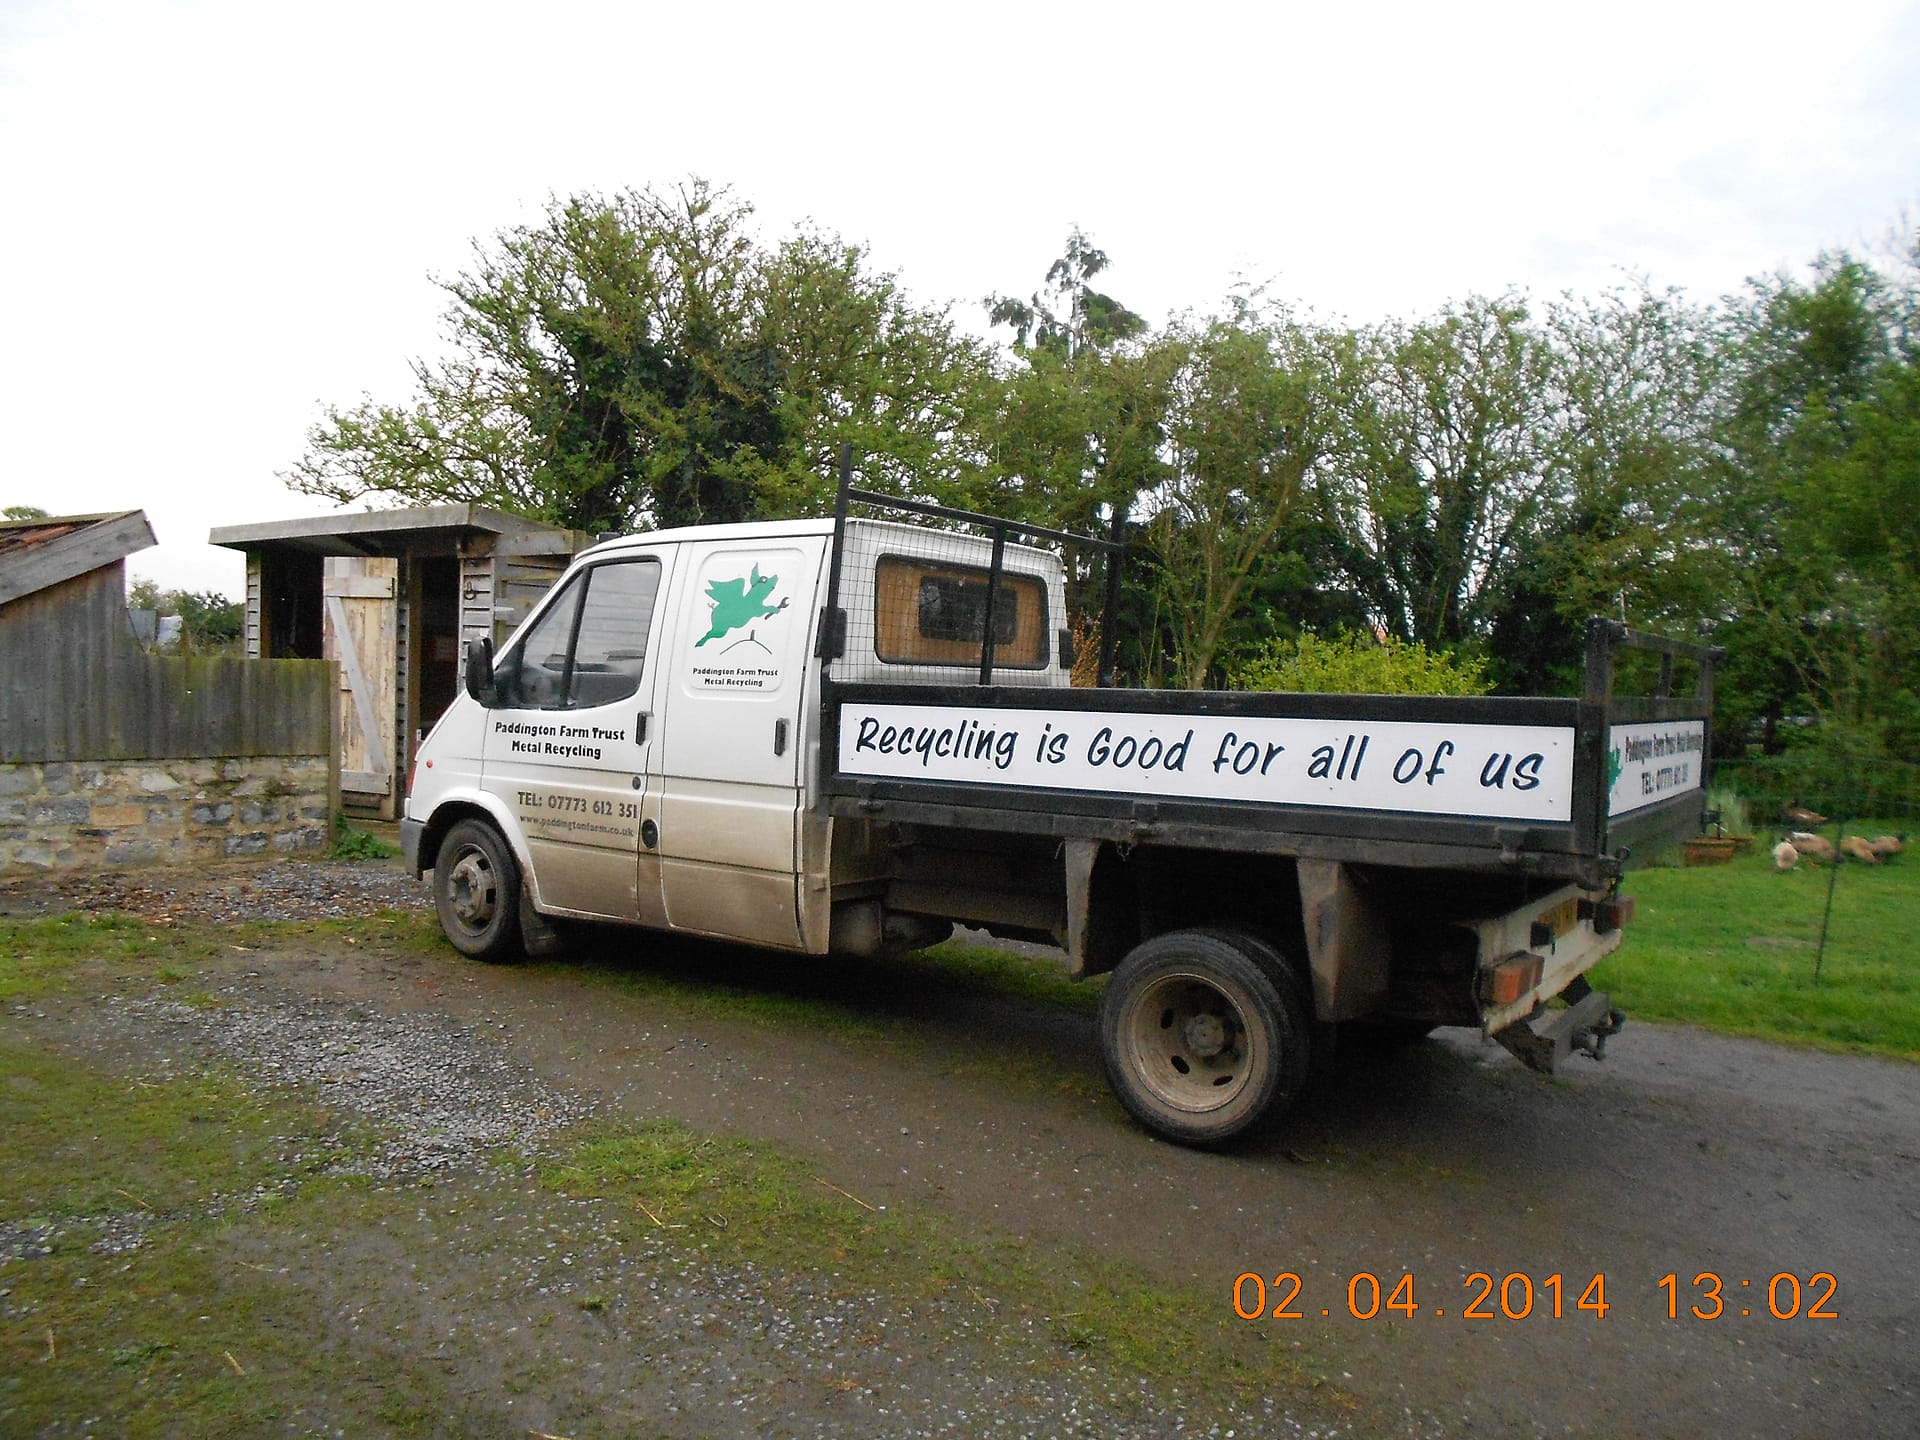
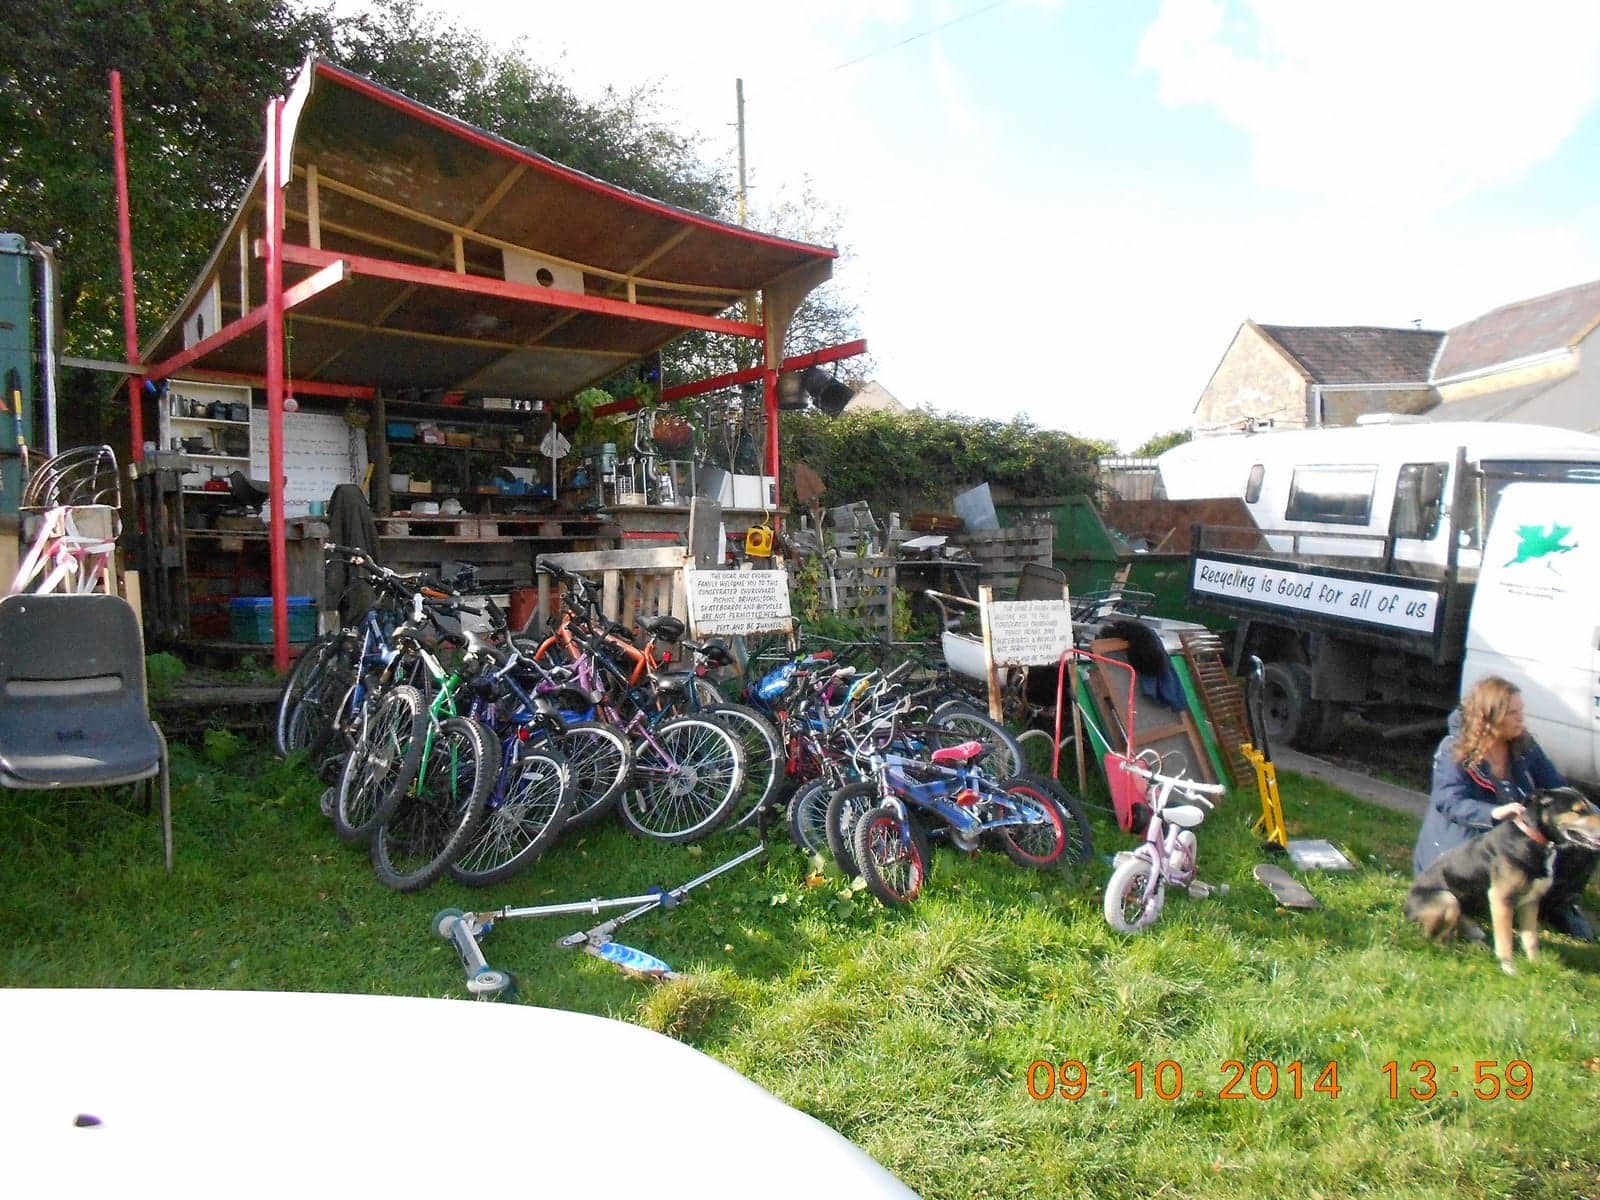
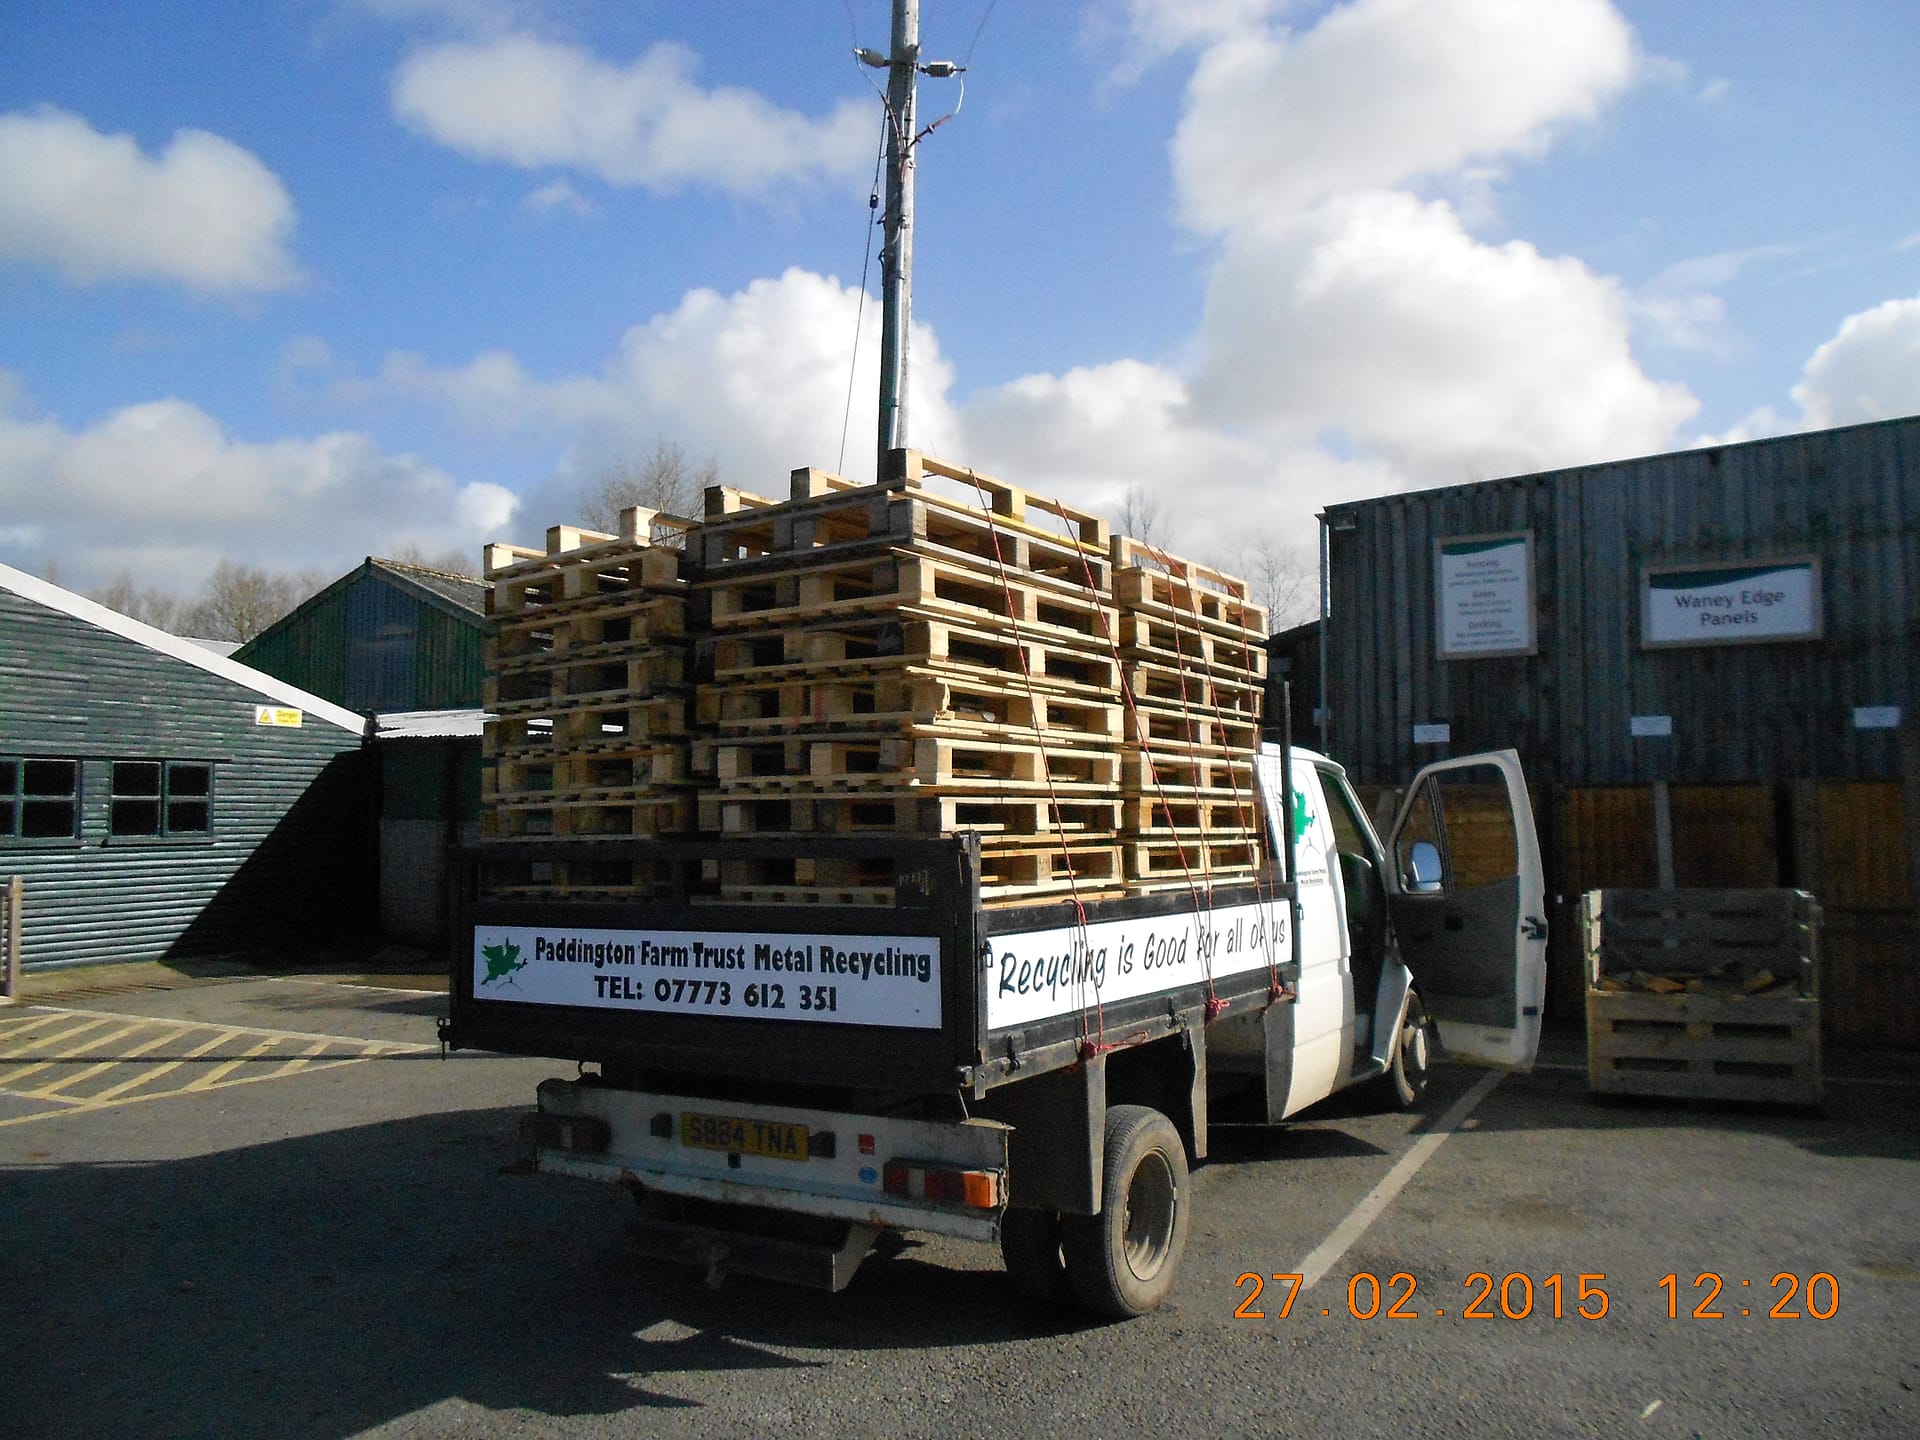
Because we are a bit tucked away it was more difficult for people to bring stuff to us so we bought a truck and we will collect.
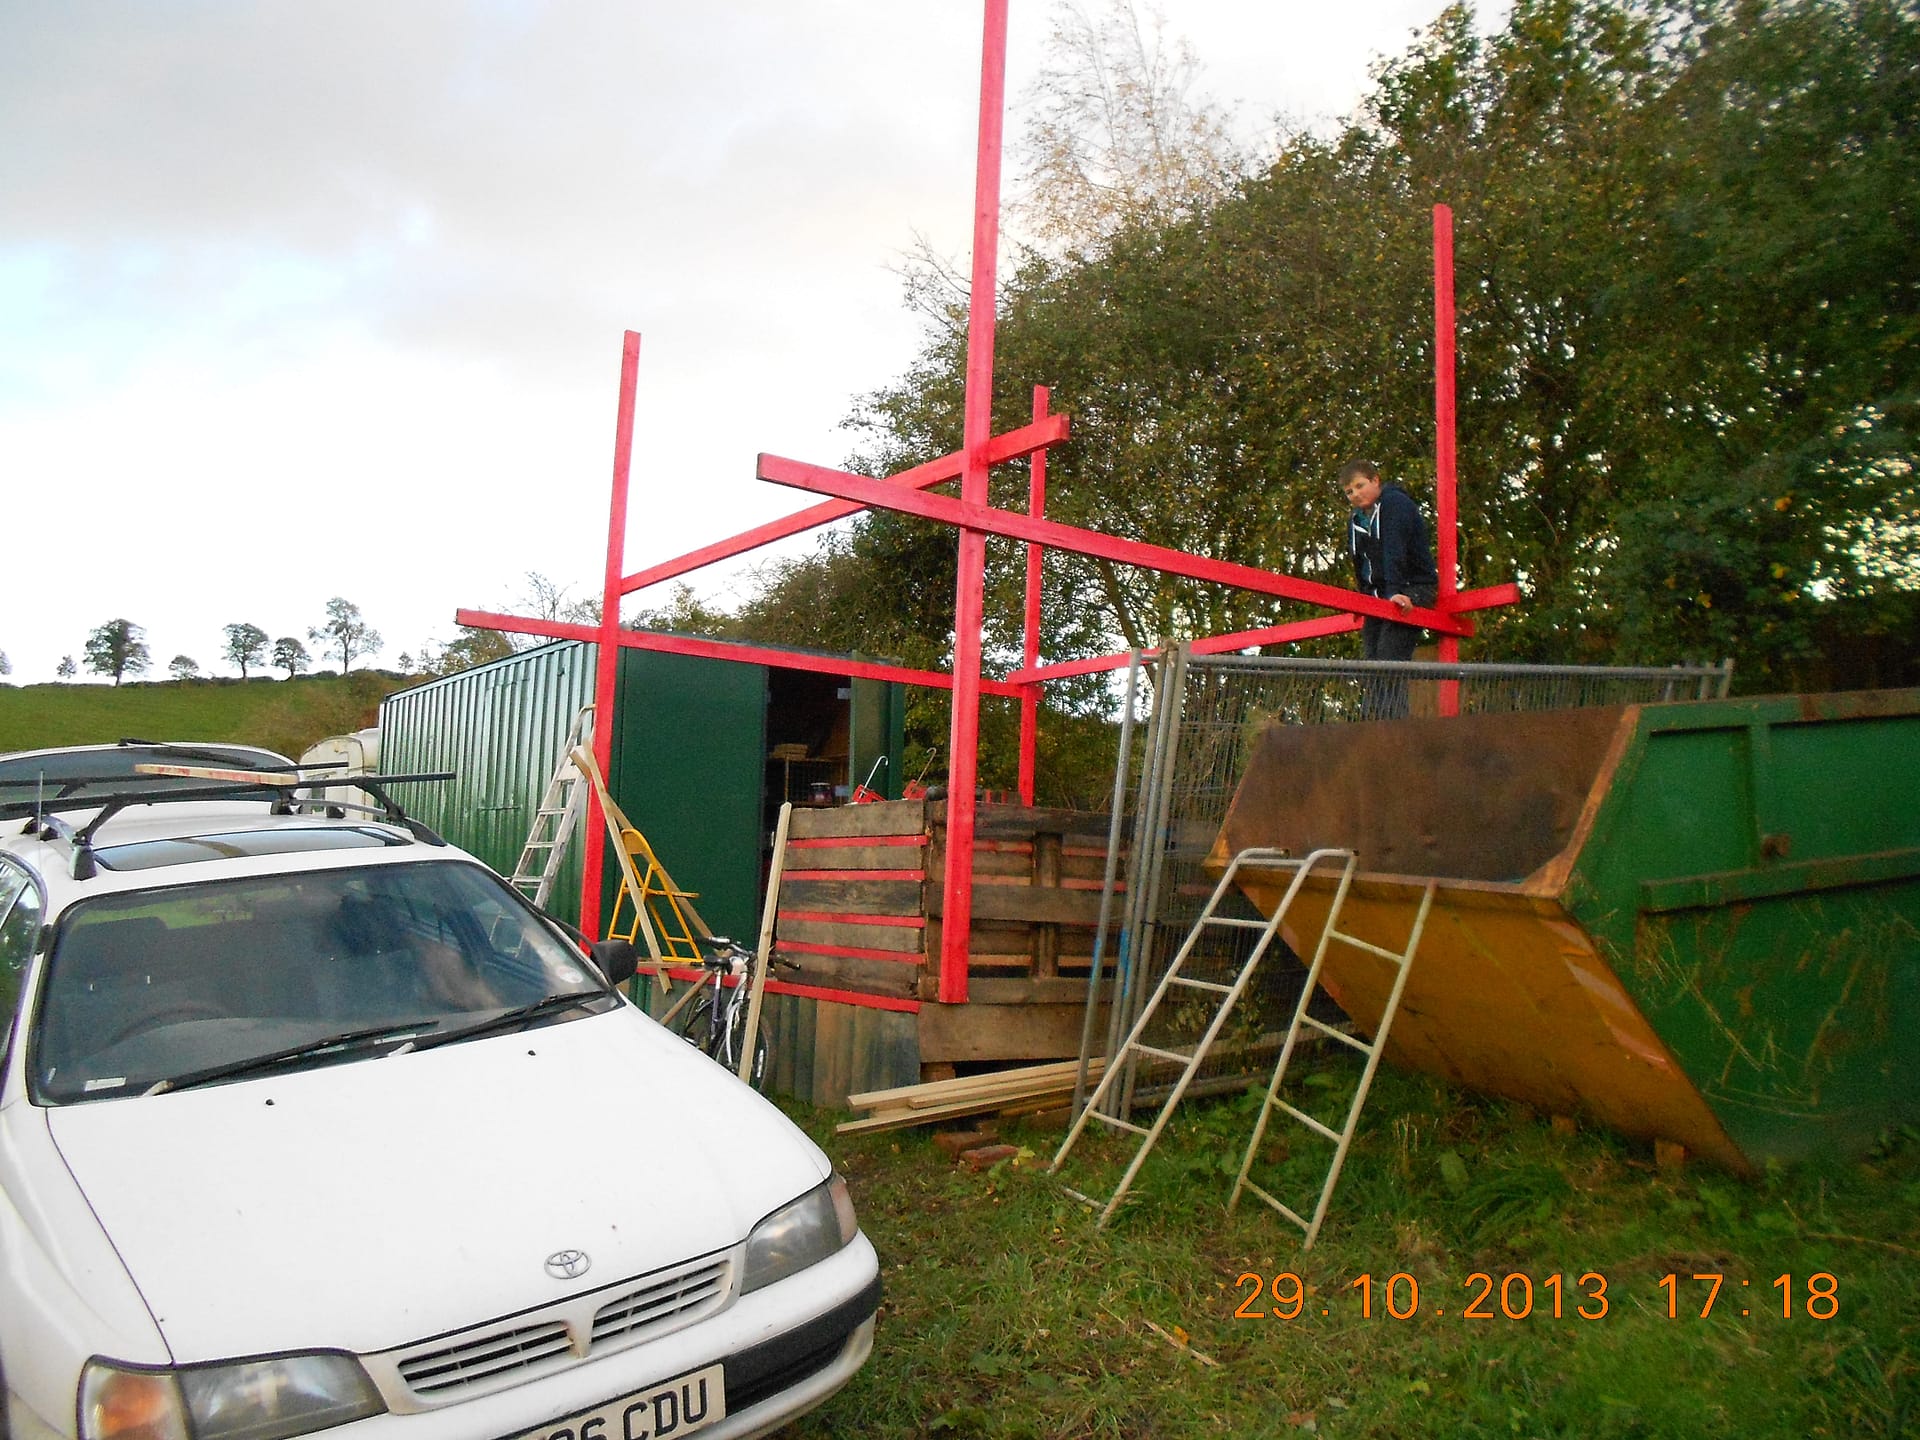
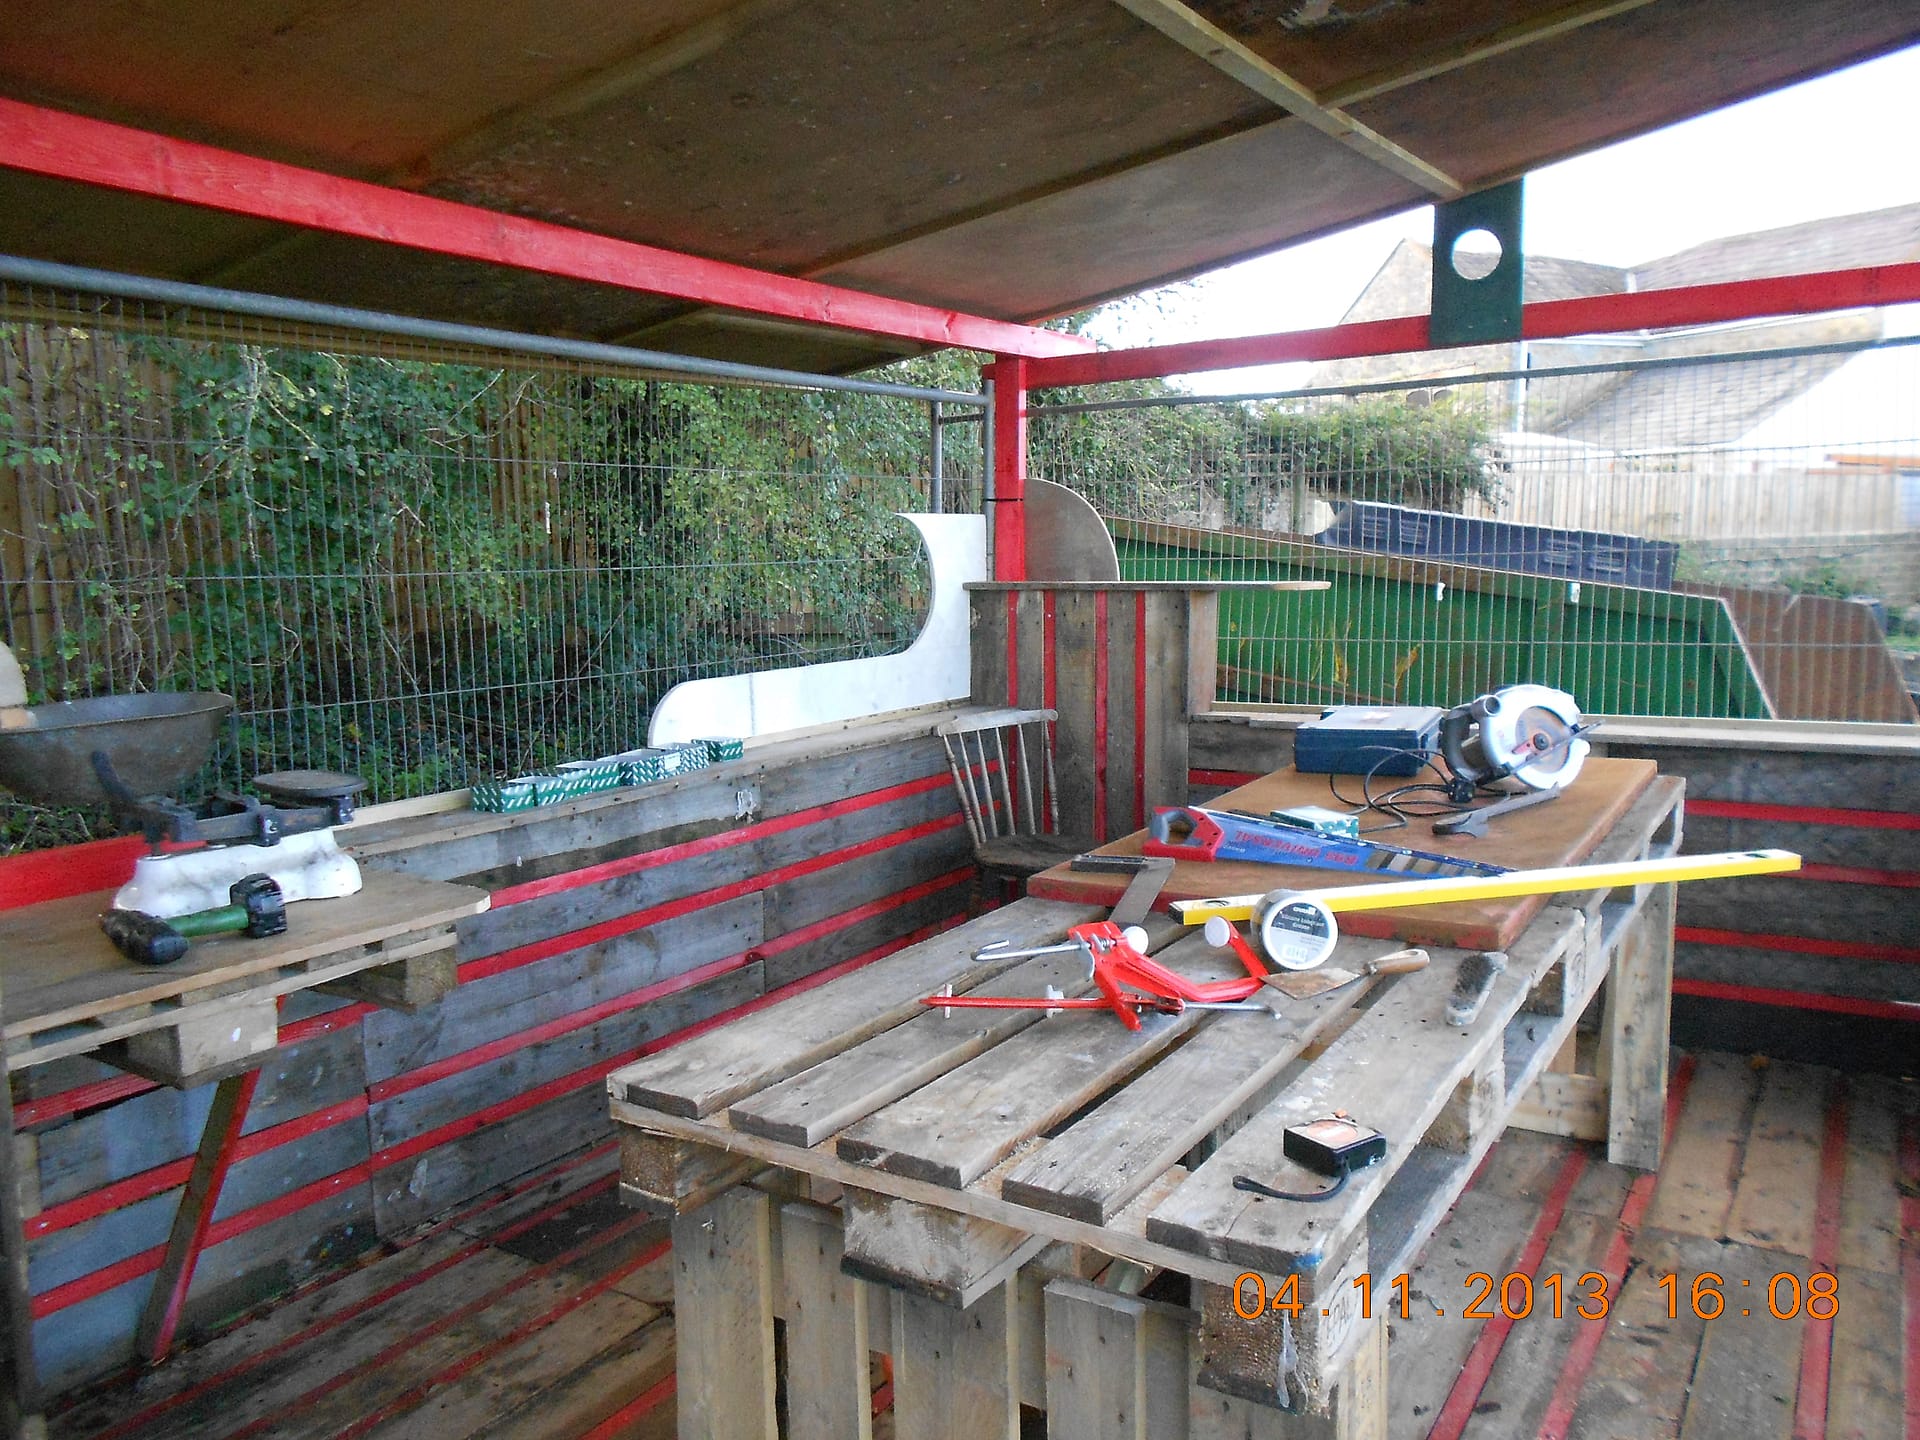
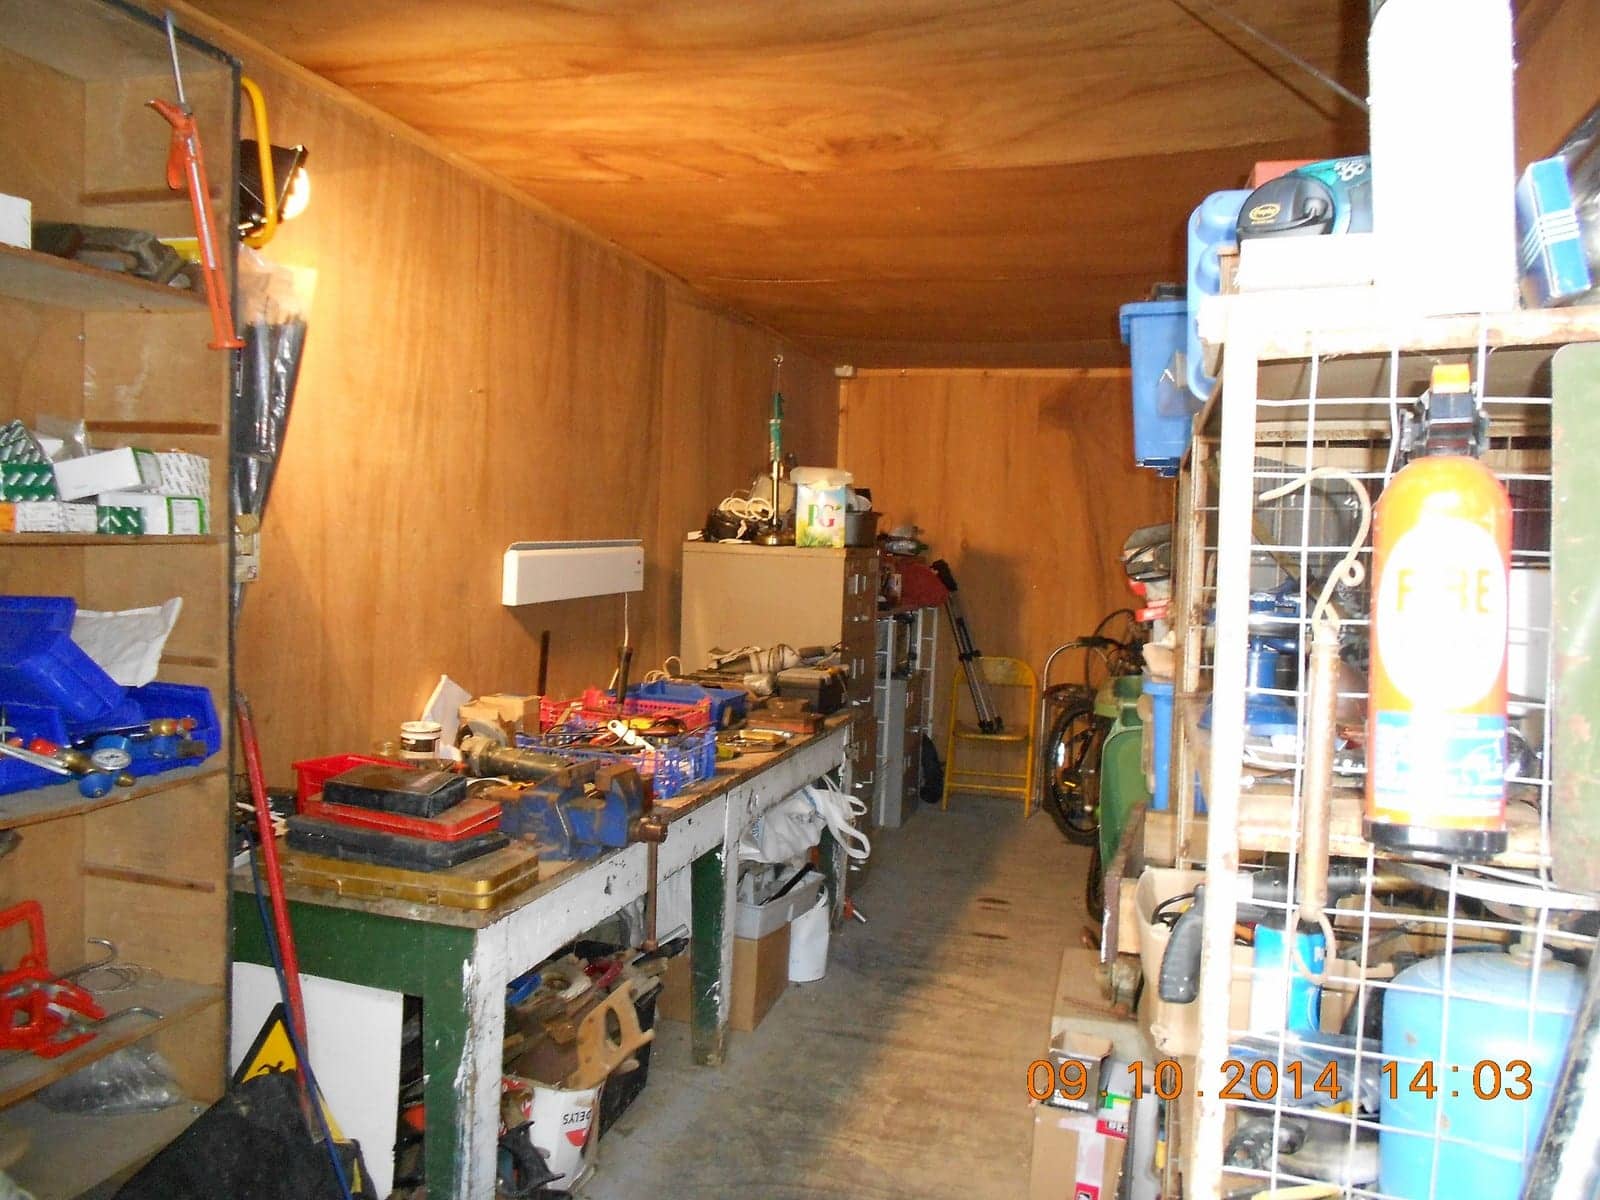
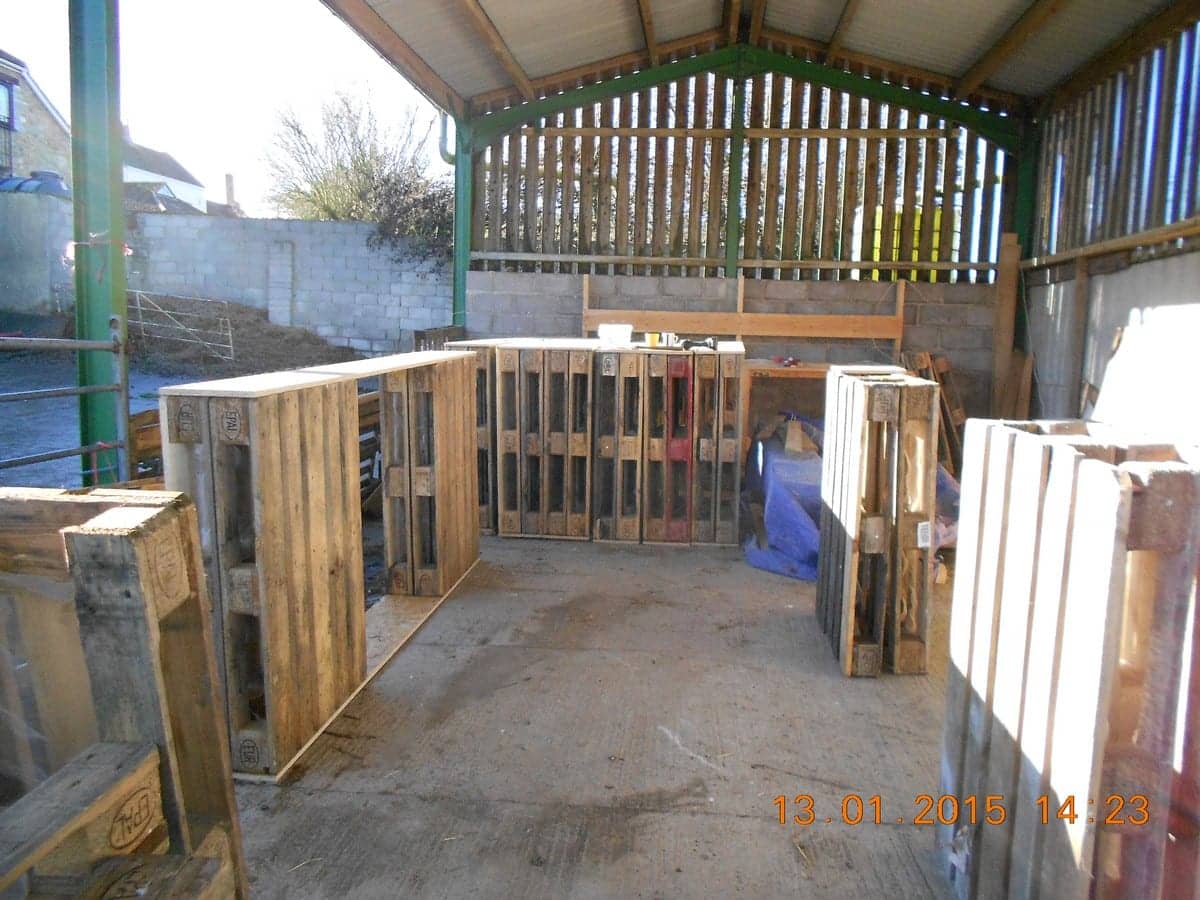
I needed somewhere to be out of the rain so we built a shelter and work area and shop.
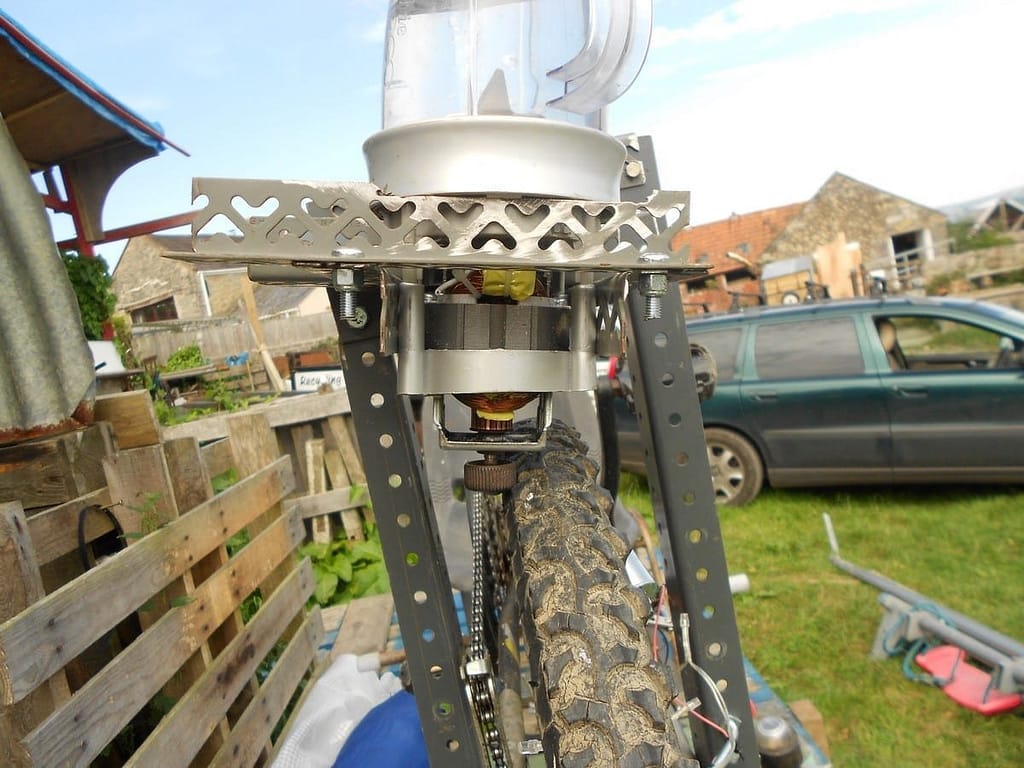
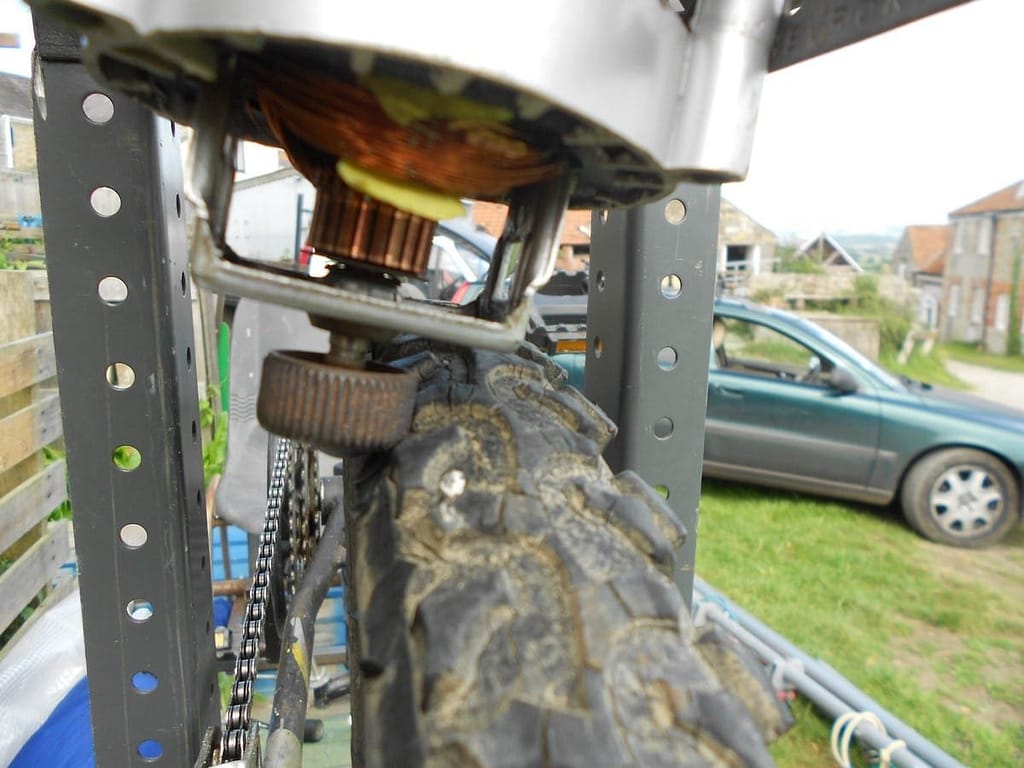
Then there was wheels! I made the first go cart from an old silver cross pram with Theo and Rowan in November 2013 and it was all downhill from then on!
The children tended to bust them rather a lot, and my early go carts were regularly bent beyond use by grownups unable to resist the temptation to have a go. The problem was that the stronger I made them the faster they went and the quicker they managed to bust them. This is an ongoing story!

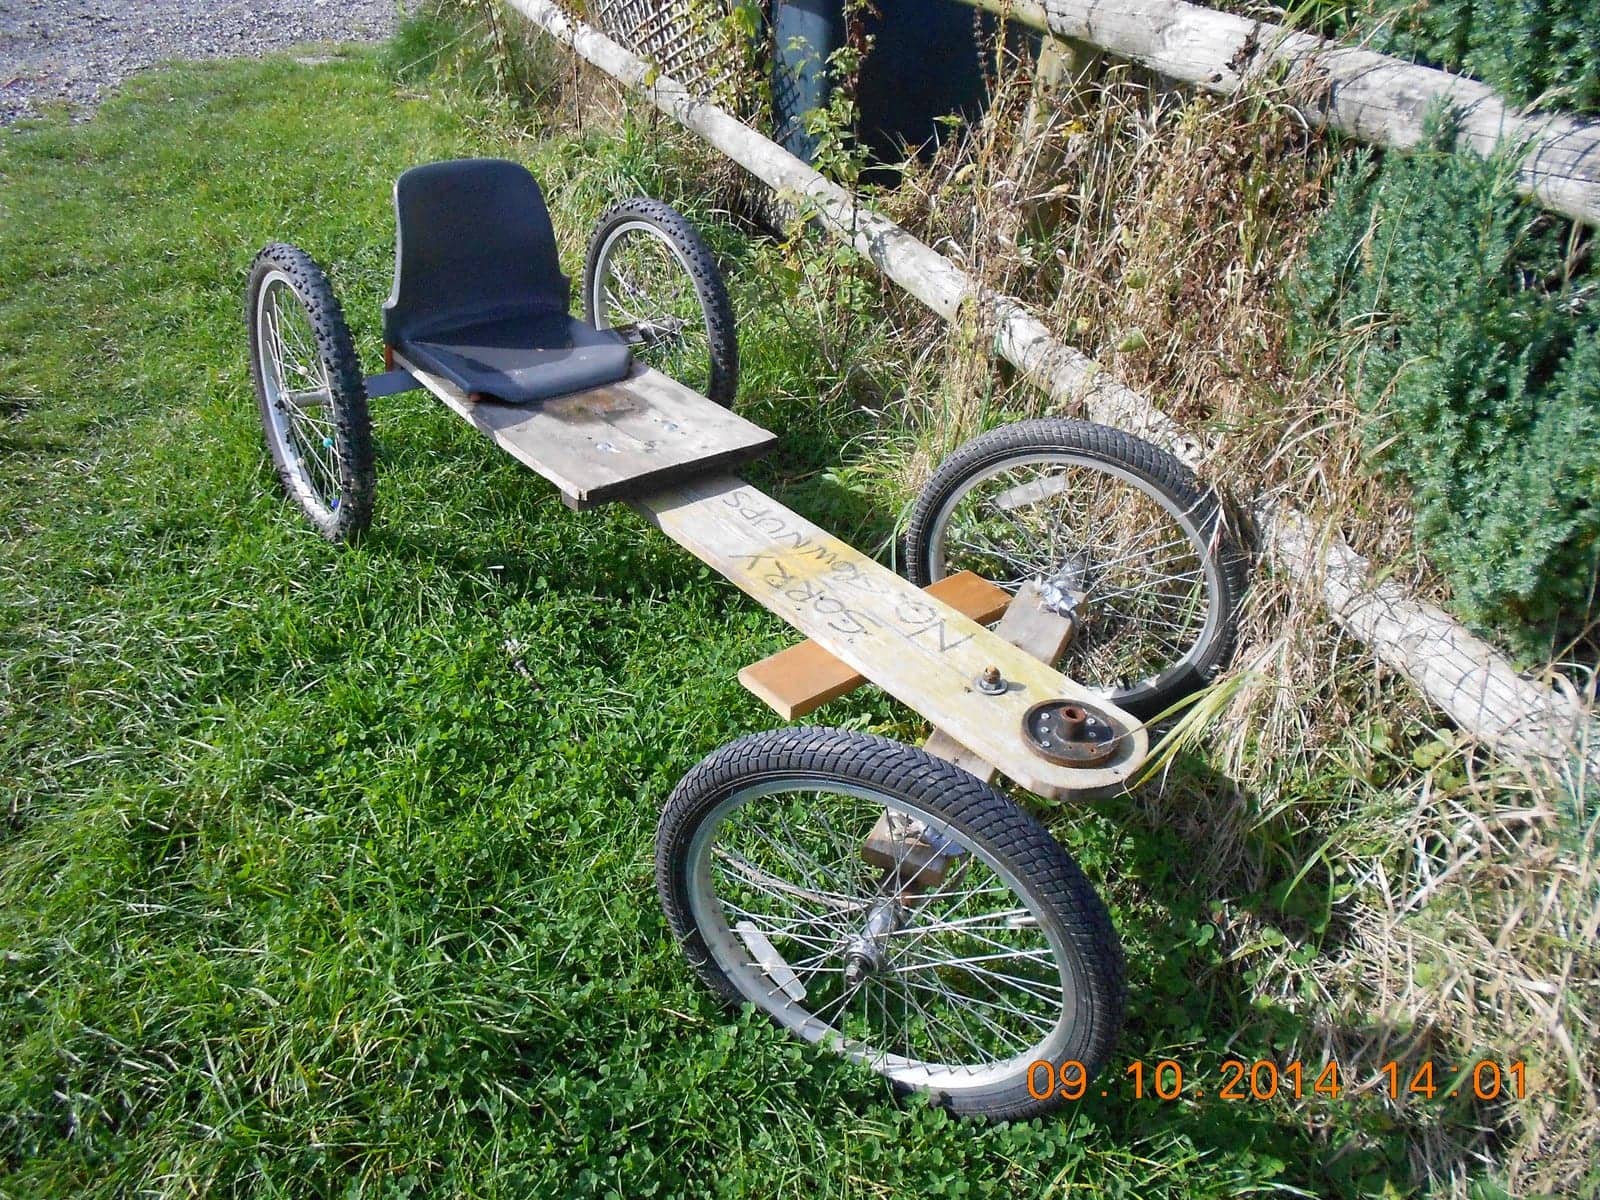
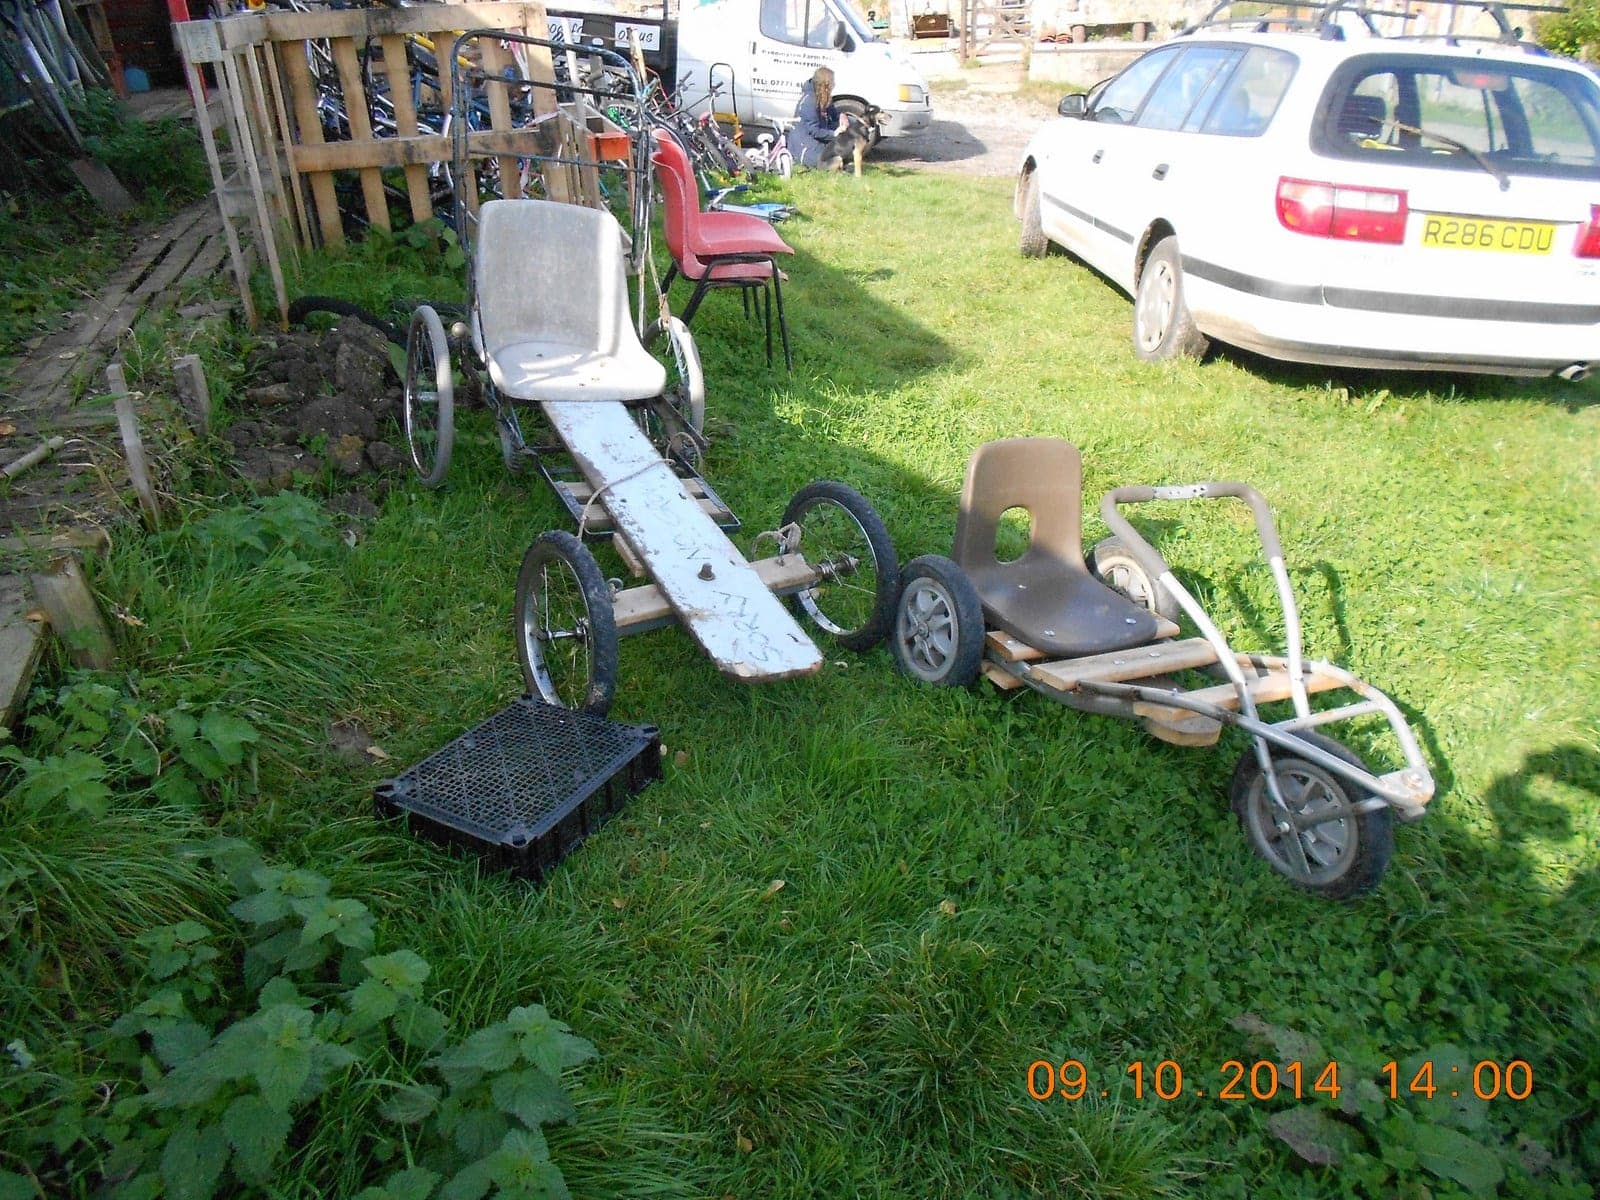
And then there were bikes. To be honest I didn’t really want to run a bike shop, but the visiting kids of all ages just loved anything on wheels.
I insisted that bikes were what they were, and most of them were pretty short on brakes, including all the go carts. I just told everyone that I made things to go, not to stop, and if they couldn’t cope with that then don’t ride them!
Once Alex arrived as a volunteer and started fixing them I relented a bit, and we now fix a few bikes properly and hide them and sell them, and try to get at least one brake working on anything that will go fast enough to seriously bump into anything.
In the scrap scheme the general principle is that the last thing we do with anything we are given is to put it in the skip and weigh it in.
If it is metal we will have it!
The only things we are not allowed to take are fridges, freezers, televisions, monitors, batteries and cars. These all contain hazardous materials that we do not have the necessary Environment Agency licenses to handle.
If it really is just scrap metal it goes in the skip. However, not before we have separated out the more valuable metals such as brass and copper, lead and aluminium etc.
If it is a tool or implement we can use on the Farm PFT gets first dibs. If it is something we can mend we will, but this depends totally on the expertise and energy of our volunteers.
I keep the Singer sewing machines, Stanley planes, and other posh hand tools aside and Dennis Massey from TFSR comes and collects them every now and then.
If I get very interesting things I may eBay them, or offer them at a bit more than standard price.
Standard Price is a novel and popular concept.
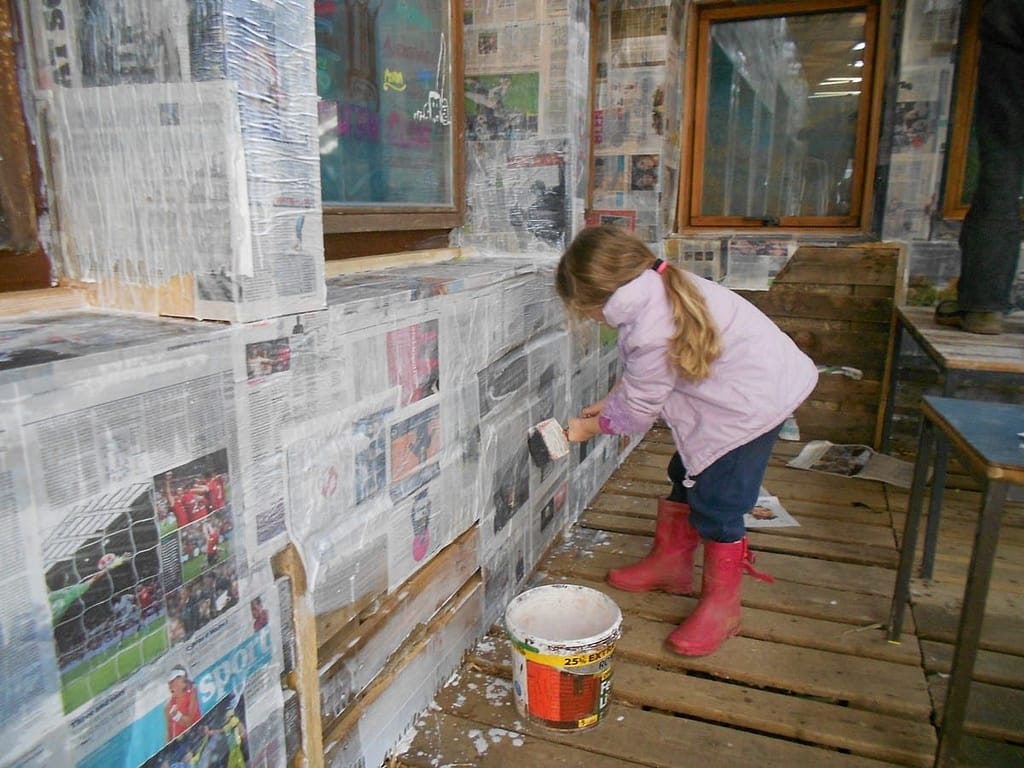
Everything is sold by weight. (The children and I made most of the weights by melting lead and pouring into coke cans against a standard weight of lentils or porridge from the farm shop).
So, anything magnetic on the large magnet in my “shop” and therefore made of iron or steel is 30p a kilo. This is more than twice as much as I would get if we threw it in the skip.
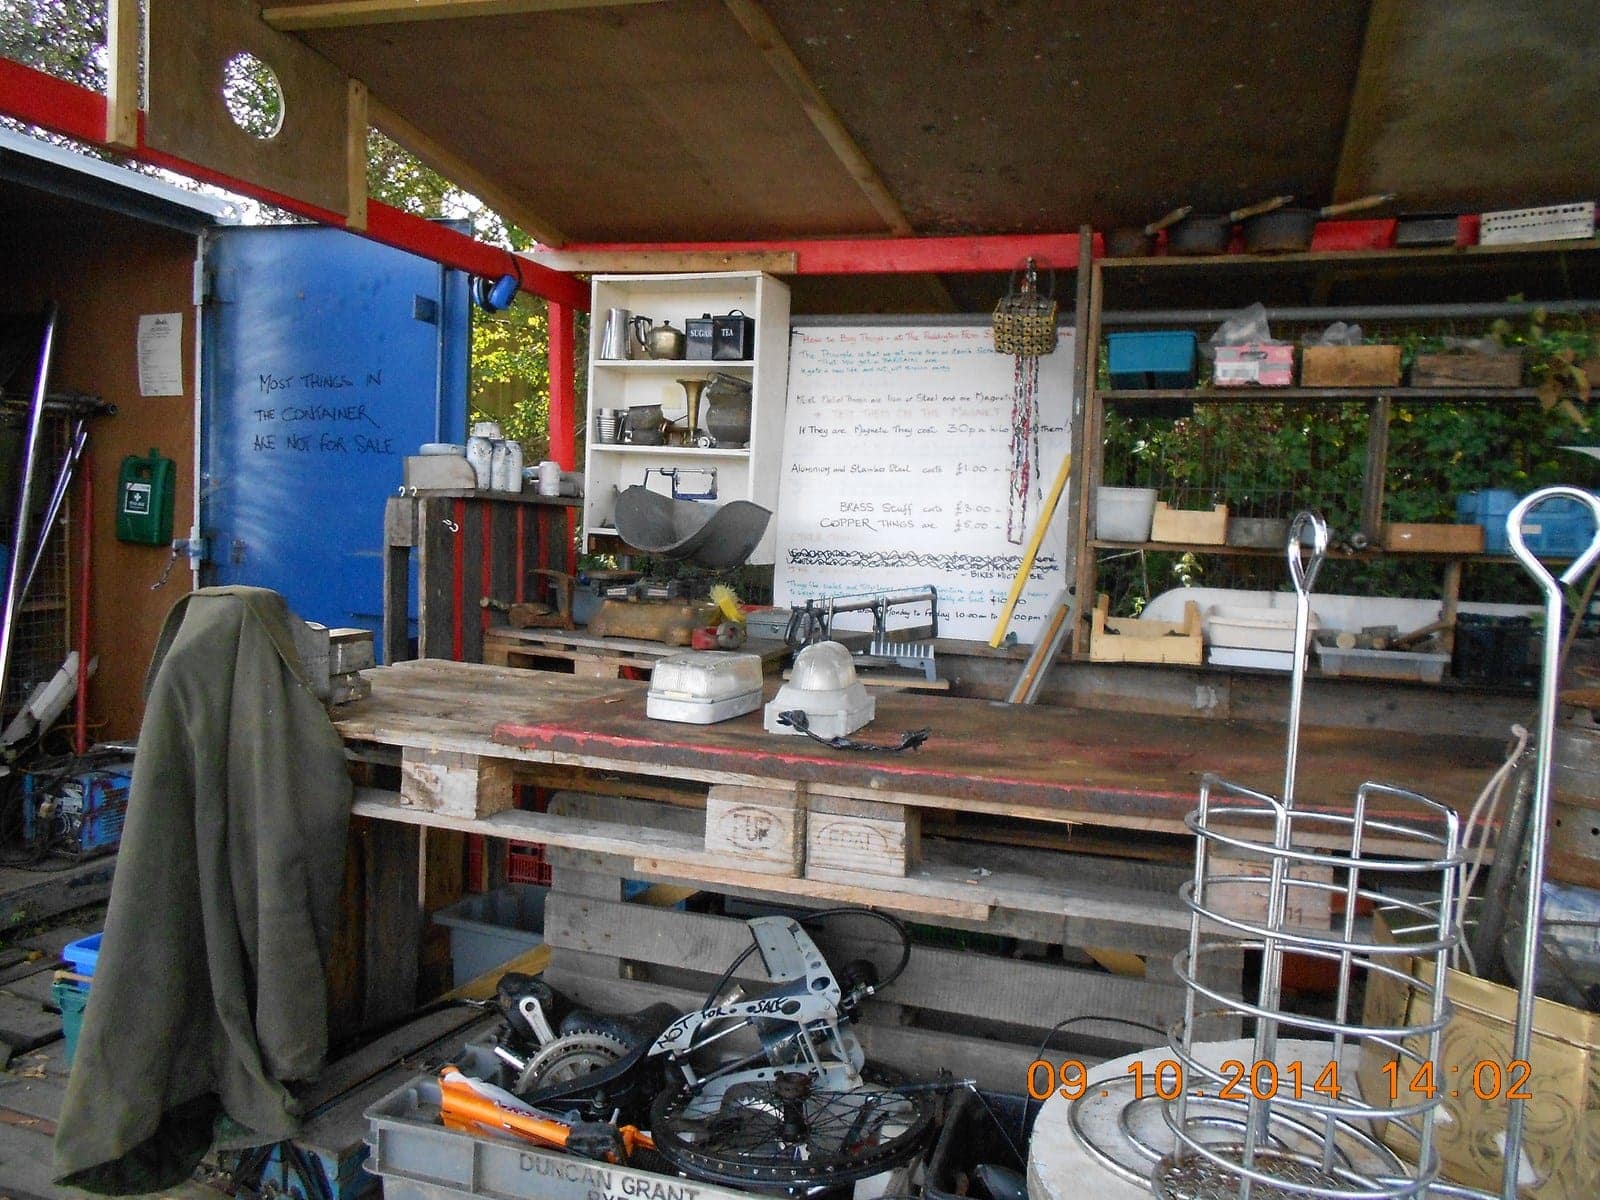
This means you can buy a hammer, some screwdrivers, drill bits, possibly quite decent chisels or spanners, all for a matter of pence. However, this is more than scrap value, the buyer gets a stupendously good deal, the tool gets a new life instead of being melted down and Paddington Farm gets a bit of cash.
We are gradually accumulating a dedicated following of engineers, blacksmiths and collectors who just need to keep getting “stuff”.
The scrap scheme started at the beginning of October 2013. It took a bit of money to buy the truck and the container and stuff. After almost exactly a year it has now paid back all its start up costs, so from now on it will make a cash contribution to the farm. If it does as well from now on it will contribute a regular income to the farm.
Hopefully we can now get other people involved in running the scheme which will free me up to get on with the new pallet building which is the real reason for me being at PFT. In the meantime I will go on being responsible for it until someone else can take it over. The problem is that it doesn’t make enough to pay someone to do it, so we need to find a volunteer who has the time and finds it as much fun as I do.
So, hopefully this brings you up to date.
Diary of the pallet building project
October 2014
The Pallet Building
This is the story of how we are building a temporary classroom at Paddington Farm Trust. It will be made out of tyres, pallets, and other recycled stuff, with a lot of help from volunteers and children.
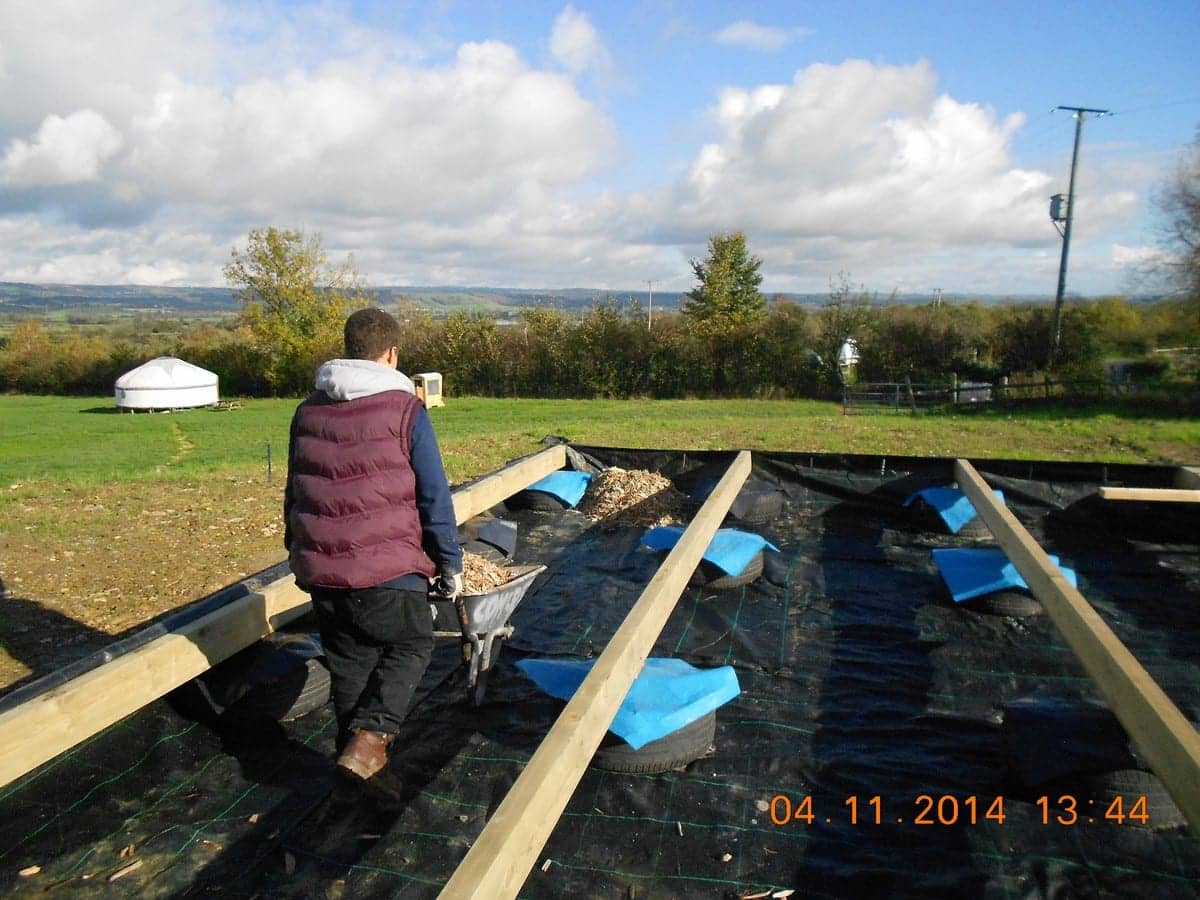
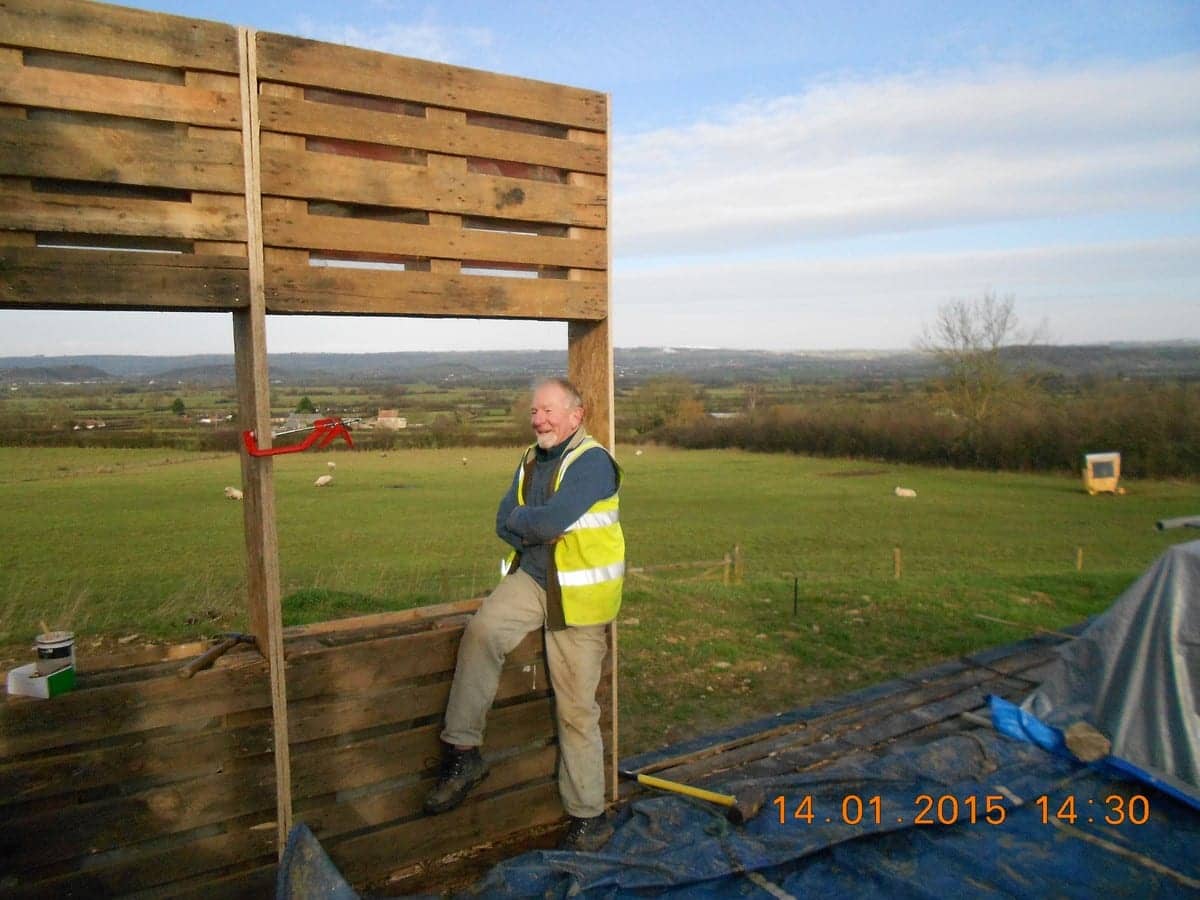
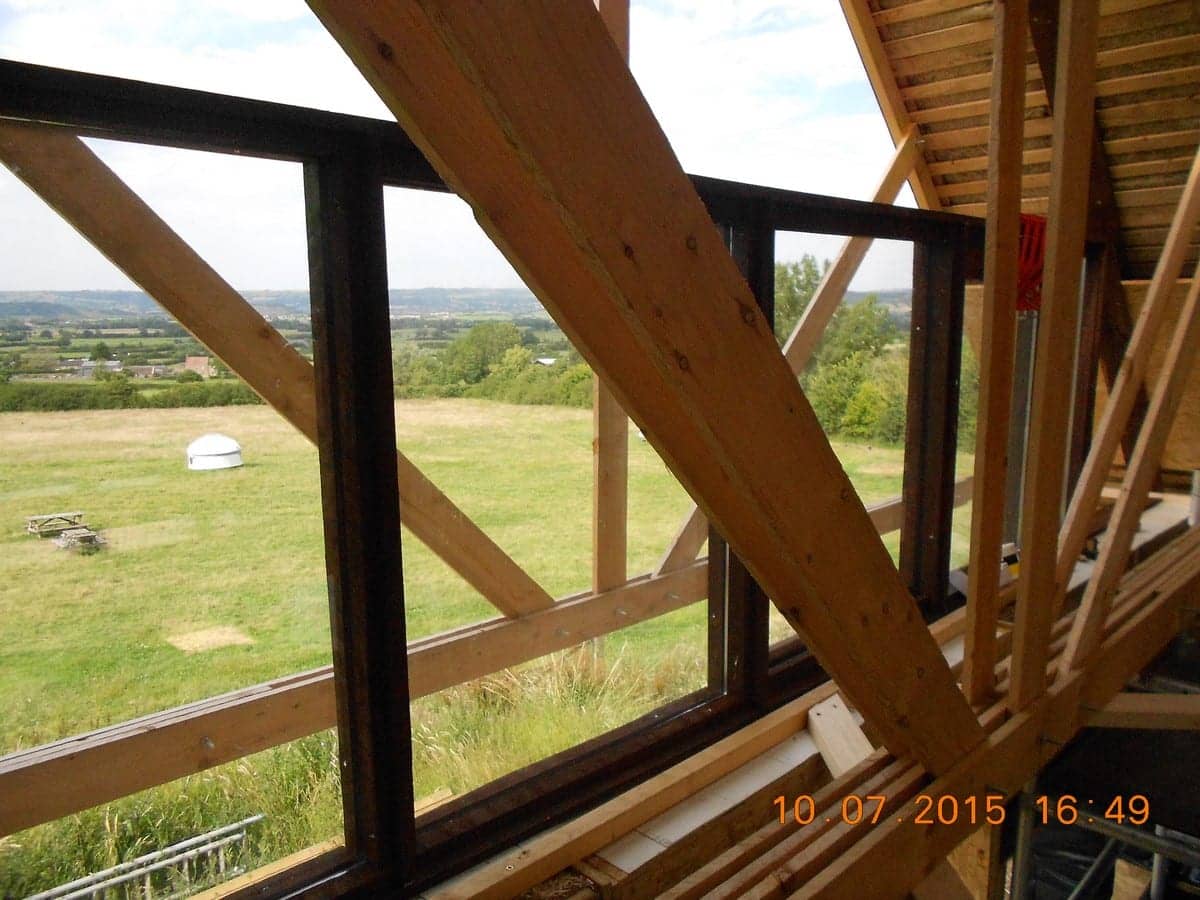
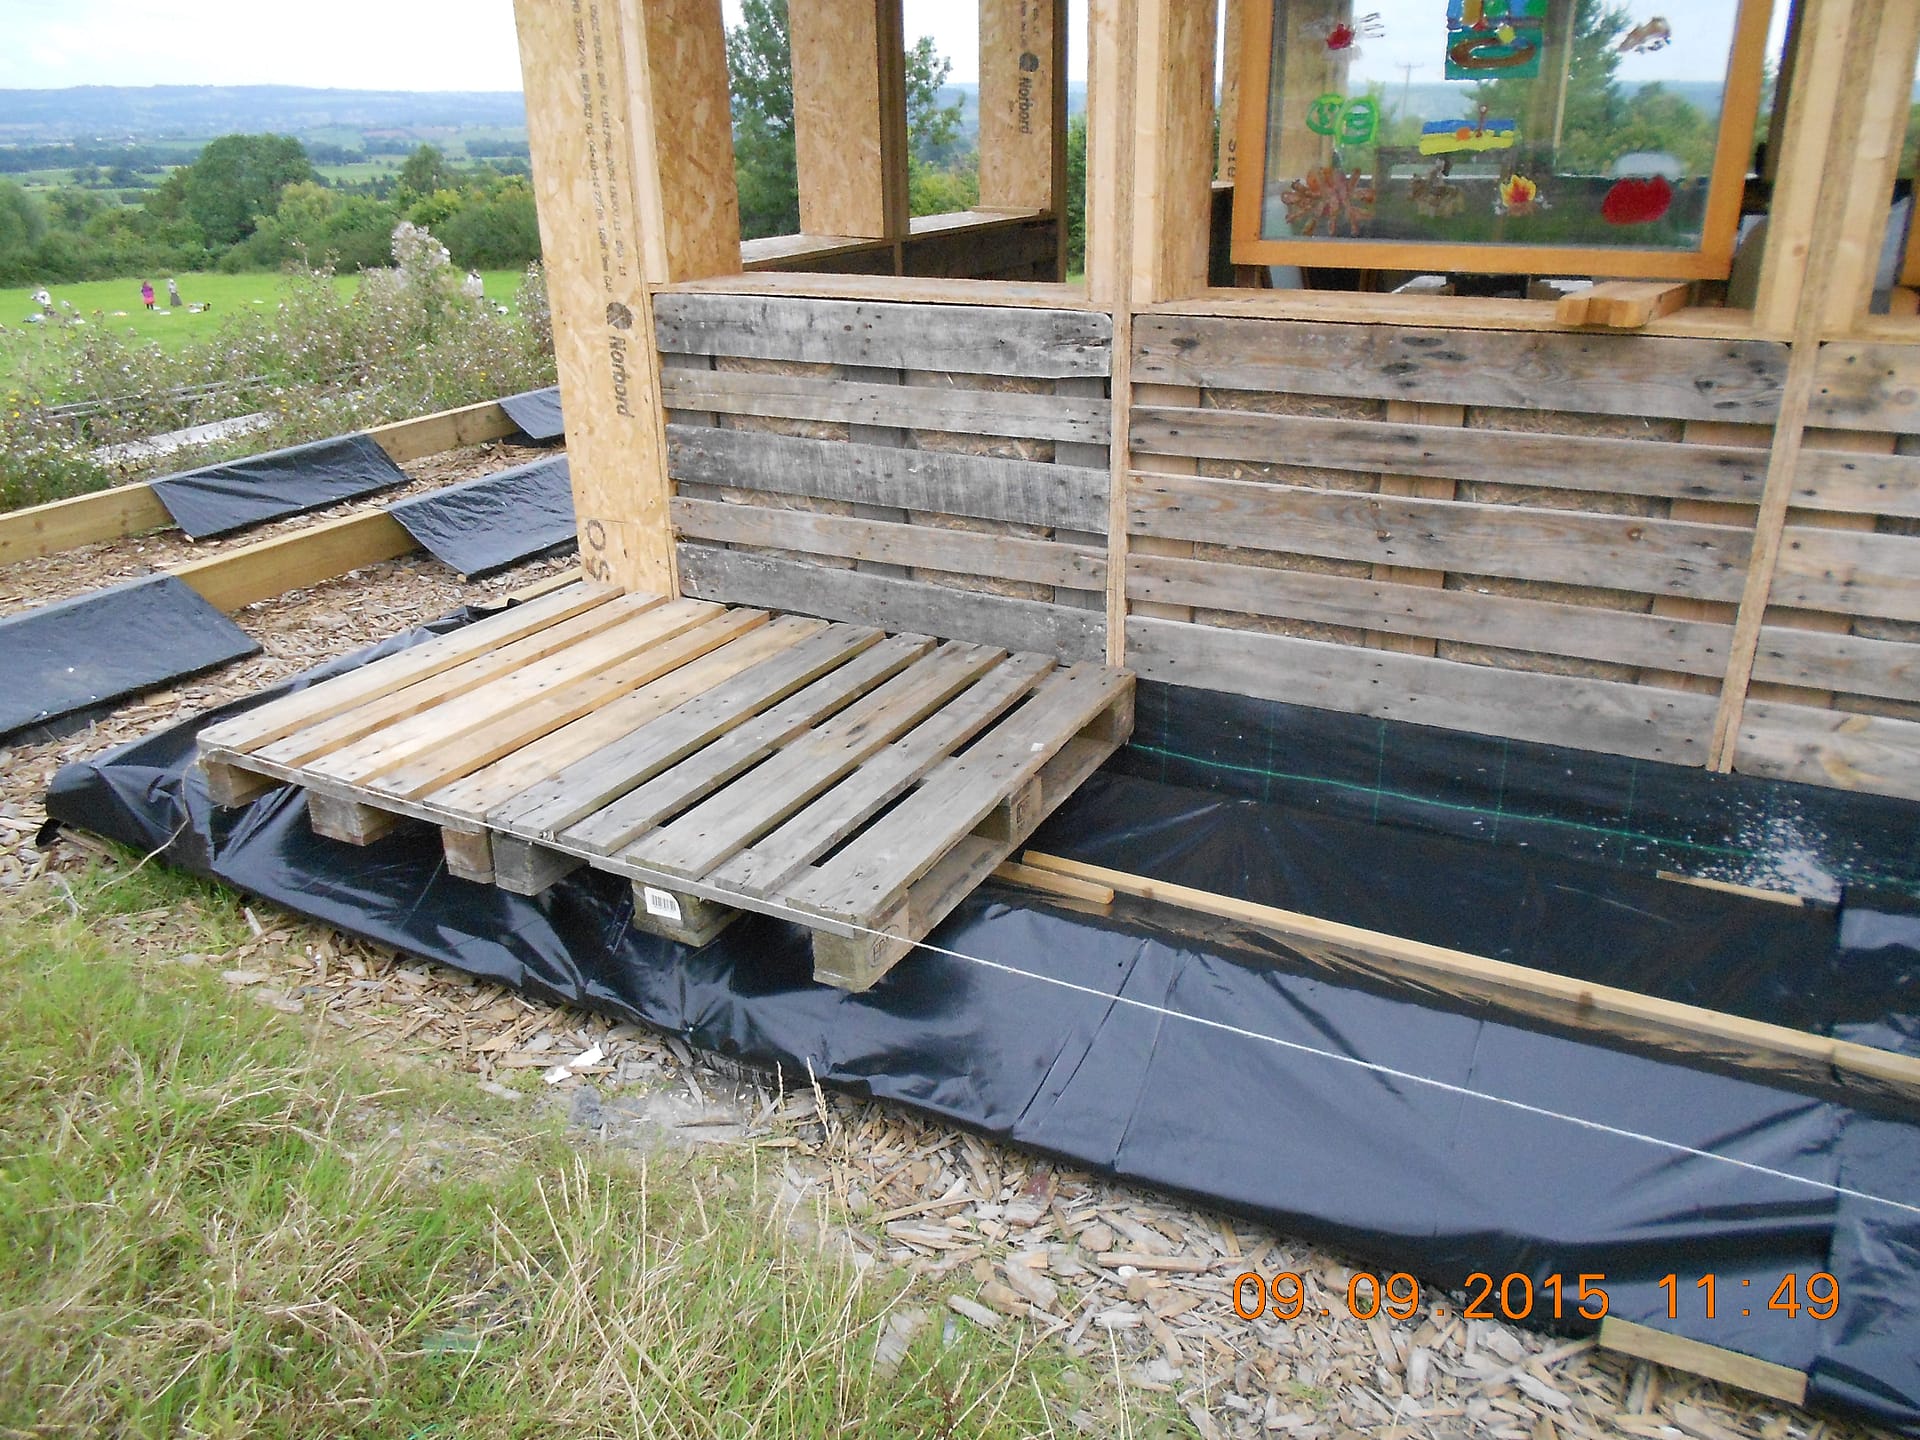
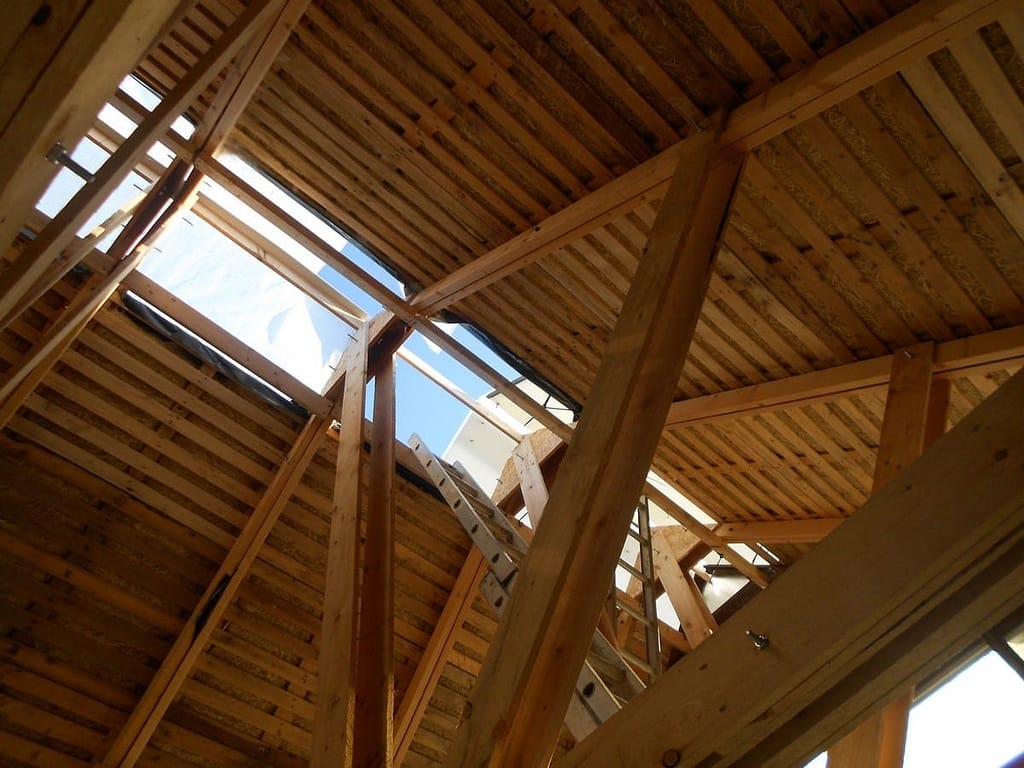
So, here we are in early October with a clear site, and a fantastic view North towards the Mendips. The ground is pretty level because Avalon Waste had dug out nearby to put the new massive septic tank in, put the spoil over here and “jumped” on it. Even so I am very worried that my whole building will go wonky if it settles too much.
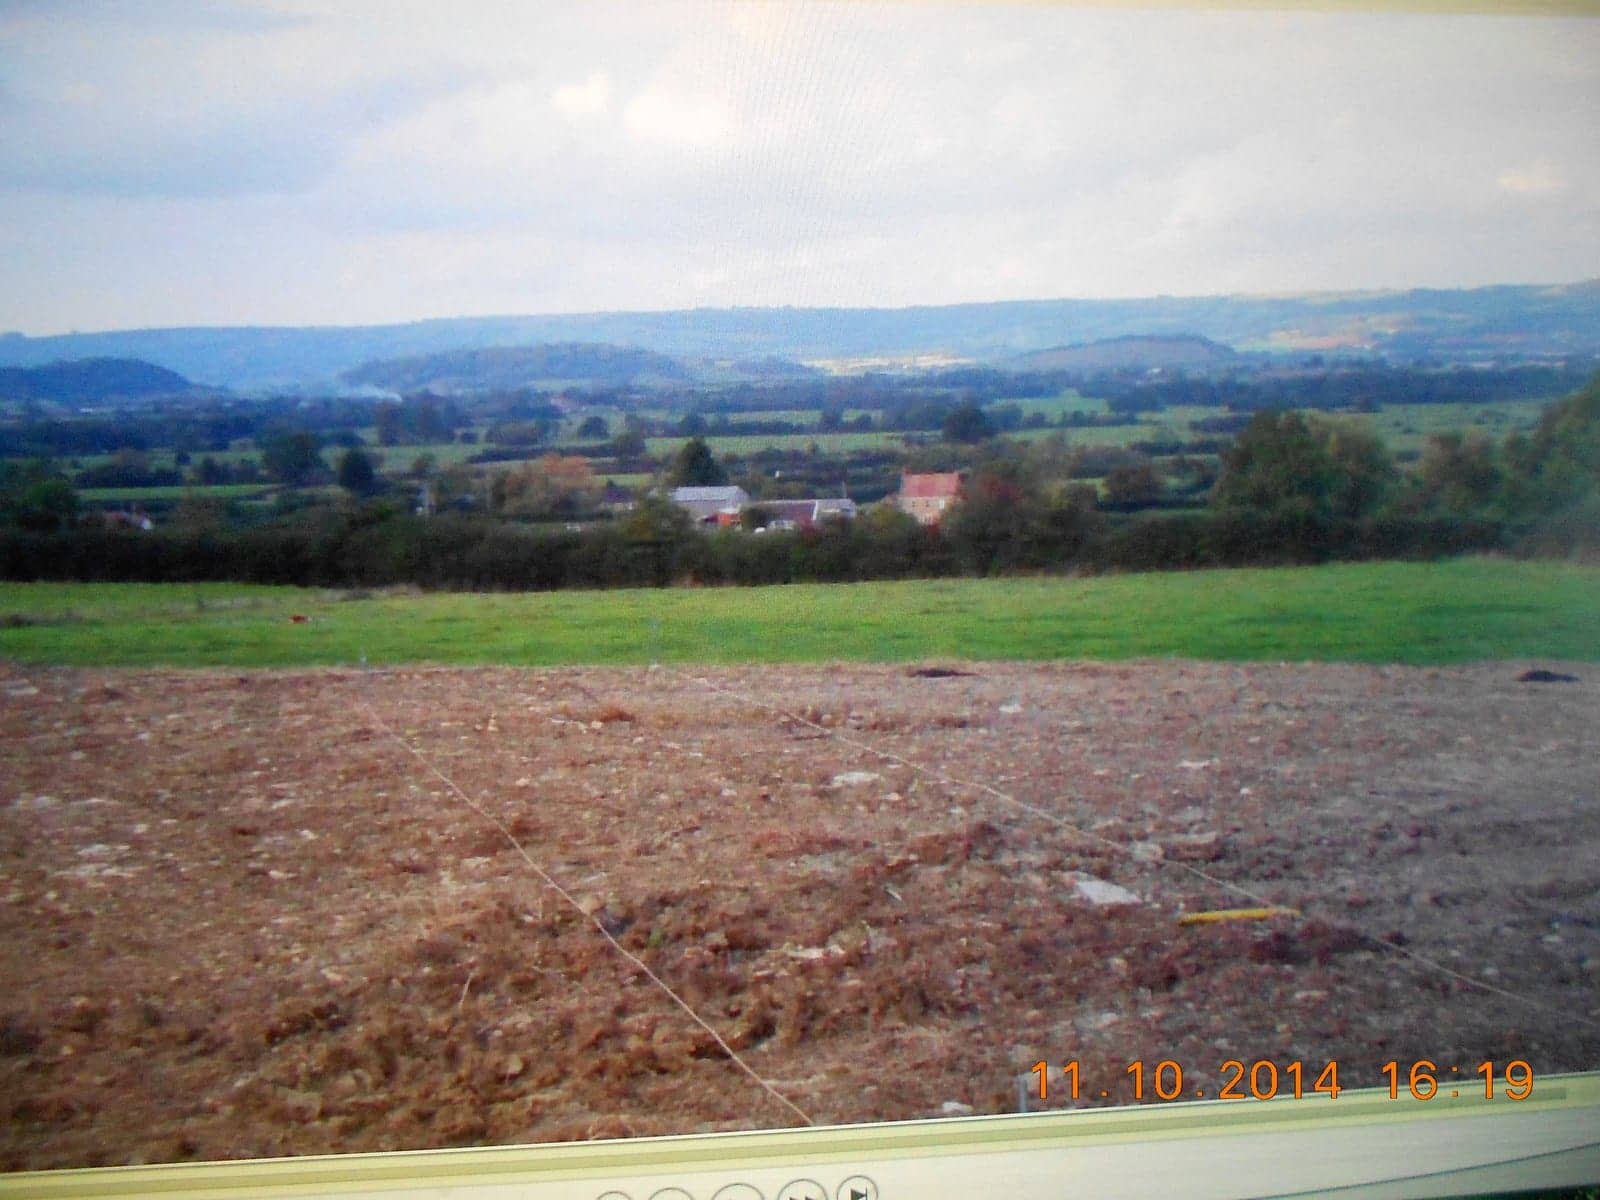
The building will have no foundations because it is a temporary structure. Over the next few years PFT is hoping that we can raise the funds to develop the big barn, so in the end my building will no longer be needed, but prefabs were only meant to be a stopgap, and some of those are still around after more than half a century!
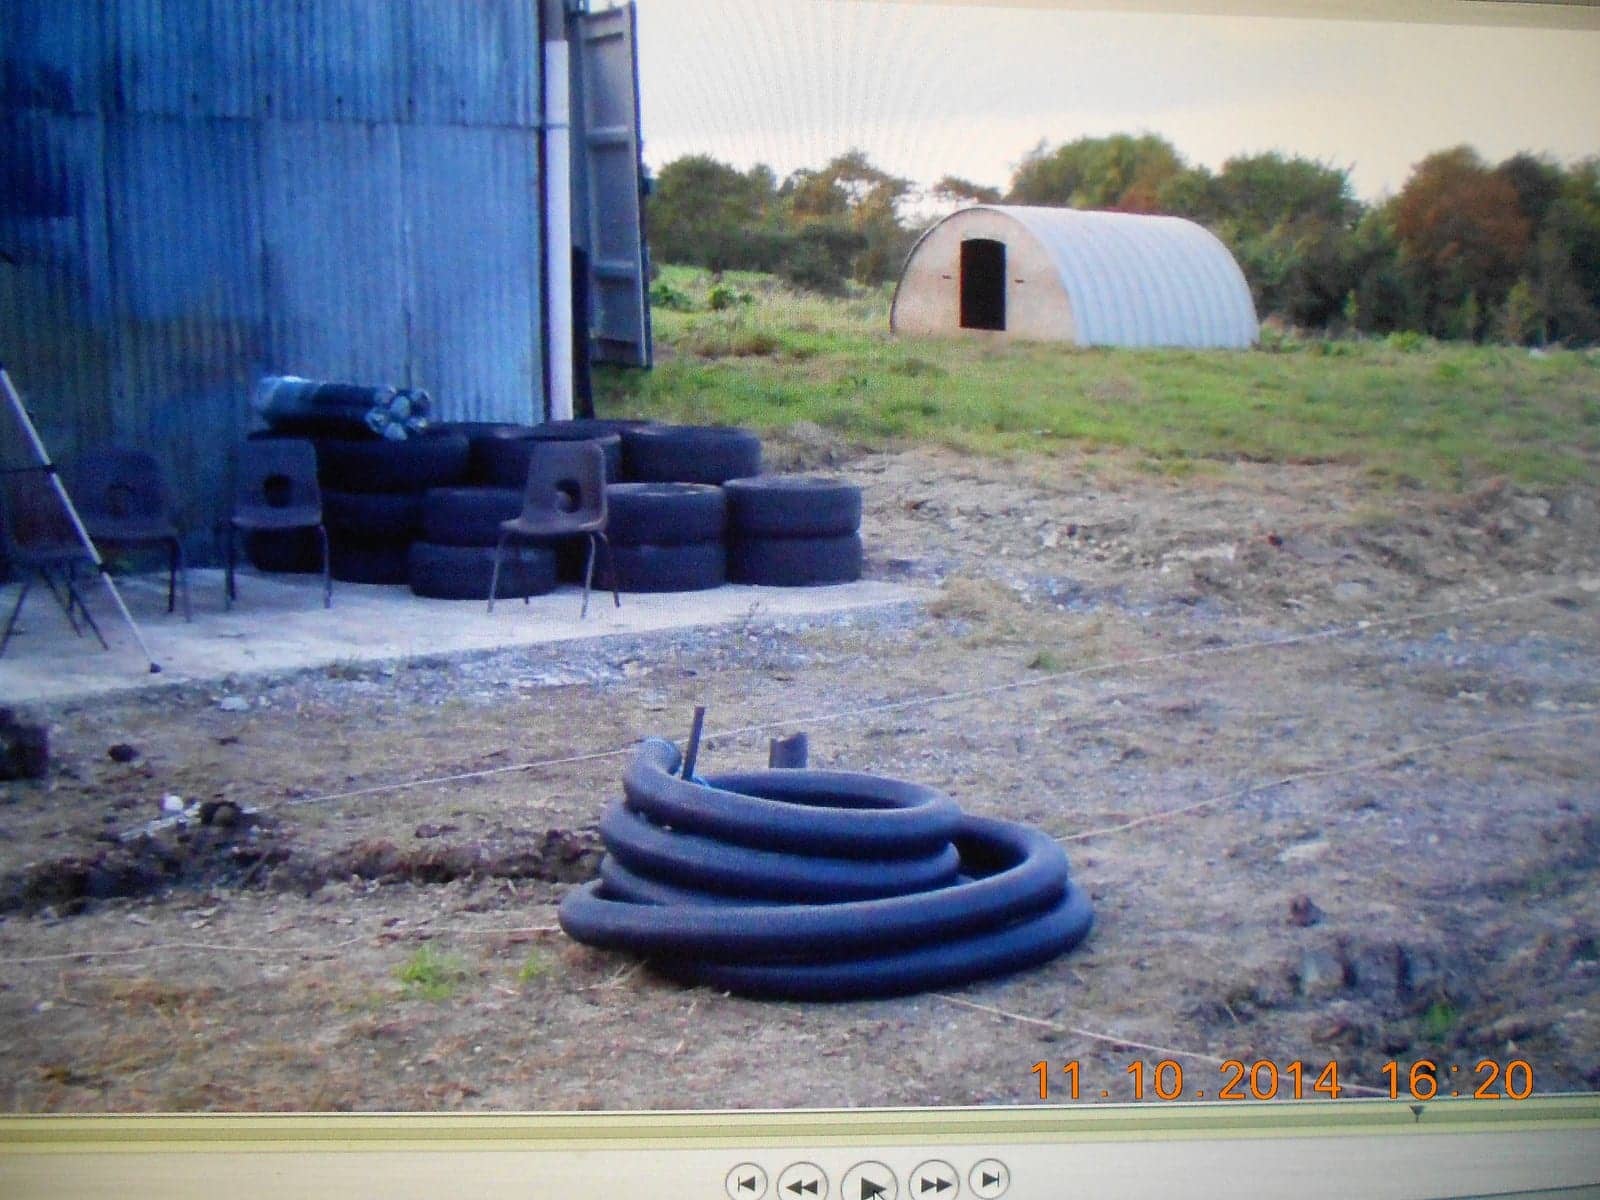
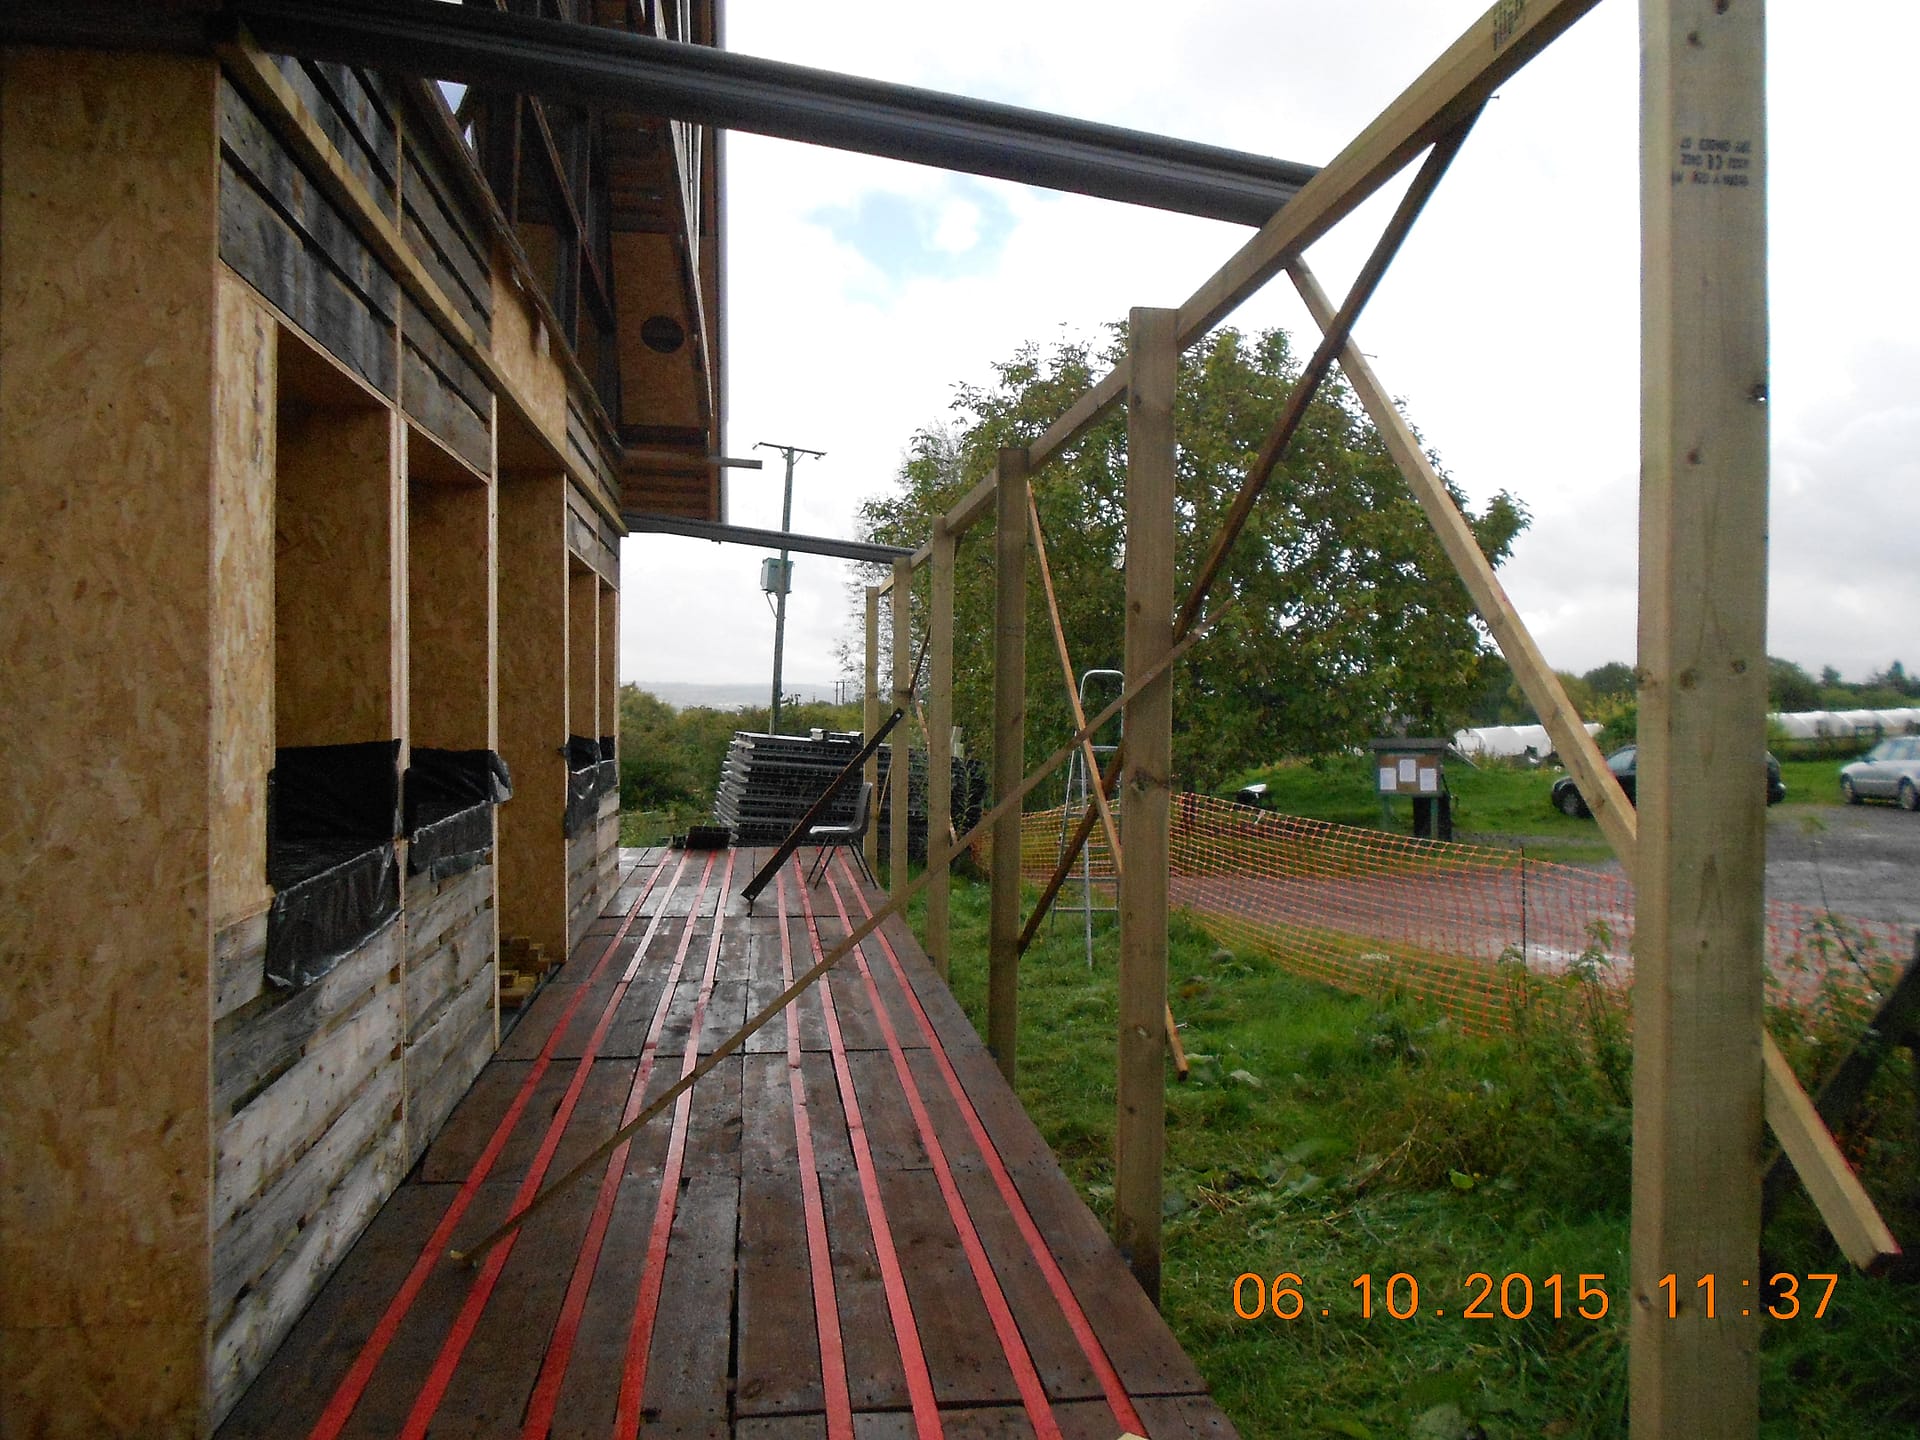
The picture above shows a couple of important things. The coiled up pipe is a conduit which I will bury in the trench you can just see. It will have a draw string through it so that I can get power or water or IT cables or whatever through it. This saves a lot of pratting about afterwards if you forget to do it. Today’s helpful hint is that if you do pull anything through bring another draw string with it in case you want to pull through something else.
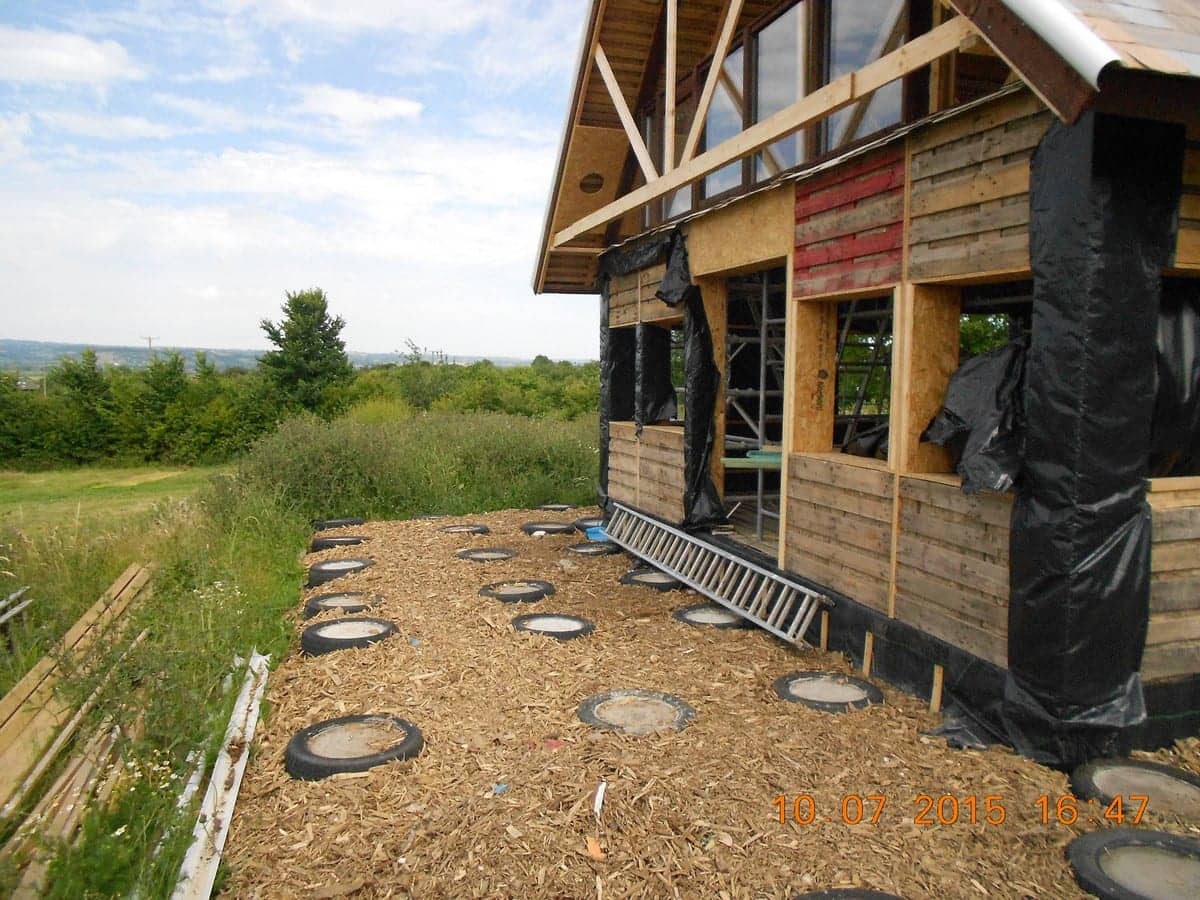
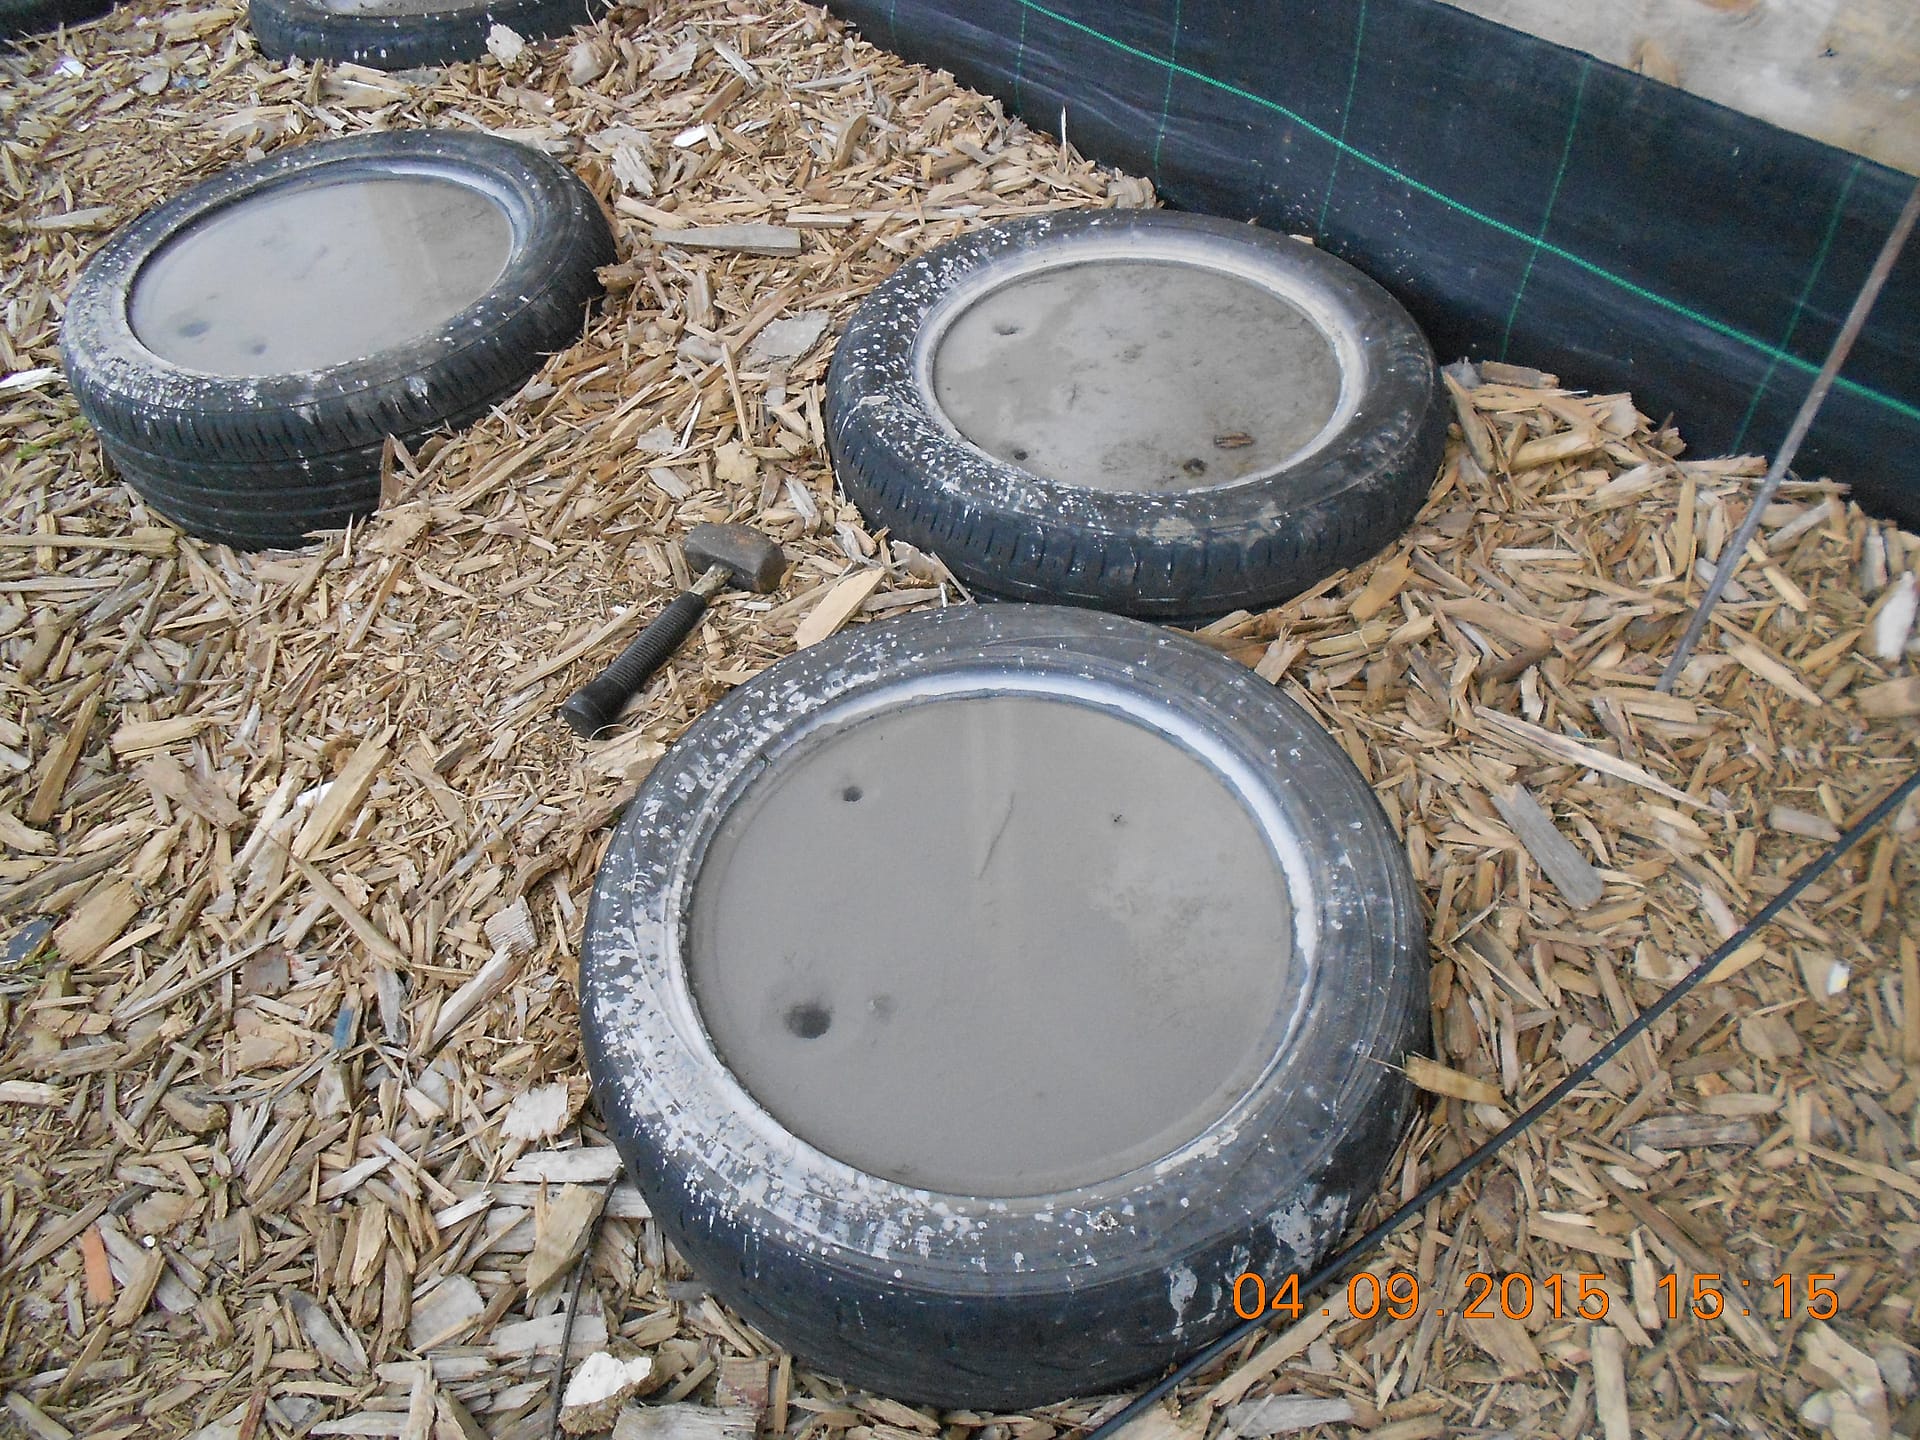
The other thing is tyres. It makes life a lot easier if you can get tyres of roughly the same size, and we will need nearly a hundred by the time we finish. We already had a load of old tyres and wheels on the farm and felt we ought to use them but they were all sorts of sizes. Bridgwater Tyres very kindly did us a swap for the horrible ones with ones all more or less the same size, which was great.
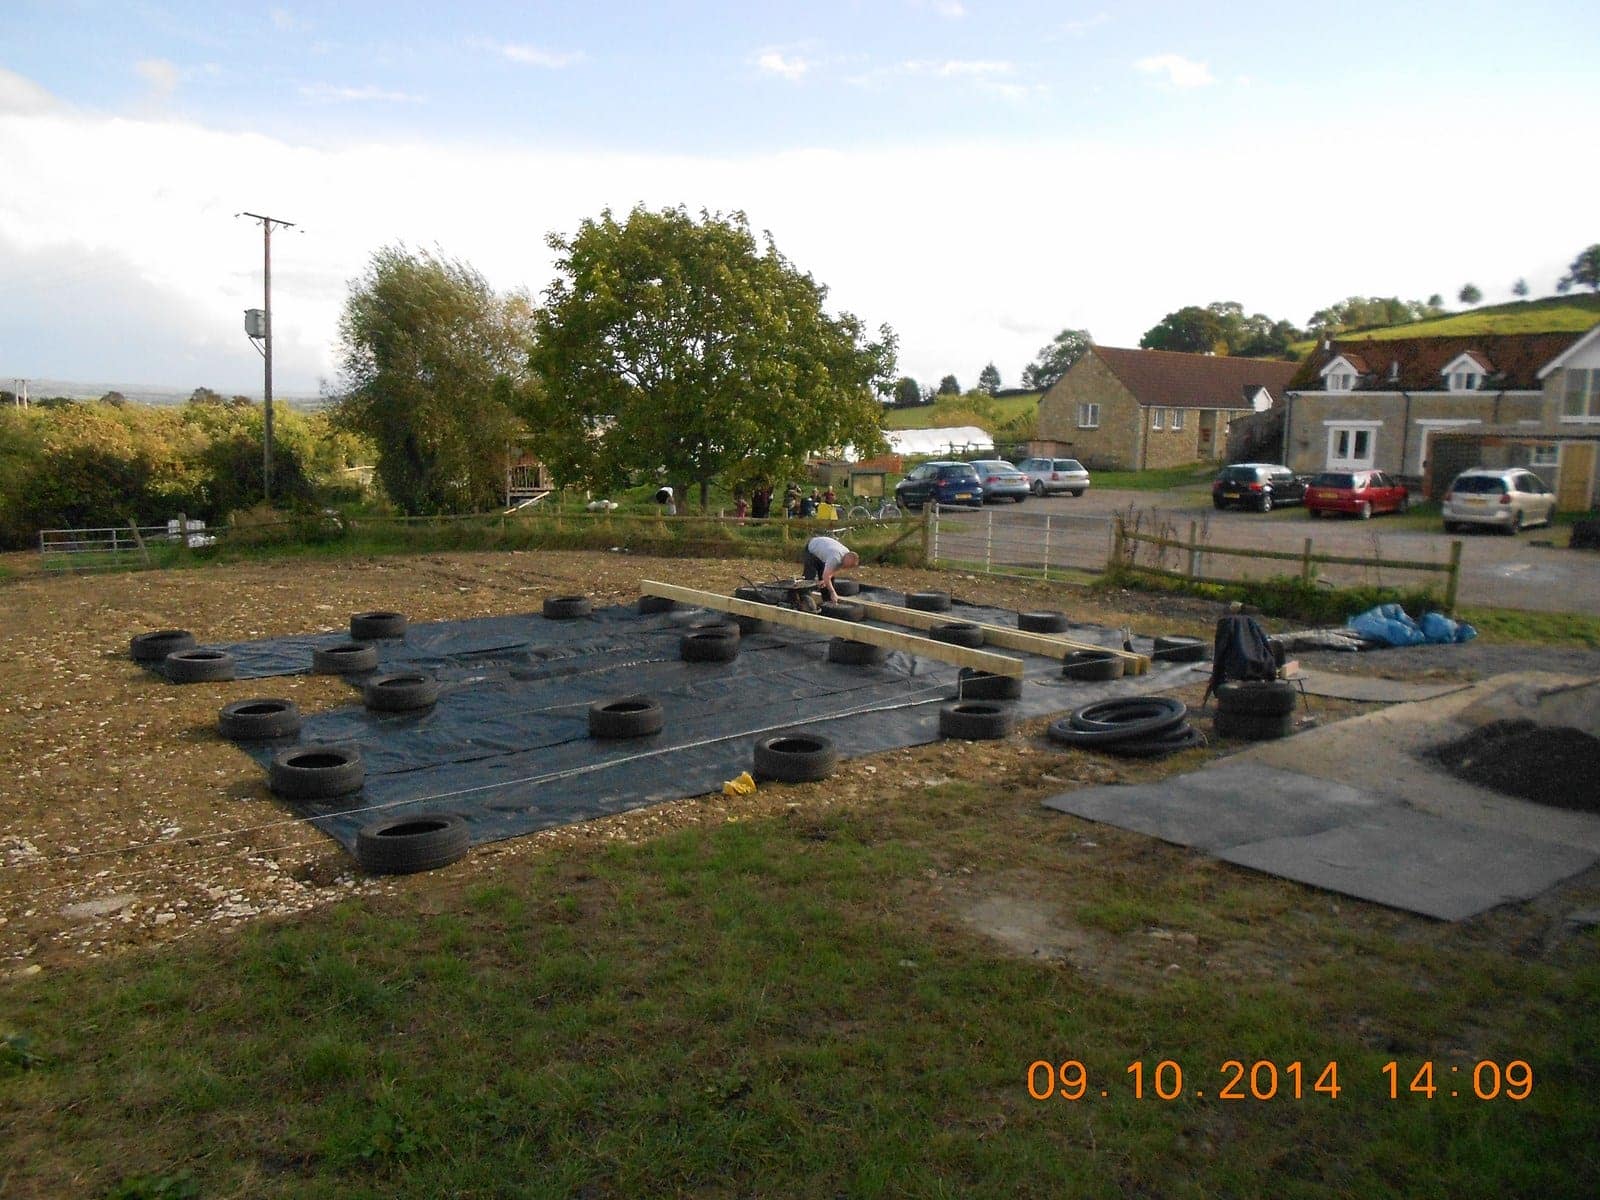
October 9th
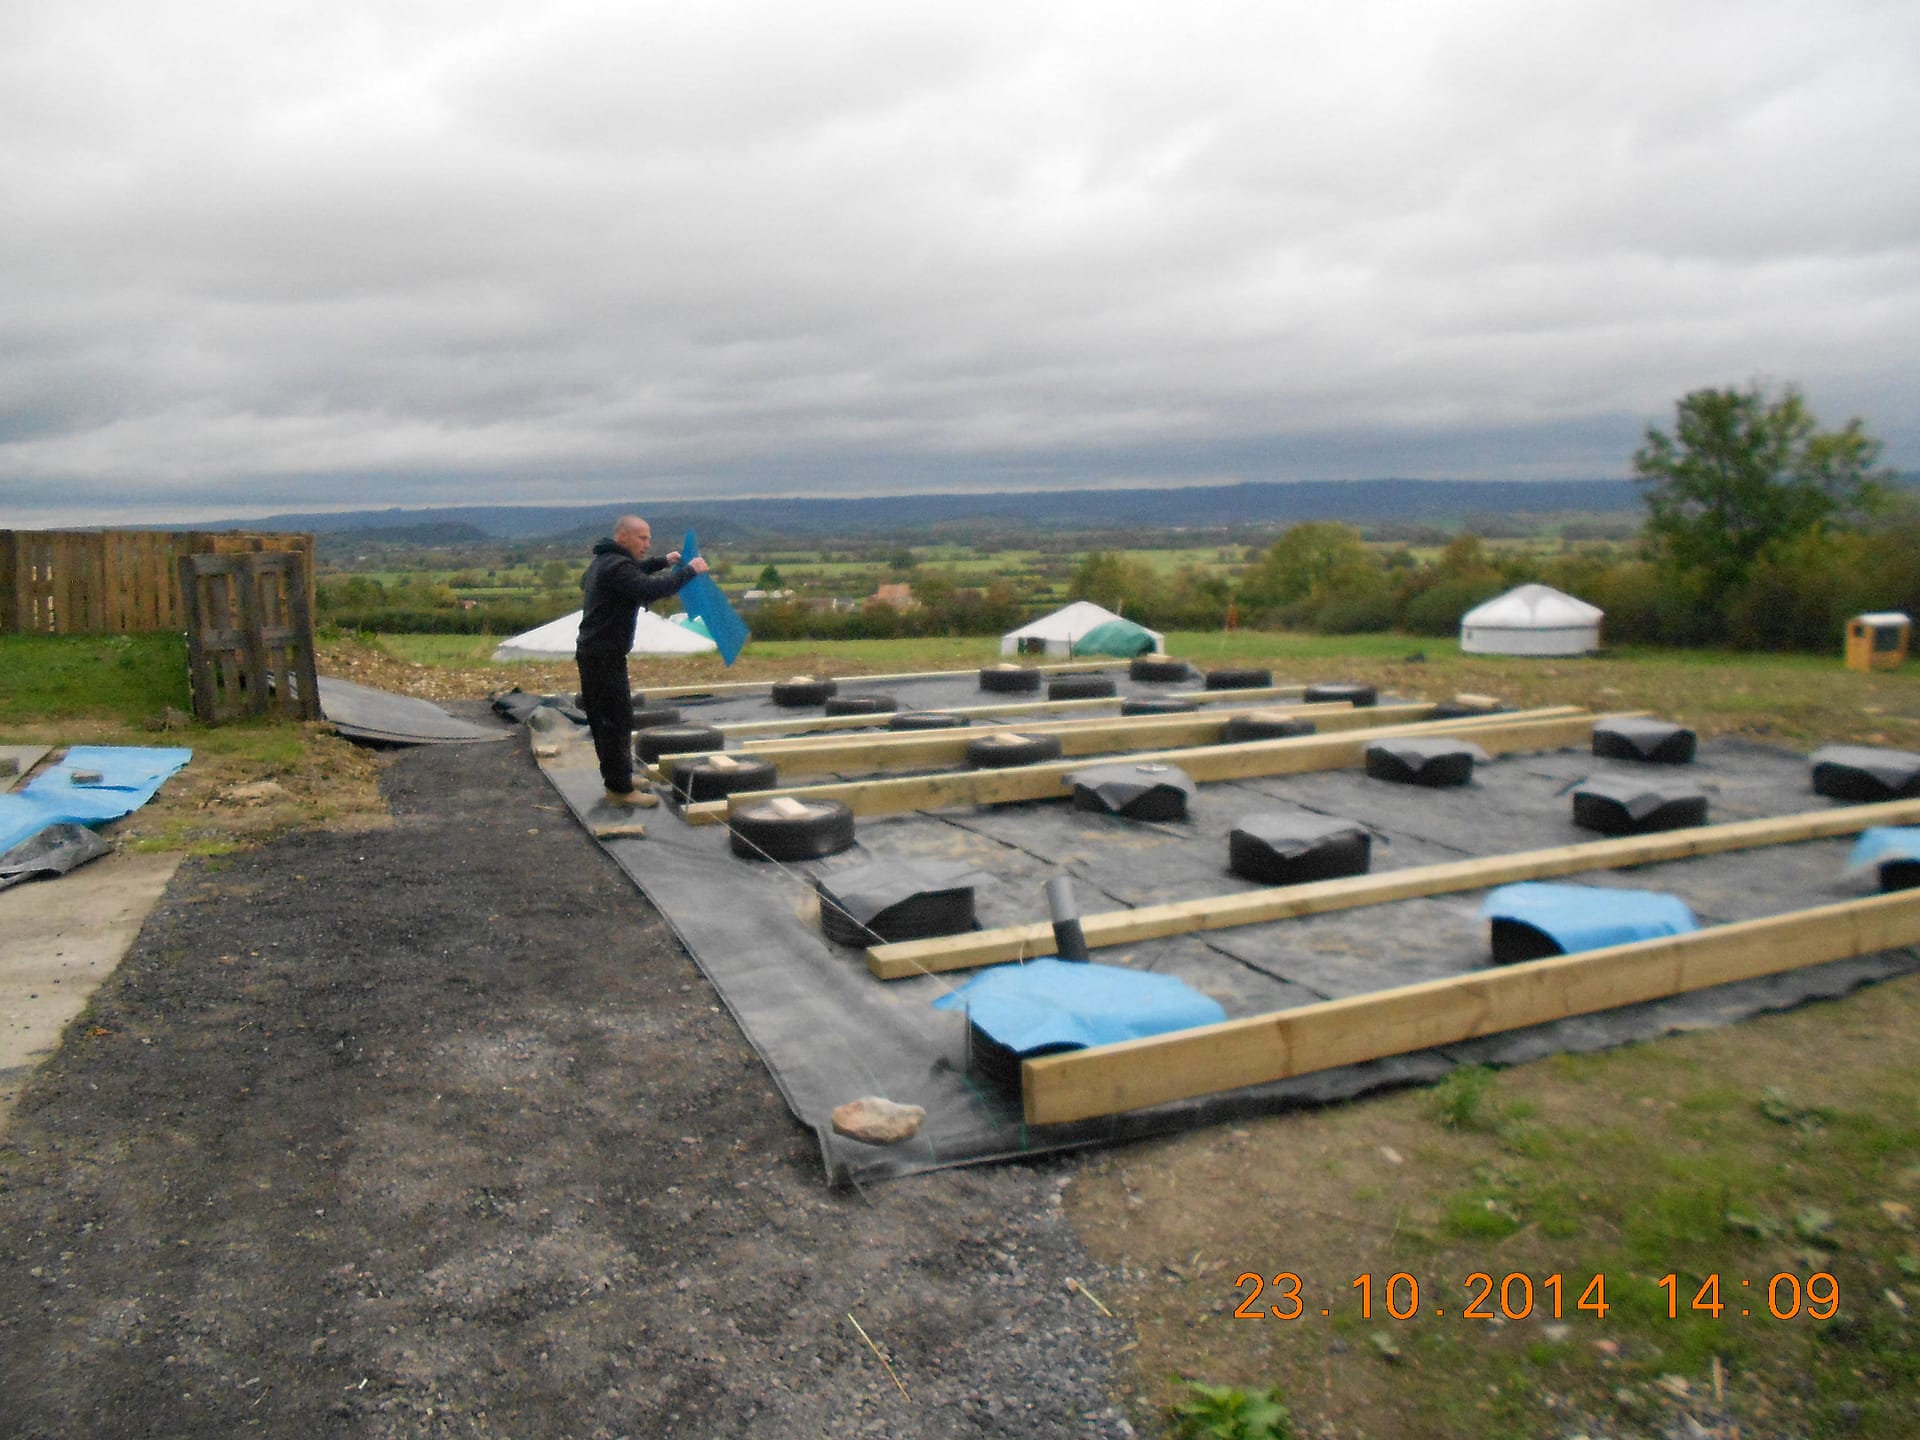
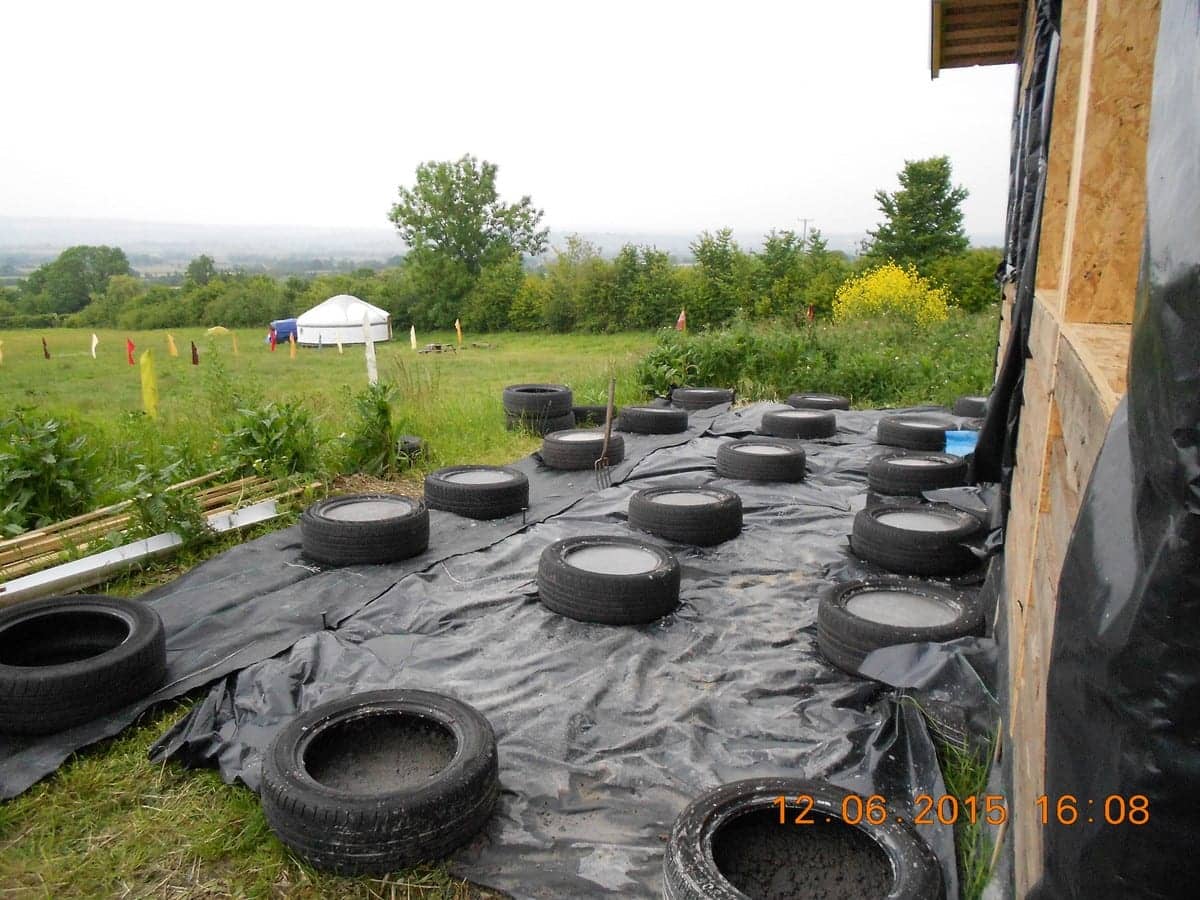
We put down Mypex type ground fabric about 600 mm bigger than the footprint of the main room for three reasons.
Firstly it is a weed suppressant. Secondly it will contain the insulation “duvet” that the building will sit on. And, thirdly it is a million times easier to work on than the unbelievably sticky clay that is the ground!
Because this is a temporary structure there are no proper foundations but we have to build it on something. The tyres will act as pads and help to spread the weight of the building so that the actual weight on the ground per square centimetre is as little as possible. This means that if we put a ton on each pad the actual pressure on the ground would be less than a couple of bags of sugar per square centimetre. We are filling each tyre with a weak concrete mix. It would be ecologically better if we used earth instead of concrete, but I have two excuses for not doing it in this case. Firstly, the whole thing is going to get rained on for a few months before we are watertight and I am worried that the rain will wash out the earth or just make it soggy and muddy which is exactly what we don’t want in a foundation. The other reason is that we don’t have to. You may have seen YouTube stuff of fit young men stripped to the waist pounding earth into tyres with sledgehammers. This process is totally knackering and in any case we are slightly short on topless young men. This rammed earth technique is essential if you are using tyres as a wall structure, and concrete won’t work anyway. The reason you have to spend all this time hitting it is to work the earth up into the space in the top side wall of the tyre so that the whole thing is solid. Concrete won’t do that and anyway we don’t need to do it, so those are my excuses.
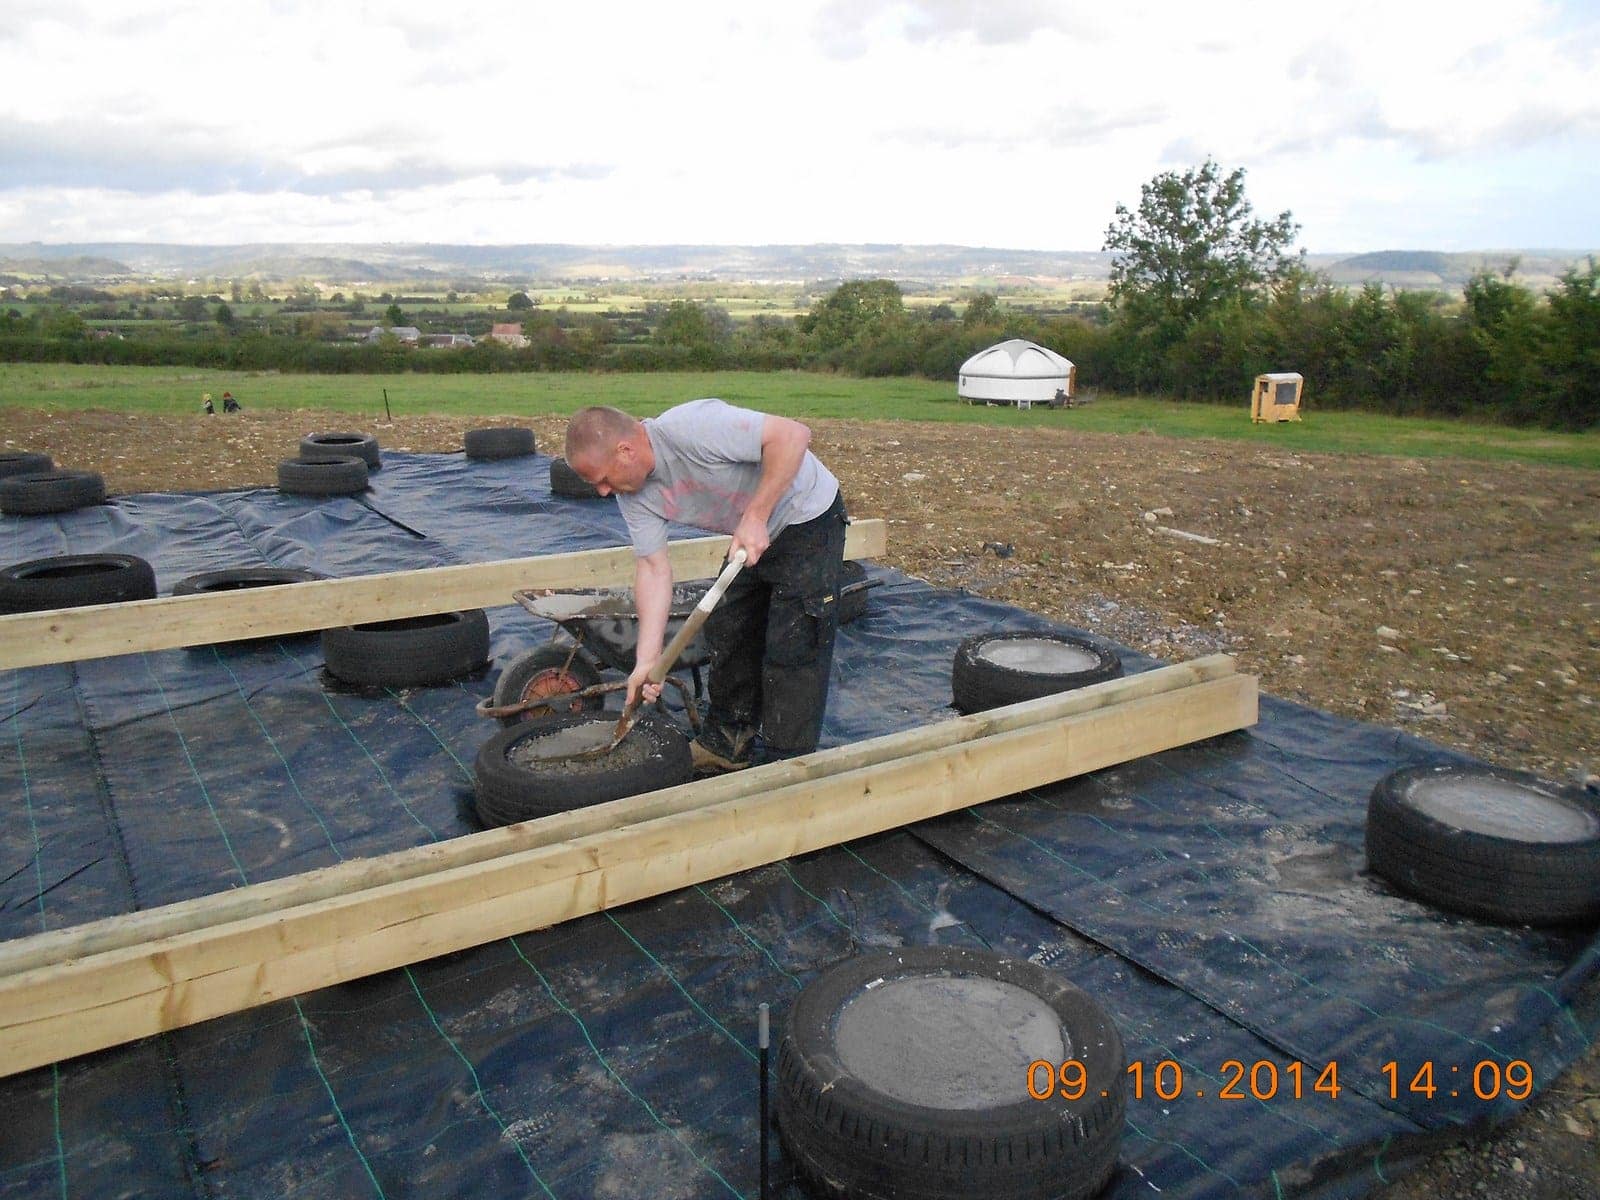
Alex is filling each tyre up to the rim and trowelling it approximately level. Approximately, or “good enough” is an important keystone of the Robin Building Stuff Philosophy. The ground is “good enough” level. The tyres are “good enough” similarly, and “good enough” in the right place. The concrete is “good enough” level. Good enough is a measure which can vary a lot. It might be a few inches or within a millimetre. The trick is to know which “good enough” you need and when to use it!
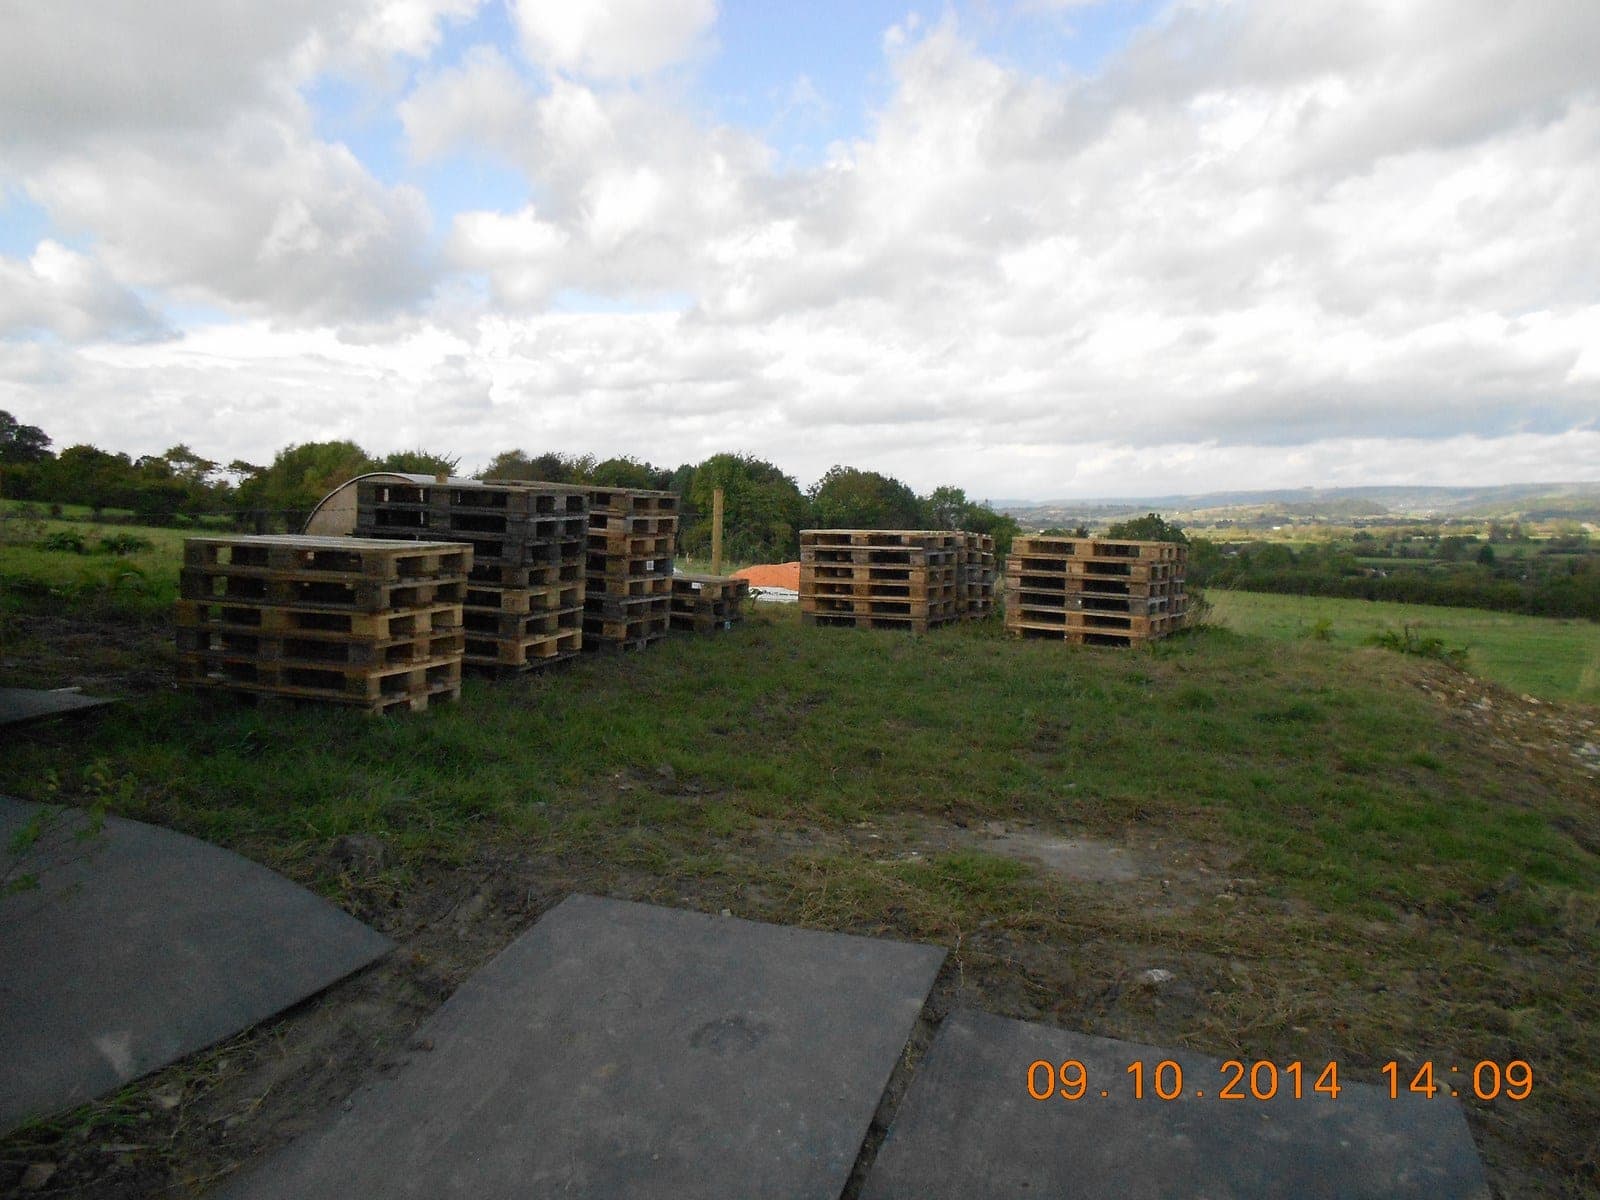
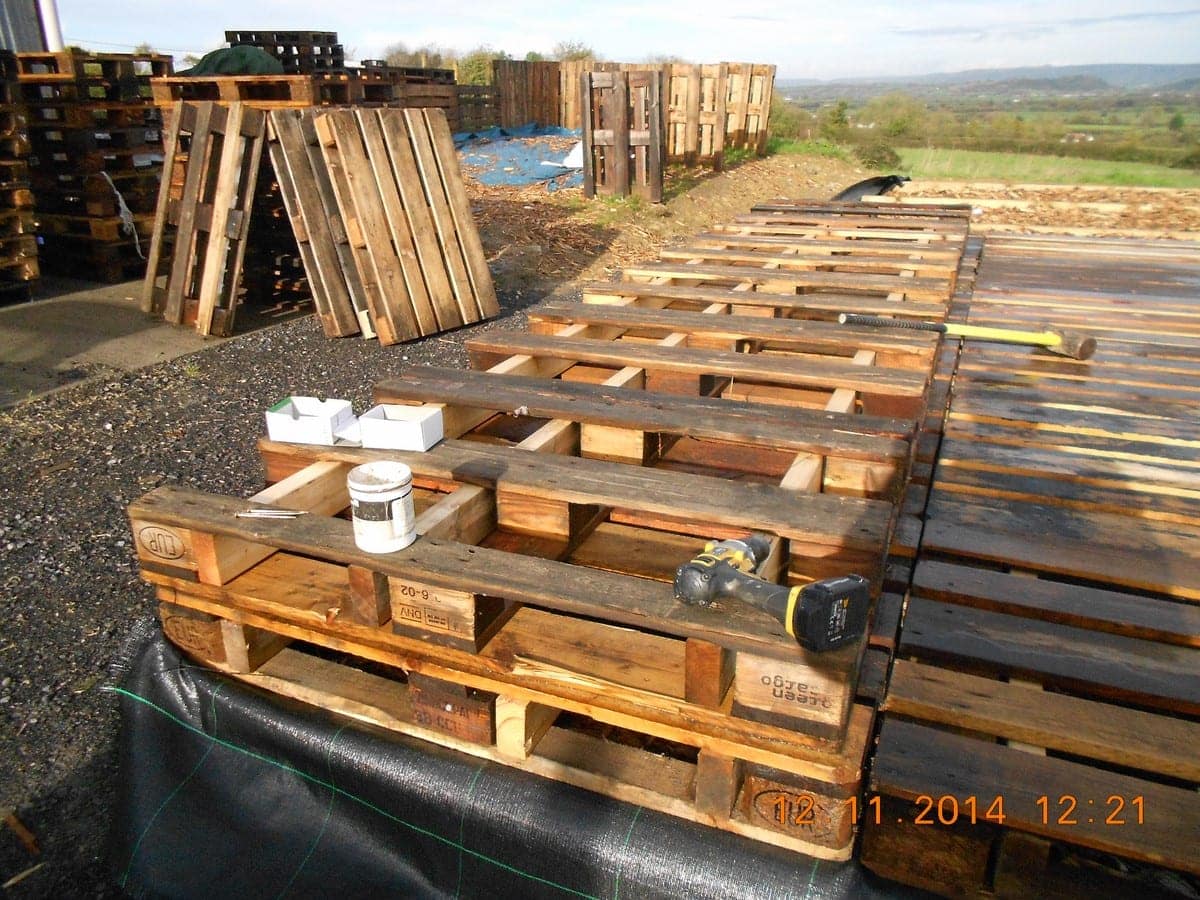
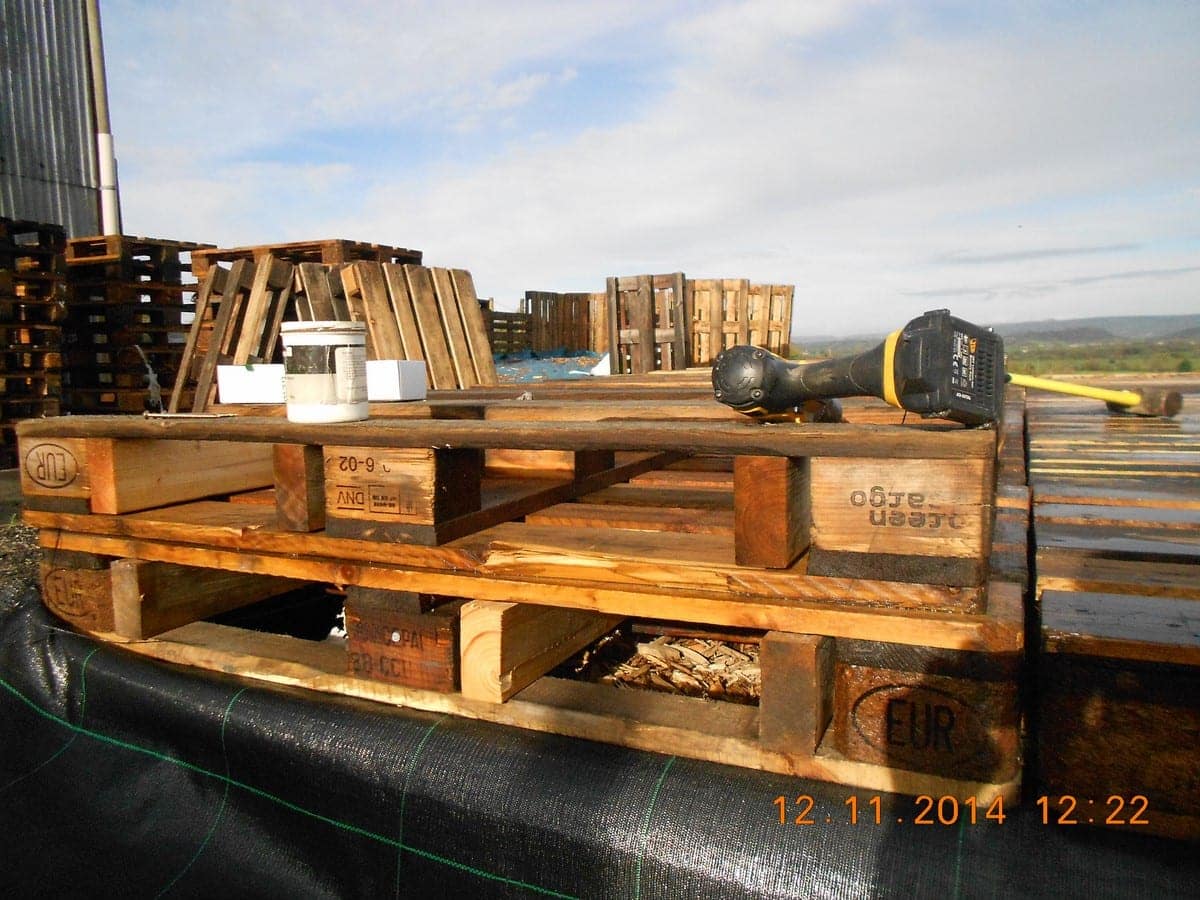
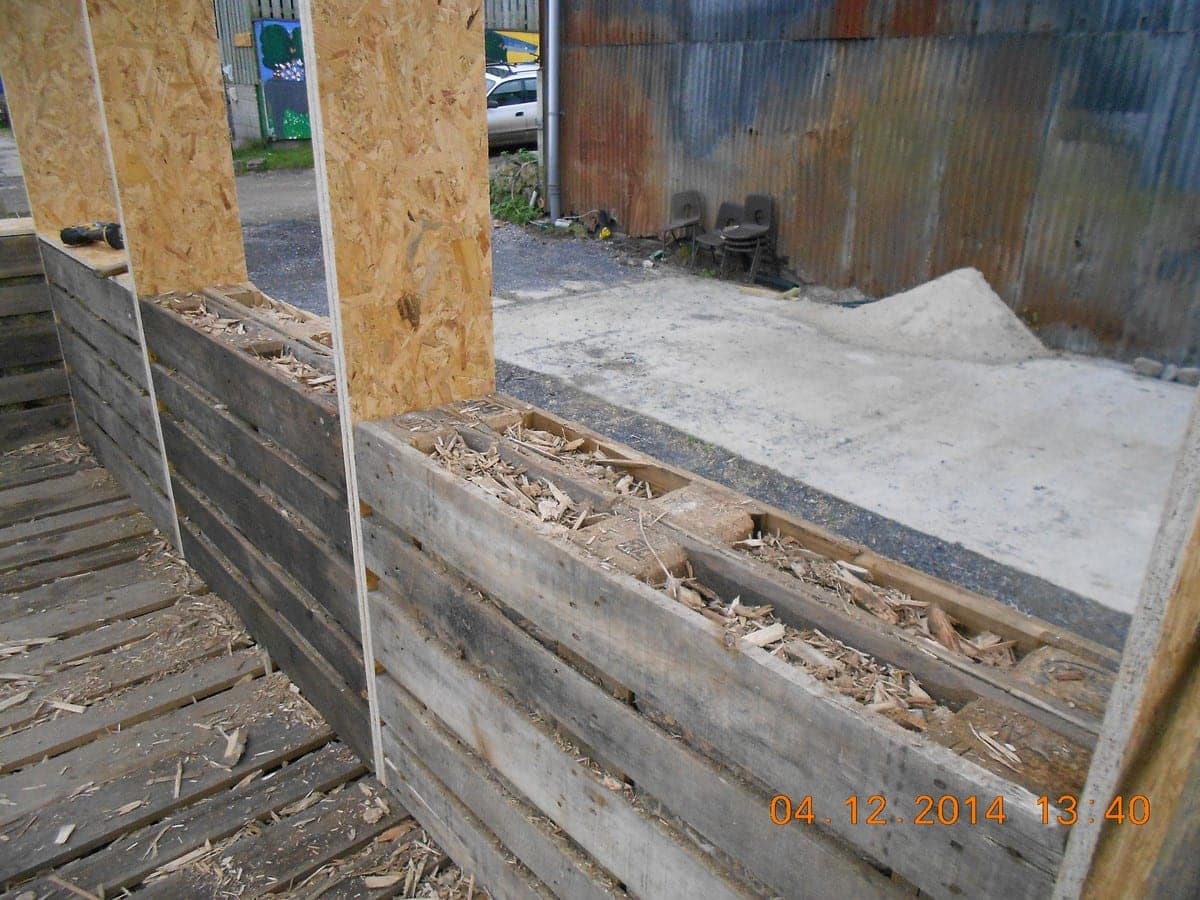
This is the first load of 50 pallets. I collected them from Bridgwater pallets. They are second hand pallets, but yes we bought them! They cost about £5.00 each and we will need around 350 to complete the job. You can get them more cheaply, and whenever I can I will. But I need a reliable source of what I want when I want it, and for that you usually have to pay. If I had to scrounge them the whole project would just take too long.
It is not practical to build a sensible structure out of randomly collected pallets. We will use scrounged ones for doing some things, but for the main structure the pallets are “bricks” and they need to be reliably uniform. So, they are Euro pallets, which are 1200 mm x 800 mm and near as spit are all exactly the same size. This is an example of where ” good enough” means all exactly the same!.
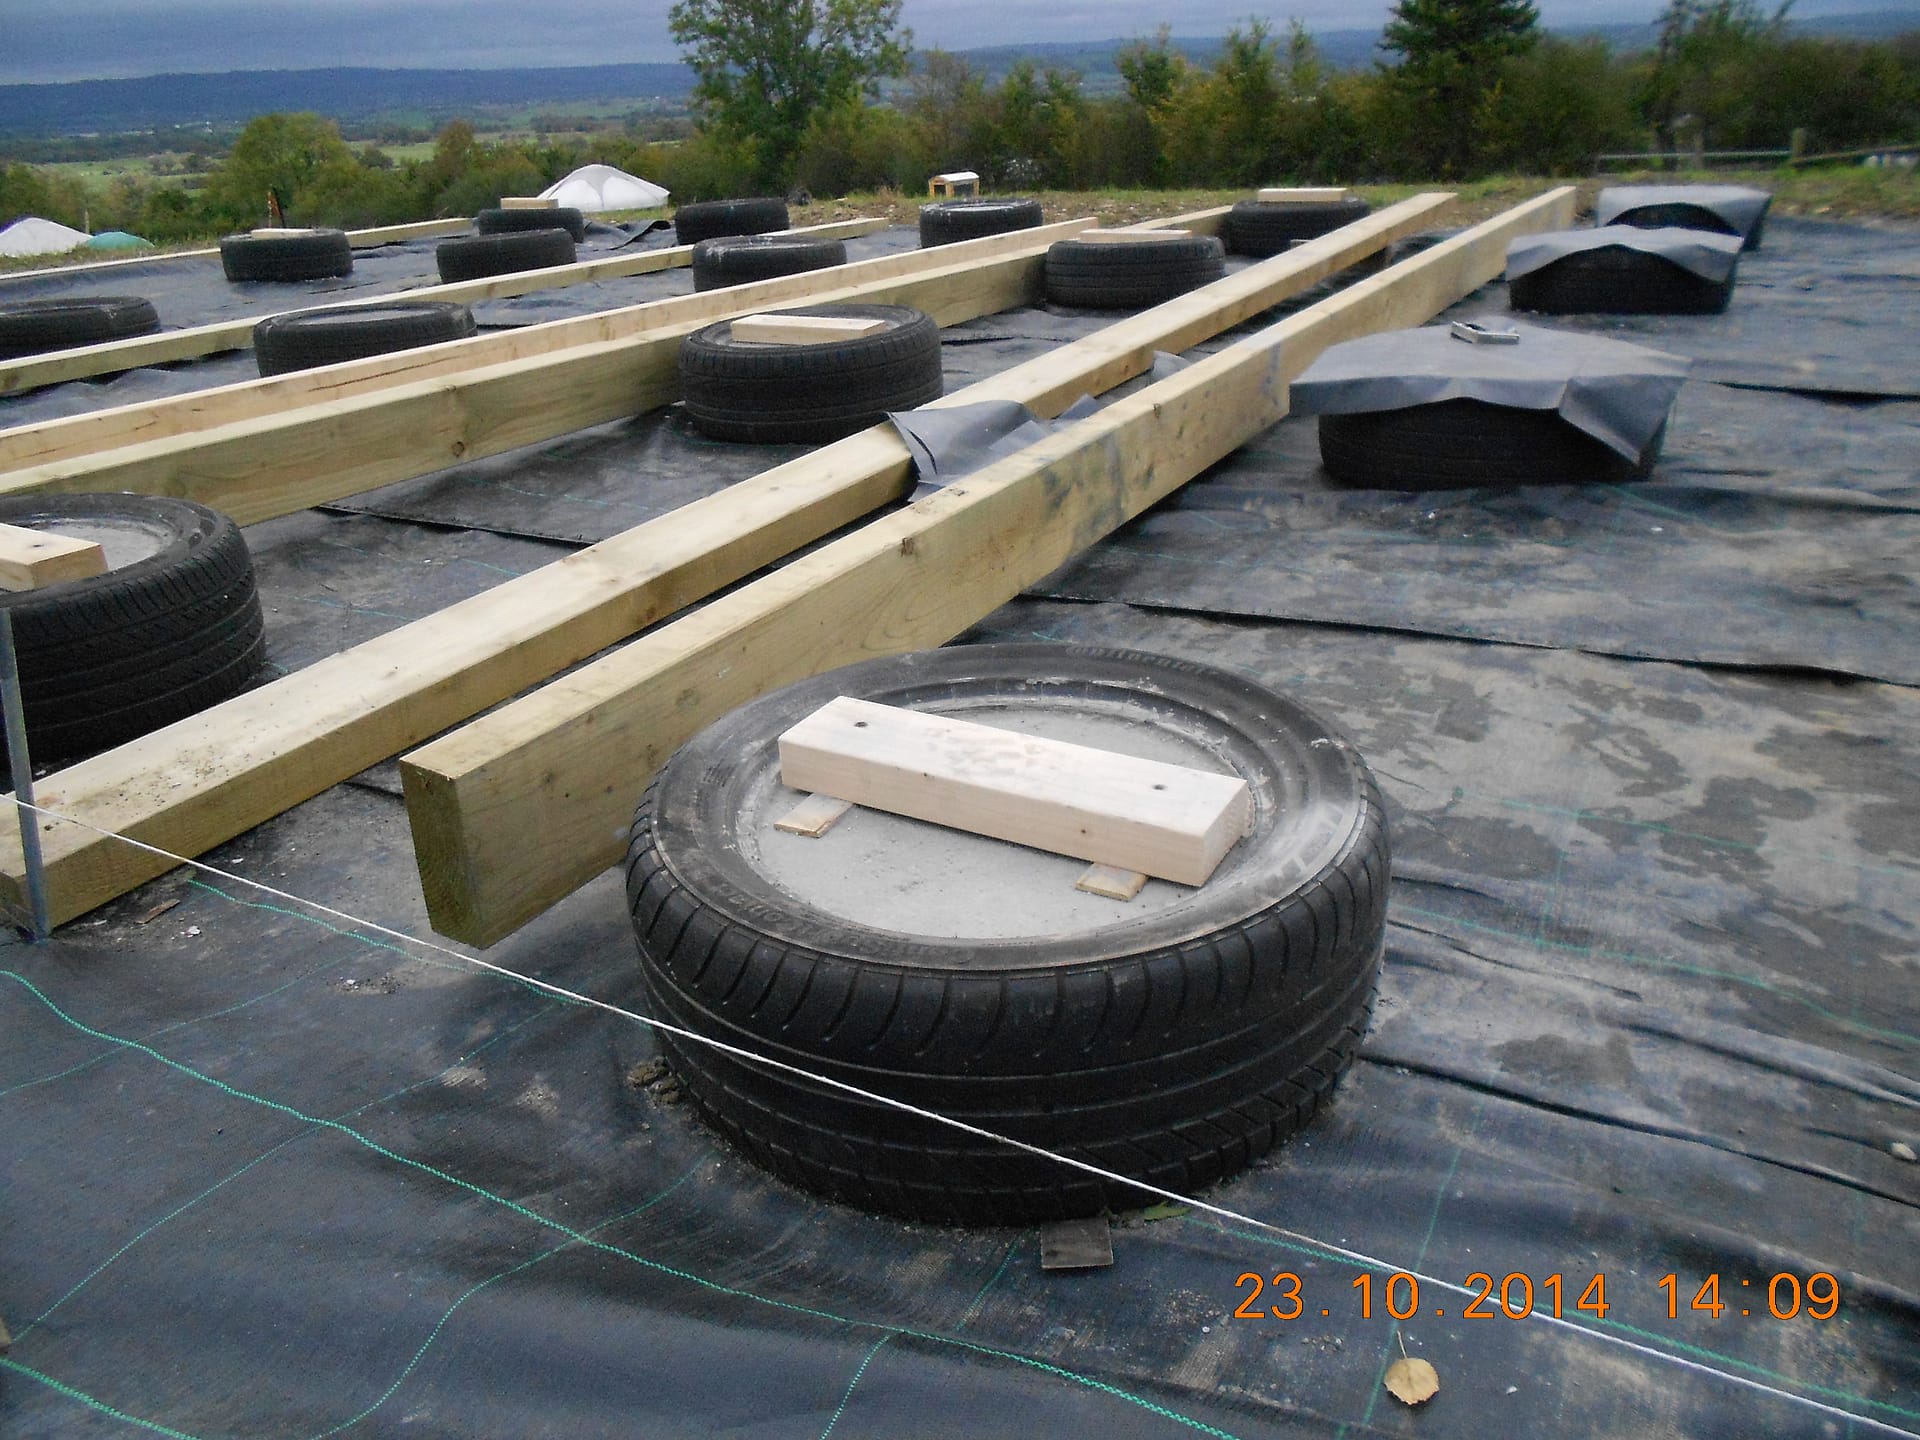
October 23rd
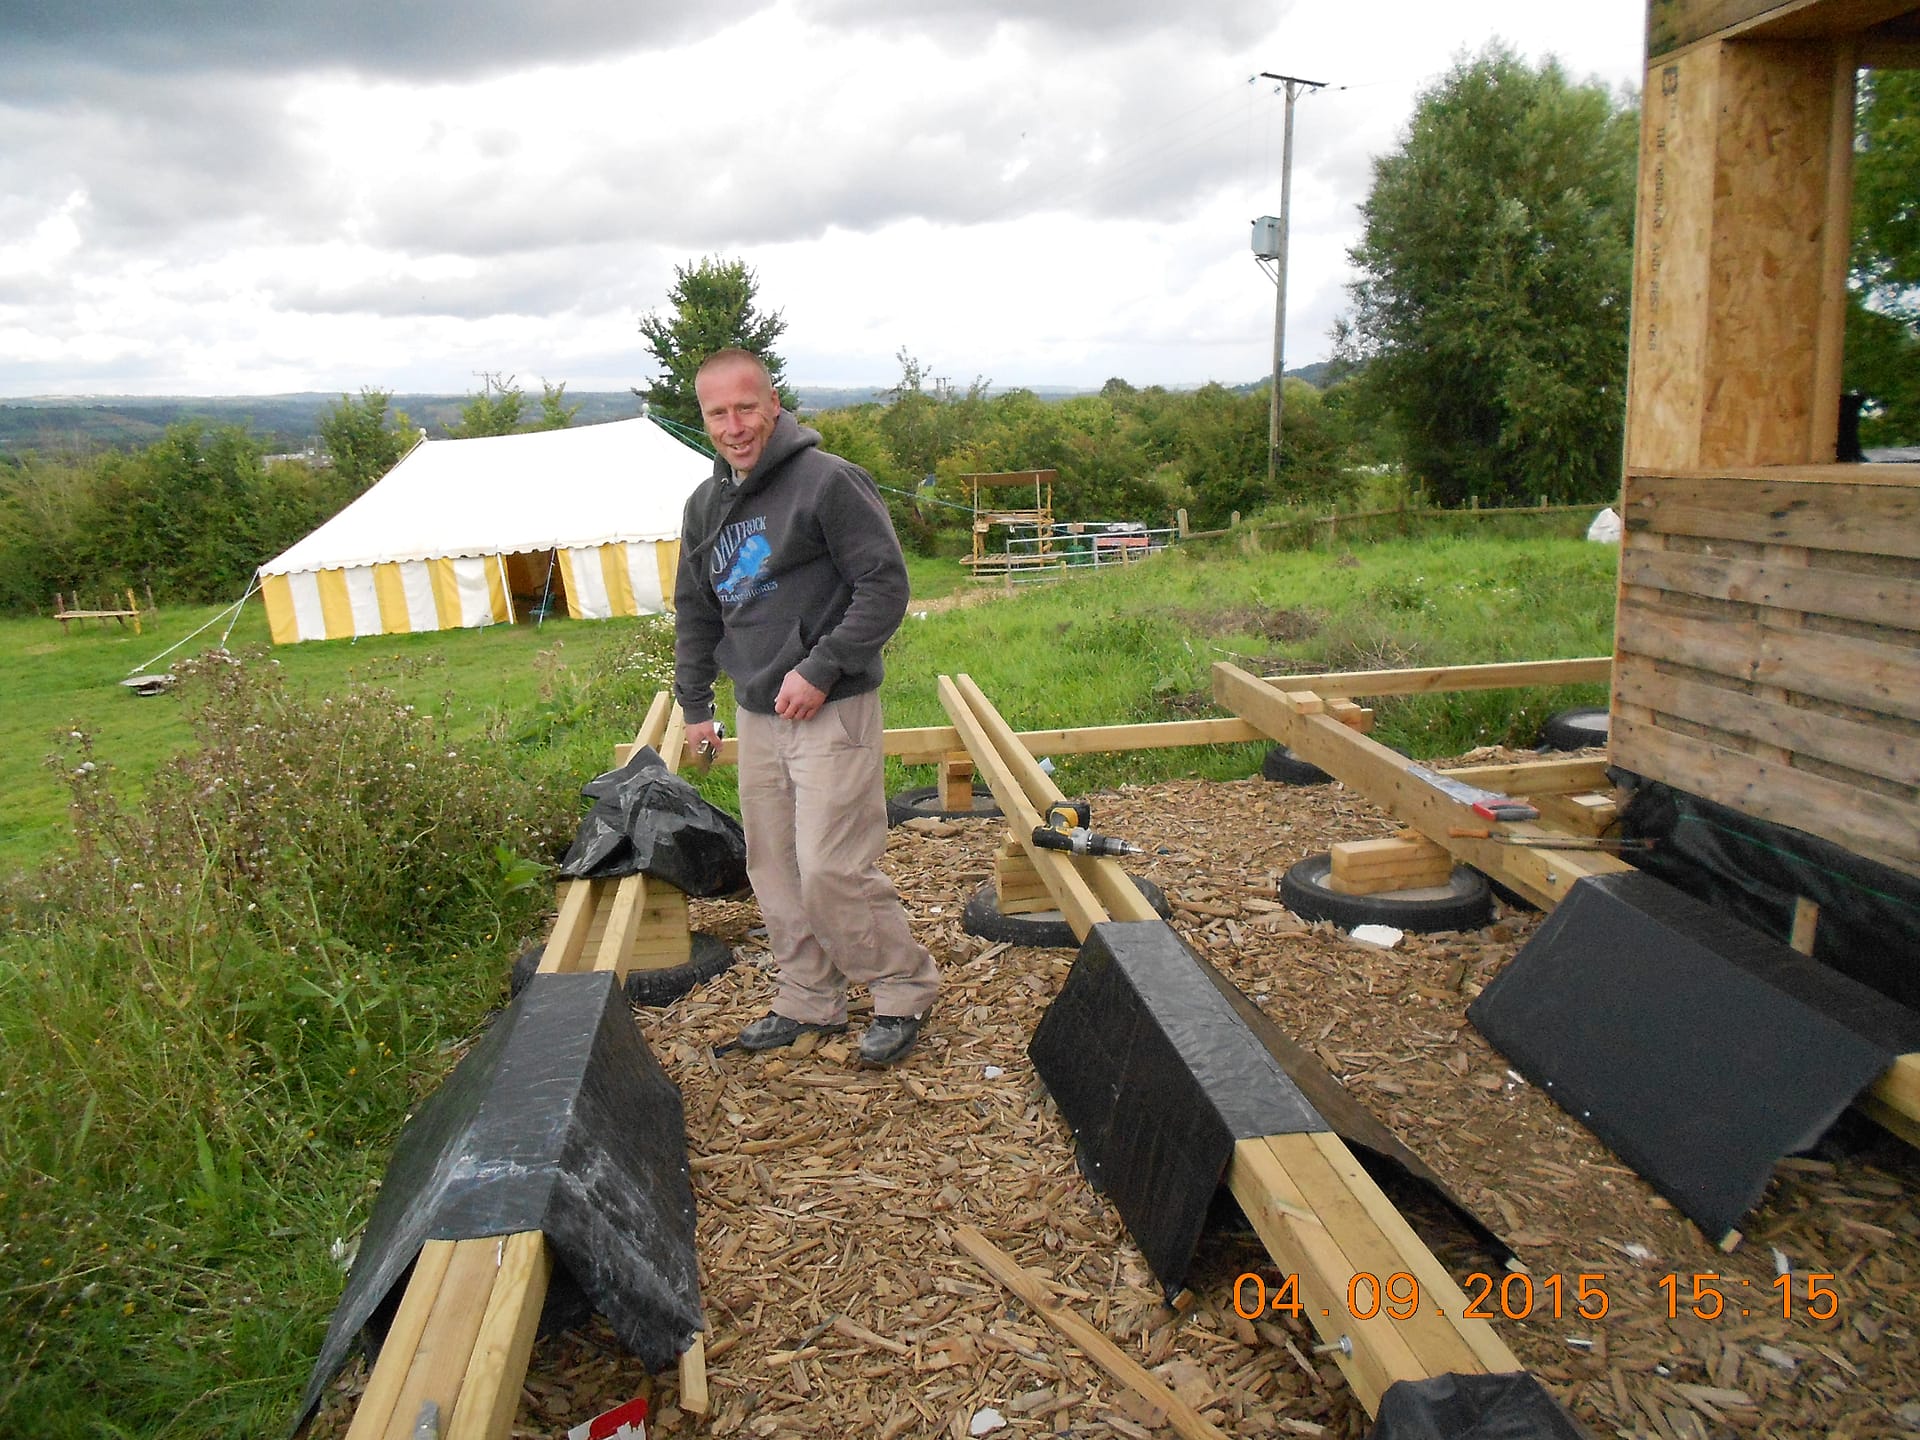
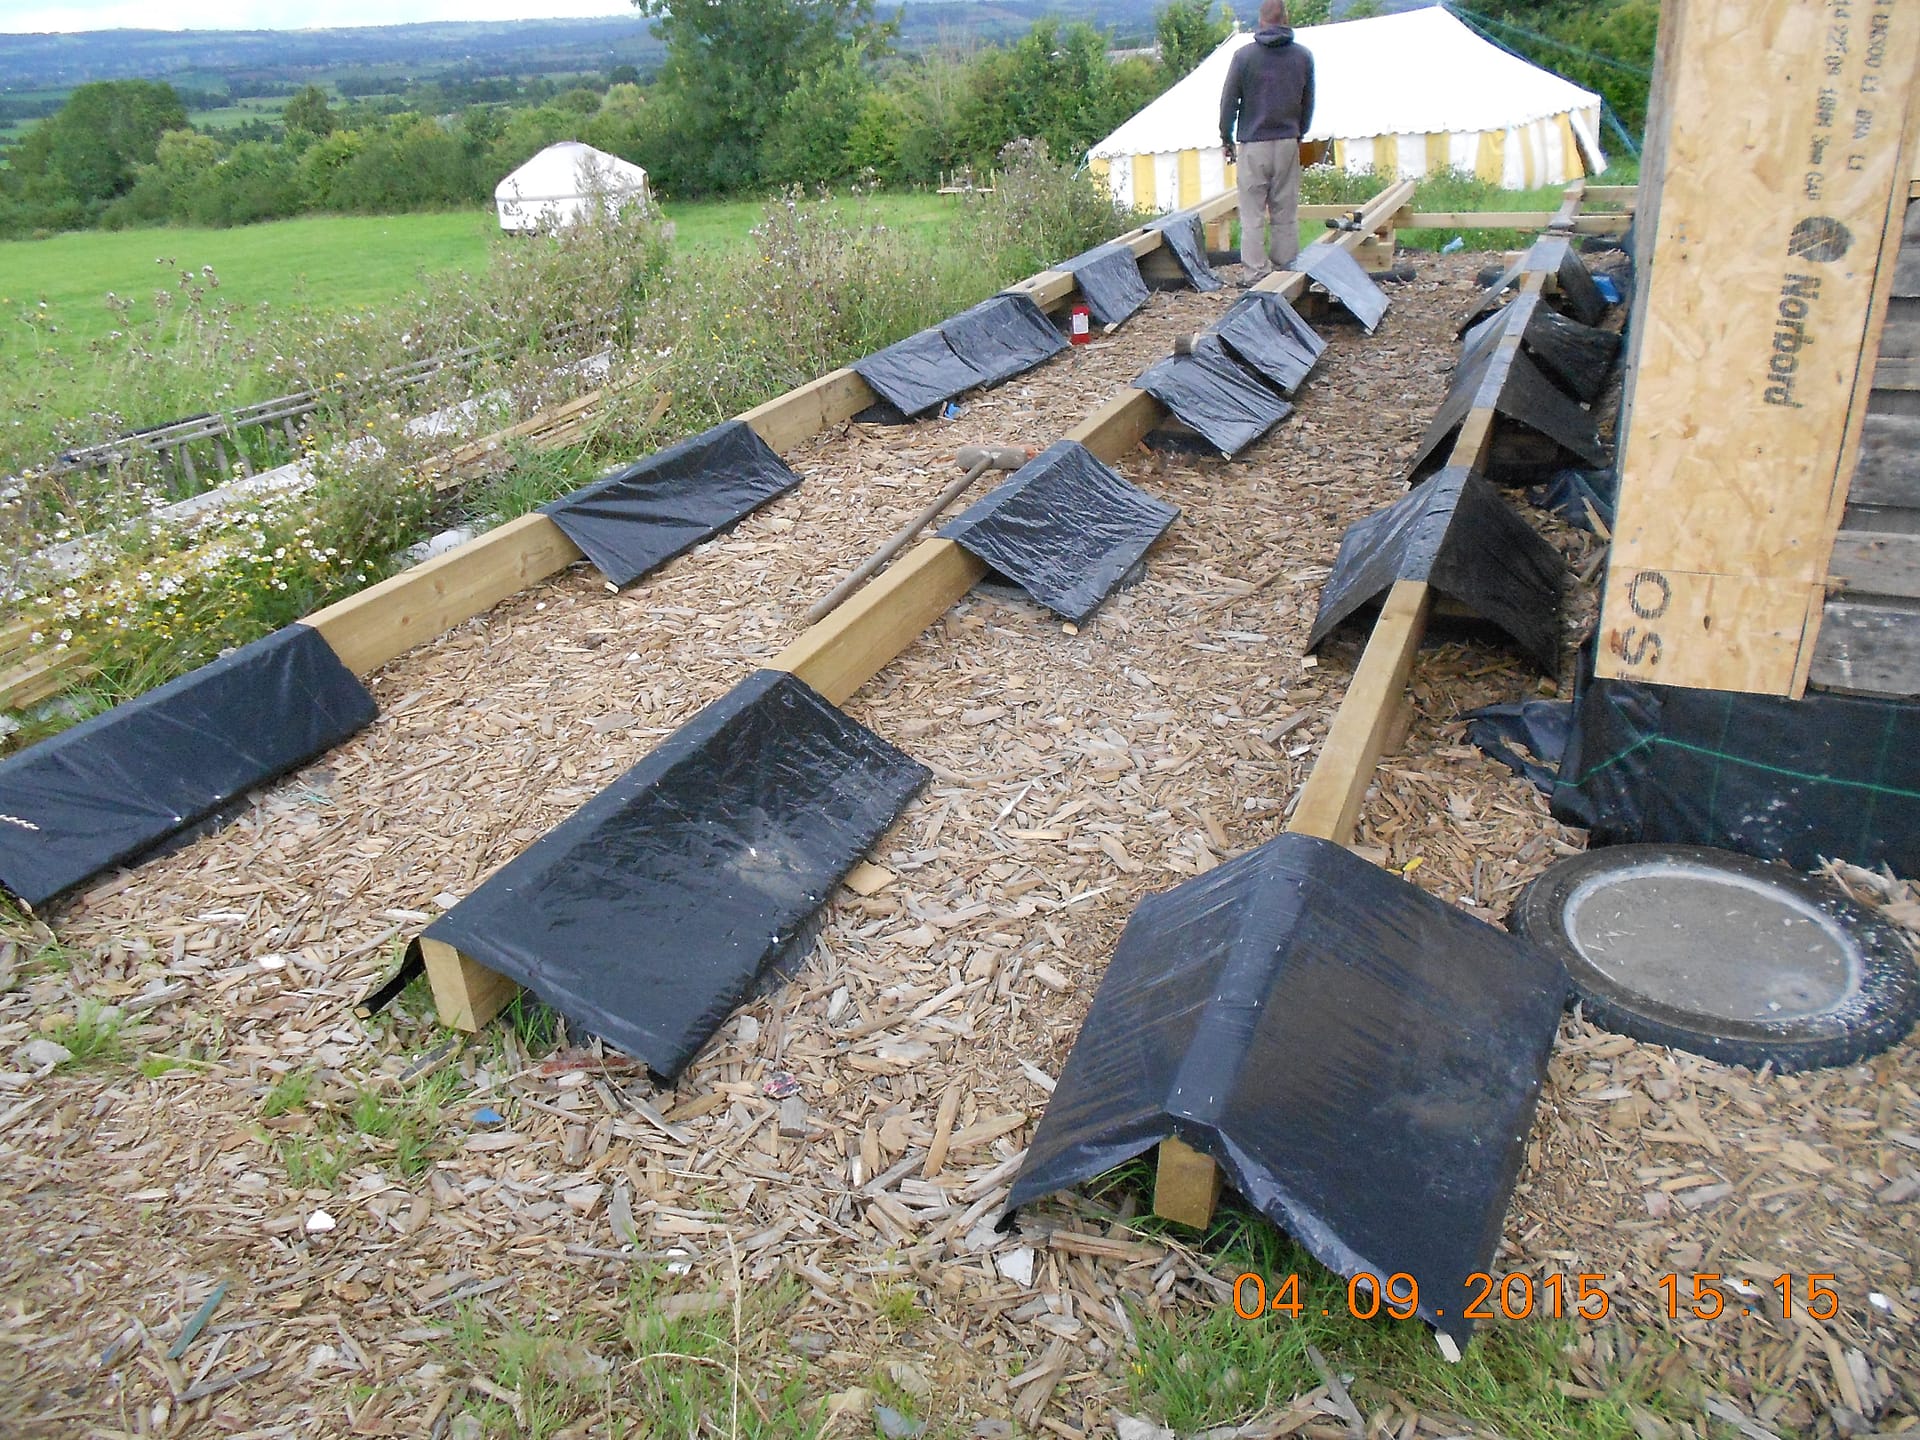
Here is a good example of where good enough is within a few mm if you can do it! It is going to pay us back in ease of construction for the whole of the rest of the job if we can get the floor absolutely level. So…. having got our tyres and concrete in roughly the right place we now want to get the bearers for our floor joists at exactly the same level right across the building. You can use spirit levels or a water level if you know how to work it, or a laser if you have one. It doesn’t matter which. Just get it as good as you can. I used a traditional spirit level. So with a bit of luck we now have the floor bearers all at the same height but we still need to get the joists in the right place.
Here again we have given ourselves a bit of room to play with. The pad should now be at exactly the right height but only roughly in the right place on the ground. The string will get our joists in an exact straight line and we still have about 6″ in both directions to get them straight and the right distance apart.
Monday November 3rd
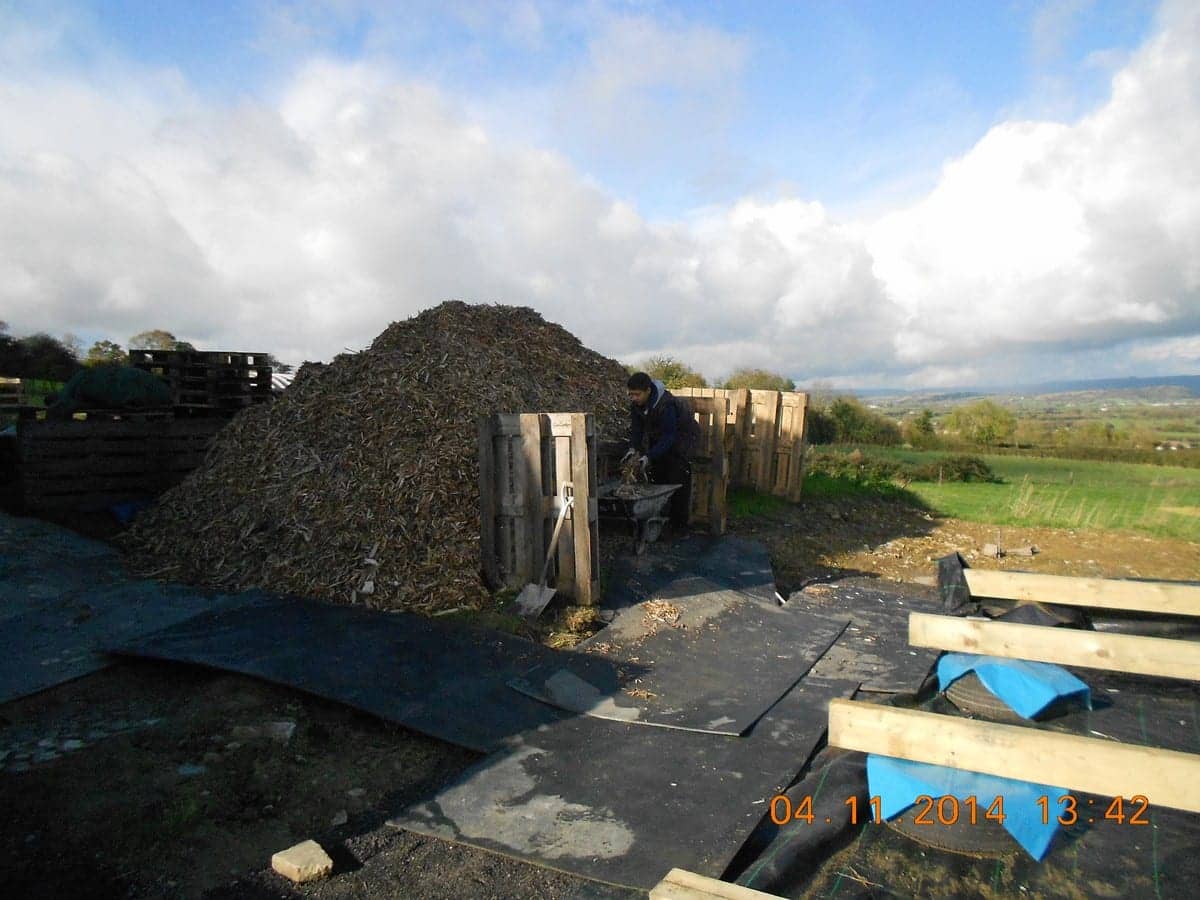
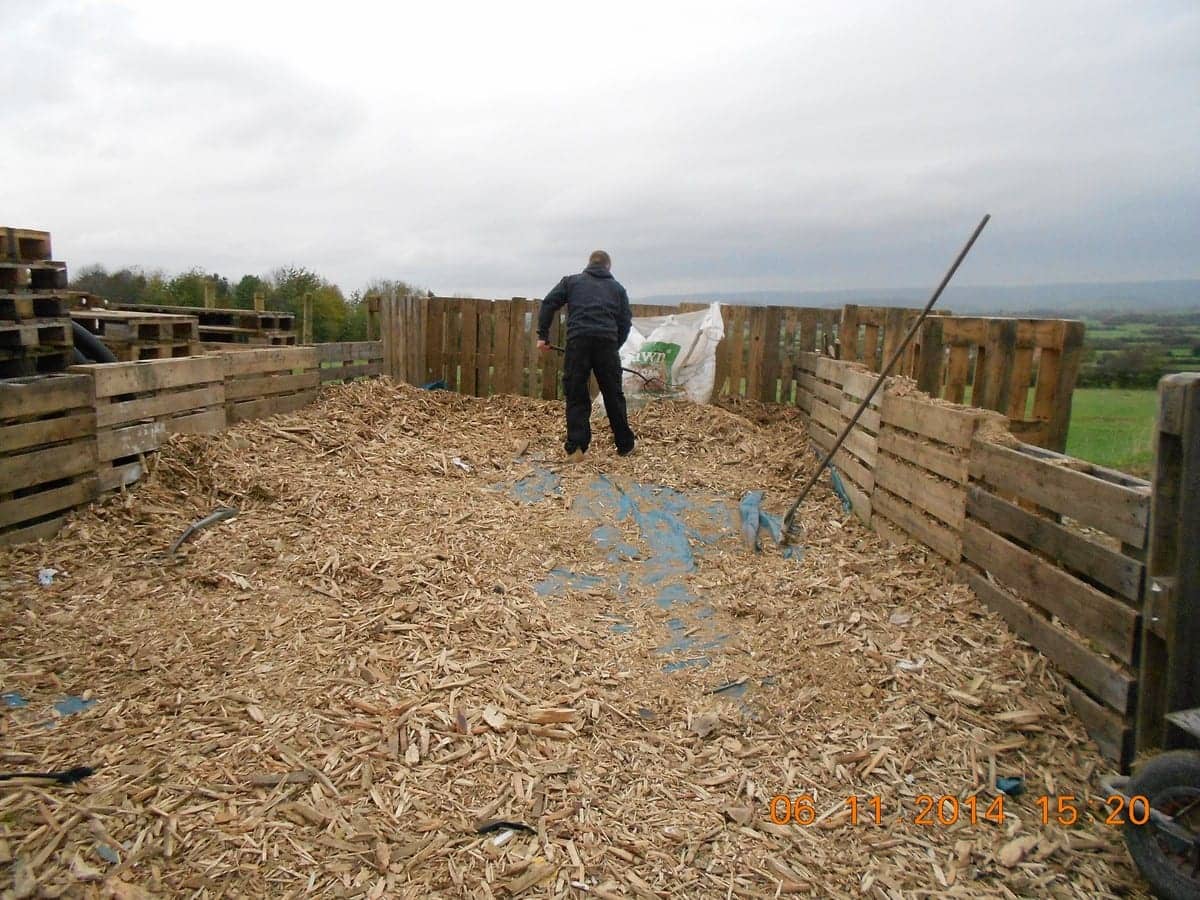
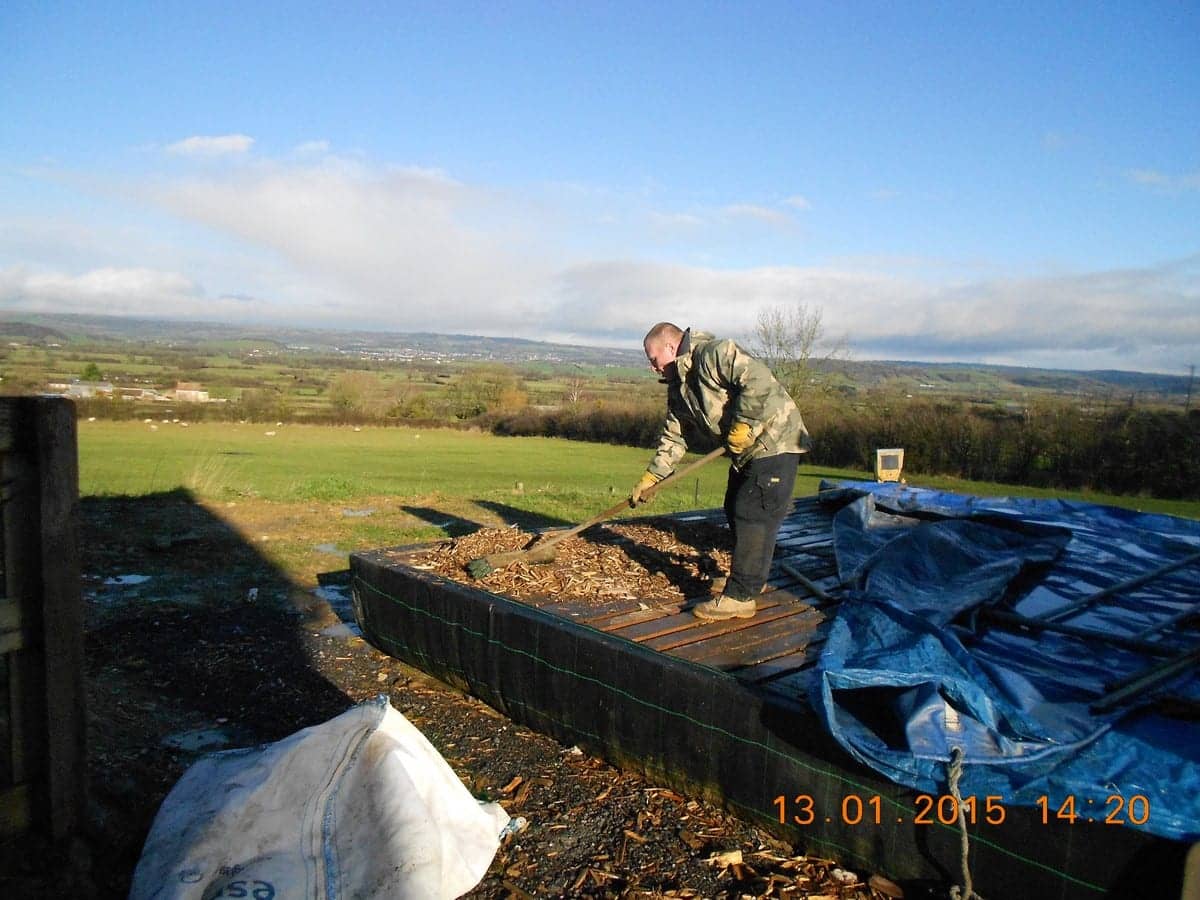
This is our insulation. It comes from a firm called South West Wood Products down the road at Ashcott. It is mainly chipped up bust pallets but may contain all kinds of now useless wood. If it is contaminated with toxic preservatives and chemicals it goes to power stations who have the technology to deal with it without poisoning the atmosphere. The dusty stuff goes back into making chipboard furniture. The majority is used as animal bedding. I guess that with a chipper we could make our own more cheaply but it would take forever to make enough. The fine dust would probably make better insulation but it has an unfortunate ability to spontaneously combust. We did consider using peat as insulation since the entire area round us is made of it, but it is rather inclined to spontaneously combust as well.
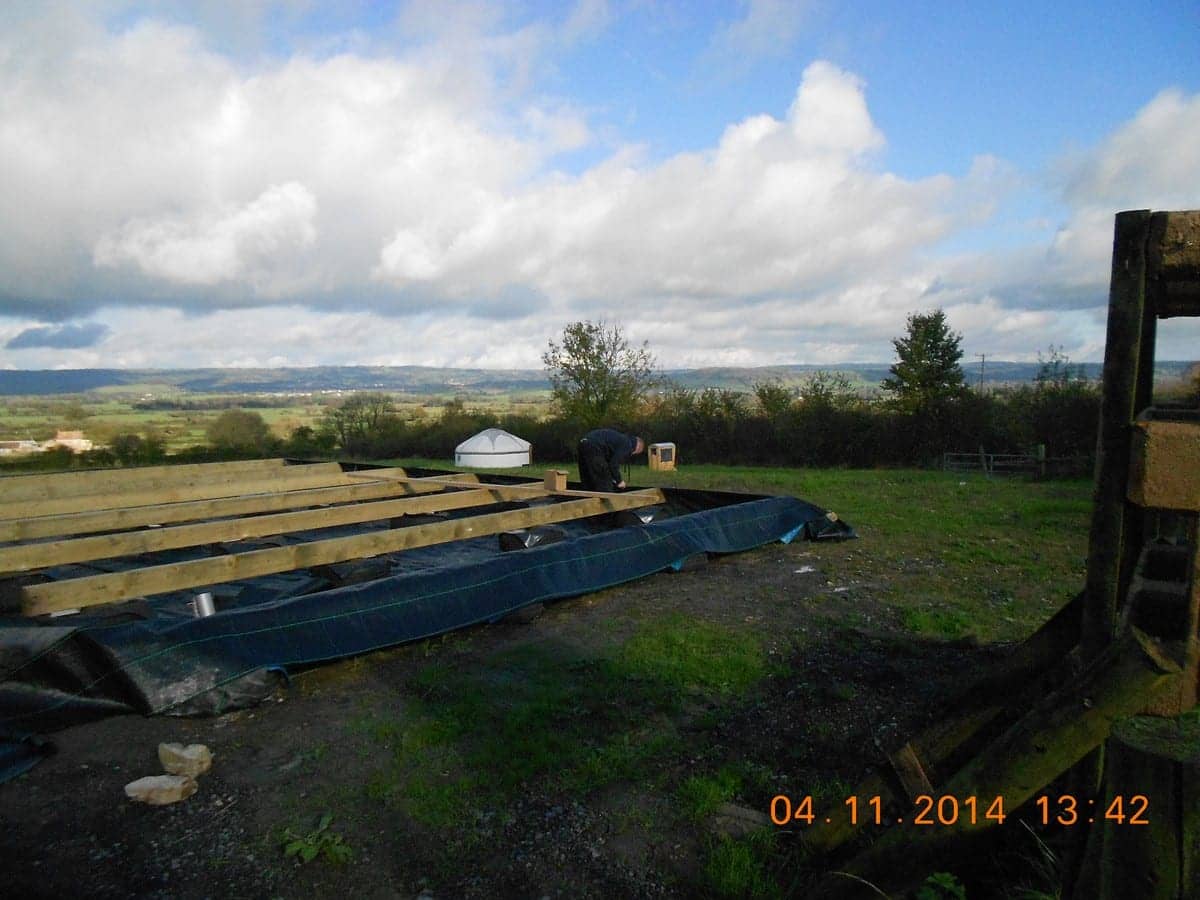
This is where we begin to fashion the duvet that will insulate the floor of the building.
This is Liam putting in one of the early loads having already announced that it was very hard work and would take forever. I find the young funny like that. They are easily discouraged by the enormity of anything that they perceive as likely to take more than about ten minutes. This is strange because you would have thought they would be the ones with unbounded optimism, and with the time do stuff which takes ages.
This was on Tuesday afternoon. By Thursday going home time we had nearly done the lot!
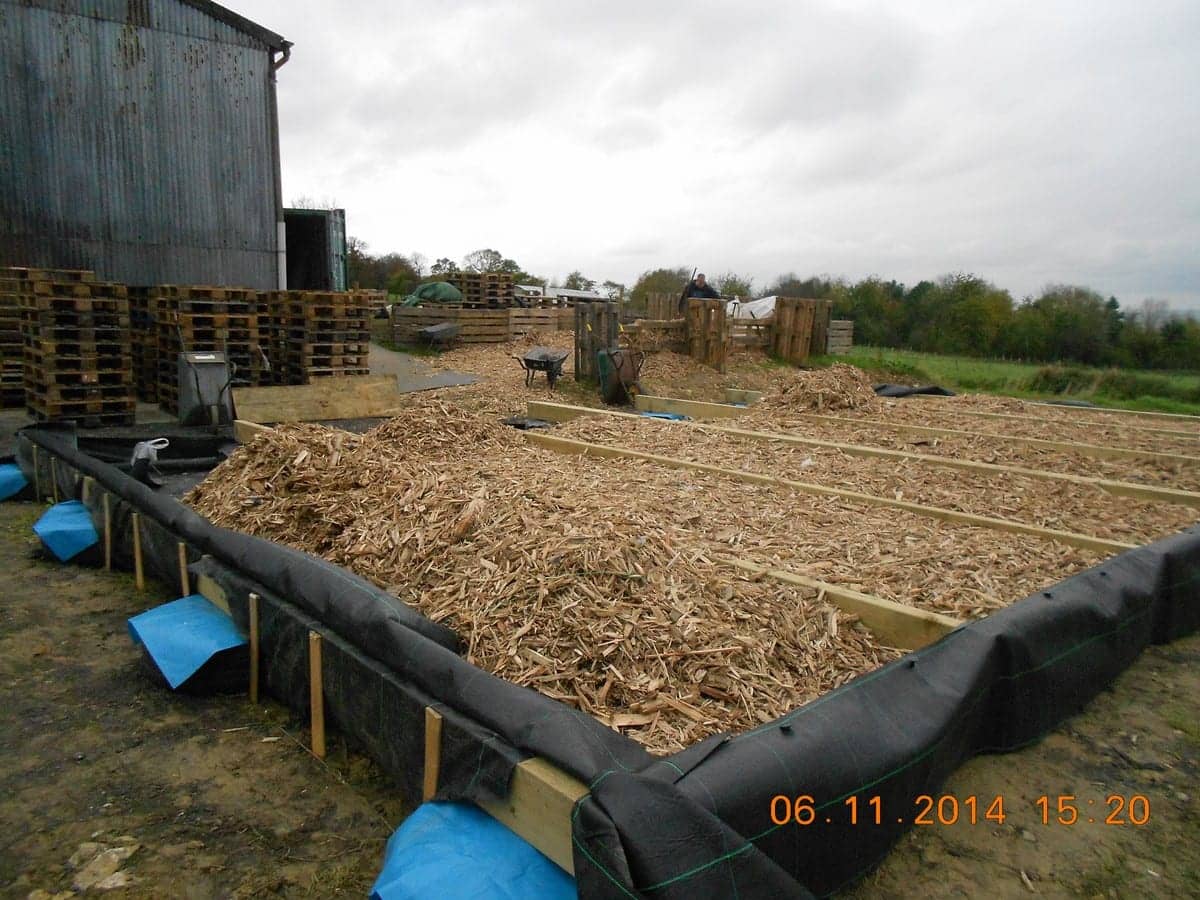
This is what is left of 4.5 tonnes so we will just about have enough to do the floor. However, this will mean that the whole building will be sitting on a giant stuffed duvet which will hopefully keep it warm at least from underneath.
Thursday November 13th 2014
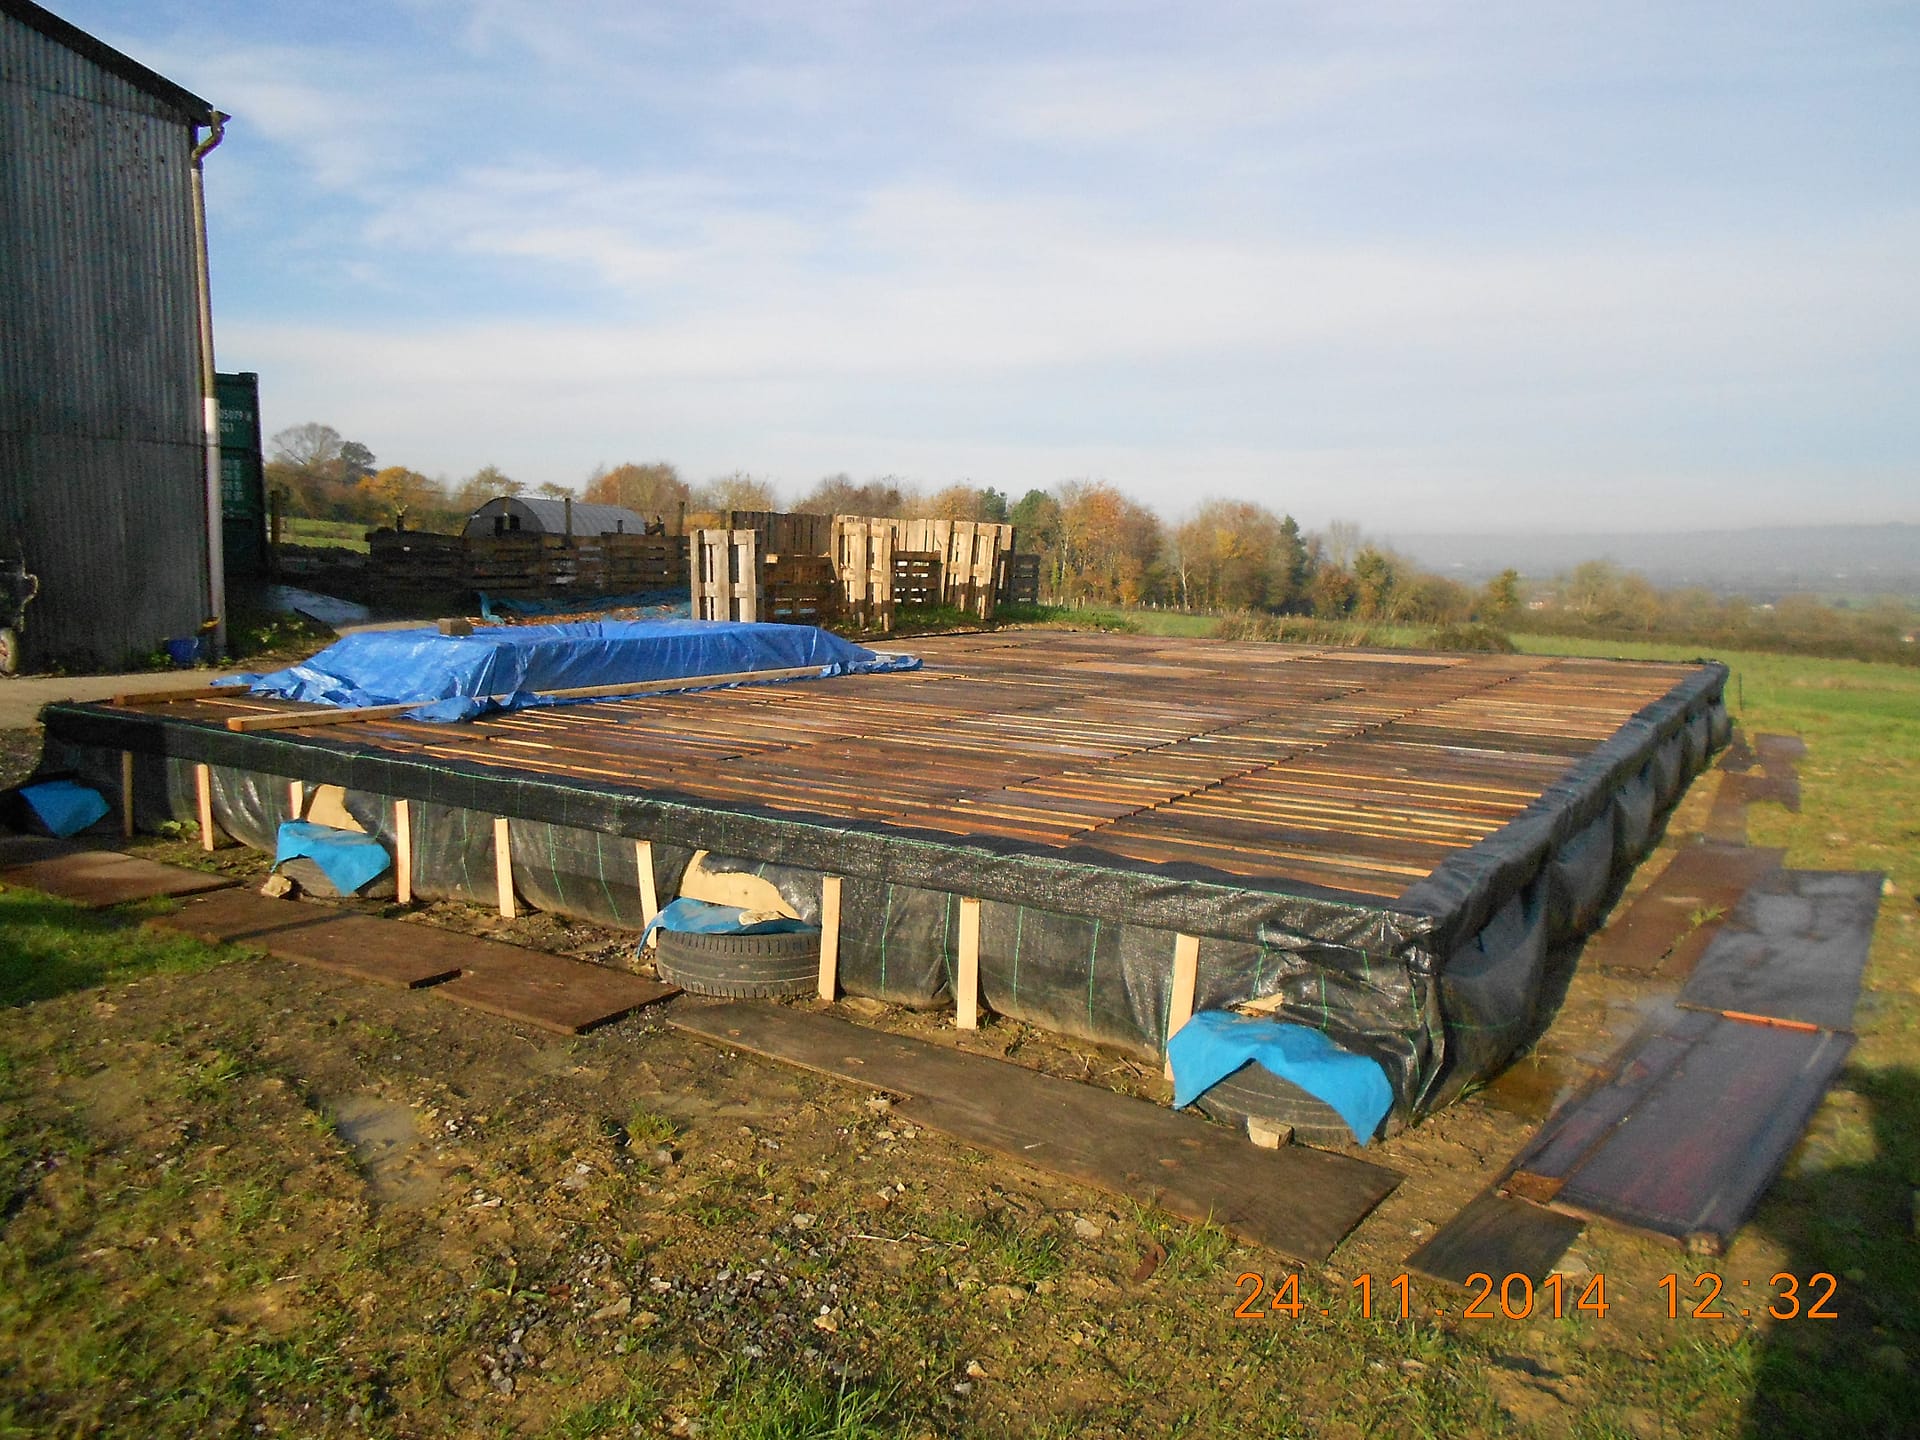
How to make a pallet floor
The weather today has been cold, windy and mizzly, so we abandoned ship and went home early.
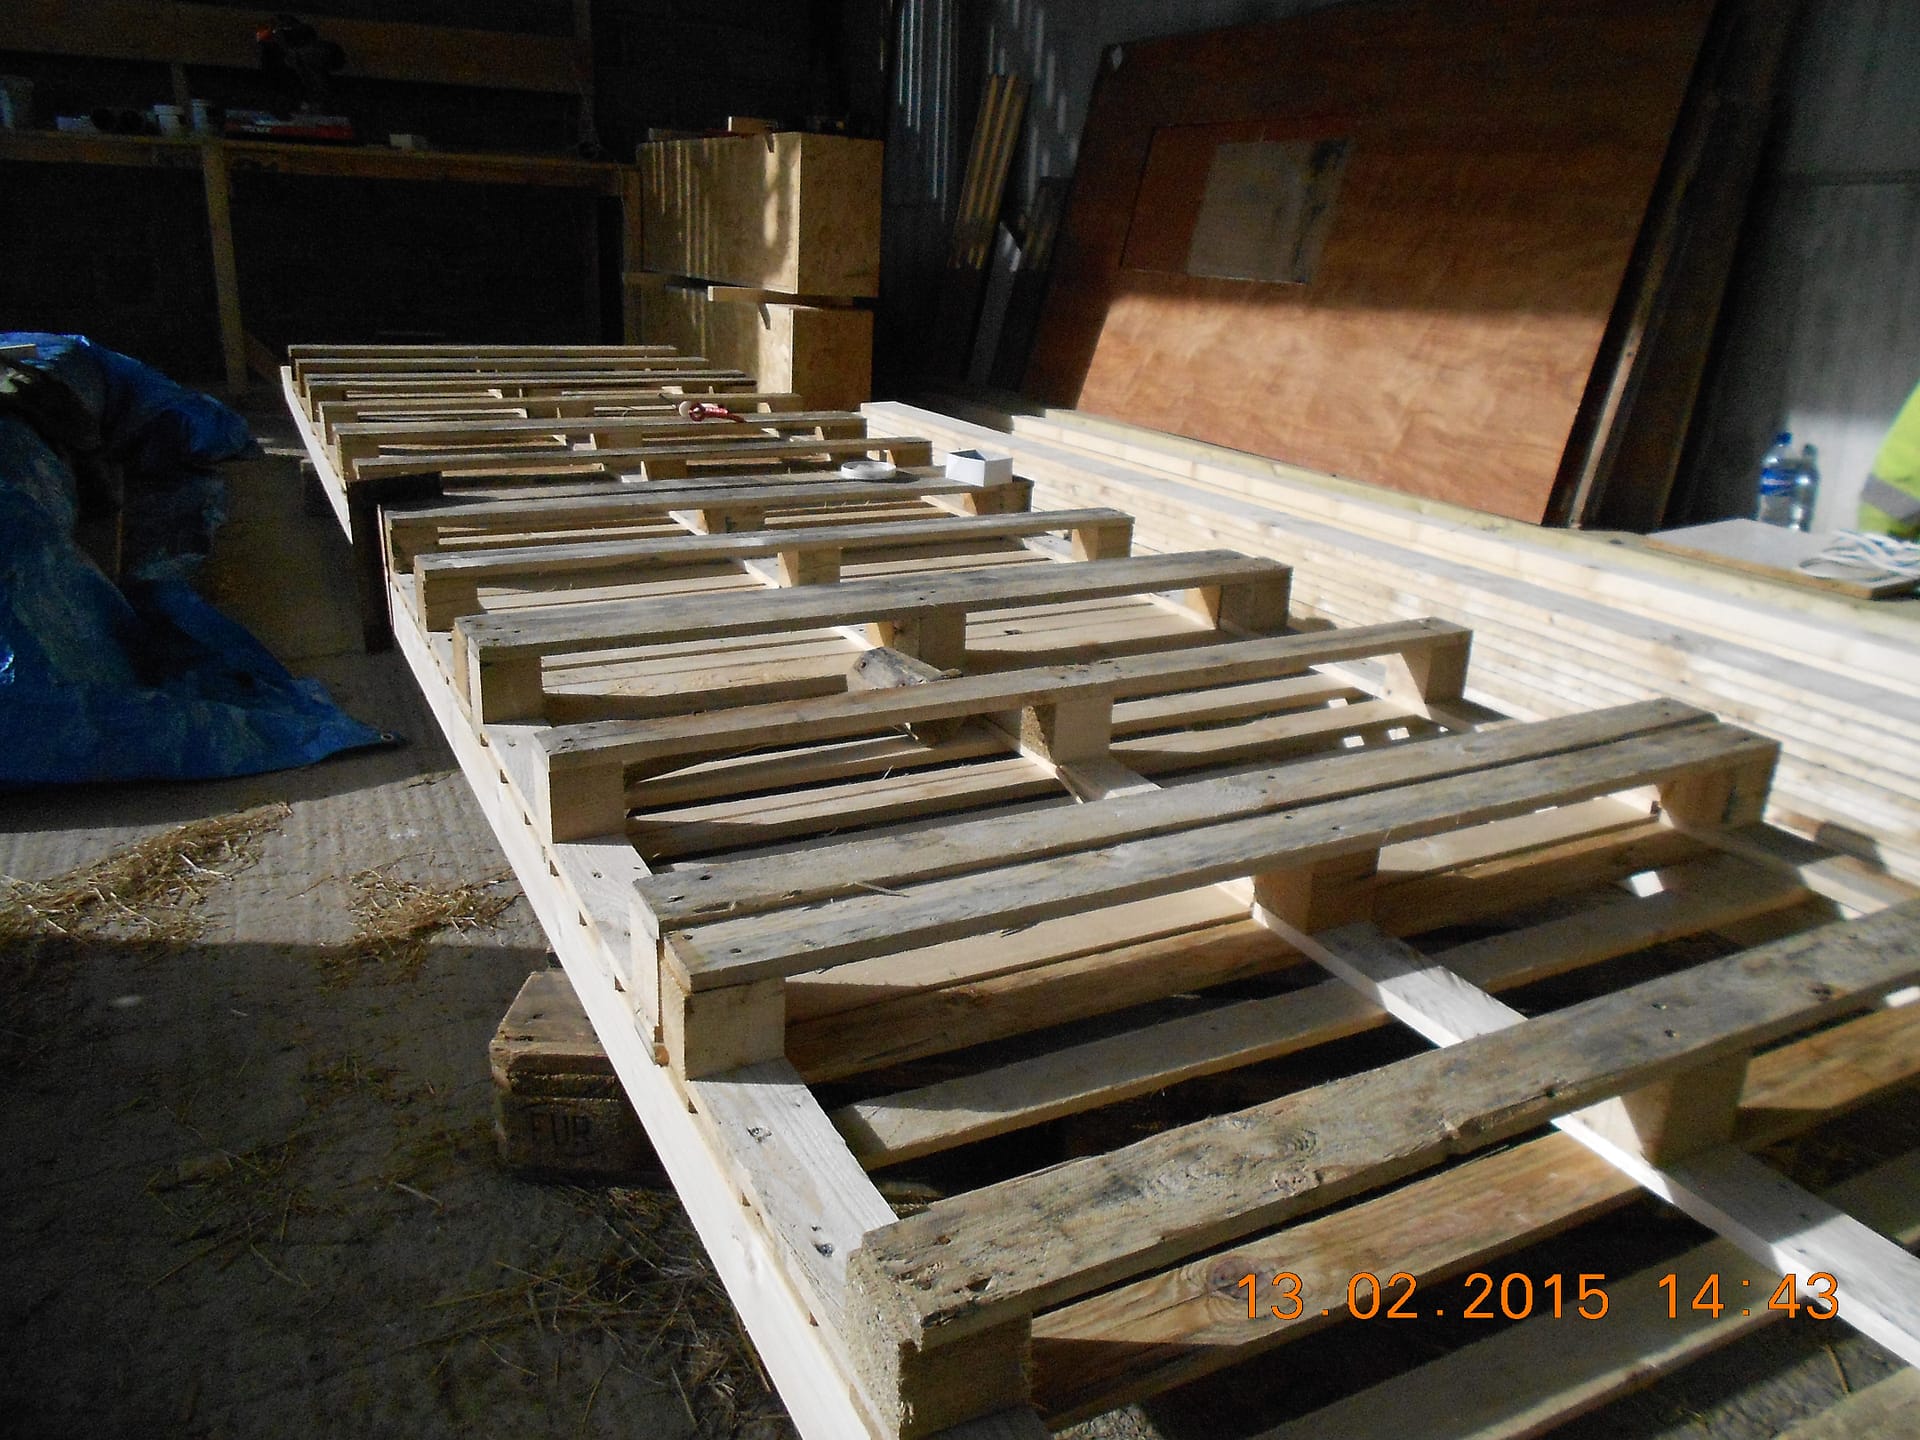
This is my tried and tested method of making a basic pallet floor.
First of all remember that we are using pallets that are definitely all the same size (ie the same type which in this case is the euro pallet.
A euro pallet is 800 mm x 1200 mm. this means that 6 x 800 mm comes to 4.8 metres which is exactly a standard length of 4 x 2 (actually 95 mm x 47 mm) which we are using to “thread” through the pallets.
It is sheer luck that a 4 x 2 will just thread through nicely.
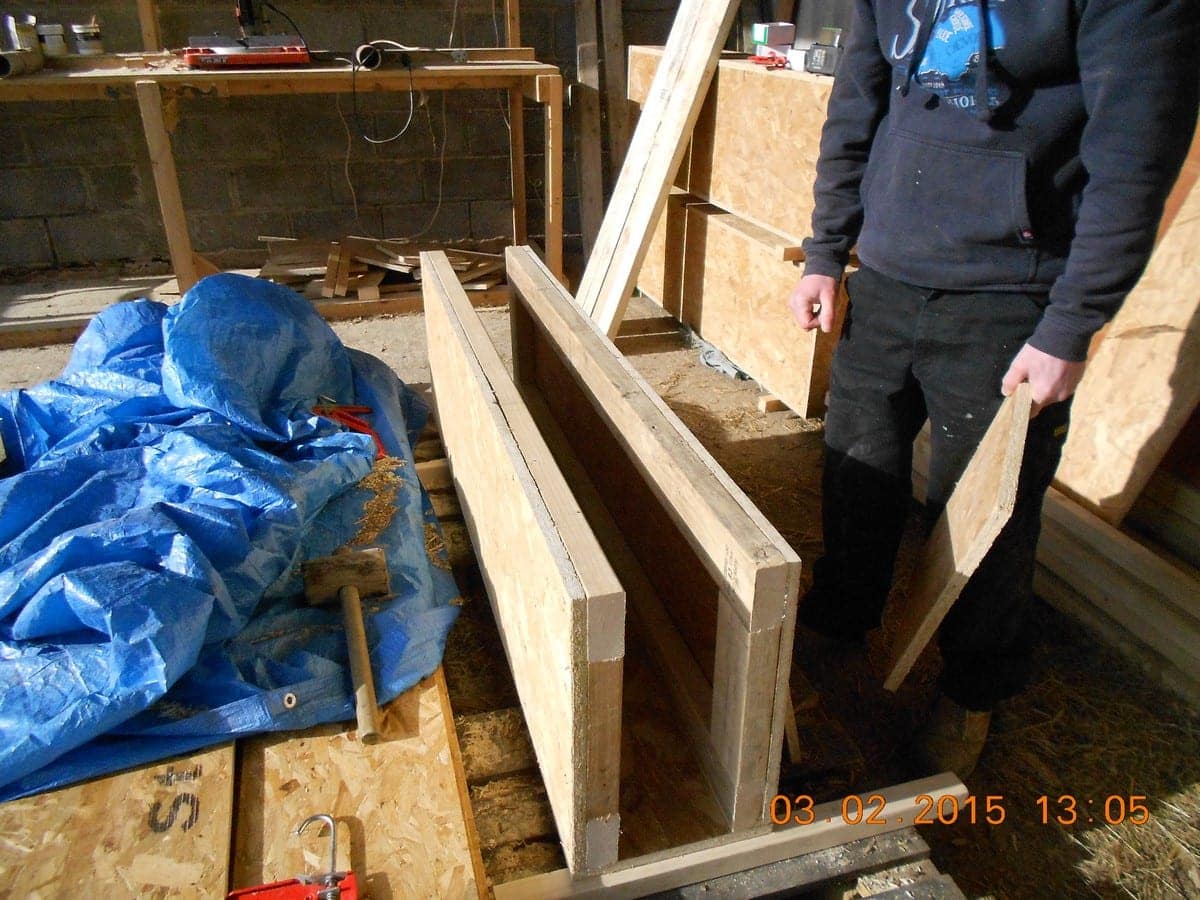
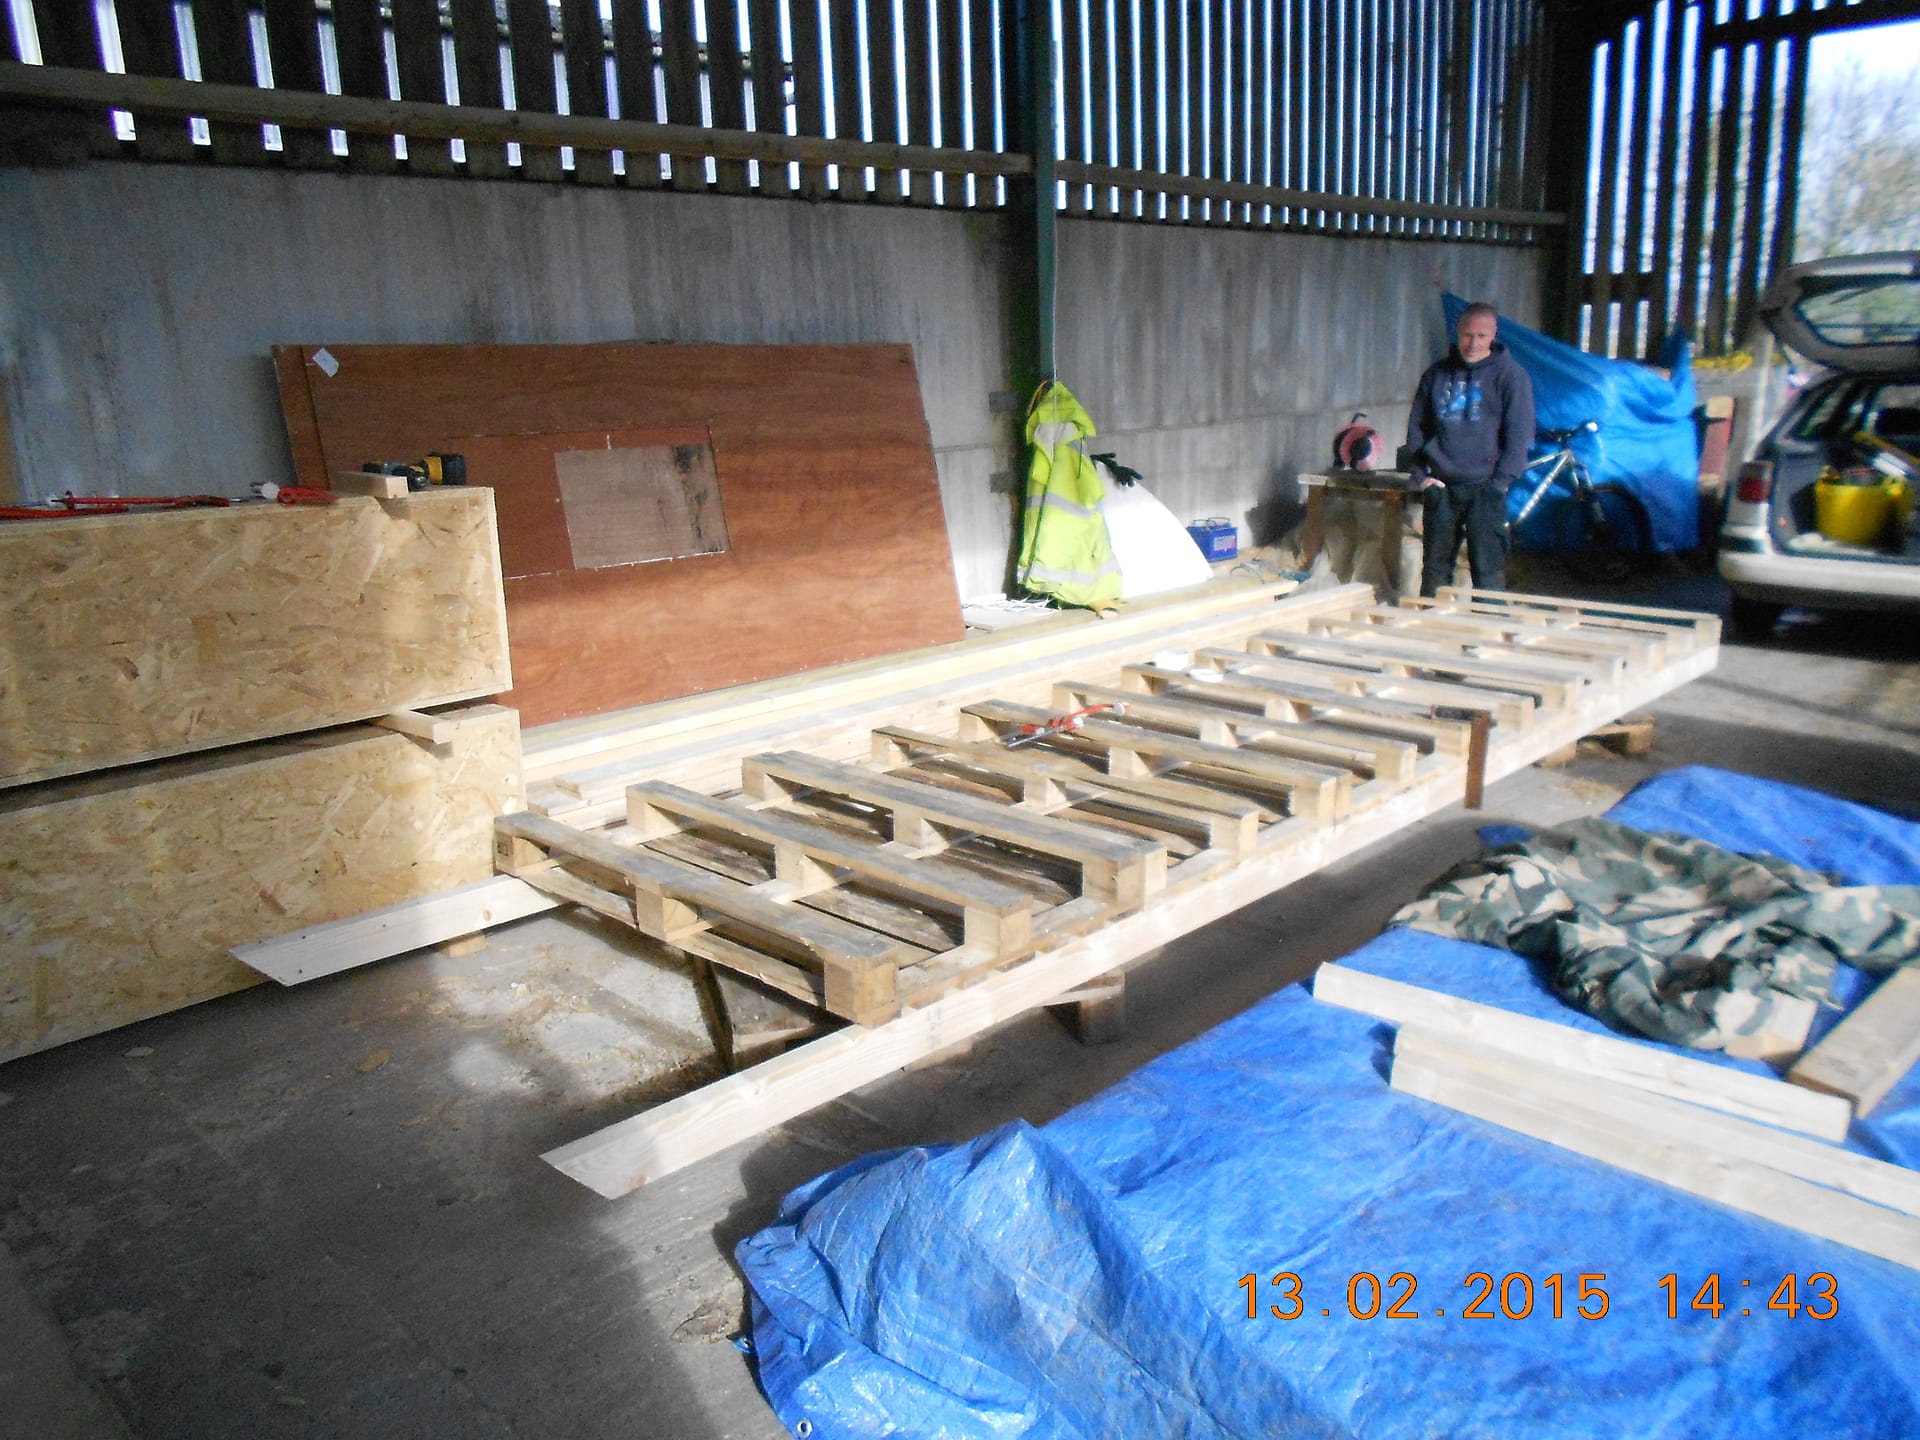
The picture below shows three completed floor sections in place and the next one being made upside down. This is because the thread joist needs to be tight against the bottom plank of the pallet to give it a good bearing on the main floor beams.
This photo also shows that the floor beams are spaced so that a joint between pallets is bearing on them otherwise we would have to pack the joist to support the floor section.
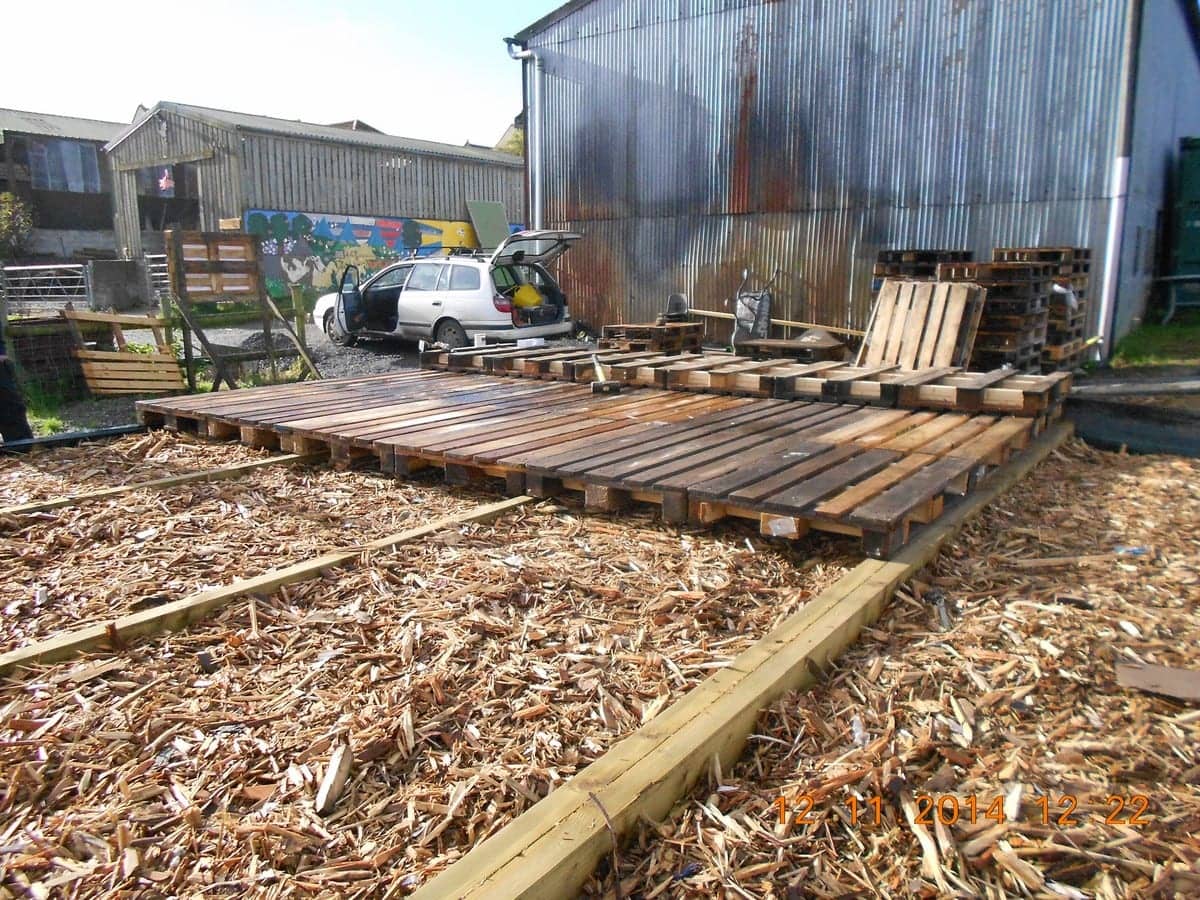
We are building the floor in two halves so that is why there is a double centre beam. In theory we could “halve” the centre one, but despite me saying that all the pallets are the same size, they aren’t that exact and I didn’t want to prat about worrying if I had enough bearing on the end of each section.
So each of our floor sections is six pallets with three stringers. To be honest it doesn’t matter which side of the centre the middle one goes, and it doesn’t matter if the stringers are not tight against the edge blocks, which would be impossible because they vary quite a lot. That variation doesn’t matter to the pallet maker because it is the thickness of the pallet as a whole which is the key dimension. We are using 4″ x 12 screws (100 mm x 6.0 mm) which is probably a bit over the top but screws everything up pretty well.
I am not particularly interested in building regs for this building but I am interested in it being safe so I do keep them in mind. Basically this floor would comply with building regs for a standard floor since the operational bits are 4 x 2 joists at 600 mm centres (or less) over a span of around 1.6 metres. What is much more interesting to me is that by building very carefully to the dimensions of the materials we have and to standard lengths we will have created the entire base of the building without an ounce or an inch of offcut or waste. Walter Segal would be proud of me, and if you don’t know why, but are interested, you have to look him up. ( Basically he reckoned that buildings should be designed using standard dimensions and the standard sizes that materials came in.)
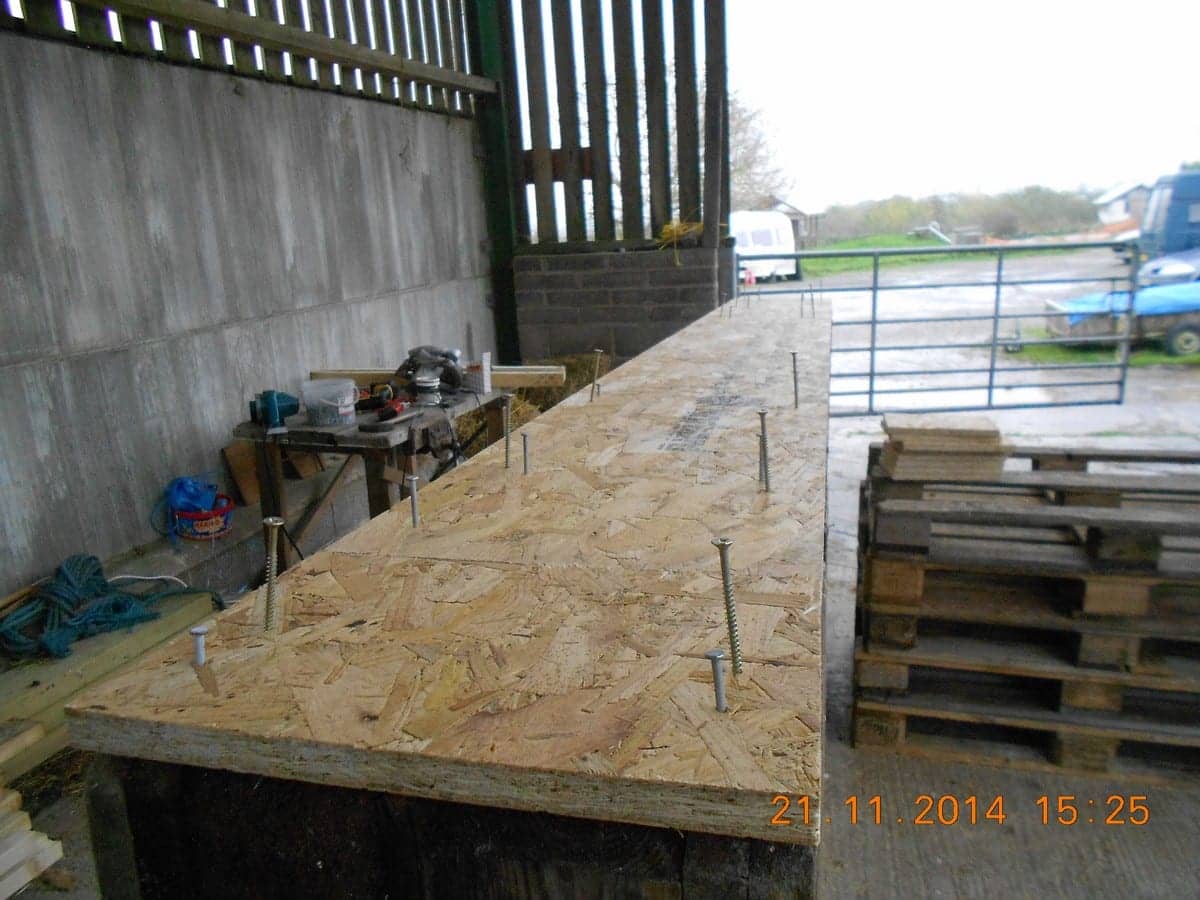
November 23rd 2014
Well, everything seems to be in some danger of going OK.
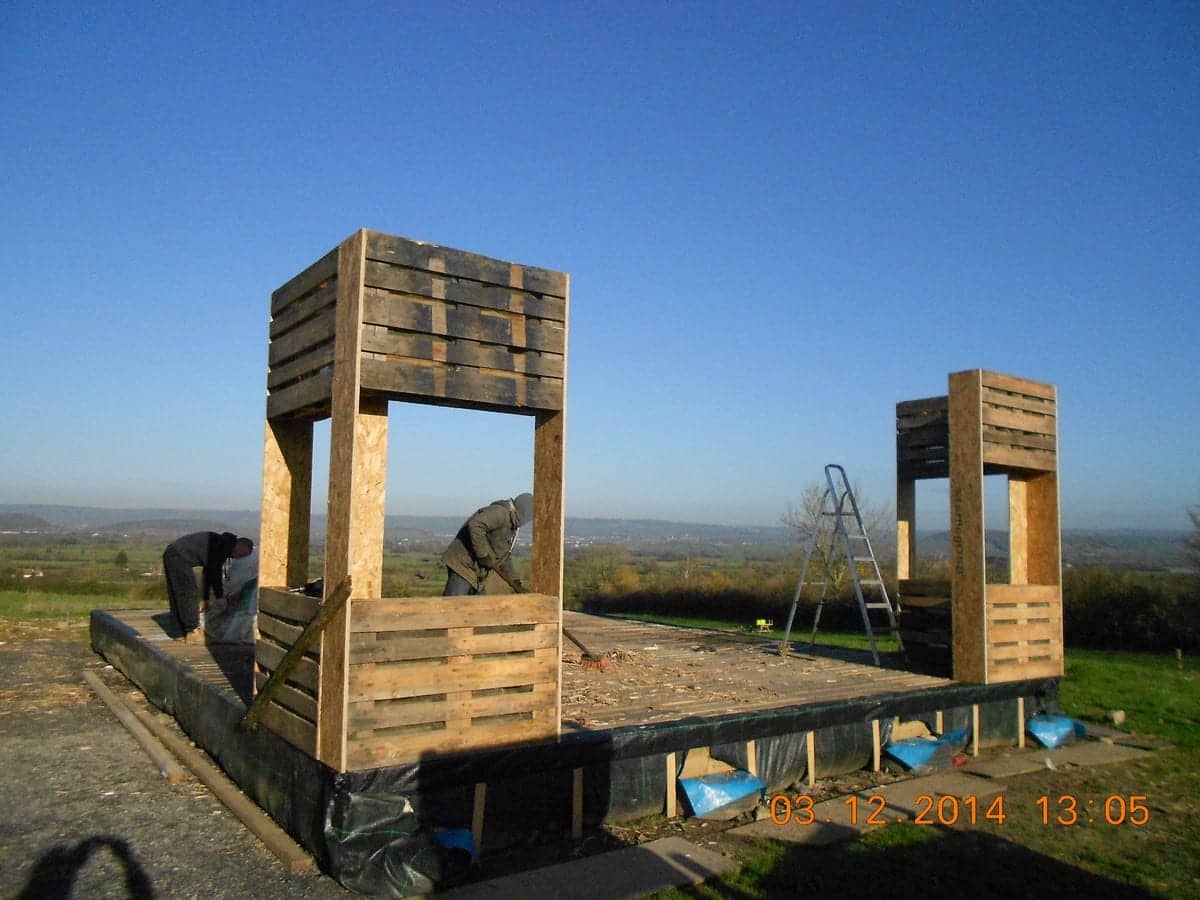
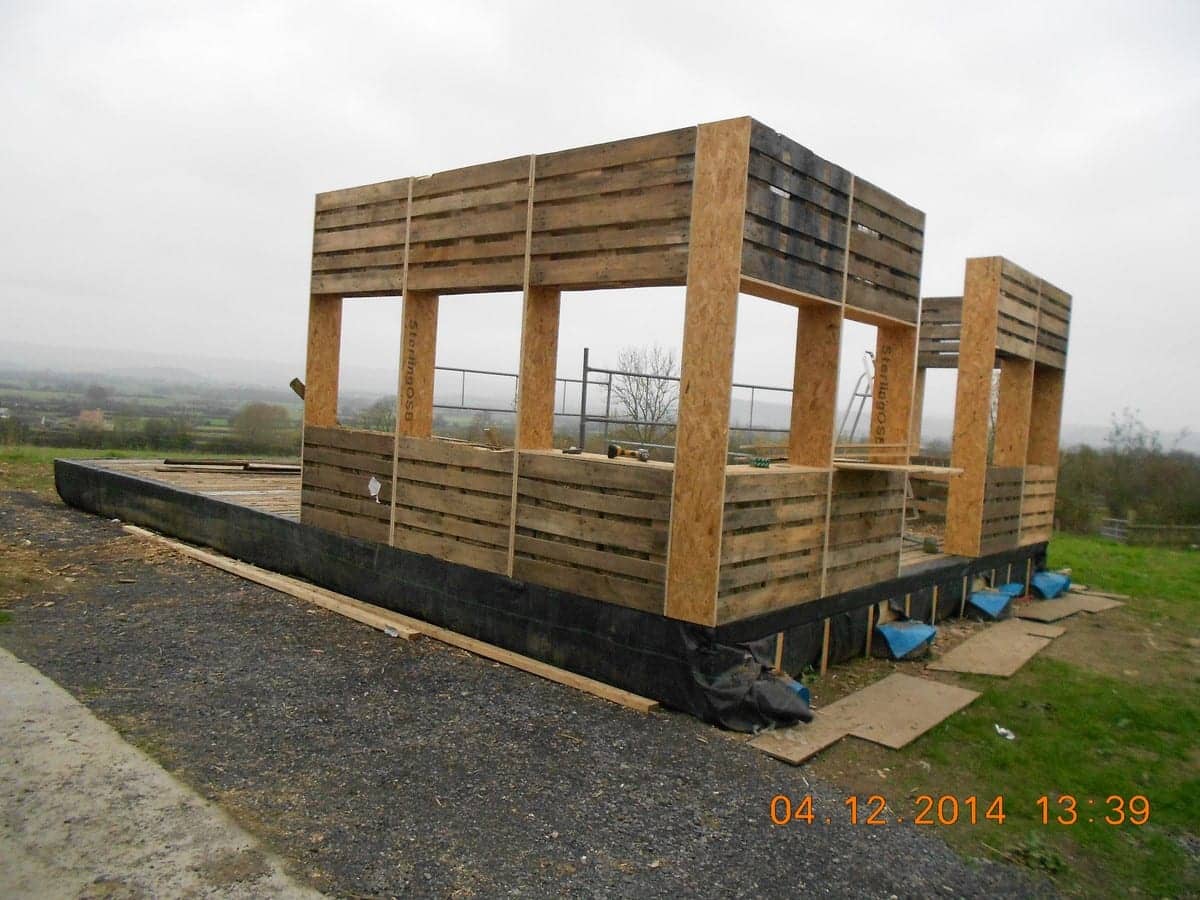
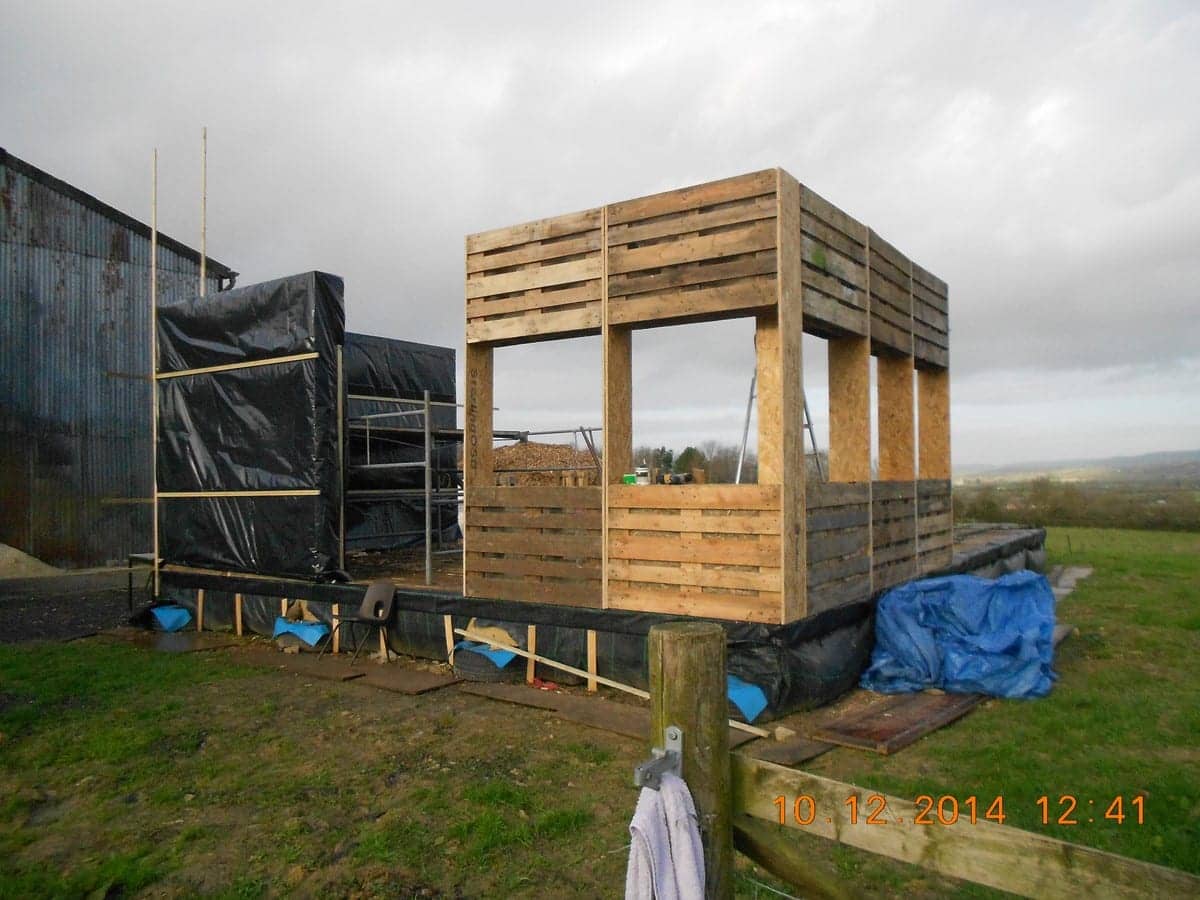
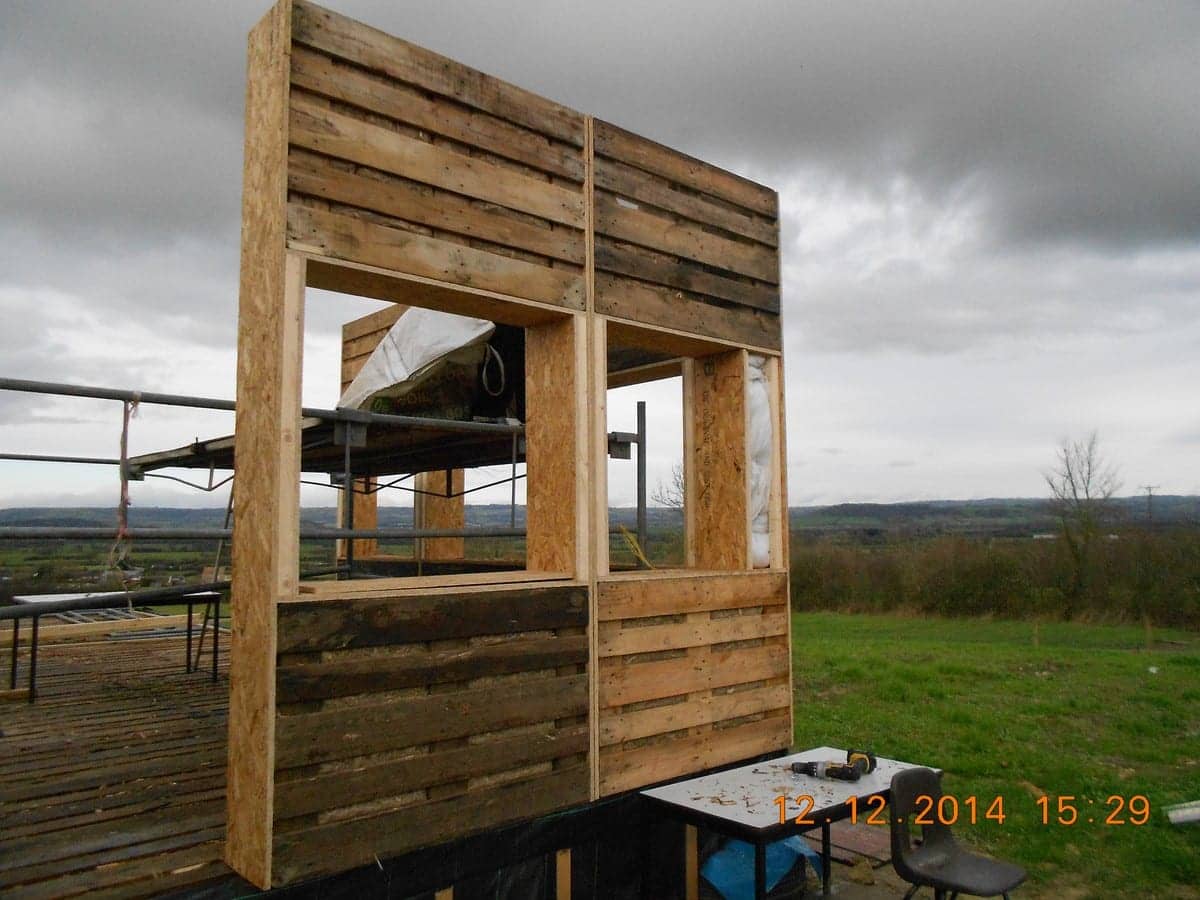
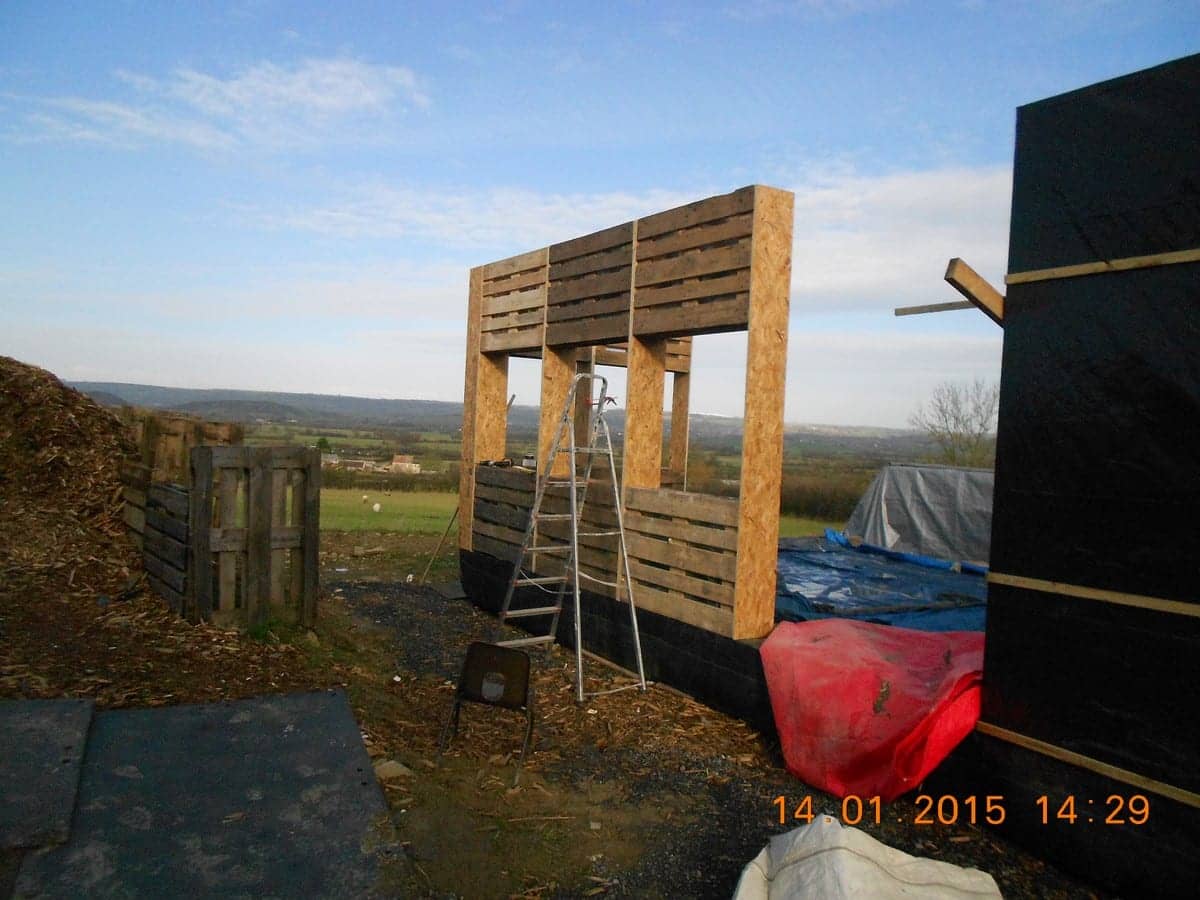
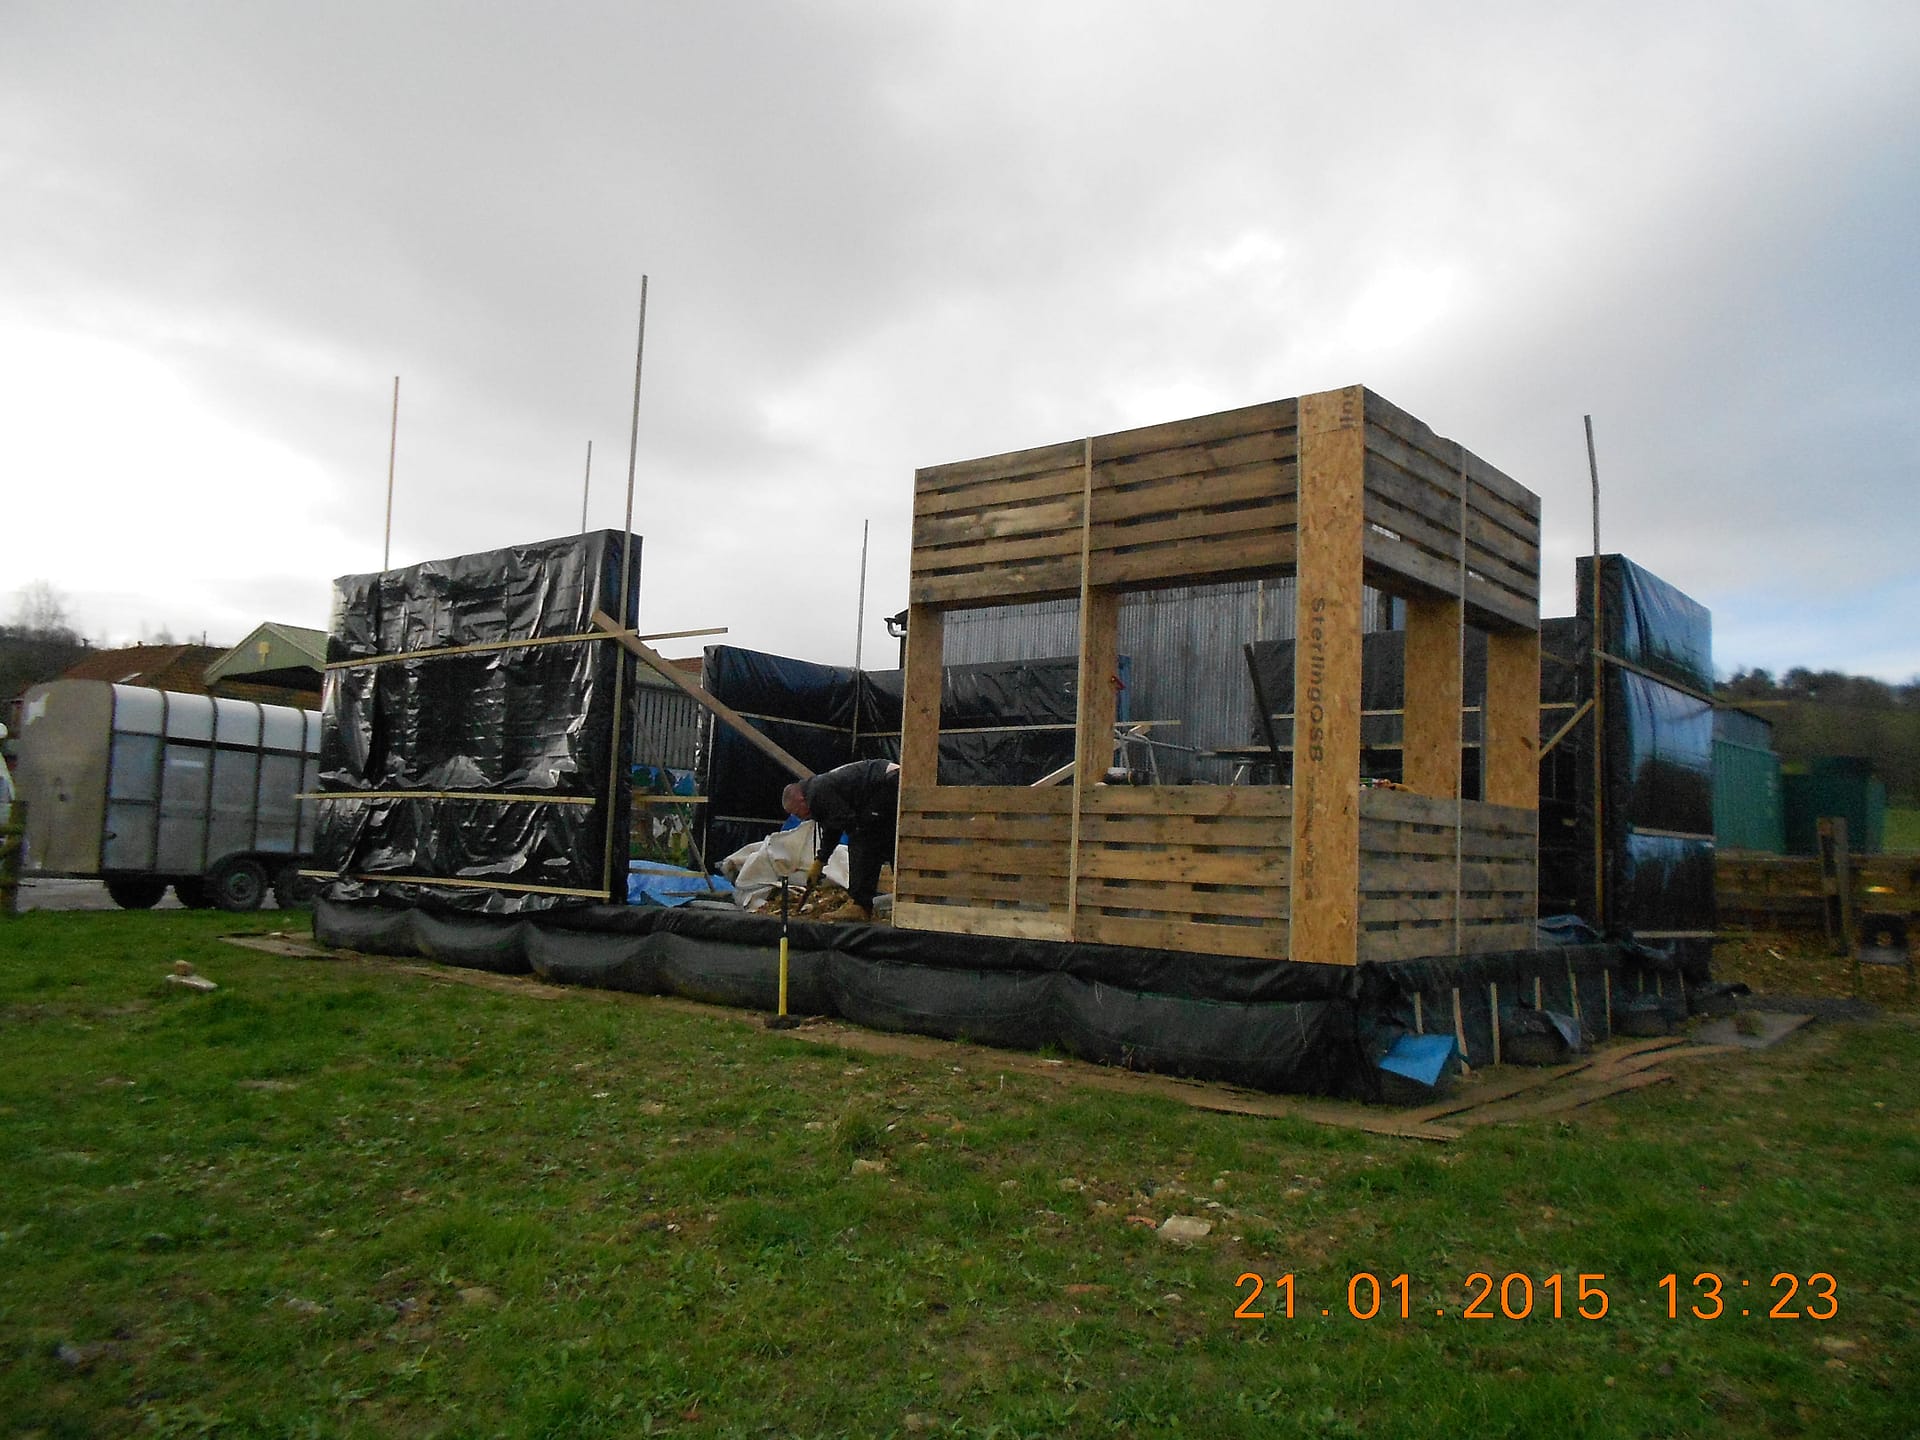
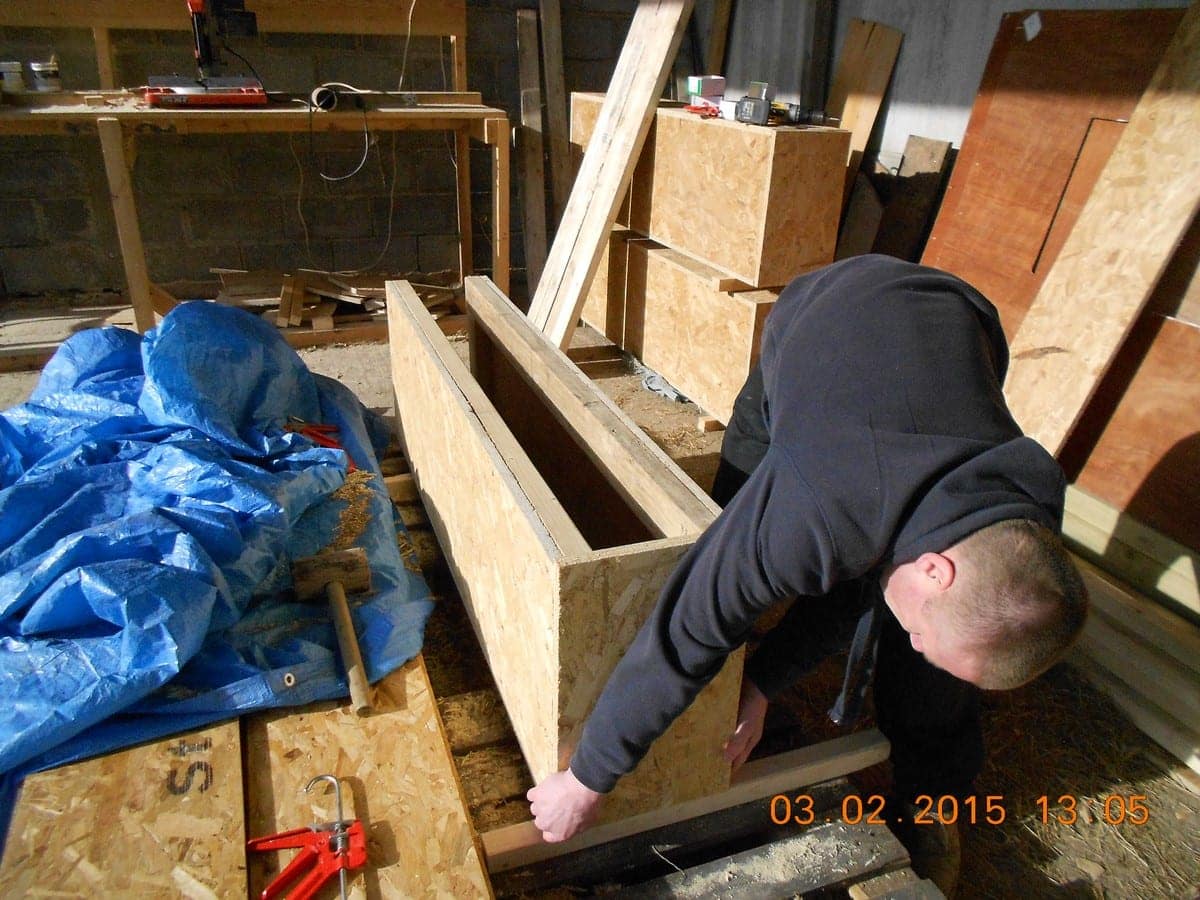
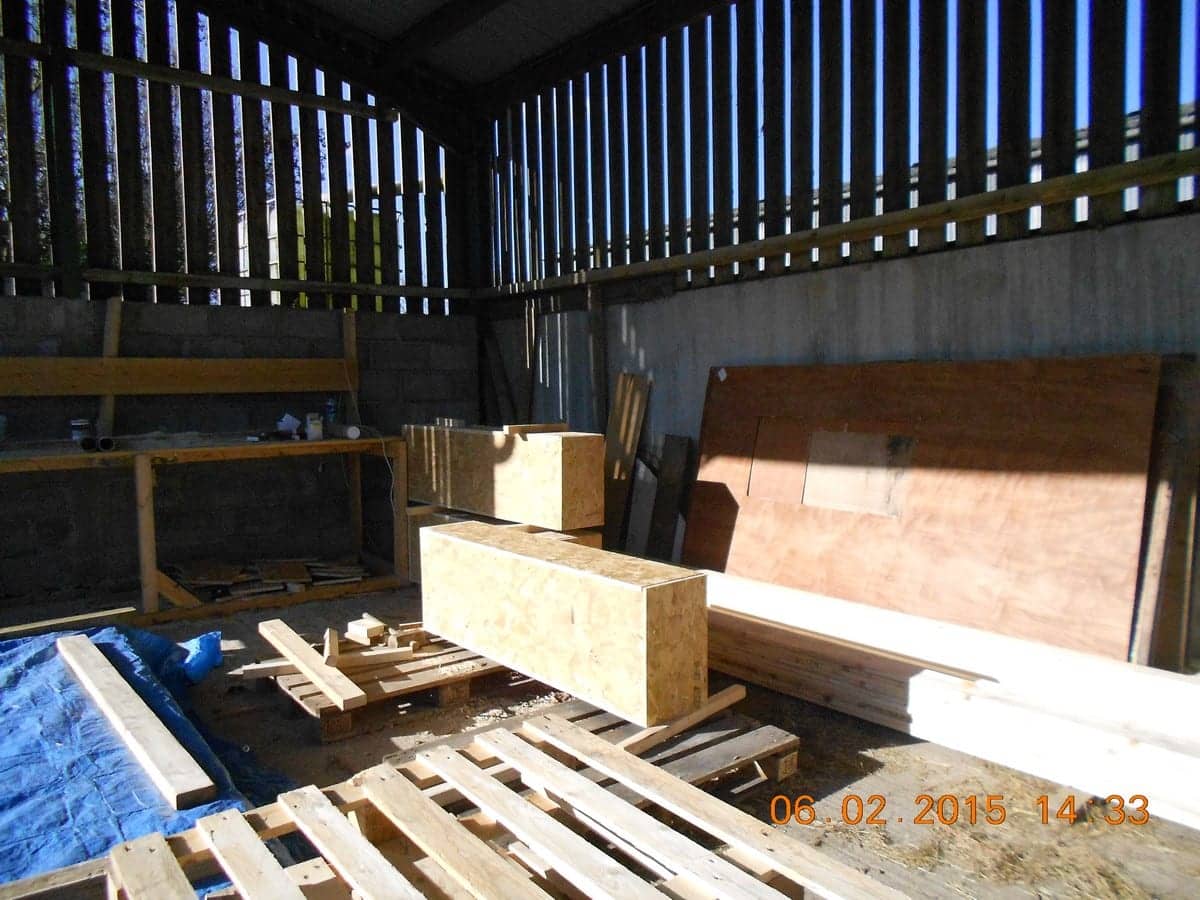
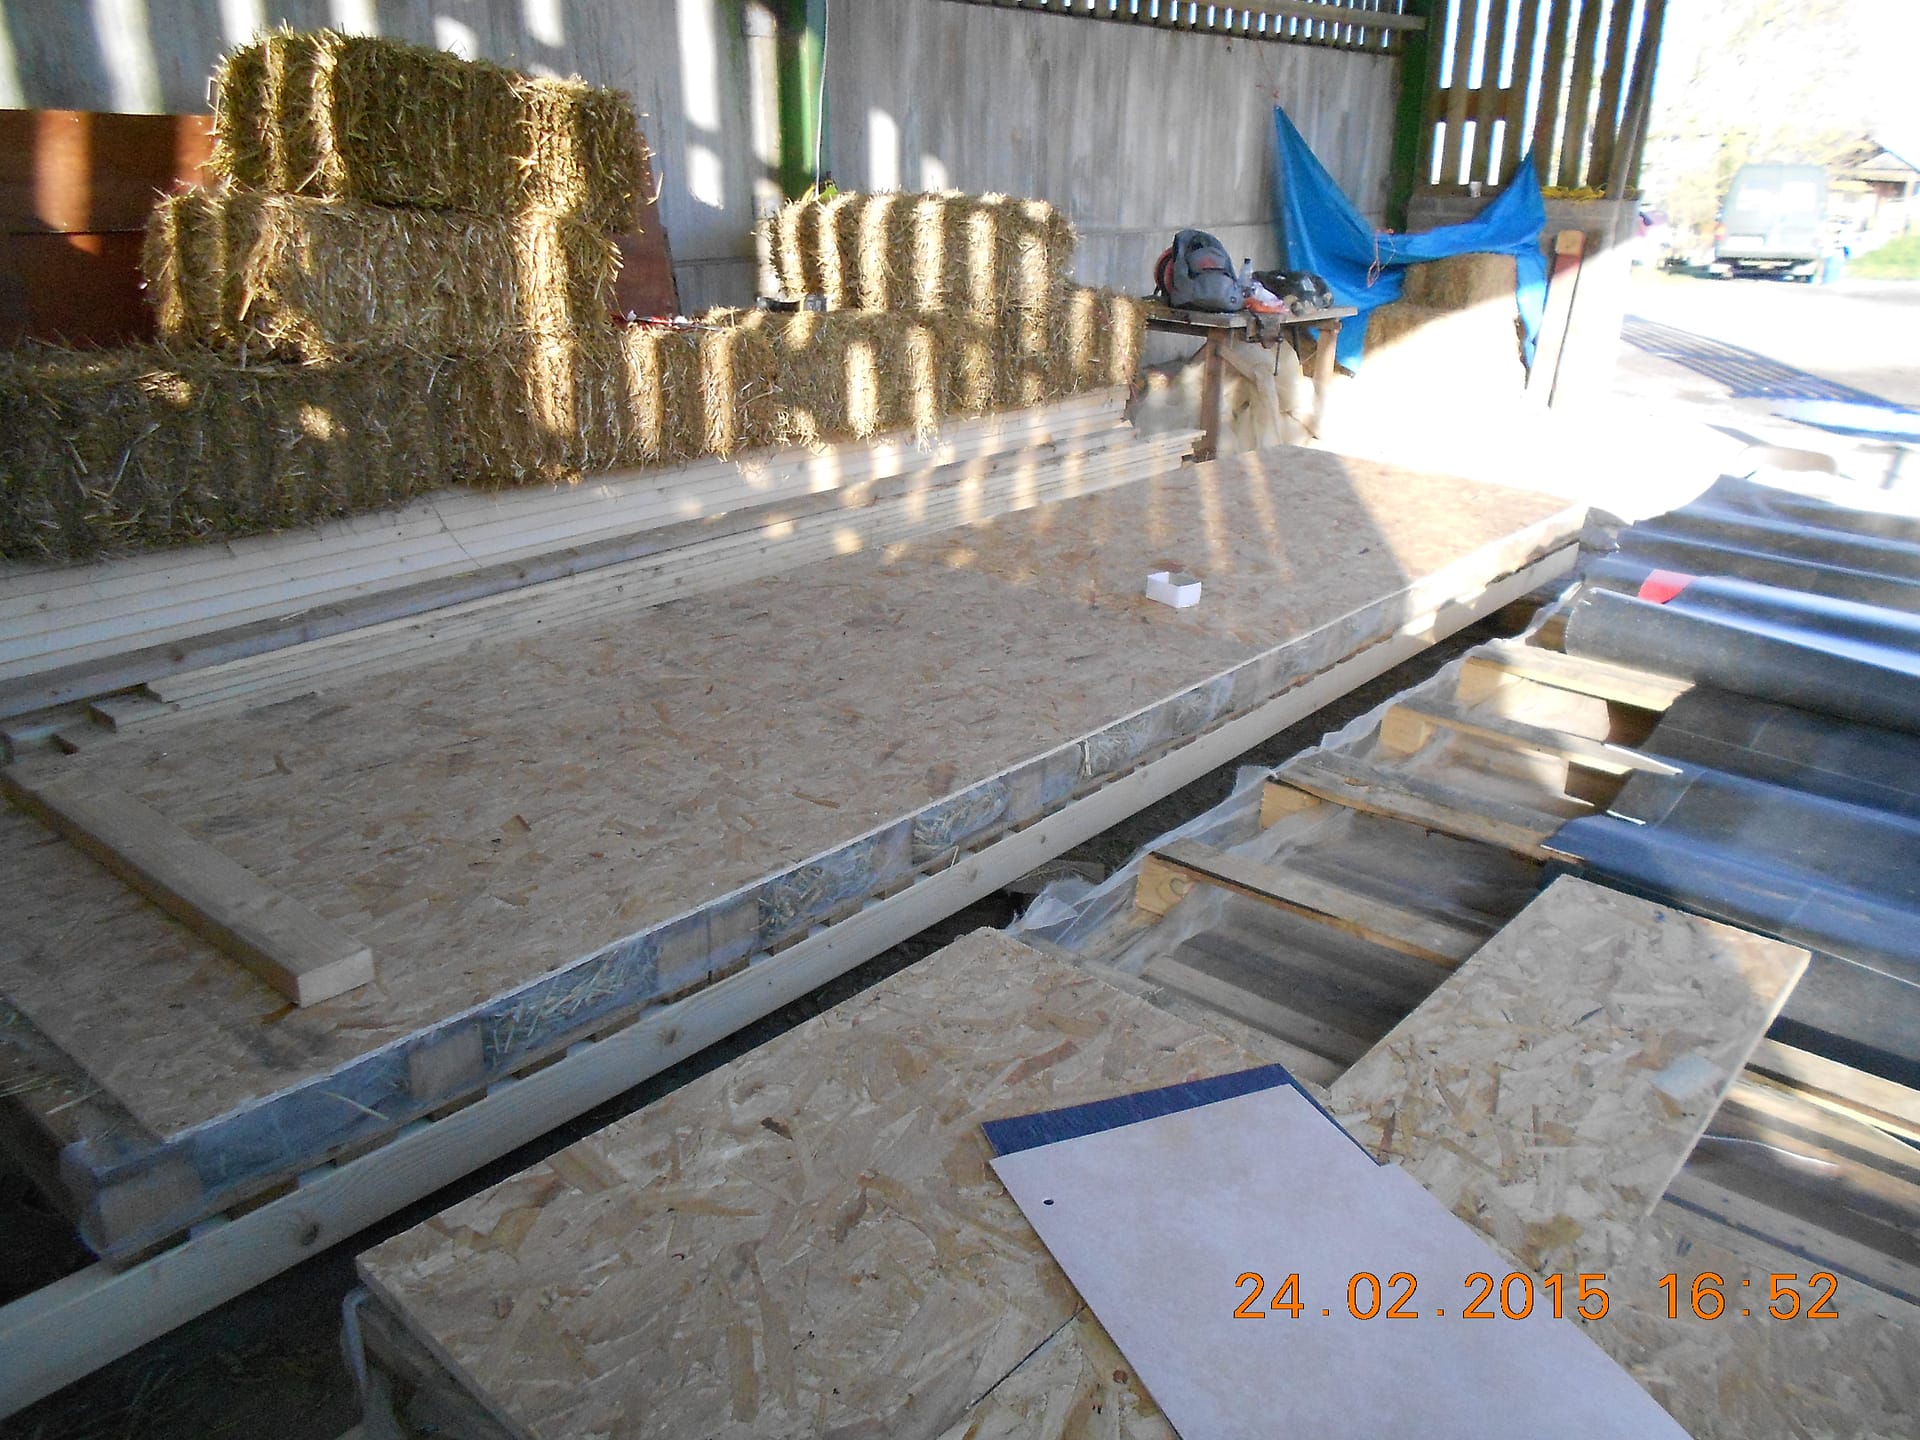
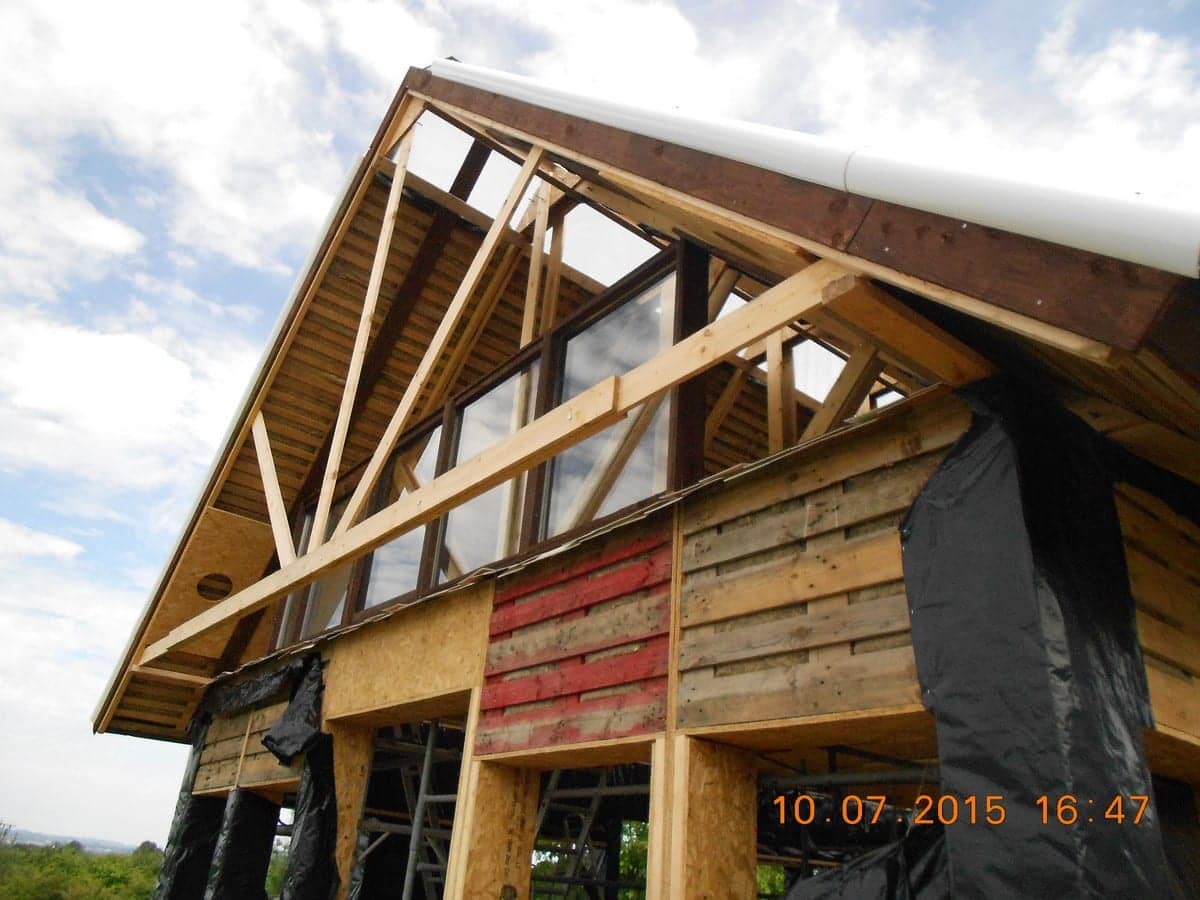
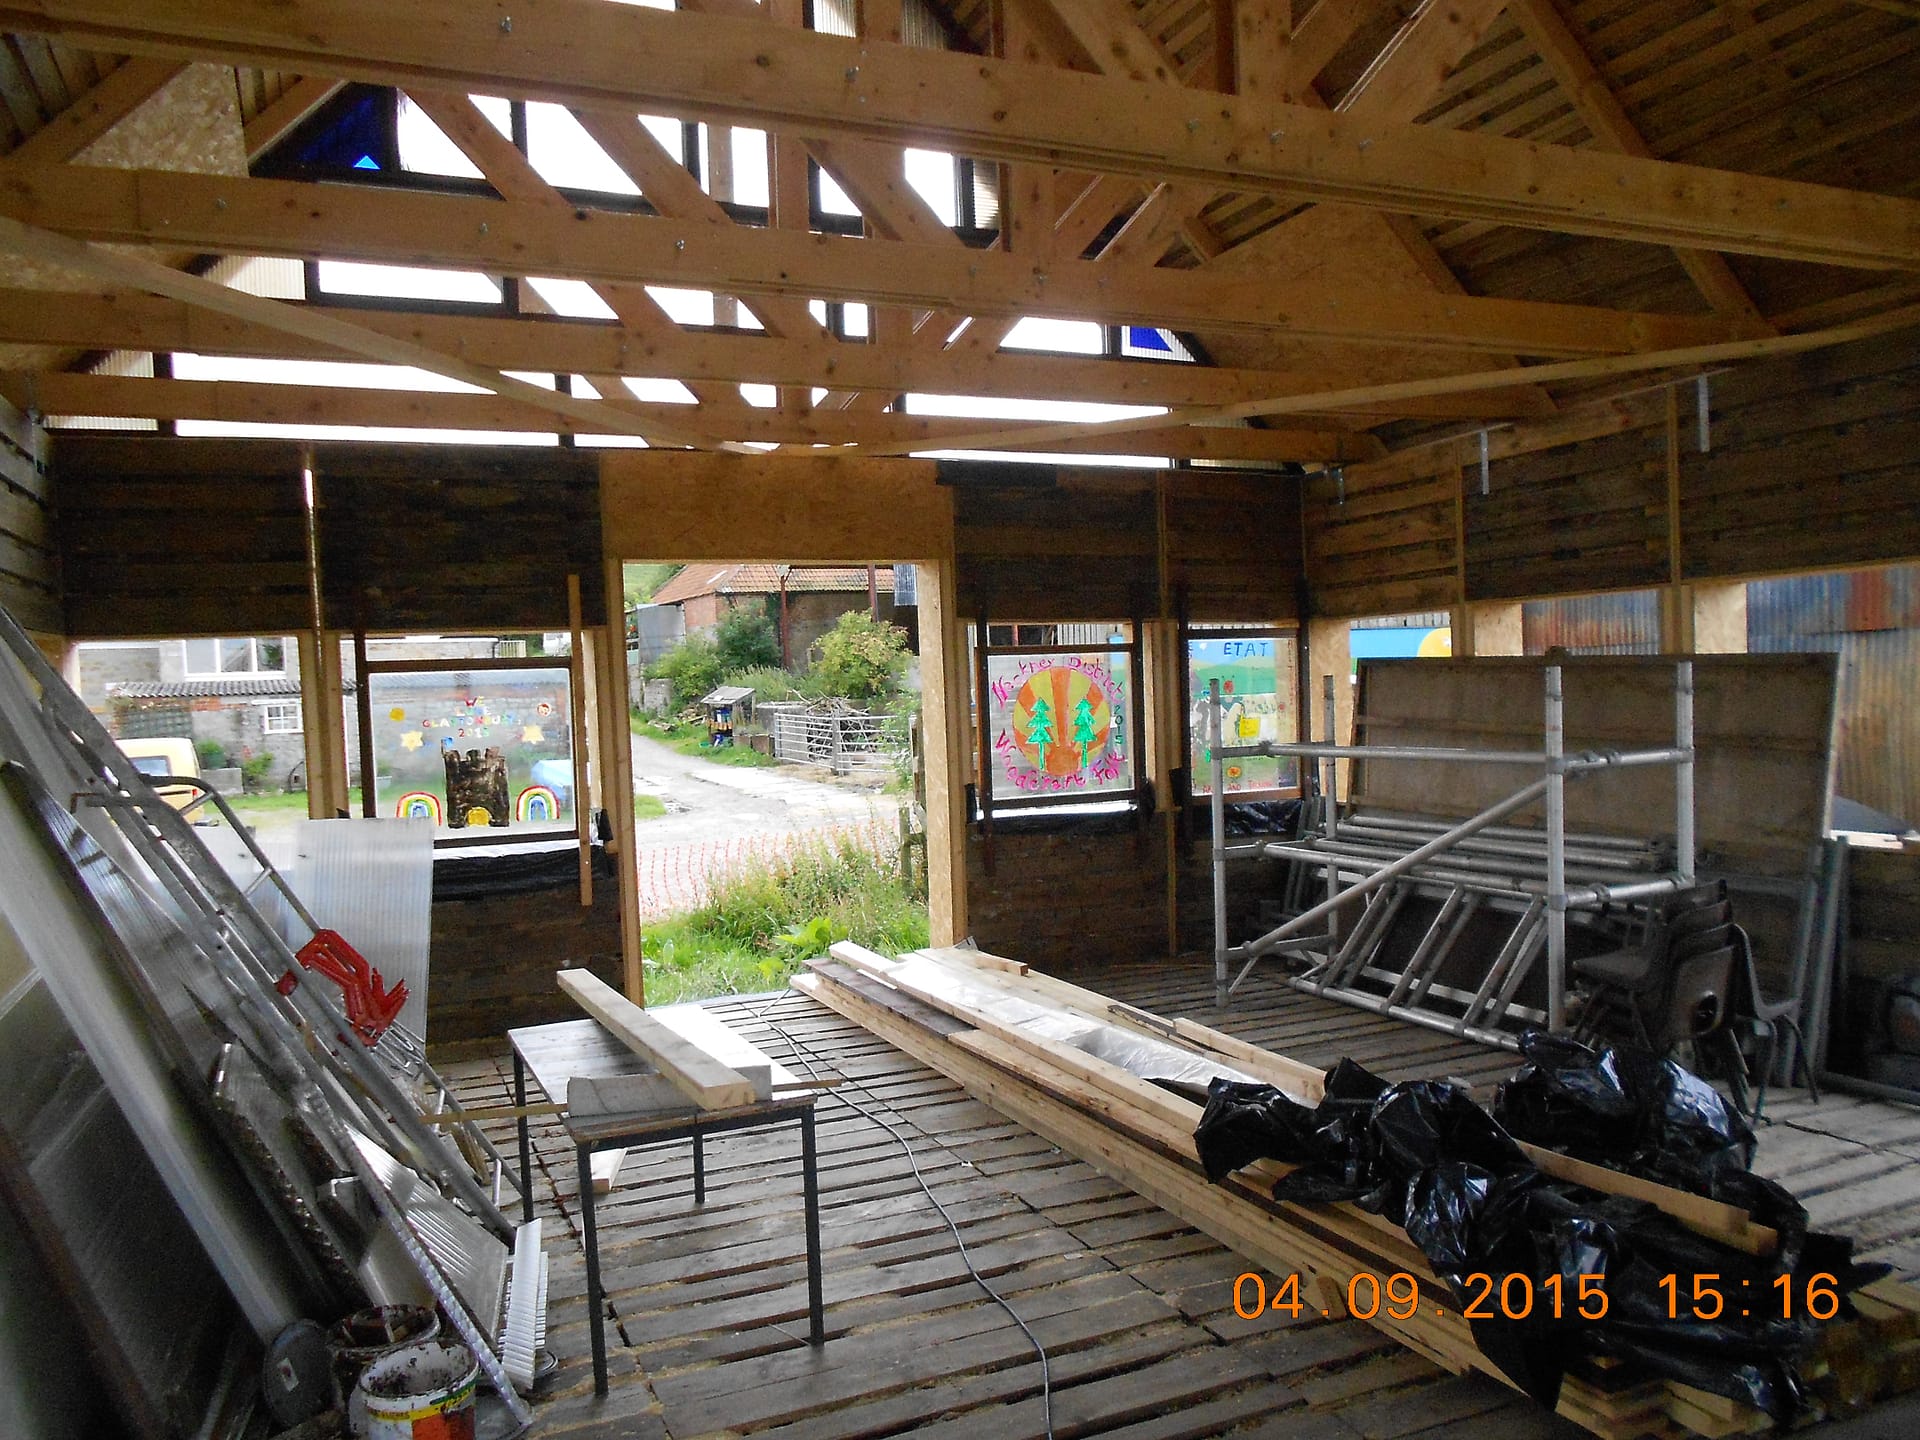
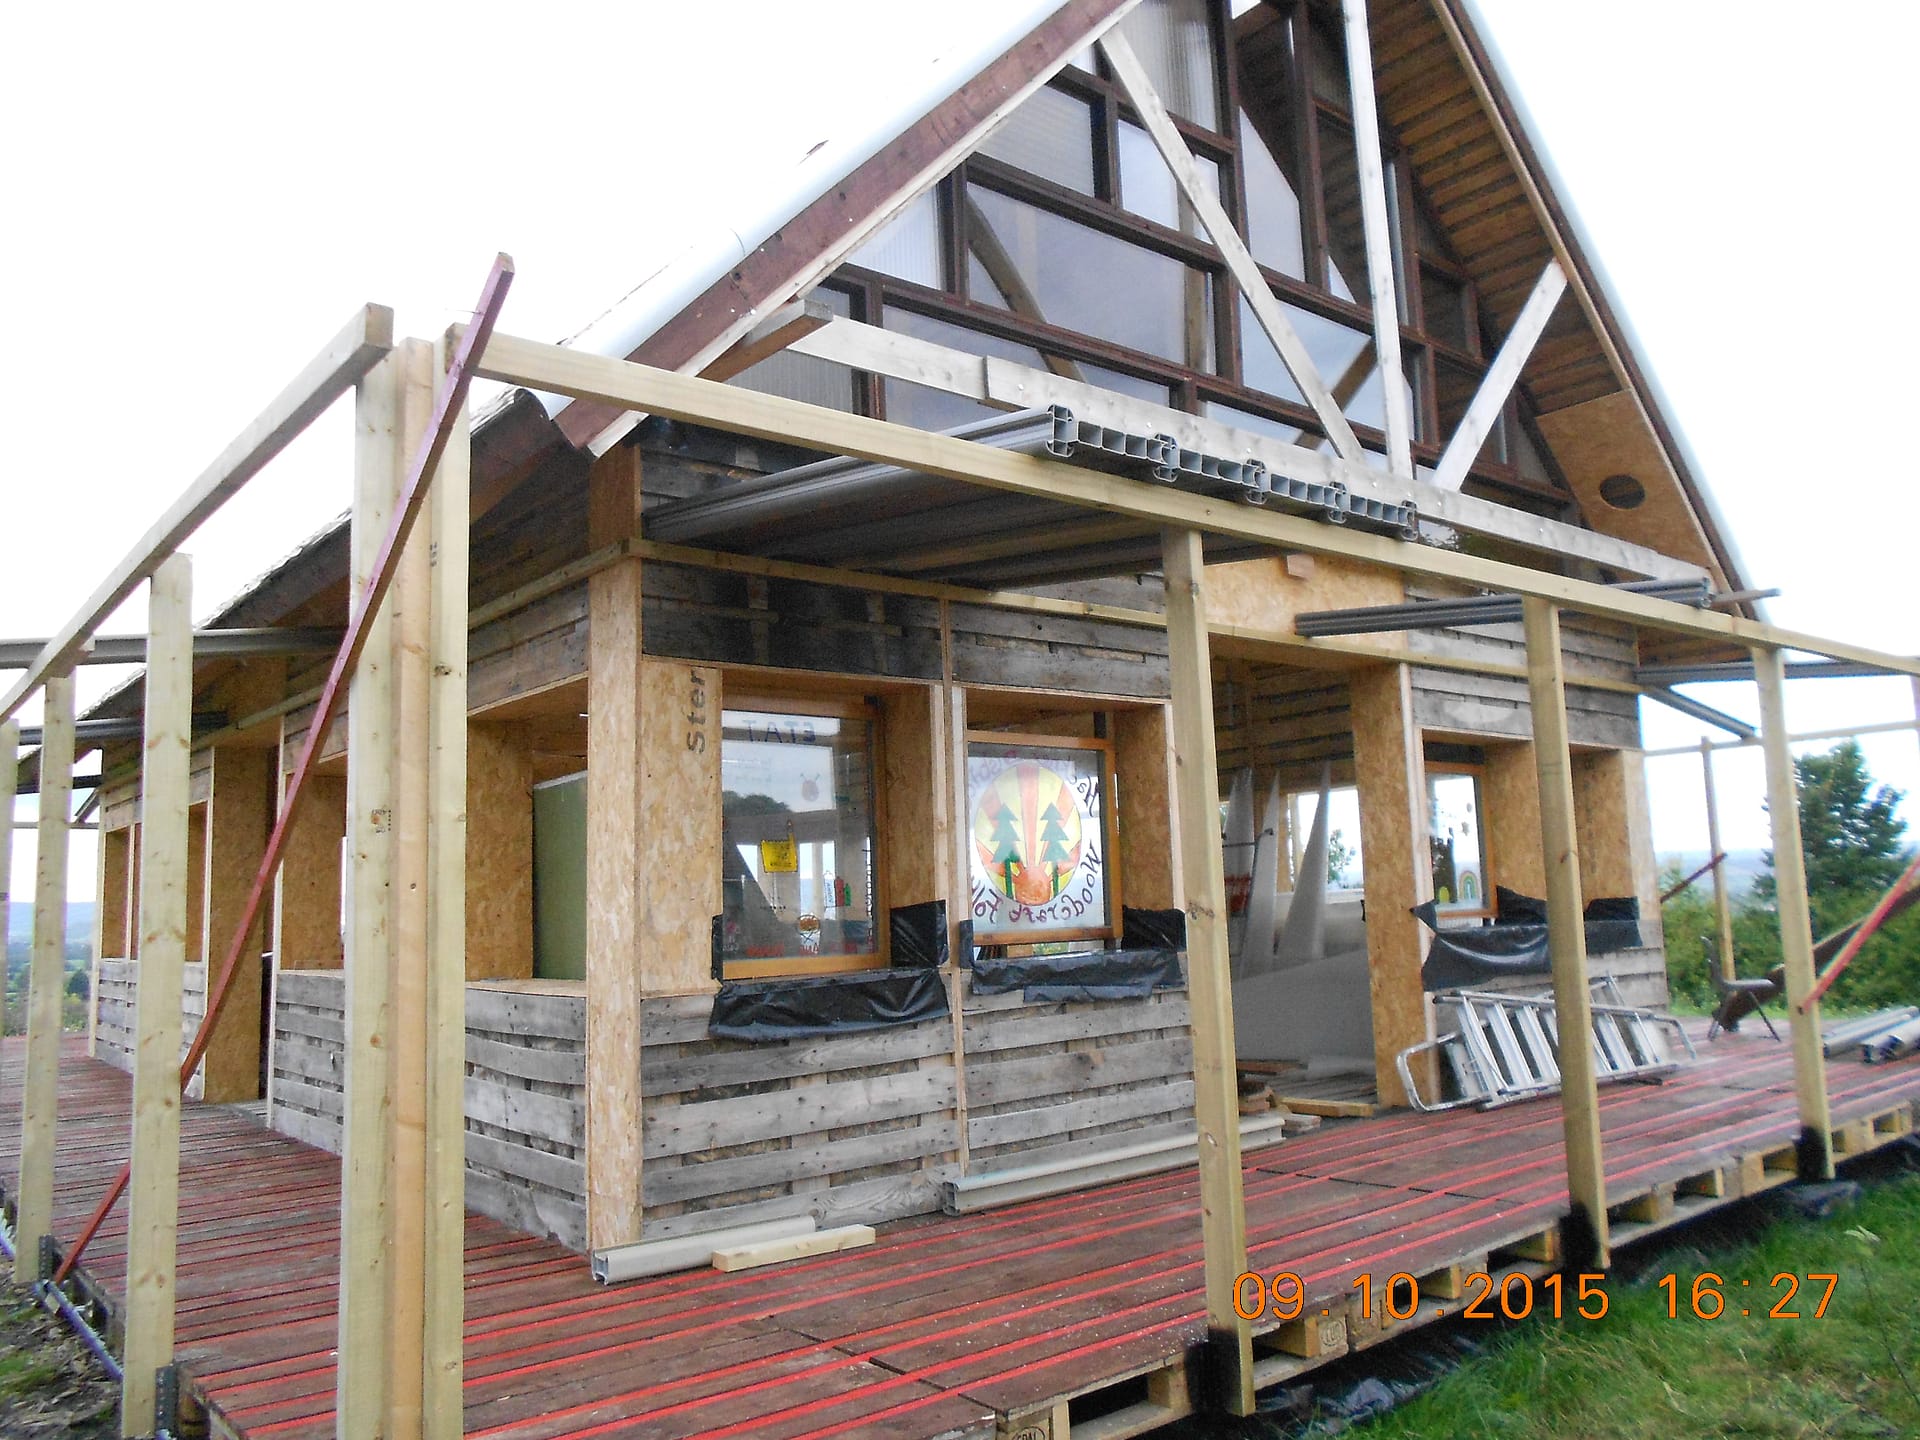
We now have the floor of the building and are starting to build the walls. I decided to use a modular system for building the walls. Each module consists of four pallets boxed in 18mm OSB Sterling board which Chris Simons and I stripped up into 8 foot lengths 300 mm wide. Chris has a woodworking shop in Wells so we were able to push 8 x 4 sheets through his table saw quite quickly.
I realise I tend to use metric and imperial units interchangeably which may be annoying to those who regard the world as having gone metric some time ago. However, I do have a couple of excuses. Firstly, I am extremely ancient and from an era when almost all building dimensions were imperial. Secondly, imperial measurements are still around and you need to be aware of them otherwise you can get caught out in ways that can be extremely irritating. For example, if you ask for 3/4″ plywood you will probably be told in a patronising way, that since the seventies, which was incidentally before they were born, 3/4″ no longer exists…..Sir. It is 18mm these days. However, if you then ask what size sheets it comes in you will be told, without a trace of irony, that it is in 8 foot x 4 foot sheets. And this is true so it is actually 1220 mm x 2440 mm. If you then ask for an 8 x 4 sheet of plasterboard, the chances are that no-one will question it but it will actually be 1200 mm x 2400 mm which is not the same thing. Knowing stuff like this would be very important if you were building a stud wall and putting ply on one side and plasterboard on the other. I have known friends who have planned something out on say 10 foot lengths of timber to find that they are actually 9’10”. When they moaned they have been told it is a “metric” 10 foot which is 3 metres. Knowing these things will save you waste, time, money and frustration.
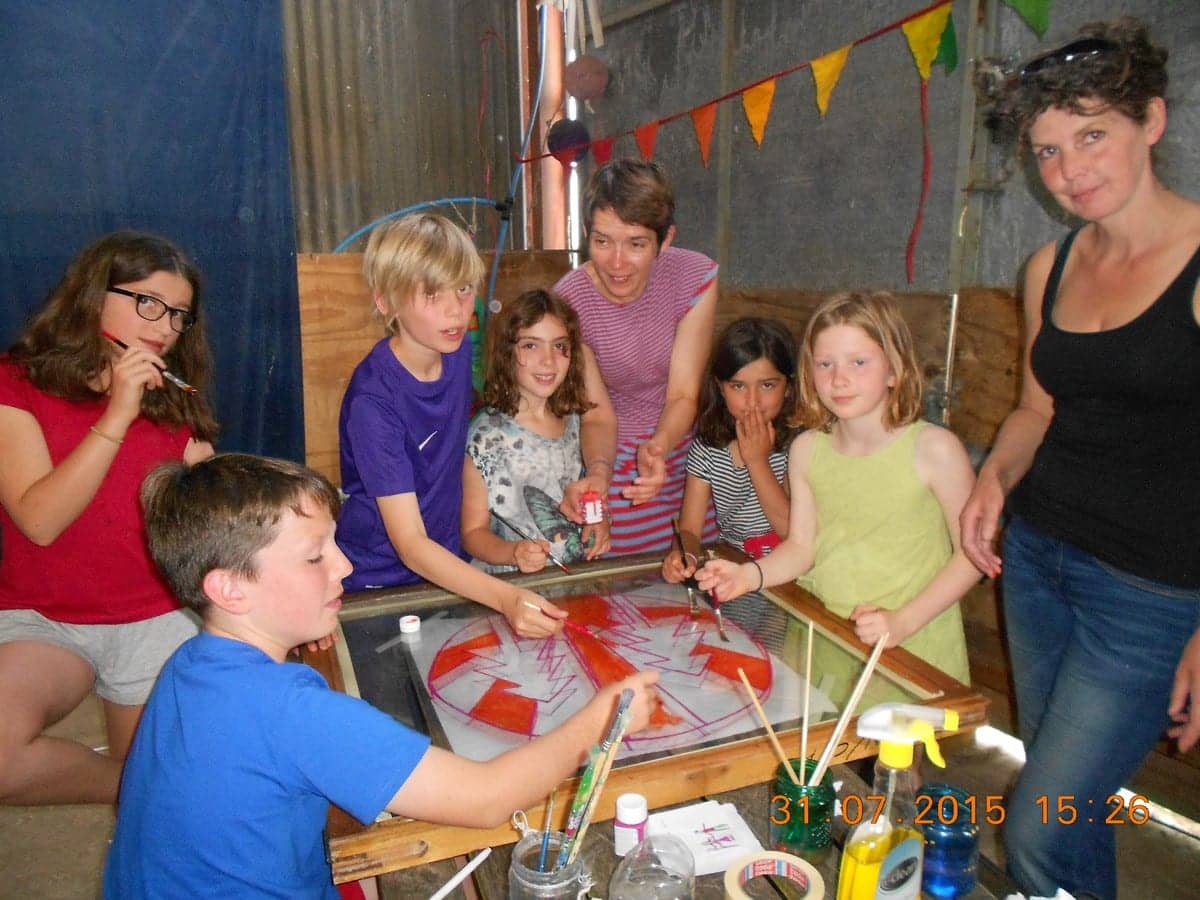
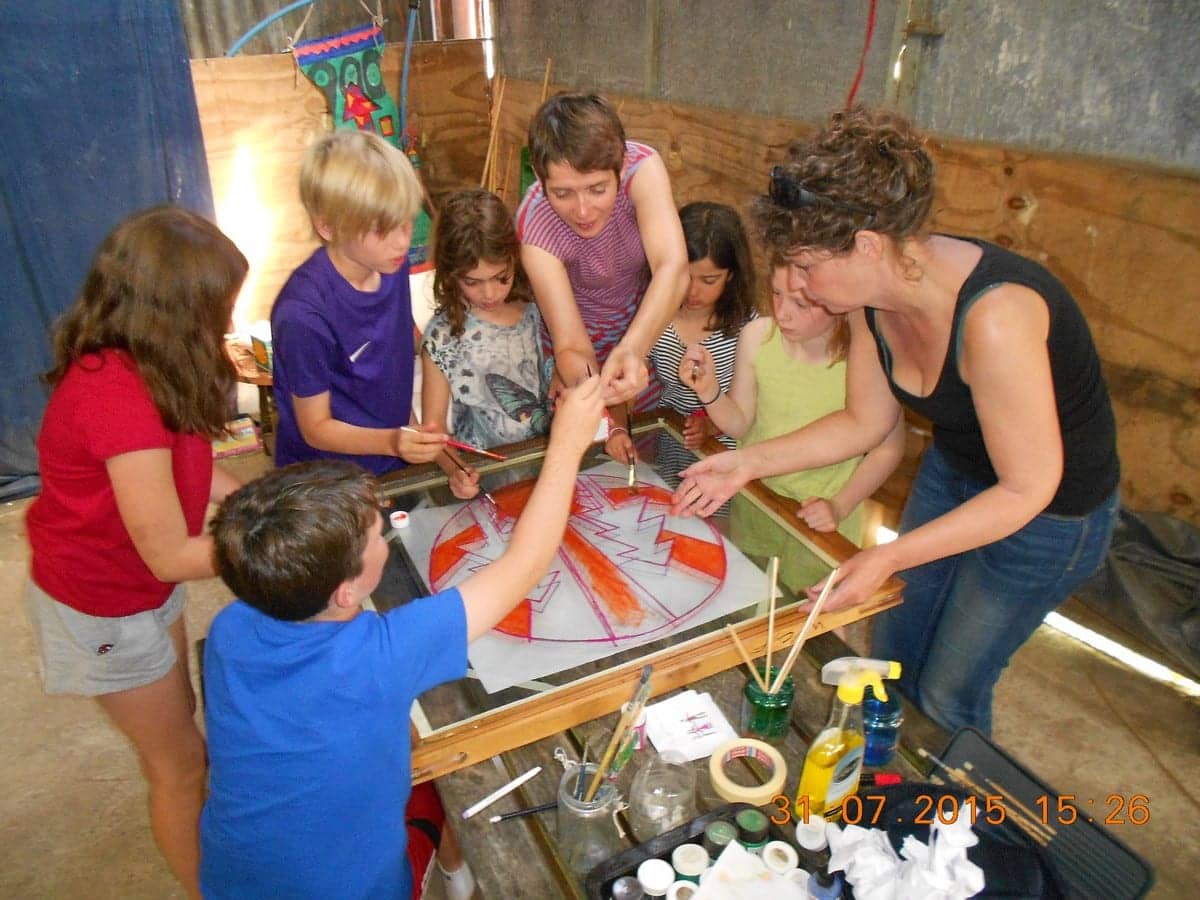
We are going to stuff my wall sections with wood chip as insulation. In order to stop it falling out between the pallet slats we are lining the pallet with some stuff called Environmesh. I used it to cover the straw bales at Burtle Village Hall when we did that project. There it was to keep the mice out because apparently they don’t like chewing through it. In fact it is designed to keep codling moth and other pests out of crops but let over 90% of light through. Rob uses it on the farm to keep the hens off vegetables in the market garden. He has let me have some of his oldest stuff. In the end it will biodegrade in the UV element of sunlight but in our building it will be in the dark so should last for ages.

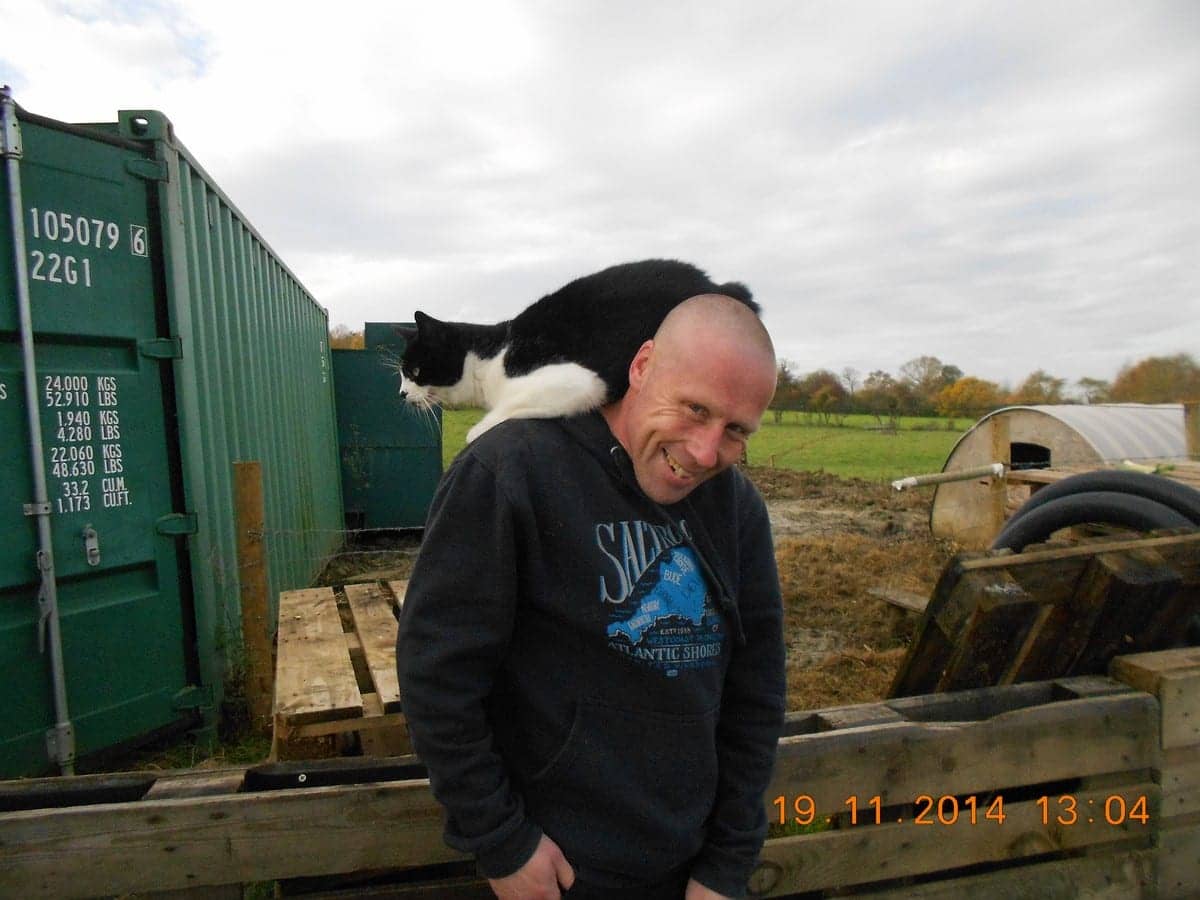
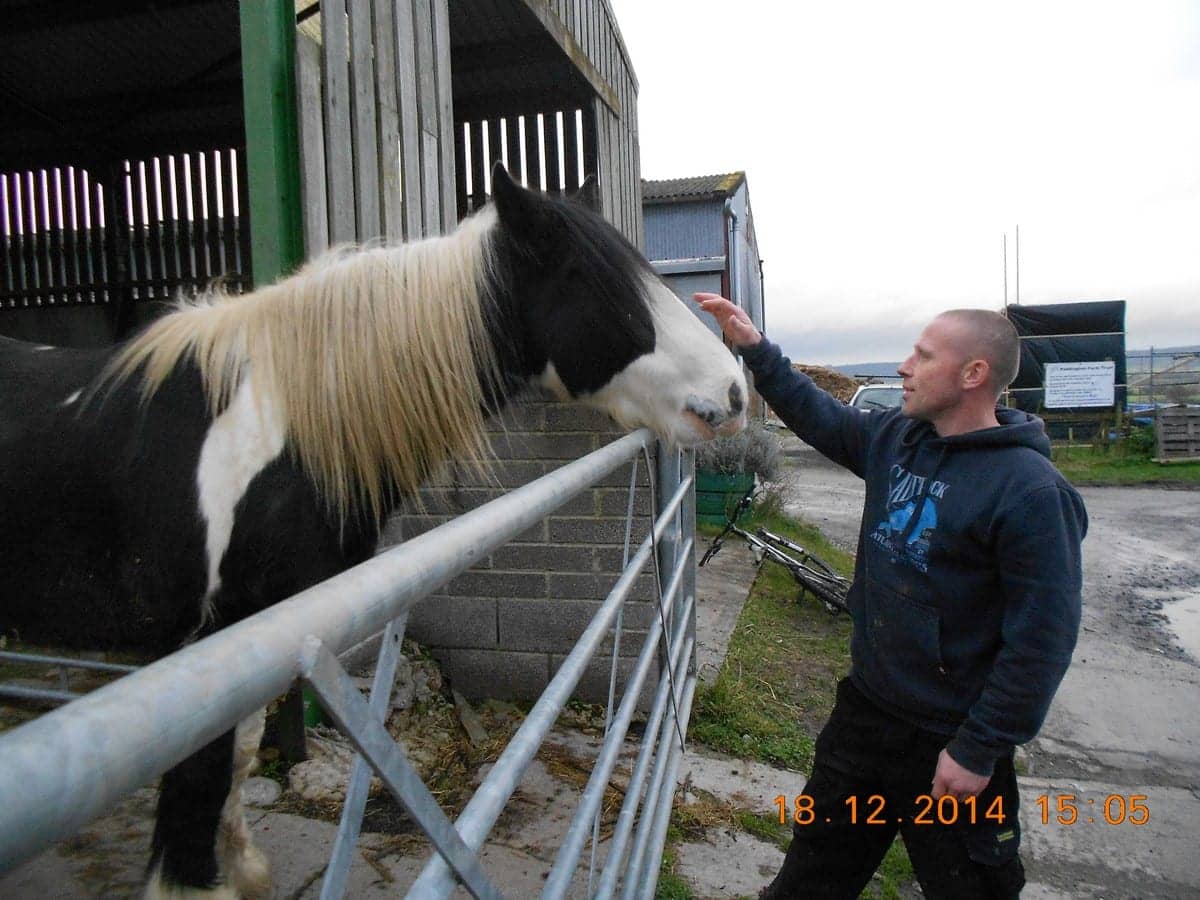
Cookie is the farm cat. She, I think she is a she, regards Alex as her best friend since he brings in chicken scraps for her. She is extremely affectionate with people, tolerant of all the farm livestock including the sheep, pigs, hens and Hallow the horse, and utterly unmerciful when it comes to rats, mice and shrews. She also takes a proprietorial interest in all aspects of the farm including the new building, inspecting each new component as it emerges. Alex also brings in carrots for Hallow and several other horses on the route in in the mornings, so they will all miss him when we finish. It reminds me of the larger building jobs I did when I was working. It was the children and pets that missed me when the job was over because I was company for the pets and always there when the children came home from school.
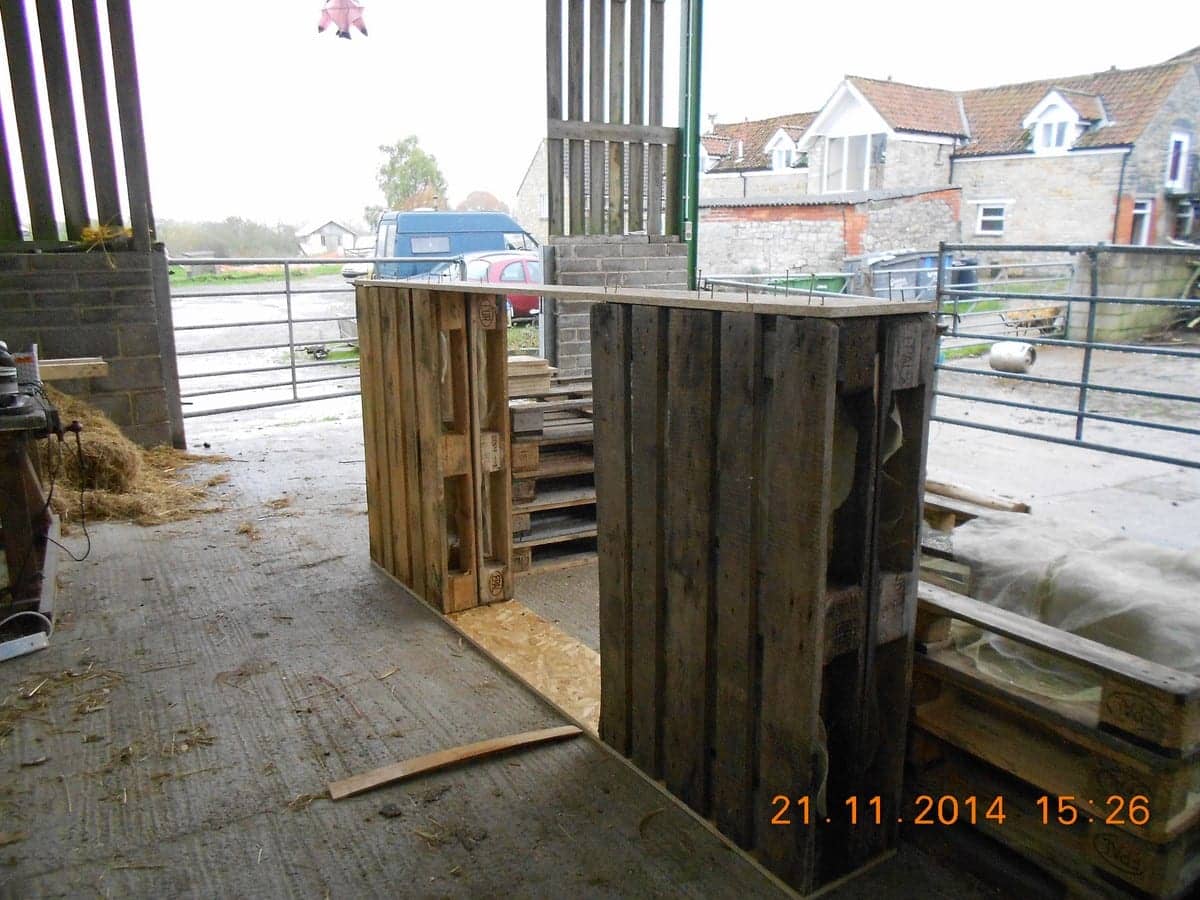
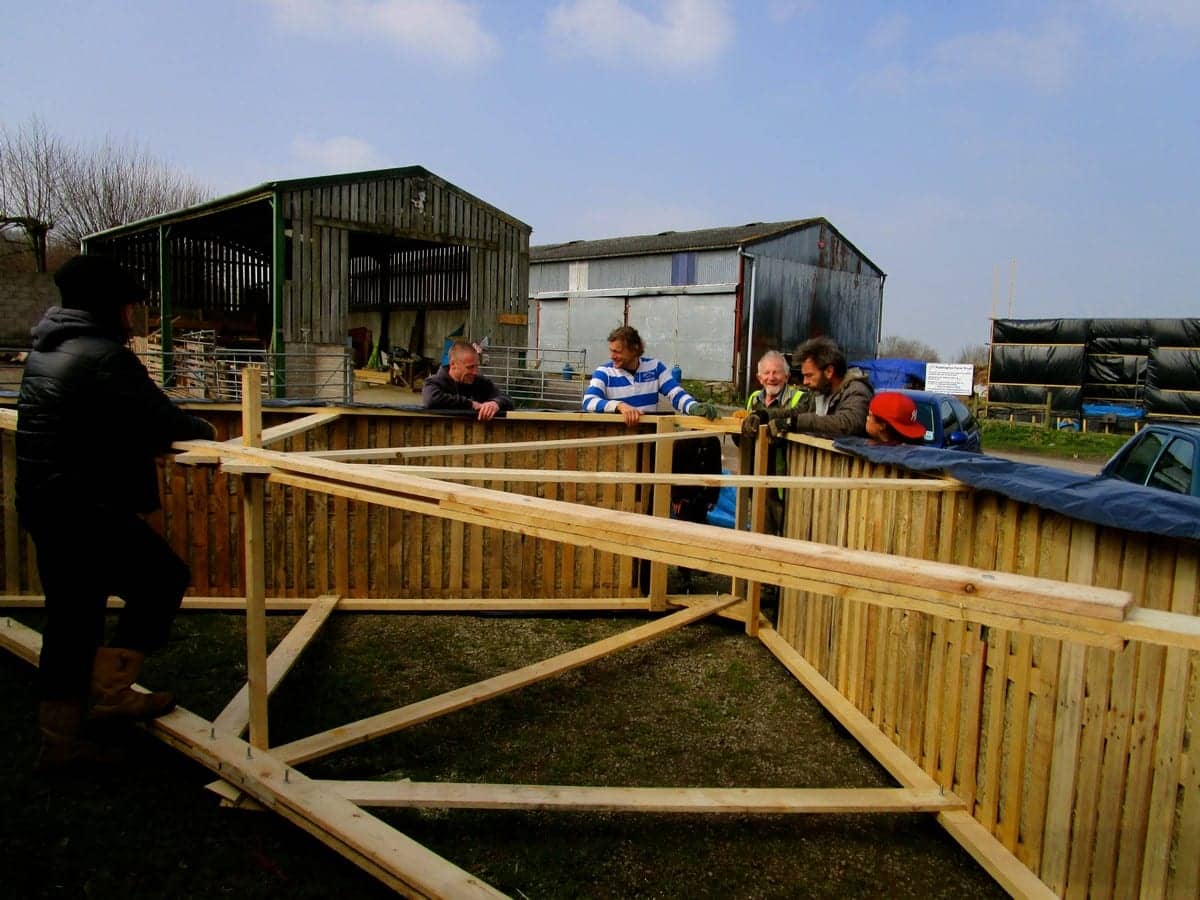
Sunday November 30th
Here are the first two corners consisting of a pair of wall sections on each corner. We needed help to carry over each section so Michael and Roger helped but I couldn’t take a picture because it needed me too. Alex and I were able to lift them into position on our own and screw them together temporarily so they wouldn’t fall over. However, I was so keen to get them covered up so they wouldn’t get wet I forgot to take a picture first. On Monday we took the covers off so here is a better picture. Rog and Alex are sweeping wood chip into the floor to fill up the gaps.
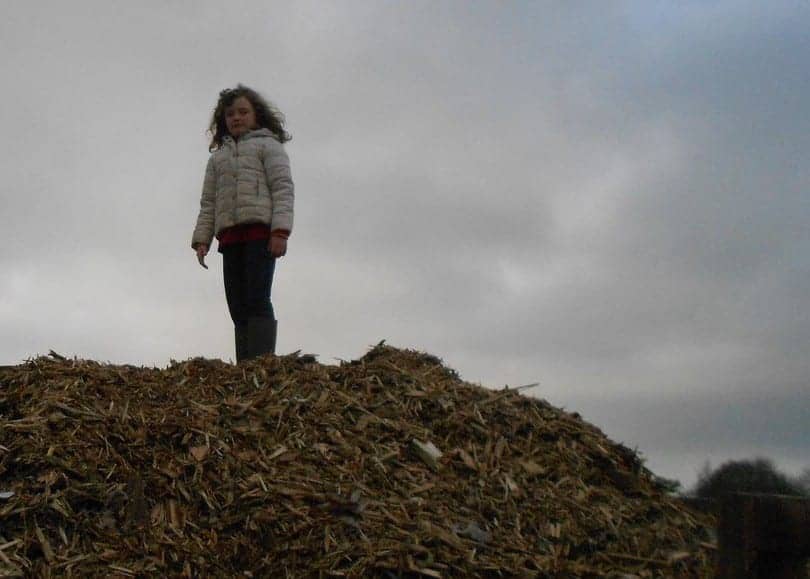
This is Celeste standing on top of the second delivery of recycled woodchip, while her mum, Becky actually does something useful. This means that we have now had a total of 10 tonnes which I hope is going to be enough. It bulks up to about 3.5 times volume to weight so we have got about 35 cubic metres of insulation. Including VAT it cost about £12.00 a ton which is really cheap but each delivery was £100.00 so transport is the real cost. Nevertheless, to insulate the entire building for about £300 is pretty good. Transporting it yourself is not really an option because you need Environment Agency Licences to transport it at all because it is technically a waste product. In addition I had to get the appropriate EA licence as an “end user” of a waste product. It’s easy enough to get but you do have to do it. As I said before, you could probably make your own with old pallets you could get for nothing and a beefy wood chipper but the nails might bust it and you would need to know your pallets to know they hadn’t been treated with toxic chemicals. This means that for the money I reckon we made a sensible decision. But if you just don’t have the money you could try doing it yourself more cheaply.
Here is Becky doing something useful while Celeste stands on a pile of woodchip. We need to fill each of the wall sections and “top up” the floor with the wood chip.
Sunday December 7th 2014
I do realise that this picture is a bit of a jump from the previous one, but here is my problem. Once we get the wall sections on to the building base Alex and I can manhandle them into position. However, it takes four of us to comfortably carry them over to the base including me so I can’t take photos at the same time. I suppose I could get another person to take a picture but I am just impatient and want to get on with it.
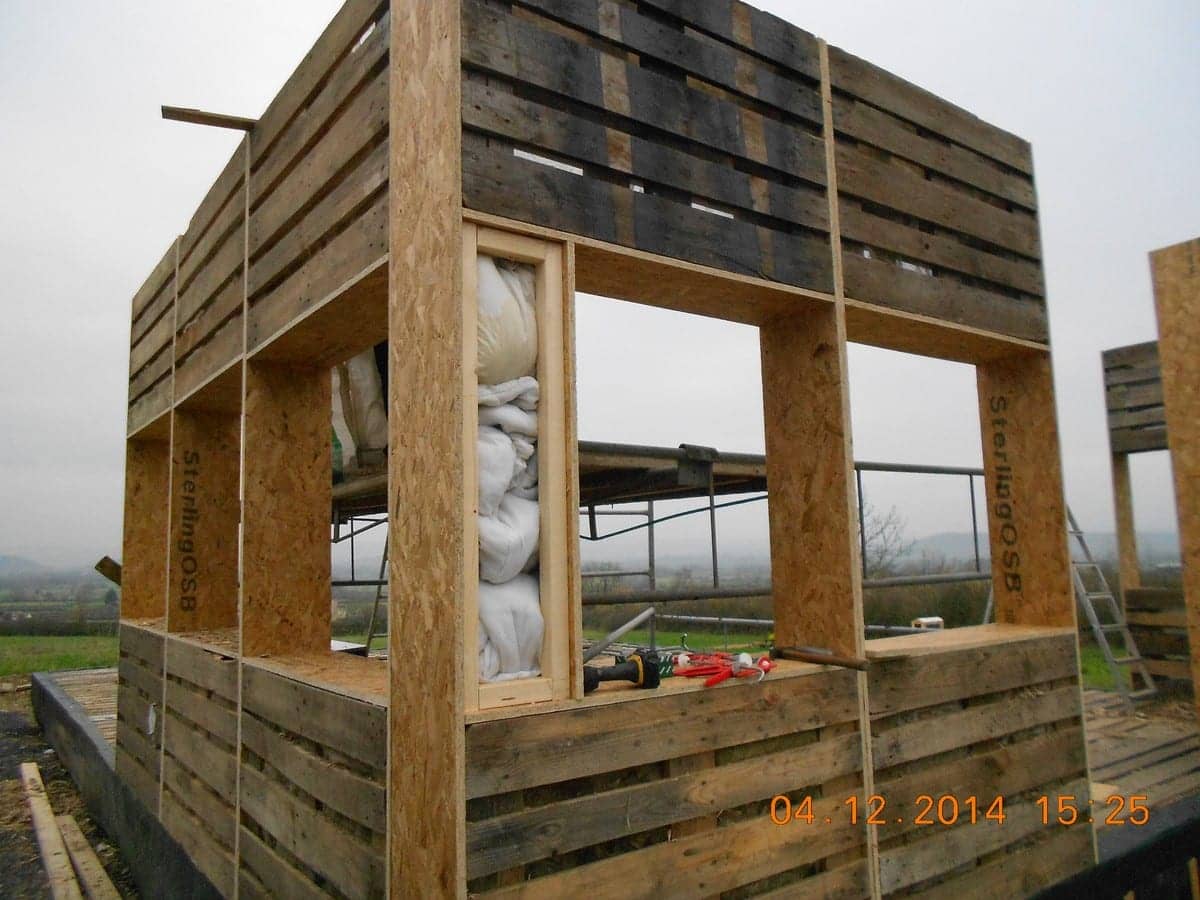
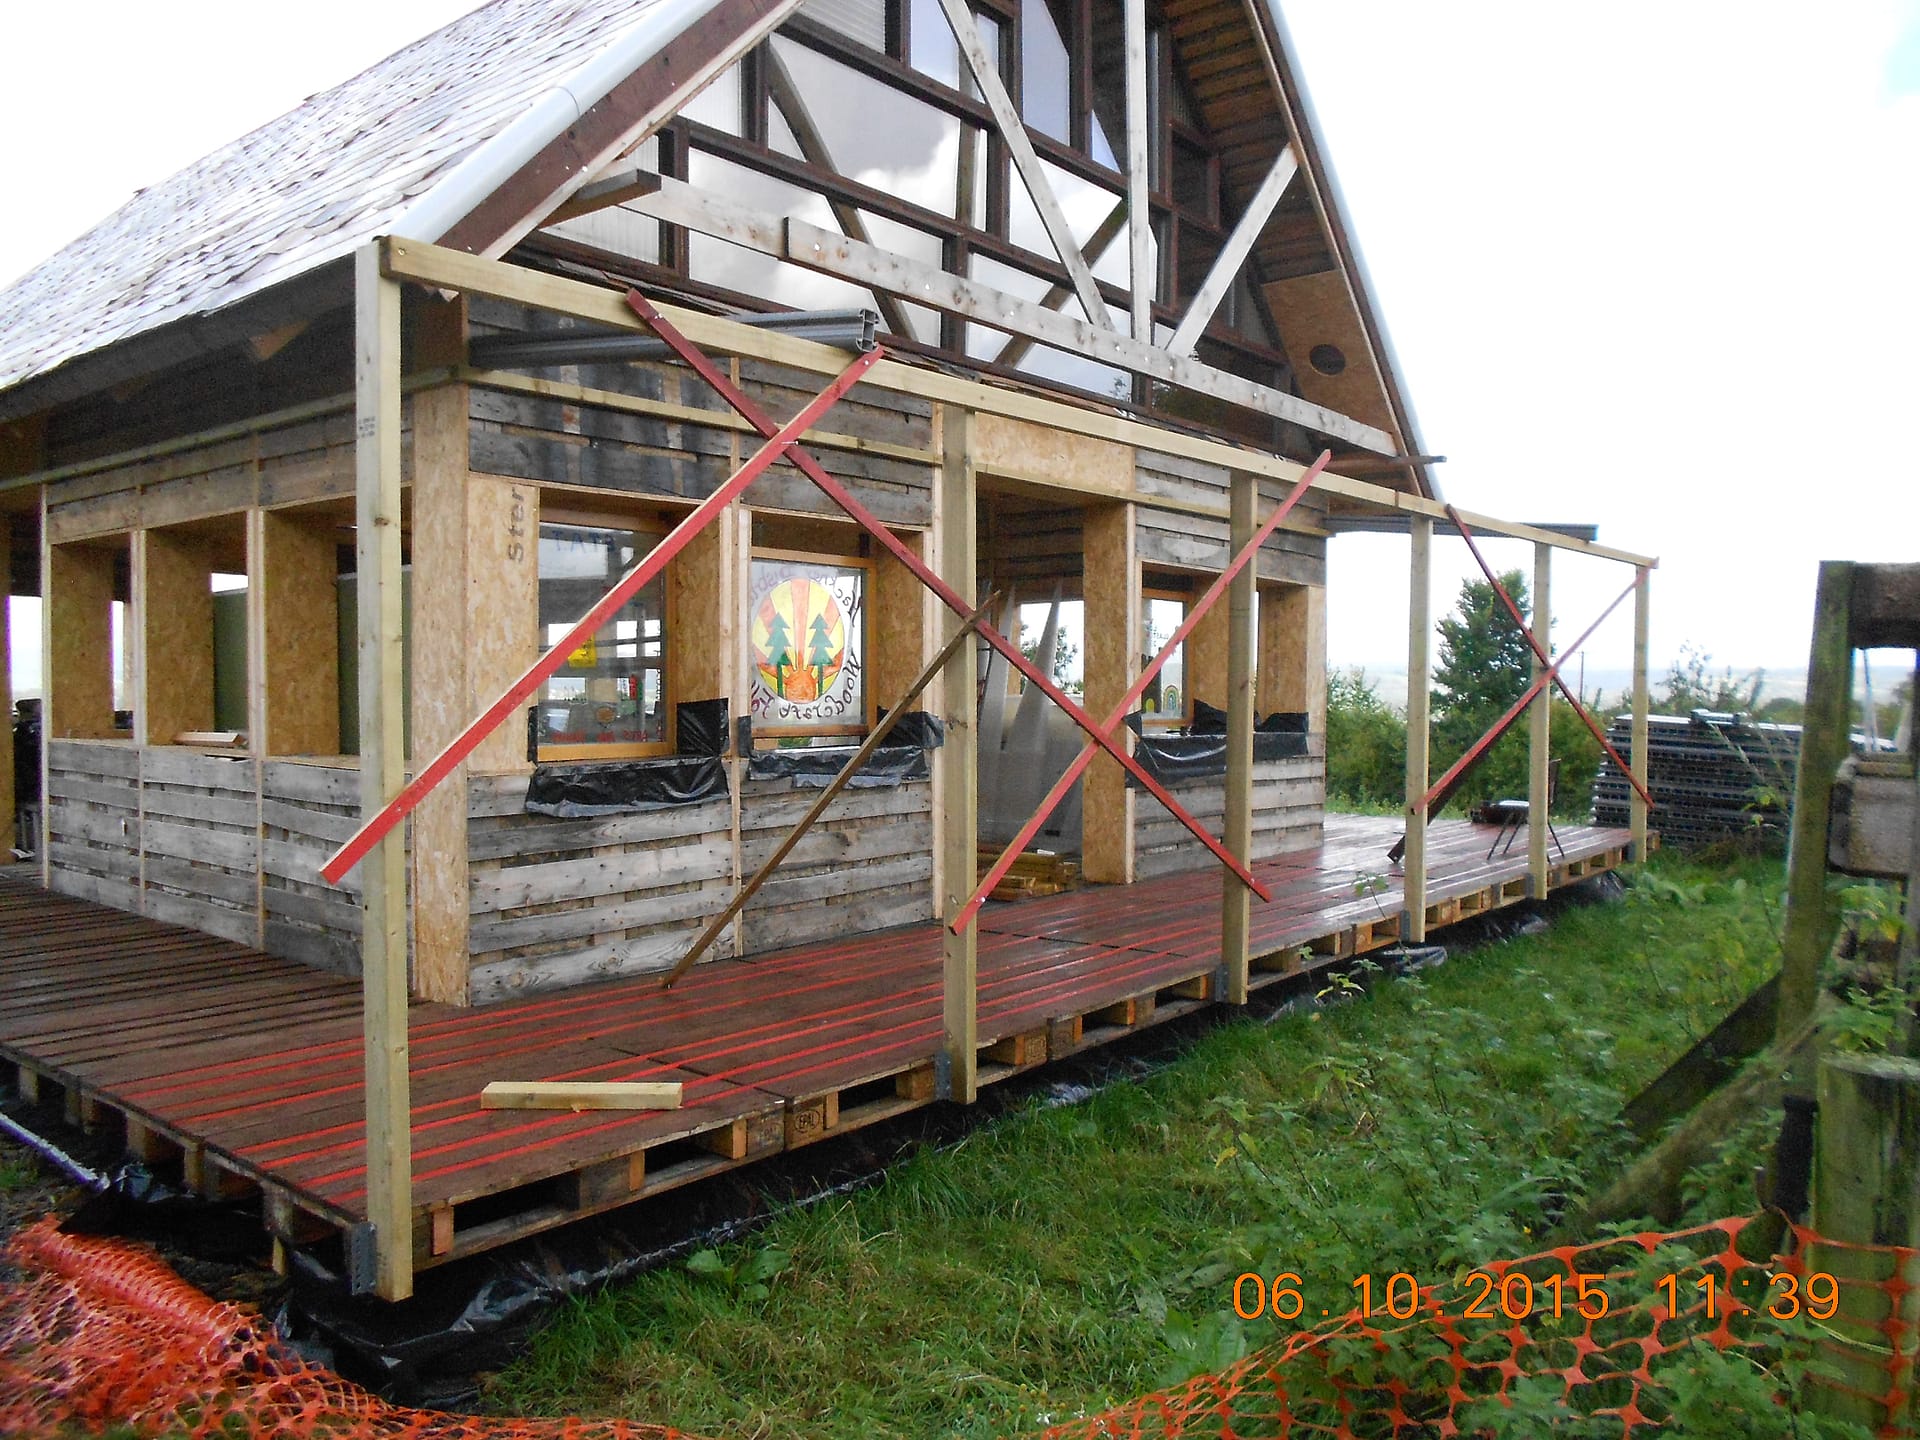
Each of the wall sections is screwed to the next and then the bottom section is filled with wood chip. The walls are about a foot thick so should provide reasonable insulation but nowhere near “passiv haus” standard. If I was going to use this technique for building a house to live in I think I would make the walls a lot thicker but the principle of the way in which each wall module is made could be exactly the same.
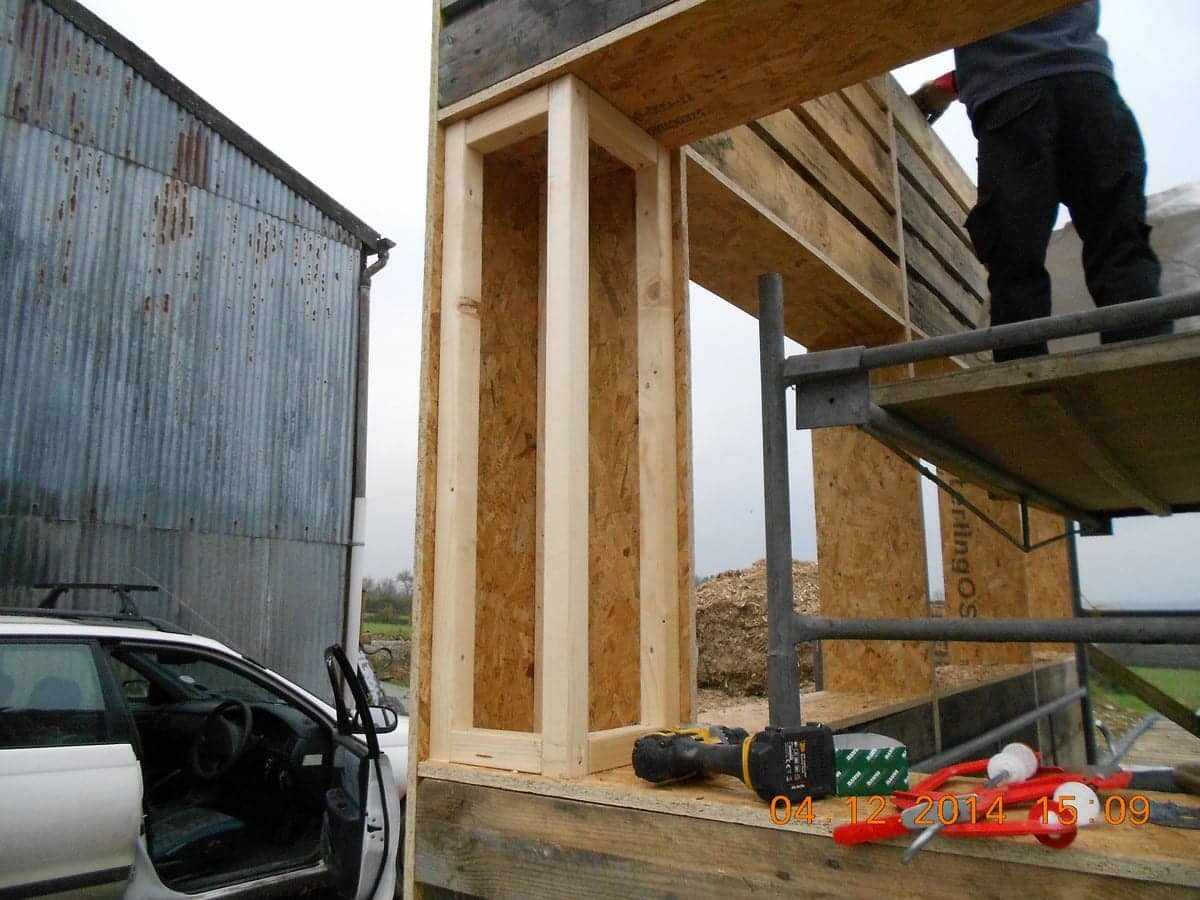
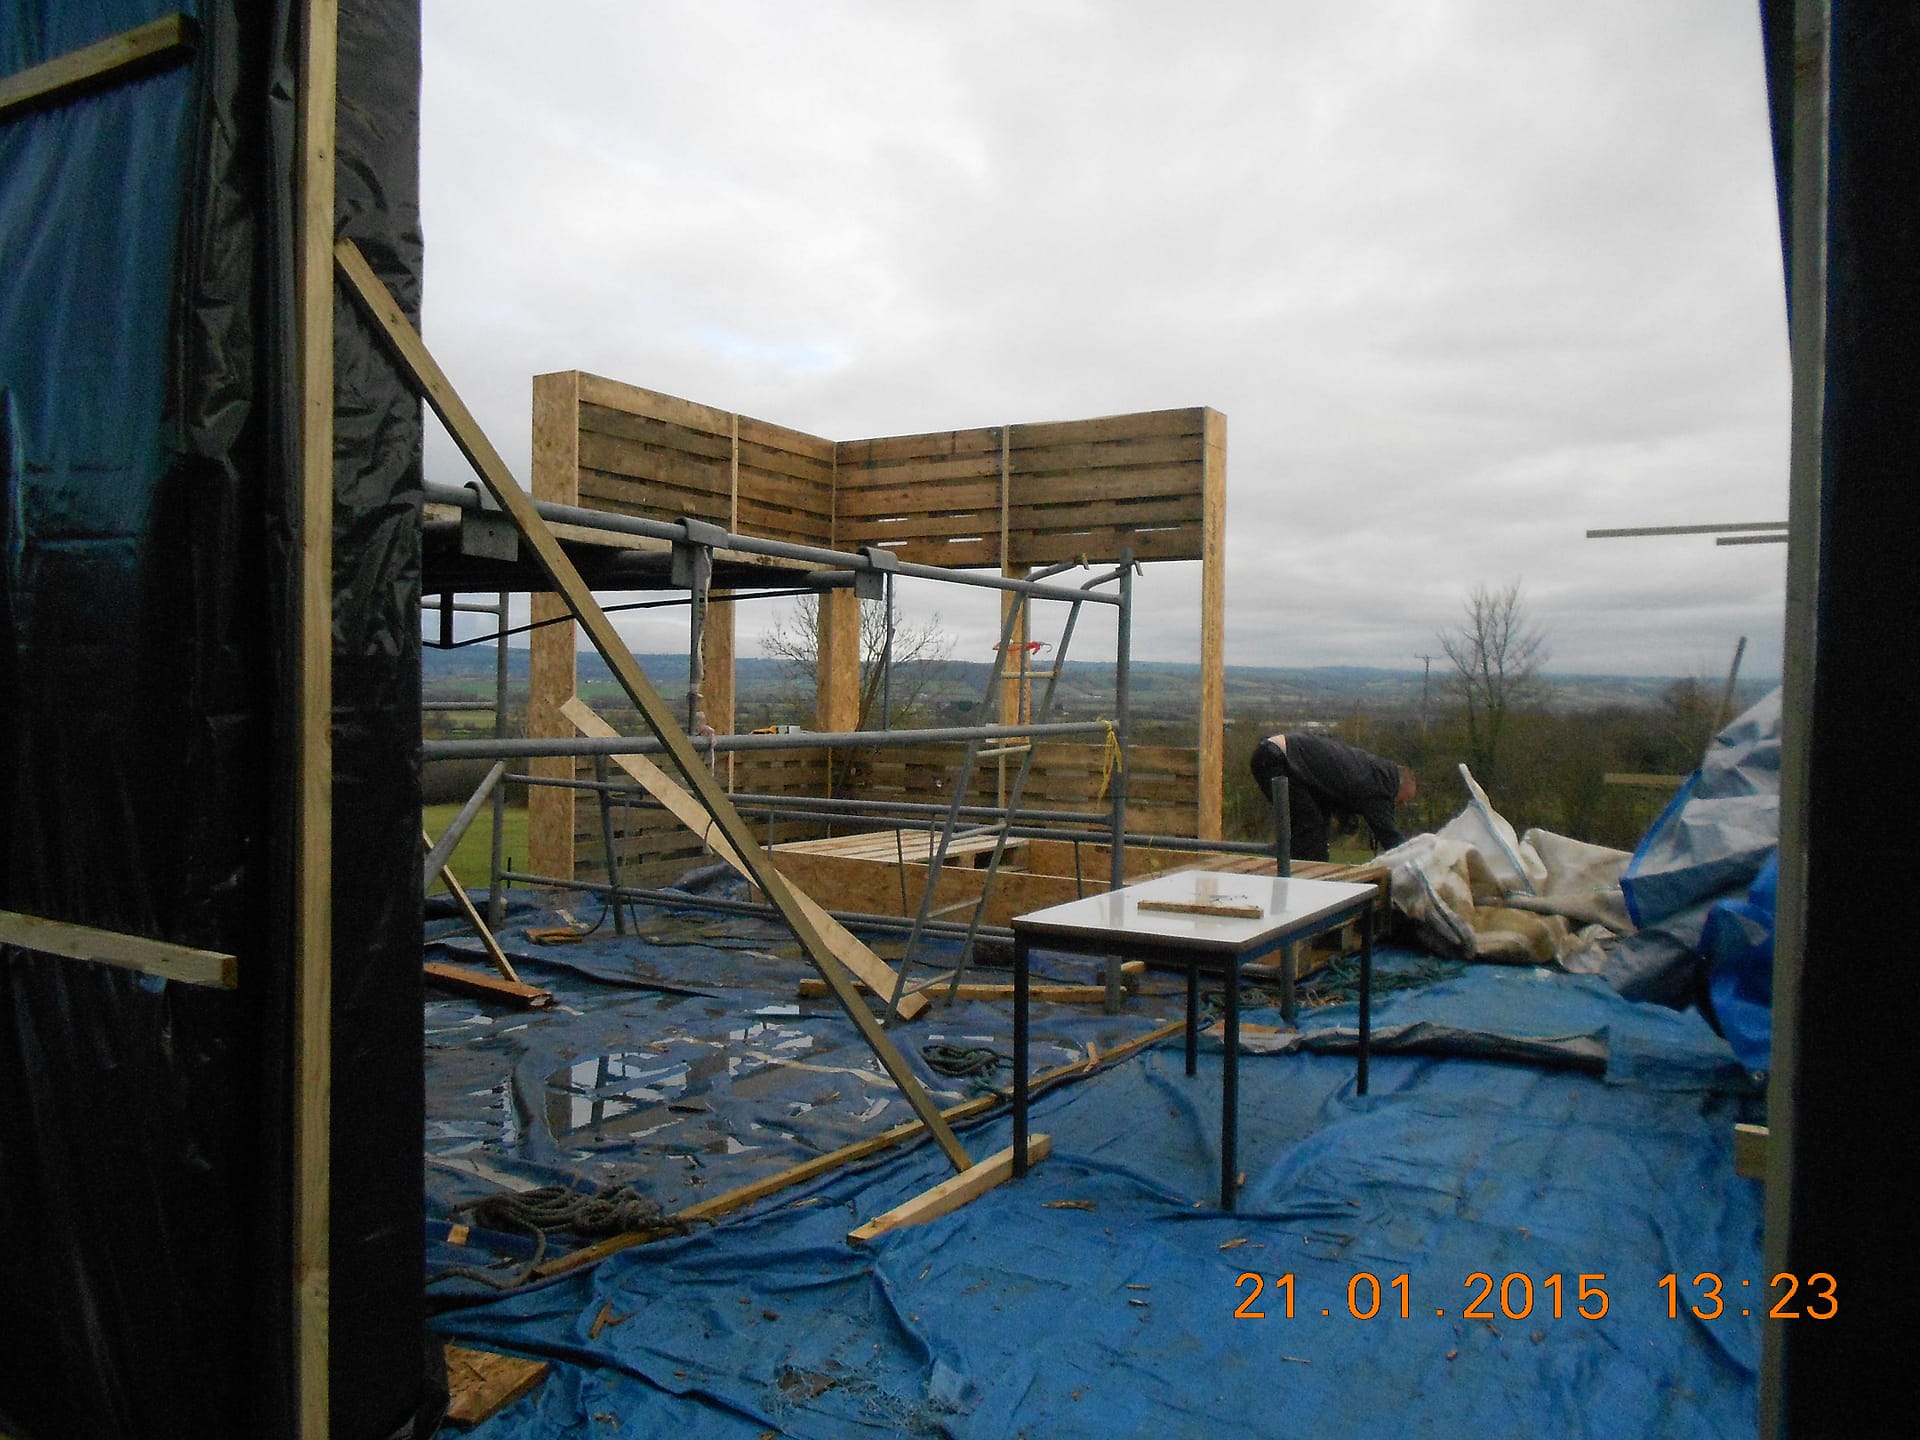
The next few pictures are showing how we deal with the corner using just the standard wall modules and strengthen the whole thing a bit. I am not sure what a structural engineer would make of two 18 mm bits of OSB serving to hold up the weight of the roof but there is another reason we have to thicken up the wall between sections. The wall modules are made by just screwing the OSB to the pallets and I reckon that if you put the weight of a roof truss in the middle of a section it might squidge the whole pallet down. So, in order to avoid squidging we have thickened up the corner and the ” mullion” between wall sections so that the weight of a roof truss would now be transferred to the ground which is well known for being quite good at holding things up.
By the way, we all talk about OSB or Sterling board and some people call it Smartply. OSB stands for Orientated Strand Board and presumably means that it is made of thin slices of wood lying in the same plane squashed together and glued. Sterling are the best known firm that makes it and Smartply is their trade name for it.
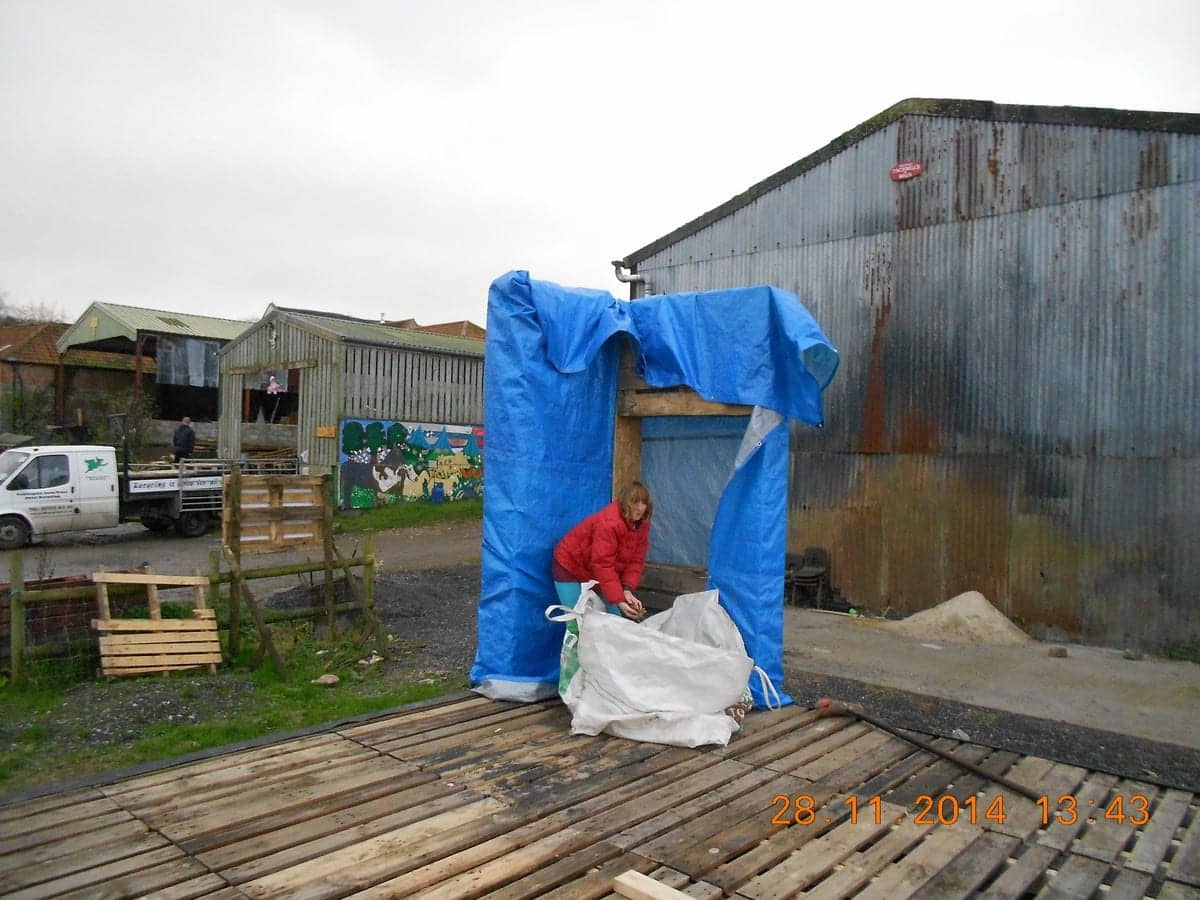
Tiff was throwing away a few old duvets and some pillows so we rescued them as insulation in the corner box.

We are going to have four doorways so this is a completed “quarter ” of the building. We are having four big doors partly because of fire regulations. The completed building will burn about as easily as a box of matches. Strangely, Fire Regulations are not very concerned that a building will burn to a crisp. Their main concern is that you can get everyone out before it does! We will need to write a management plan that will satisfy everyone that in the event of a fire we can get everyone out safely. In this building we are dealing with a single room on one floor and no-one will be further than 3 metres from a way out, so I am happy that fire should not be a danger in this building.
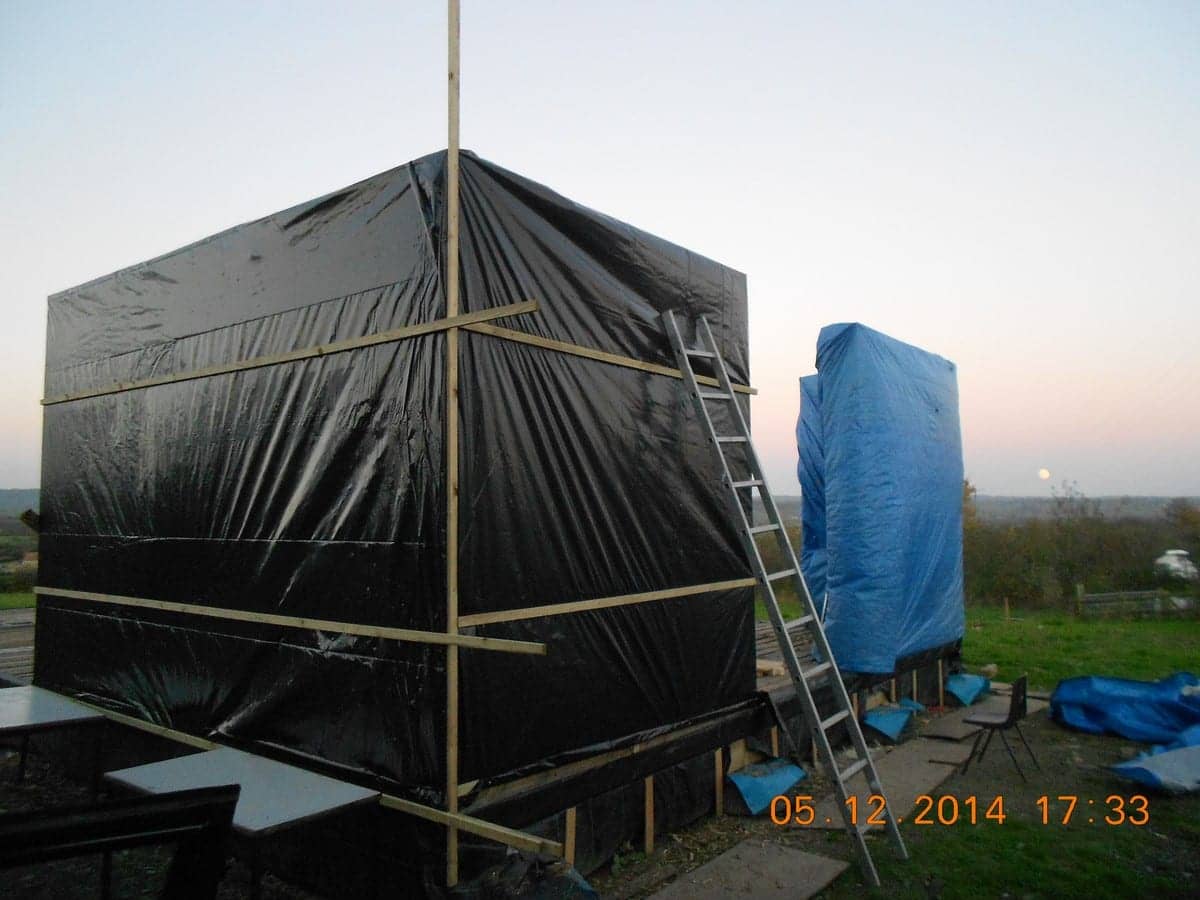
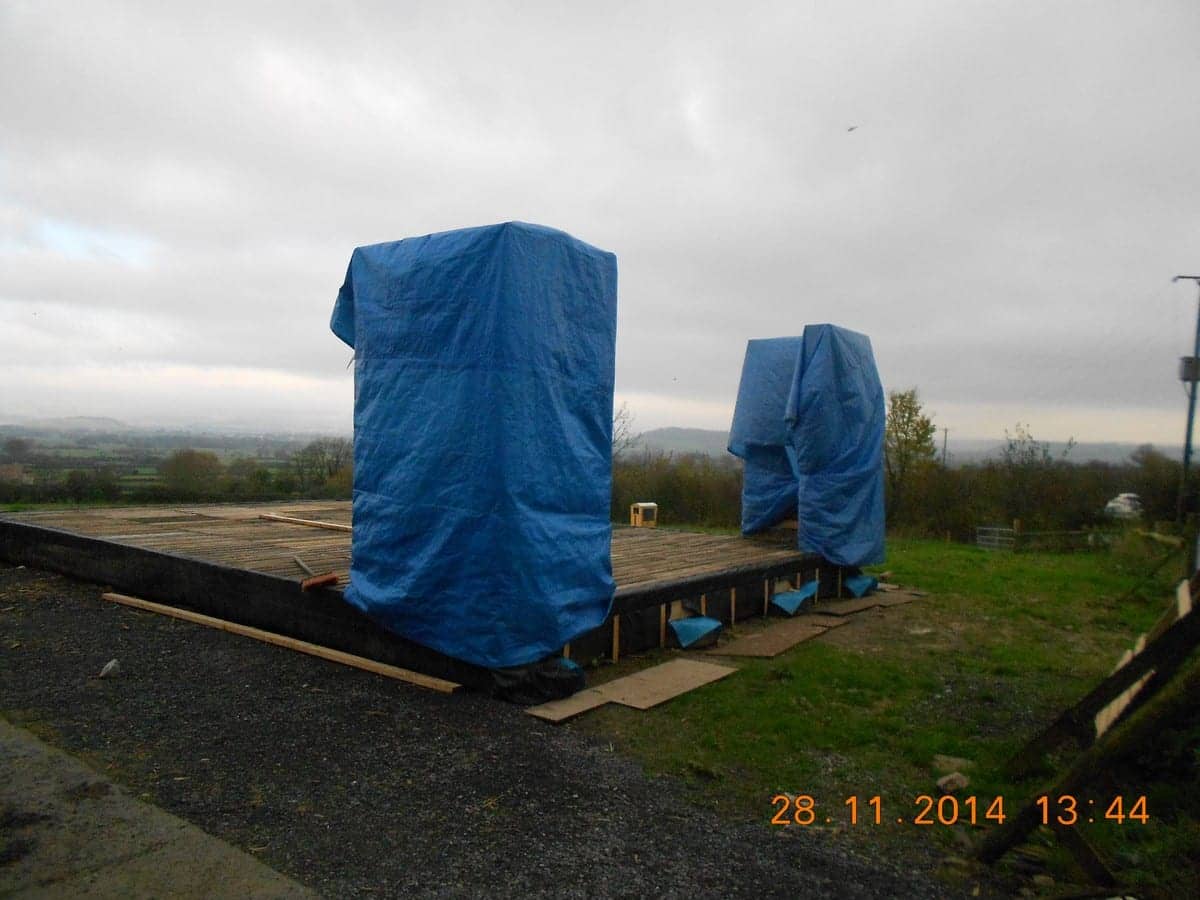
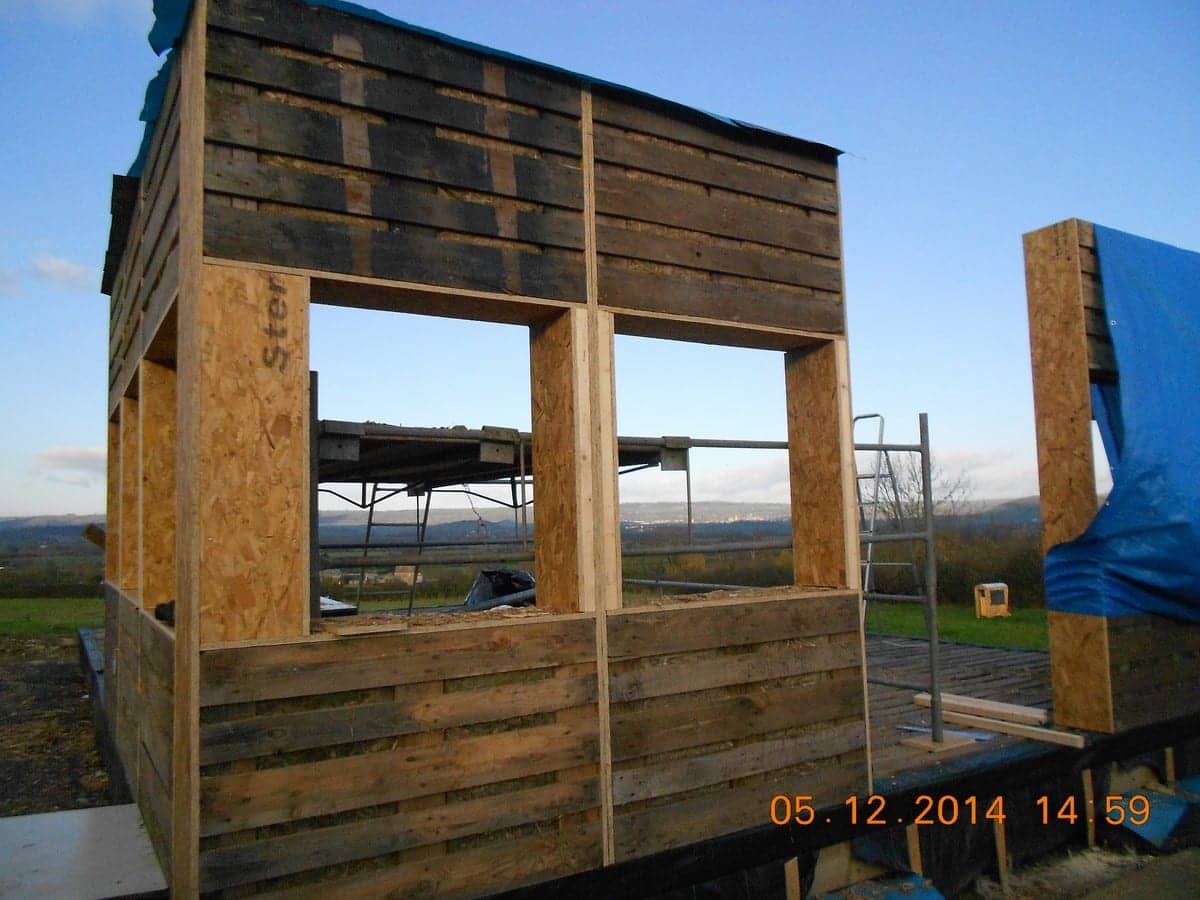
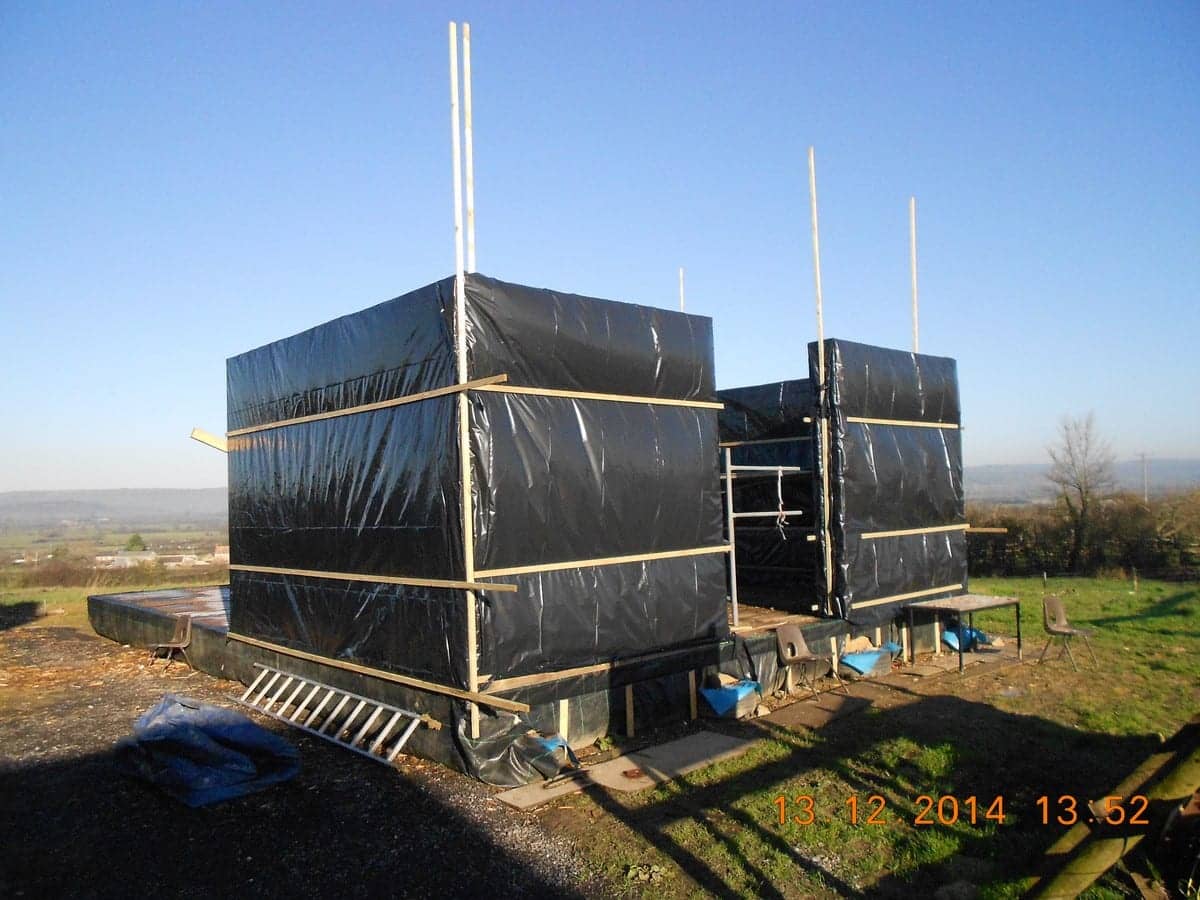
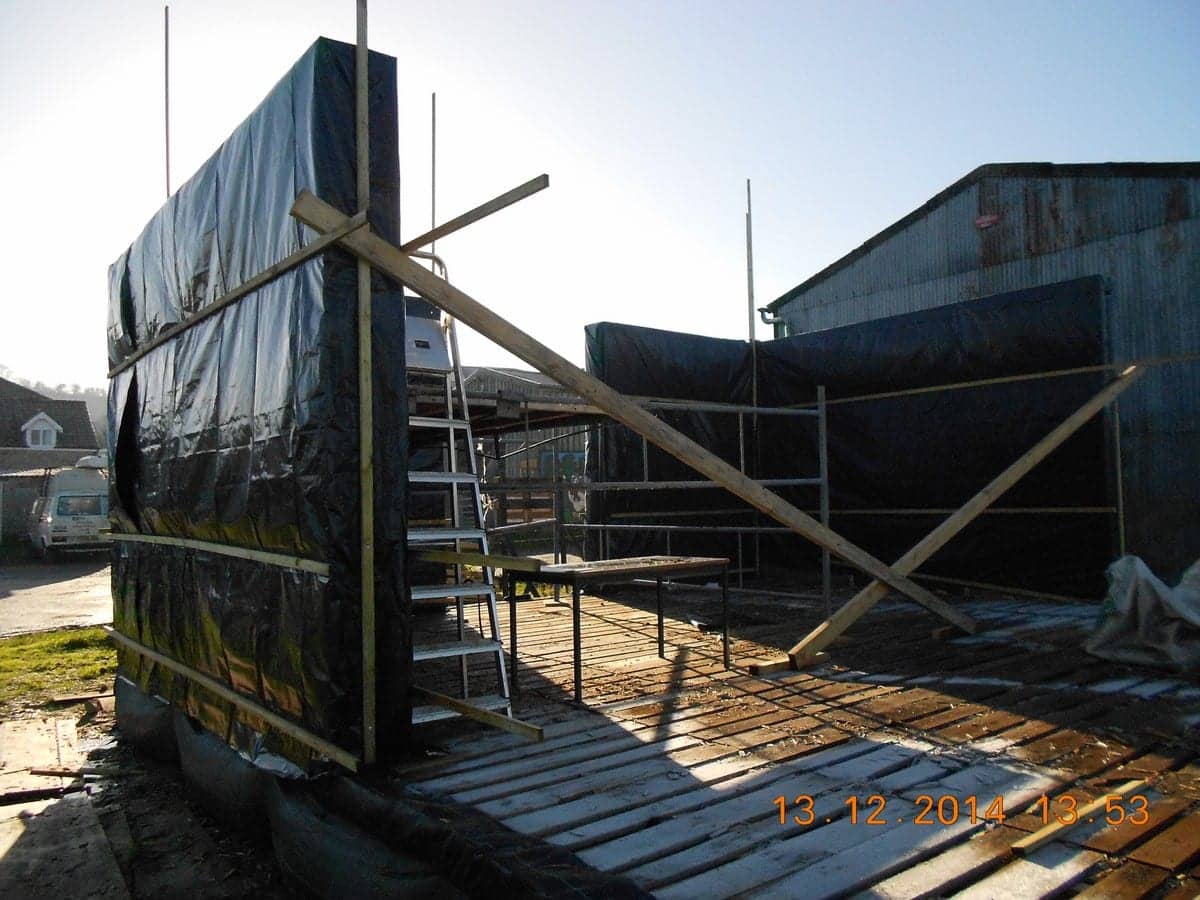
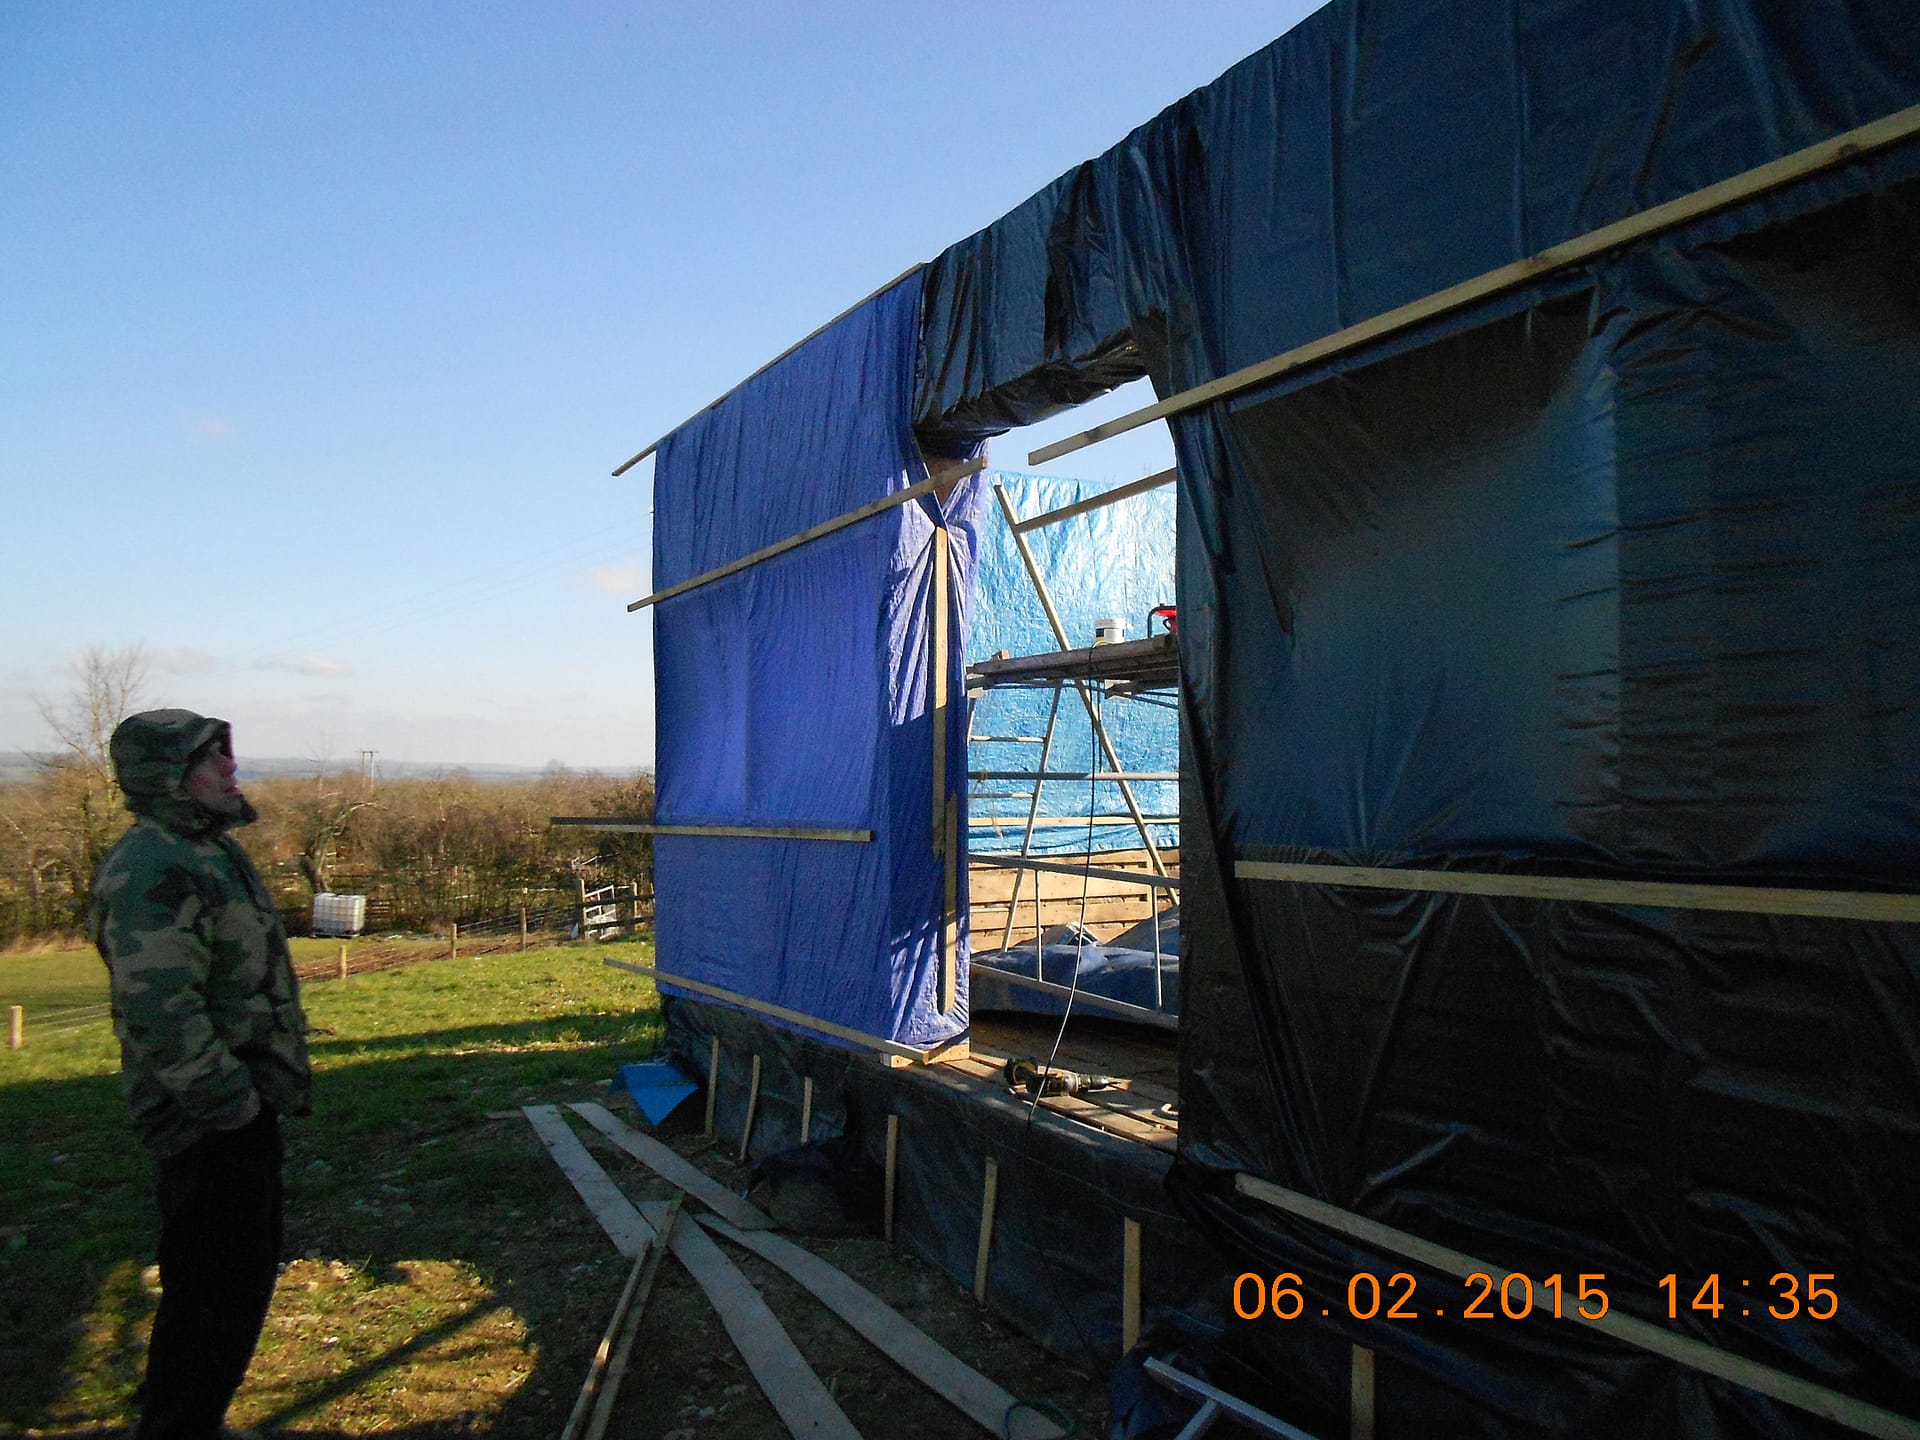
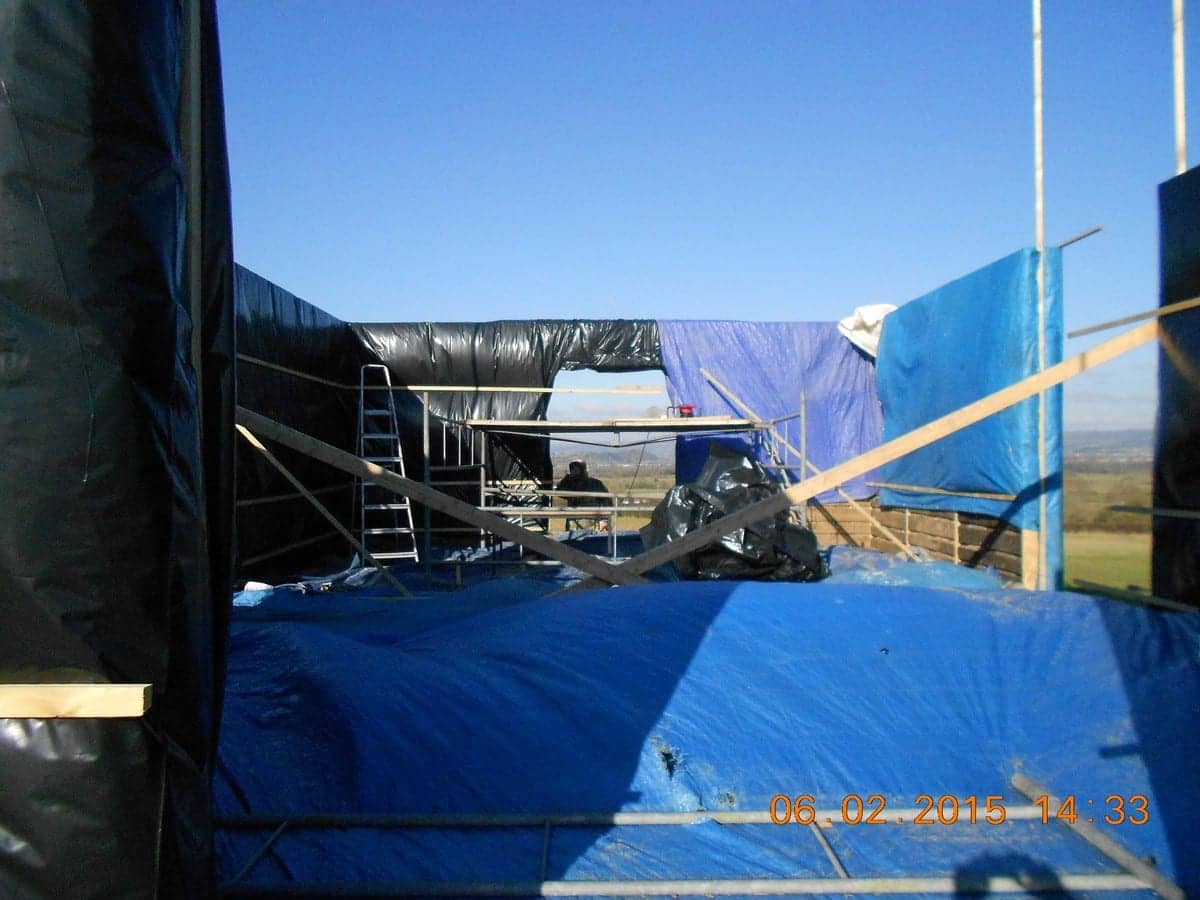
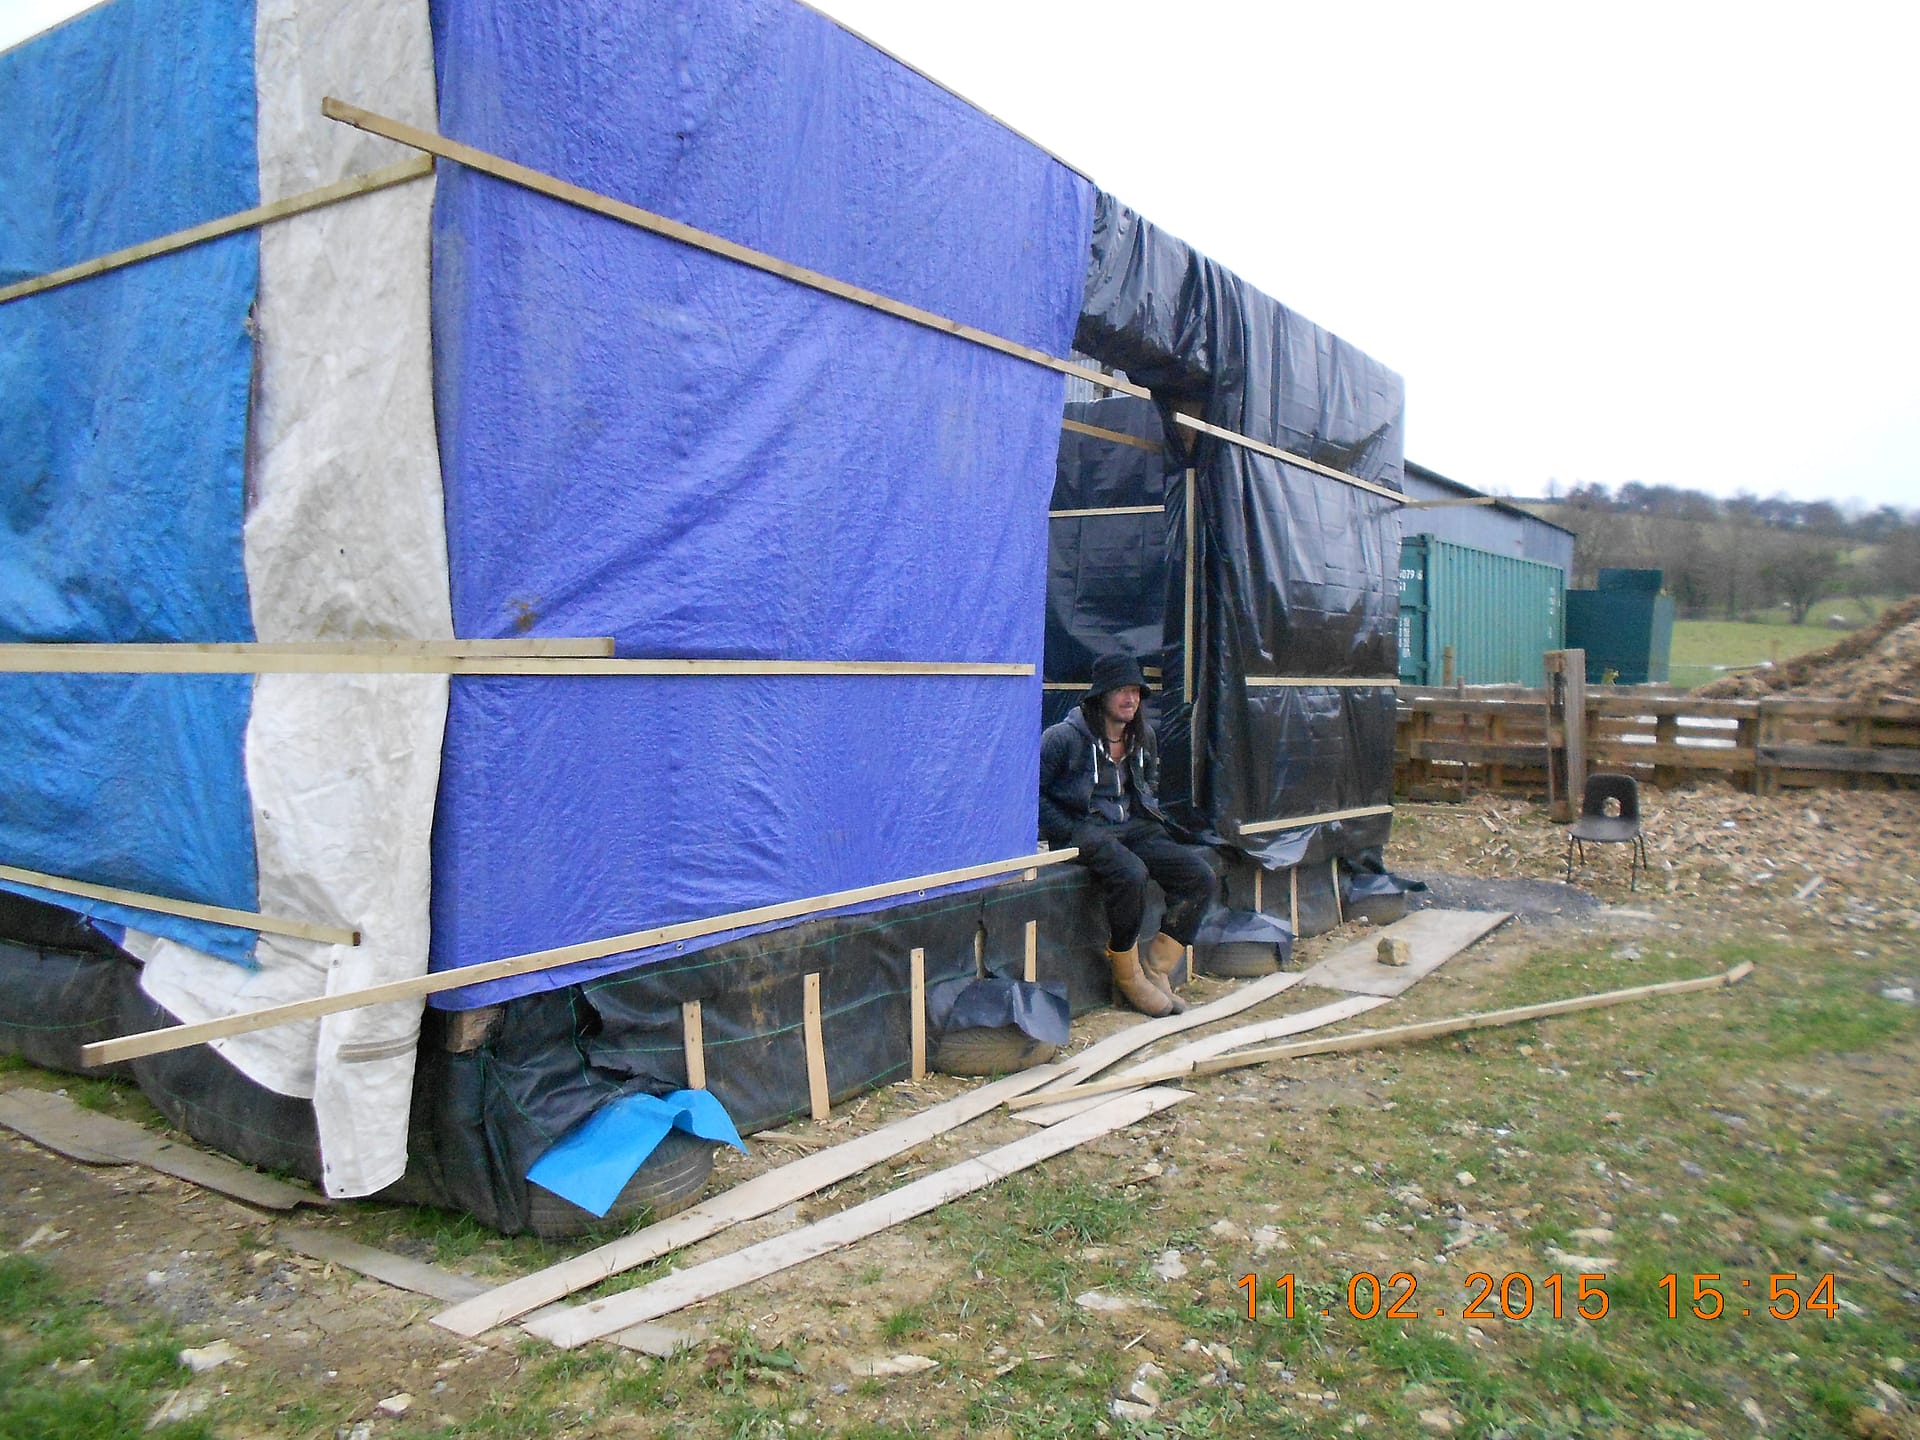
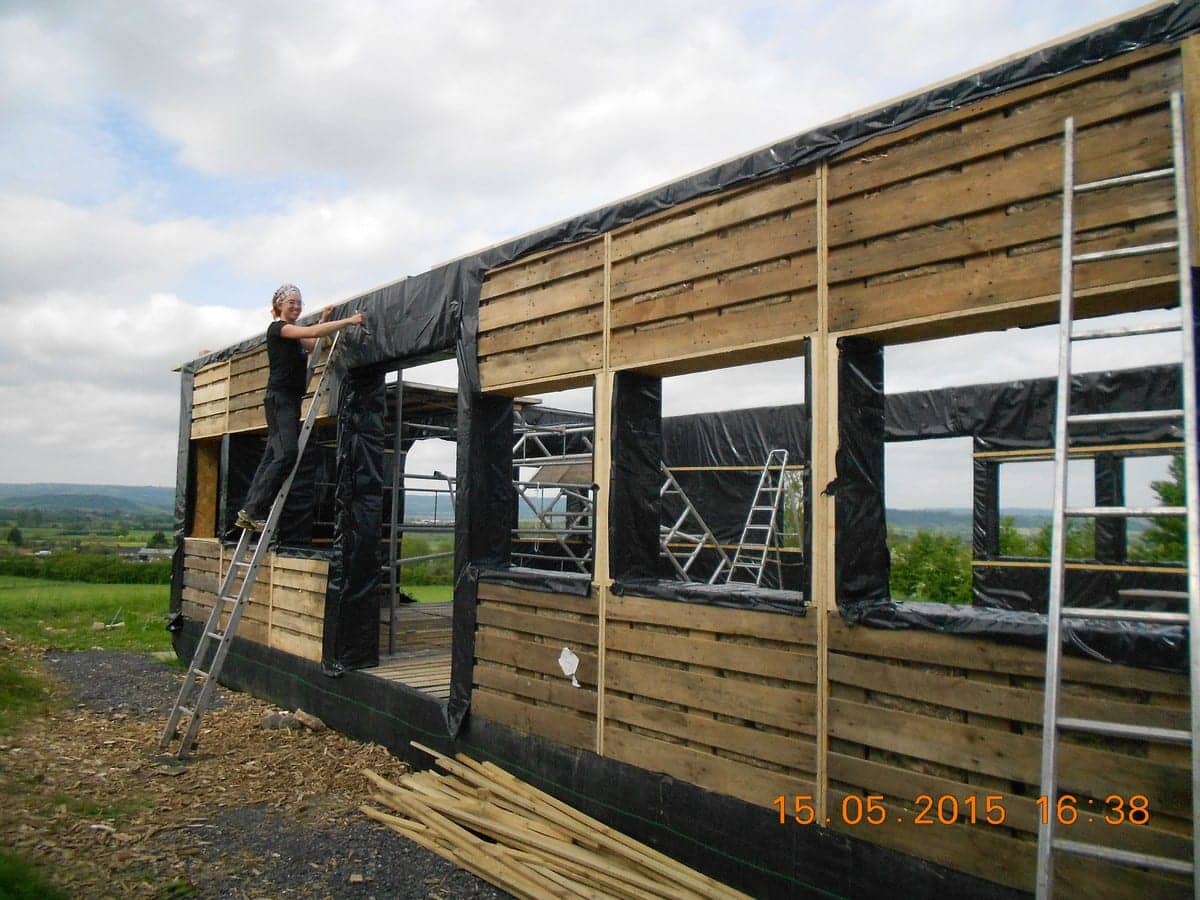
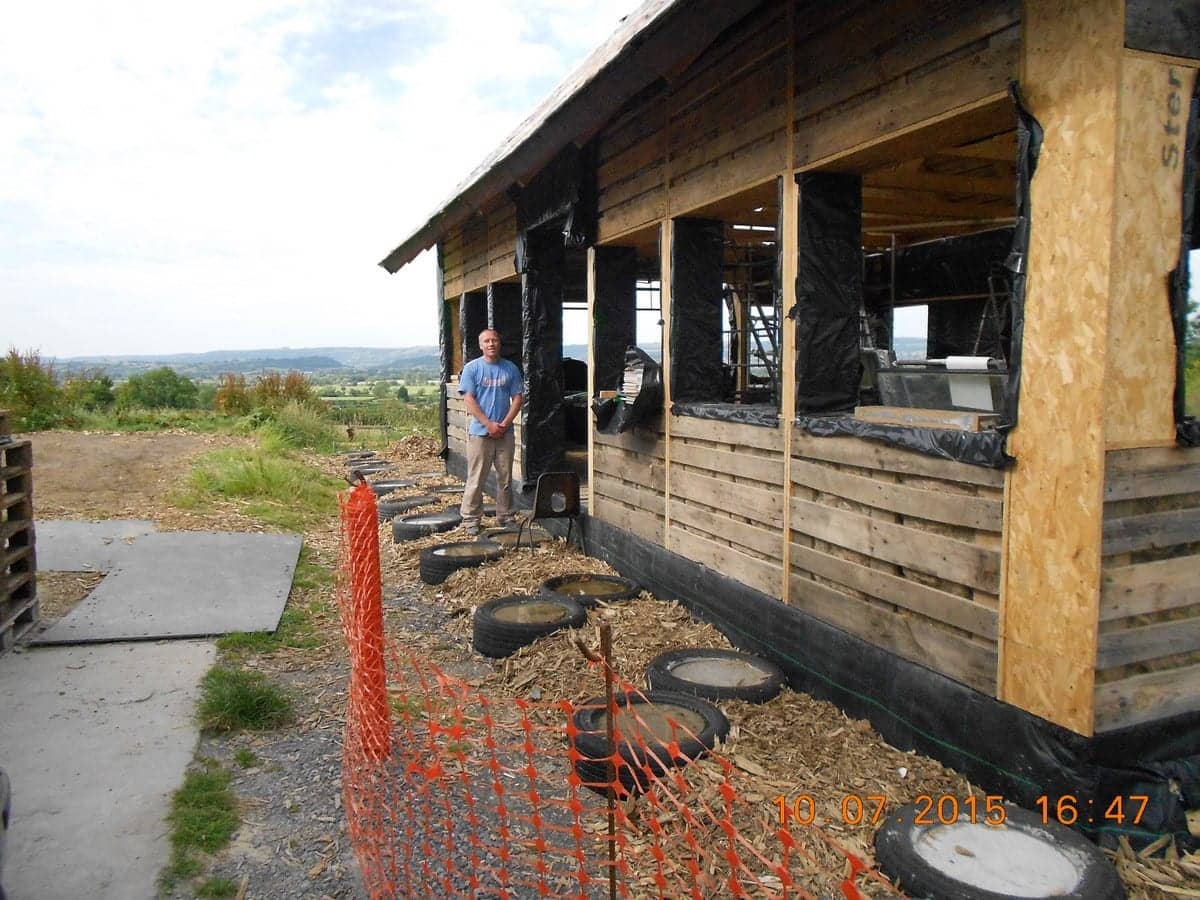
The whole section is now a bit vulnerable to the weather. After prolonged exposure to rain OSB tends to assume the texture of wet Weetabix. We have therefore wrapped it in silage sheet and with a bit of luck it will remain in this “cocooned” state until we get the roof on. It isn’t very ecologically sound but I don’t know what else to do. I will use it for something else afterwards, although I am not sure what, but it was very cheap. It came from Mole Valley Farmers and cost about £30.00 for ( 4 m x 50 m) 200 square metres which makes it about 15 p a square metre. I have held it on with battens which I also bought, but as you will see I have a job for all of them.
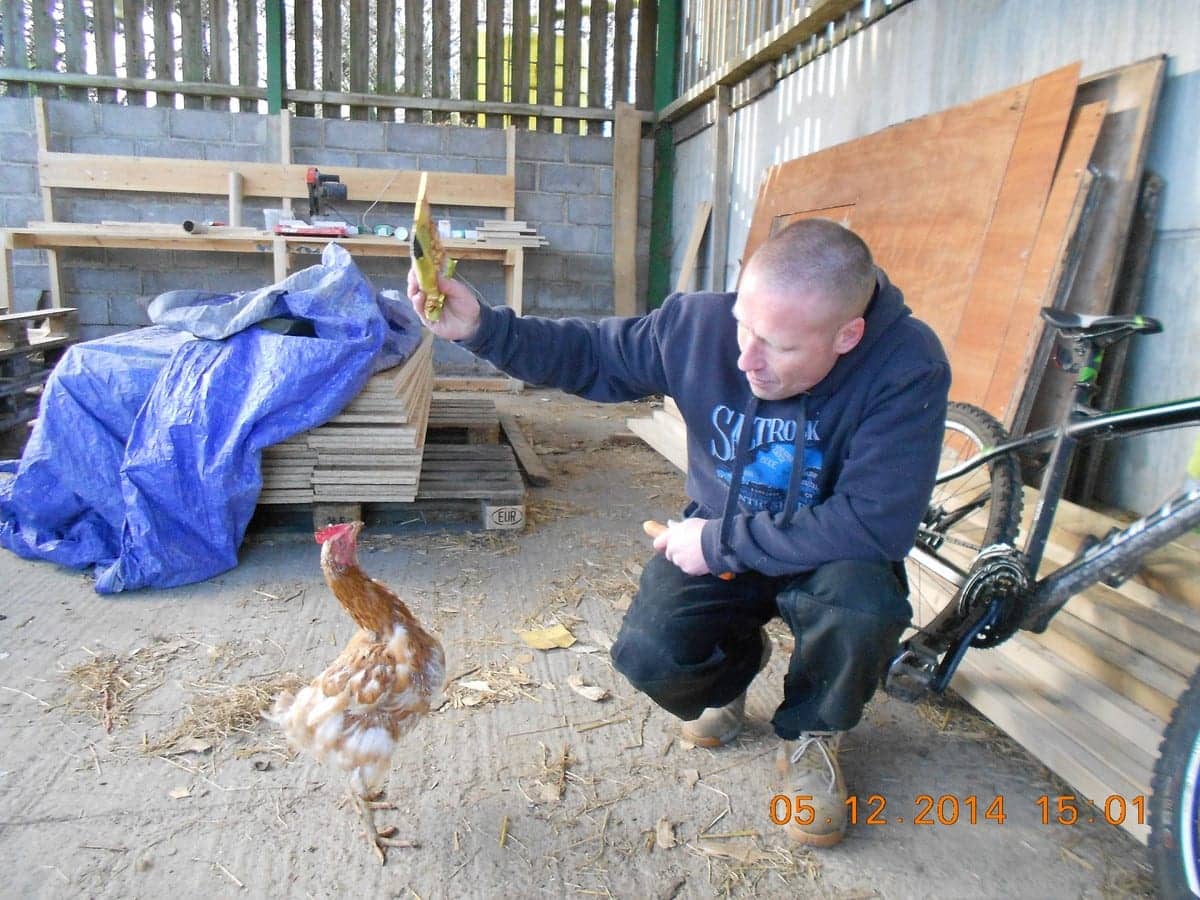
Here is Alex feeding chilli flavoured dry roasted peanuts to his hen. Well, not exactly his hen but it has obviously sworn its undying allegiance to him on account of the peanuts and now hangs around him all day hoping to get some more, which it does.
In addition to feeding a scrappy moulting hen, and bringing chicken skin for Cookie the farm cat, Alex is also buying carrots and apples for Hallow the horse and Dara, Simon the blacksmith’s horse and a couple more he passes on the way in from home in the morning. If he is not careful he won’t be able to afford to volunteer anymore!
Sunday December 14th 2014
So this week we need to get the second quarter finished and wrapped. It is exactly the same as the first quarter so it is just a question of doing it, but the weather has been crap and it is bloody freezing.
So that is the next quarter strengthened and insulated.
I can’t tell you how relieved I am that we have managed to get it wrapped and “safe”.
We have also been suffering gale force winds so I have been worried that it might blow over with the wrapping on it. This is partly because I have only “tacked” it to the base with a few screws. This means that when we get the back half of the walls up, I can take out the “tacking screws” and “nudge” it with a sledge hammer just to get the walls nicely lined up and then screw it down more firmly. These braces will do the job of stopping it blowing over in the wind.
We are packing up for Christmas at the end of the coming week so now we just have to batten down and get it all safe and tidy.
This will also give me time to work out a design for the roof!
Tuesday December 23rd 2014.
In fact we packed up on Thursday last week because we got battened down and tidied up. We have got enough pallets to finish the walls so we will start making wall sections in the New Year.
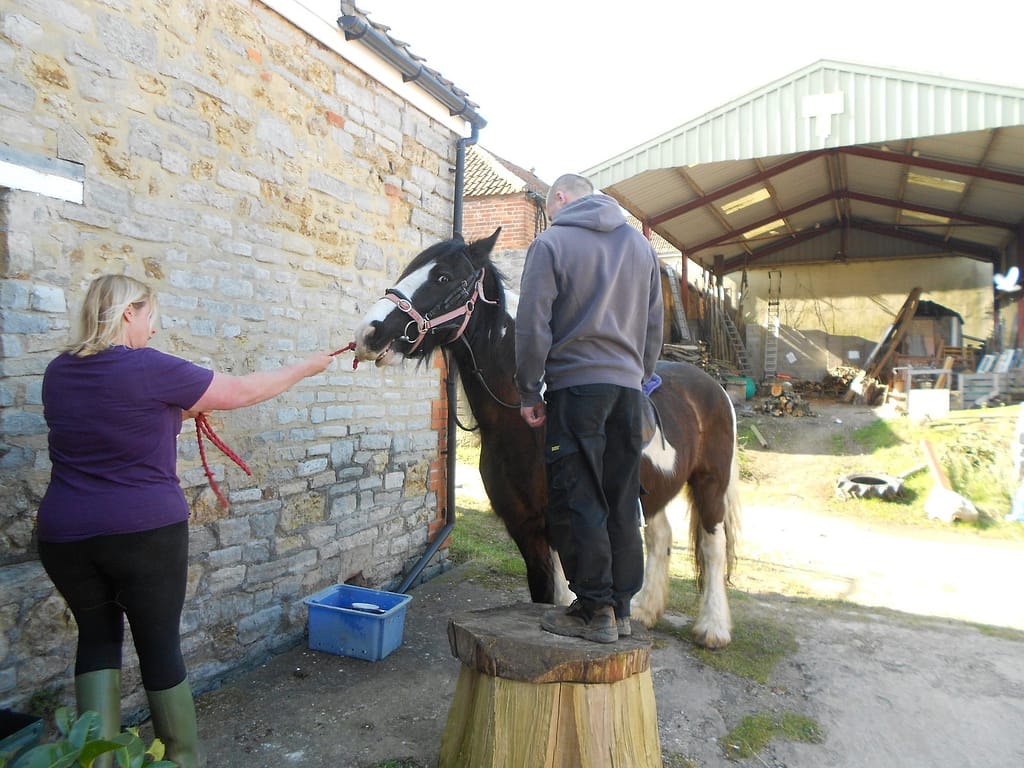
We all seem to have a slightly ambivalent relationship with Amy’s horse Hallow. He always seems pleased to see us but then moves as if to bite us. No one wants to see if he really would so we all keep him at arm’s length. Alex brings him a regular supply of carrots, but even so is a bit wary.
Anyway, Merry Christmas and a Happy New Year.
Thursday January 15th 2015
We got back on the Monday after New Year but it was cold and wet and miserable, so it has taken us a bit of time to get back into the groove.
We have been making wall sections in the barn which is at least out of direct rain and wind. They are all identical so there is not a great deal of brain involved but that is part of the point of the design.
Alex is just topping up the insulation round the edges where the wall sections will be sitting.

It would be a lot easier to work round the outside if it wasn’t so muddy but fortunately we can do most of it on the inside.
The wall sections are just too heavy for me to manoeuvre on my own whilst I am making them and just too heavy for me and Alex to carry over to the plinth. This means that moving wall sections over is best done on a Wednesday because this is volunteer day at Paddington Farm. The weather forecast for this Wednesday was snow and ice so I wasn’t hopeful that we would be able to get them over. In fact it was a great day and by lunchtime we had carried the eight out of ten sections we had finished and set up the third quarter of the building! However, since I was part of lifting and carrying and setting up and screwing together there aren’t any pictures. In the afternoon Alex started filling the sections with insulation and by the end of the day we had got everything wrapped. It is a real pain having to wrap everything but if I don’t I know the OSB will go soggy.
I took this of Wills because he is part of it but also to show the light snow on the Mendip Hills in the background, but you can’t really see it.
And then he took one of me and you can just about see the snow in the far distance.
January 29th 2015
It is still cold and miserable but not as bad as it is elsewhere so I suppose we can’t complain.
This is the final quarter of the walls. We made them under cover, and then got Rog and Wills to give us a hand to get them over there on “volunteer day”.
We will strengthen this section up exactly the same as the others and then wrap it.
The next job is to make four “lintels” to go over the door gaps. These will be basically box section girders made out of OSB, and will join the whole thing together and should make it pretty stable. In fact we just made the first one but I forgot to take any pictures of how it was made so I will take pictures of the next one.
Saturday February 7th 2015
It is still very cold and the classroom is on a very exposed part of the farm so any wind makes it even colder. This is really just an excuse for not getting that much done this week. However, we have got the rest of the lintels made, and on Wednesday with the help of Michael and Rog we got the first one up. Once again I am afraid that being part of doing it meant that I didn’t take photos but I will try on one of the others.

Each box is filled with insulation the same as in the walls.
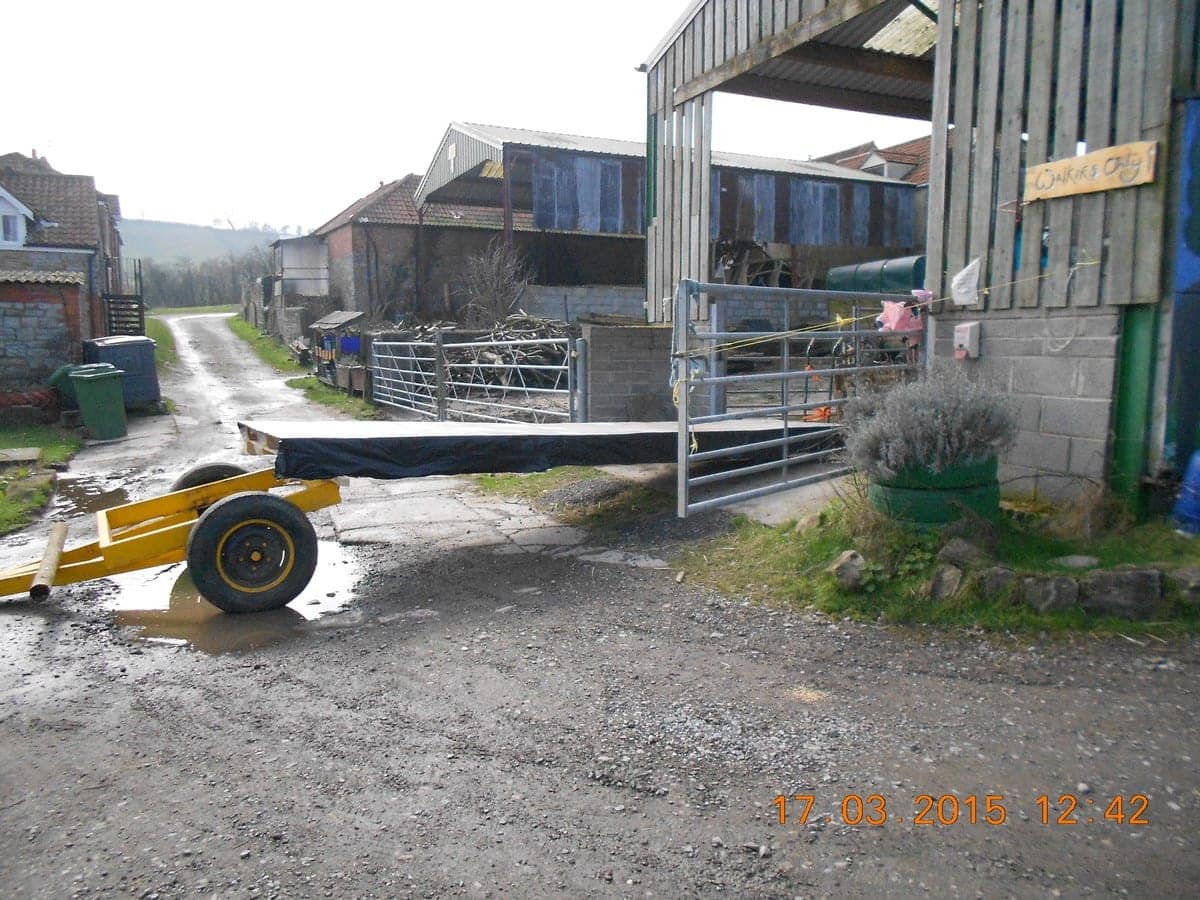
OK, these are the first of the lightweight pallets that we are going to use for the roof. I plan to build the roof on the ground, mainly because it is the safest place to do it, and then lift it on in sections. I know pretty much how I am going to do it, but I am not sure it will work. The other problem is that I am not sure how heavy a section will be. This is important because we are going to have to move each one by hand to store it. I plan to get them lifted on by a truck with a Hi-ab. Since it is expensive I want to do it all in one hit.
So, I am going to build the first one and see how it goes before we get in the materials for all the rest. Rog is trying to persuade me that we don’t need the expense of a truck and can do it ourselves with ropes and pulleys and Egyptian slaves. I am doubtful, but prepared to be persuaded once we see how heavy a section is.
Sunday Feb 15th 2015
We still haven’t got the last of the lintols in or finished the last quarter but we will as soon as we next get a warmer dry day and help to lift them into place.
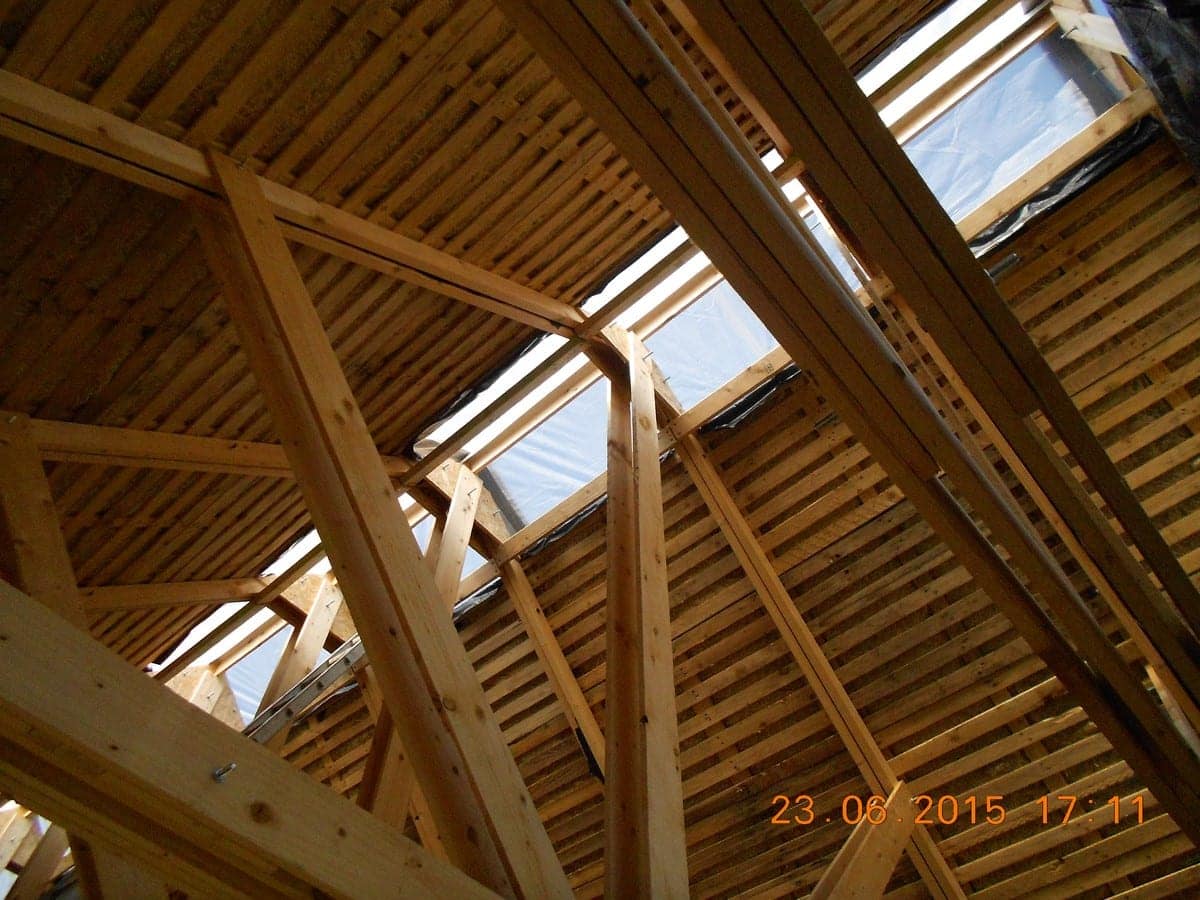
Here is the first roof section which is basically six pallets screwed to a pair of 5.4 metre 4 x 2 timbers. Alex now has to line it with environmesh to contain the insulation. At each stage Alex and I have to try to lift what we have made to see how heavy it is.
Saturday March 7th 2015
This is where things begin to go wrong and where I am in danger of getting my comeuppance!
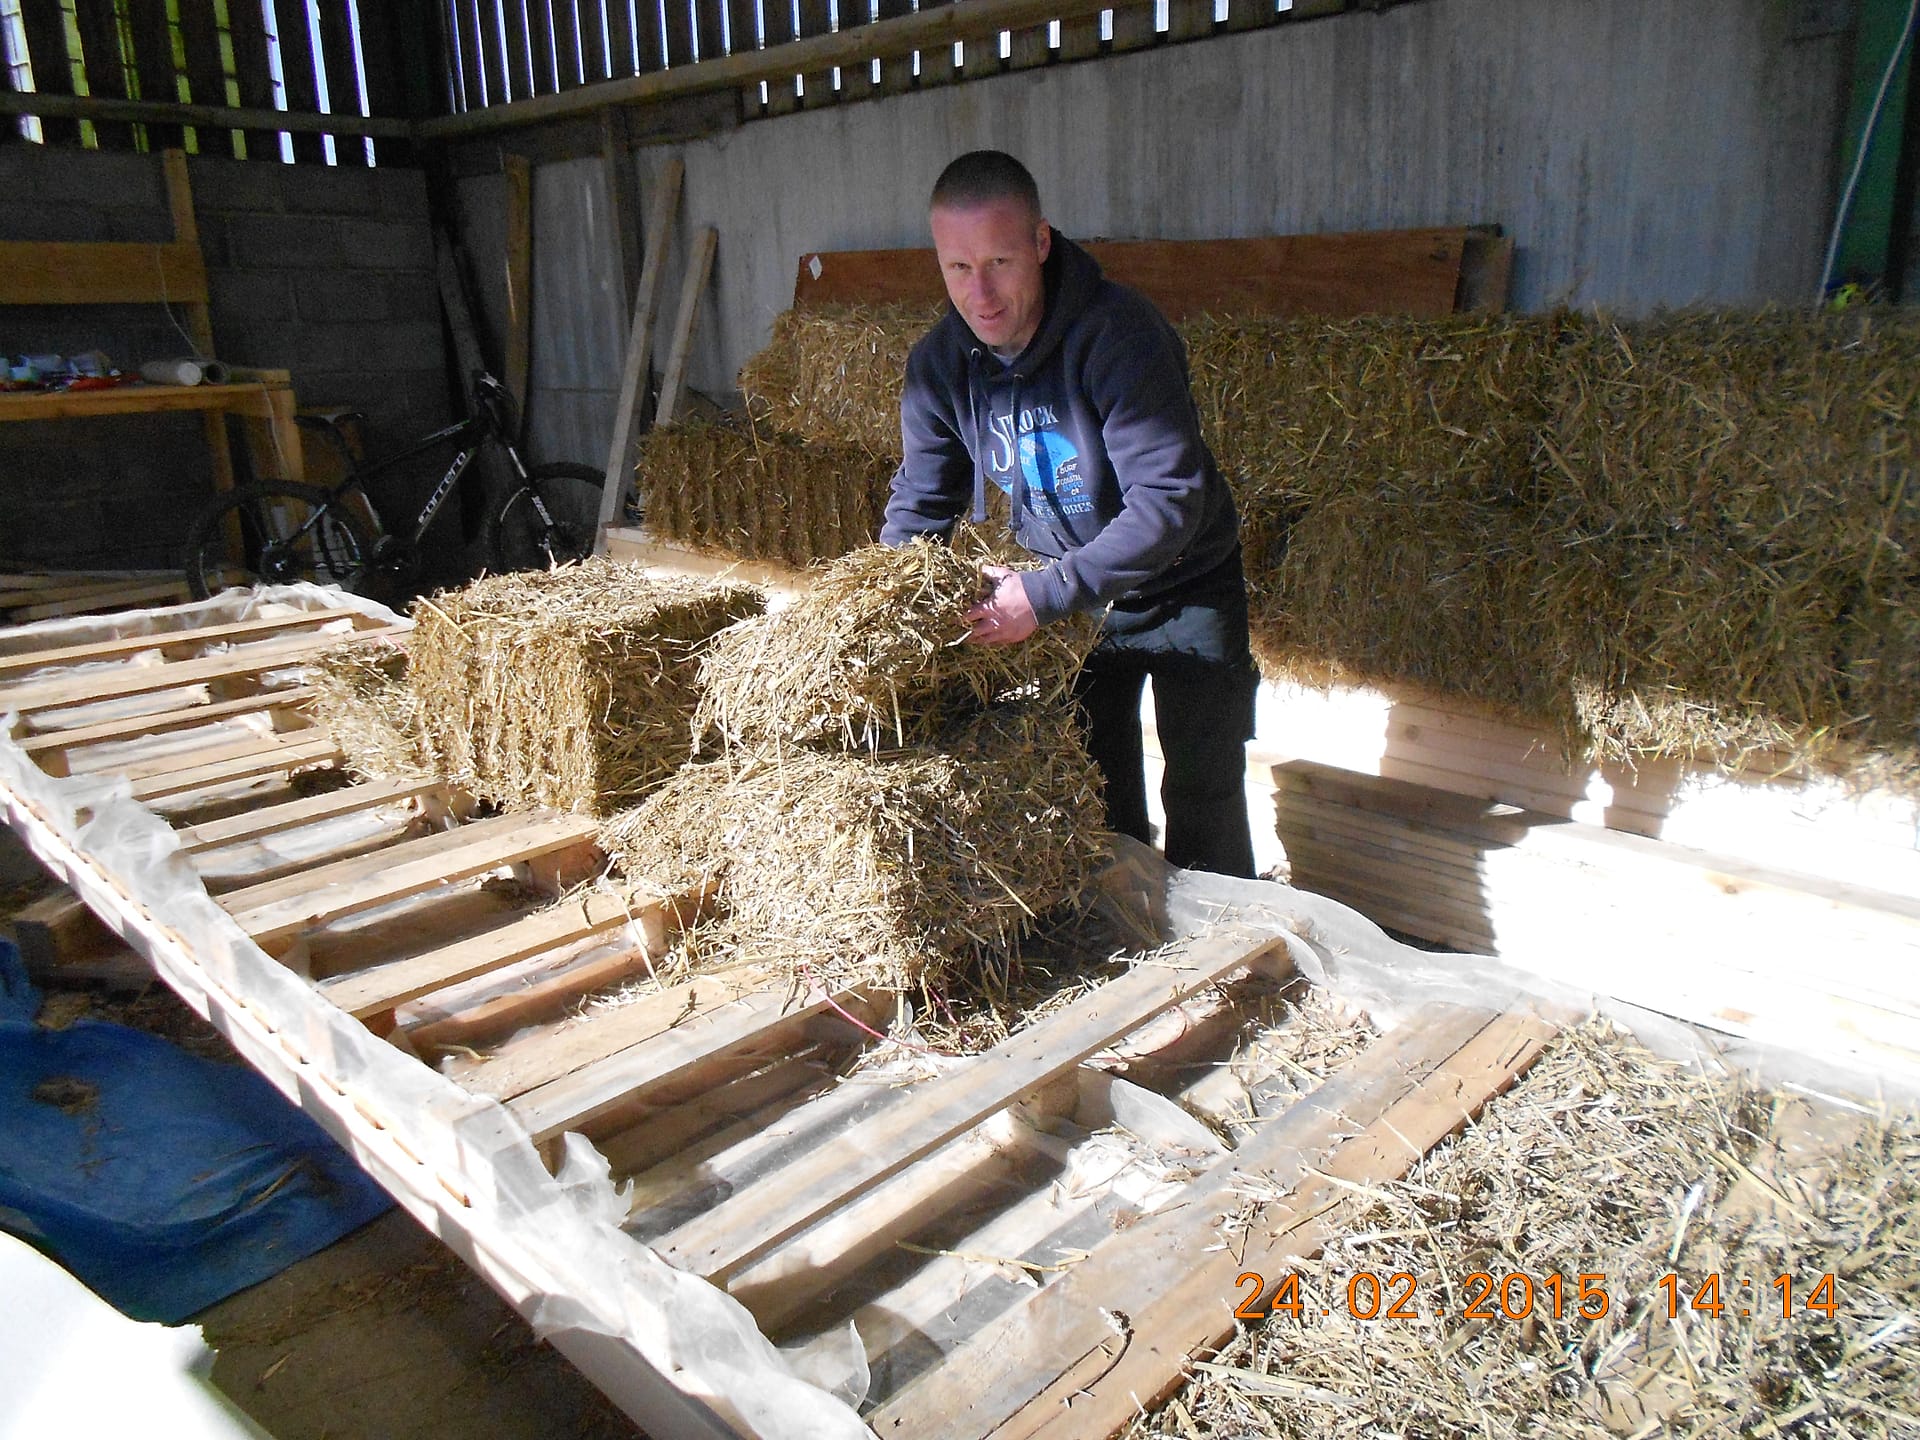
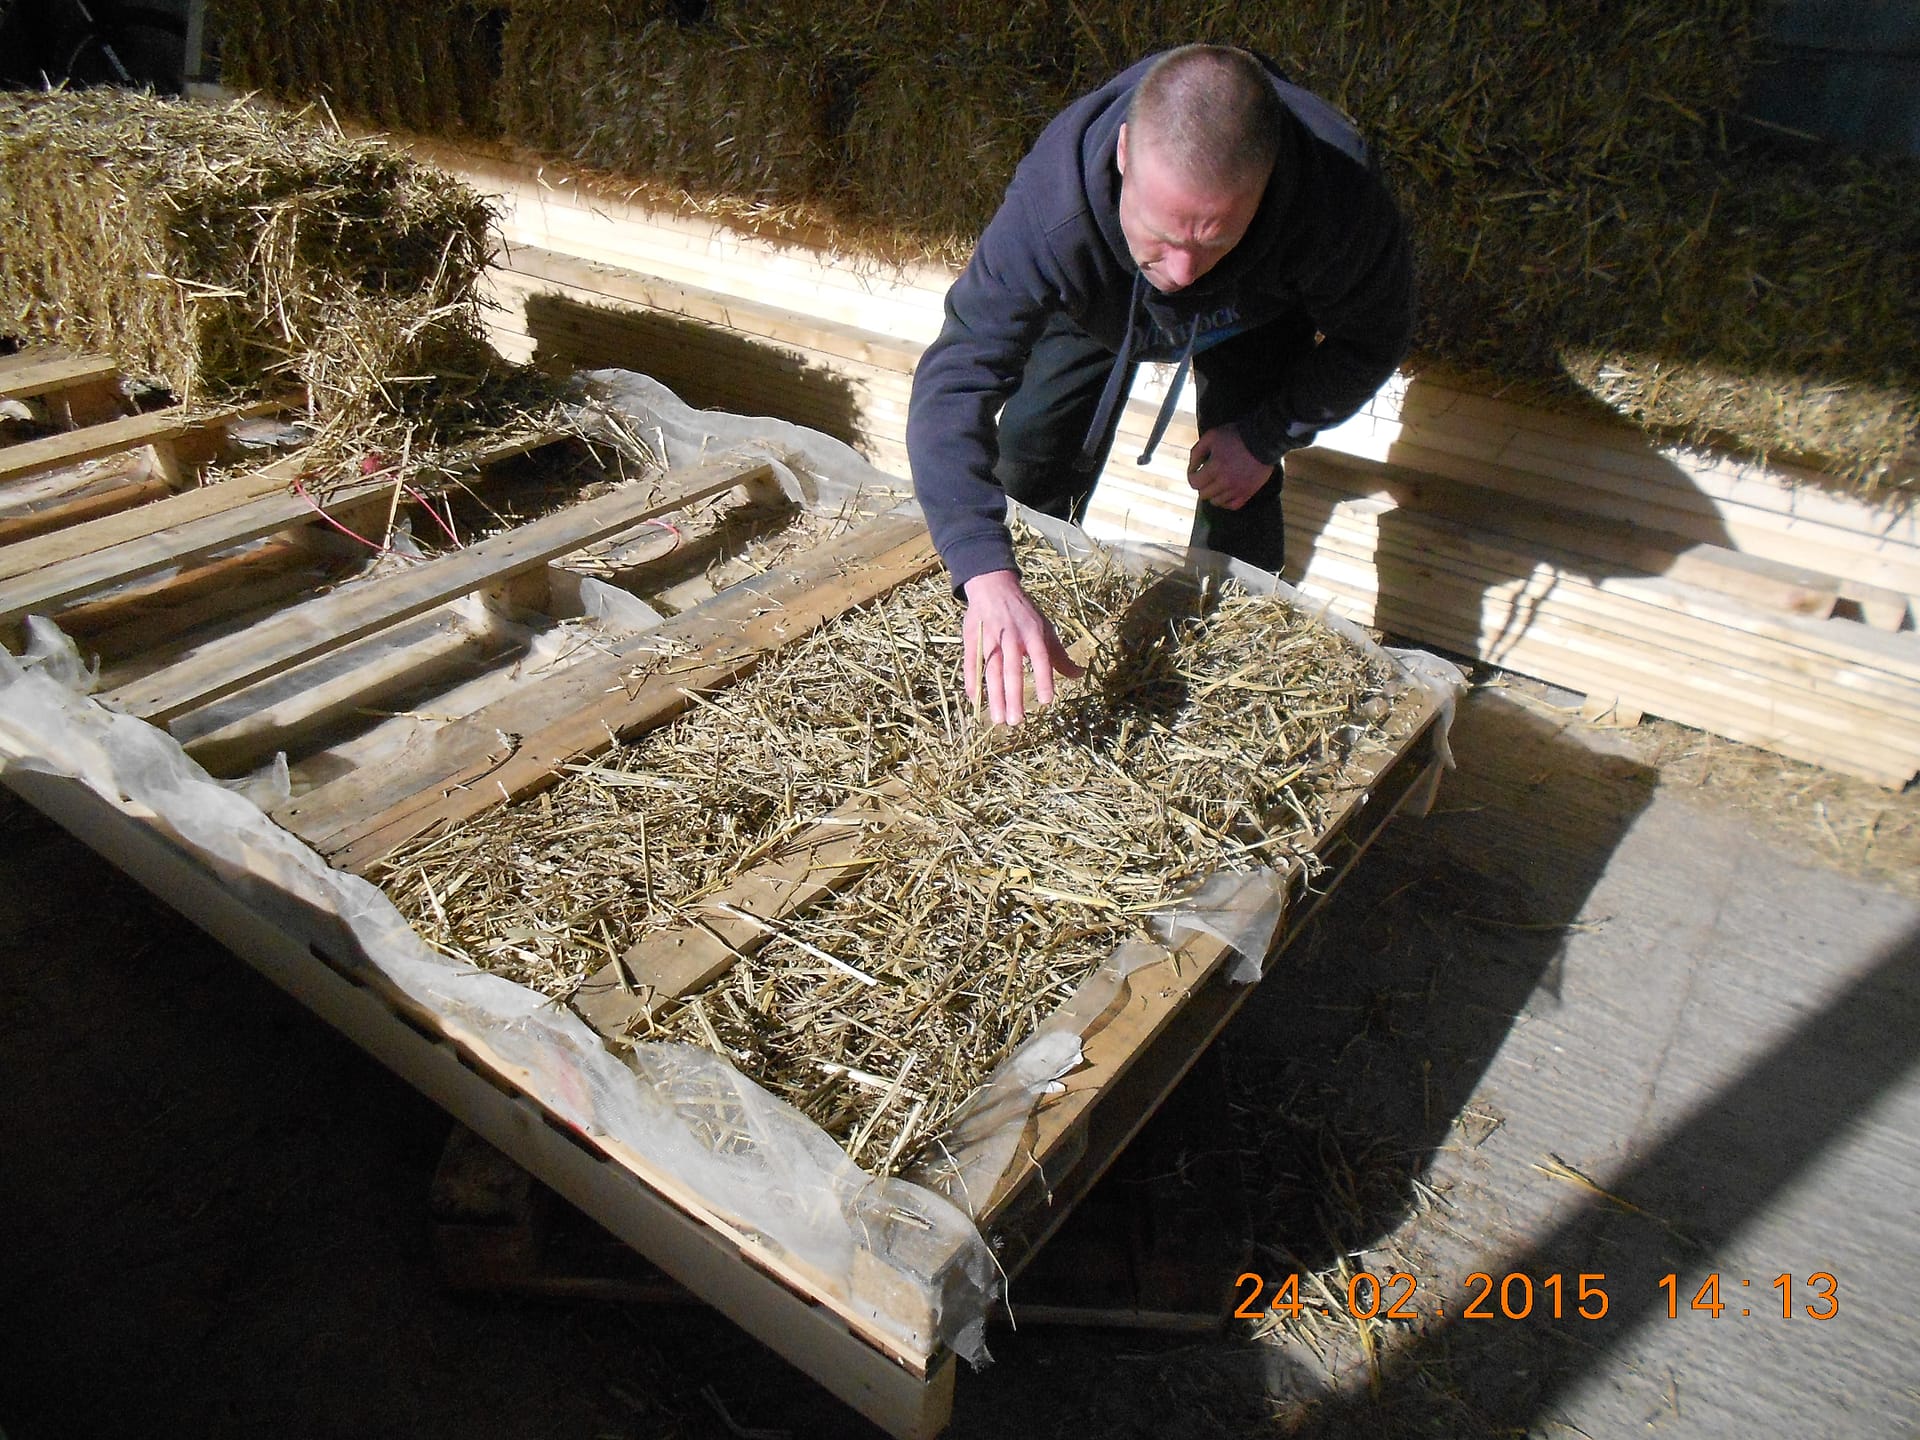
The first thing to go wrong is that the wood chip that we have used as insulation for the base and walls is too heavy. Also we think it will settle and move, and all tend to collect at the bottom over time.
Fortunately Dave Banwell comes to the rescue. He is one of the Trust trustees and a local farmer and we pick up some straw which is fine. In fact because it is in small bales it “flakes” off and goes in really well. If this was a house the whole roof section would have to be a lot deeper to get sufficient insulation values. This means that the roof would have to be built in situ which would involve scaffolding etc which is what we are trying to avoid. This is partly because there seems to be an issue about my sending orphans up scaffolding but they can help me build the roof so long as we do it on the ground.
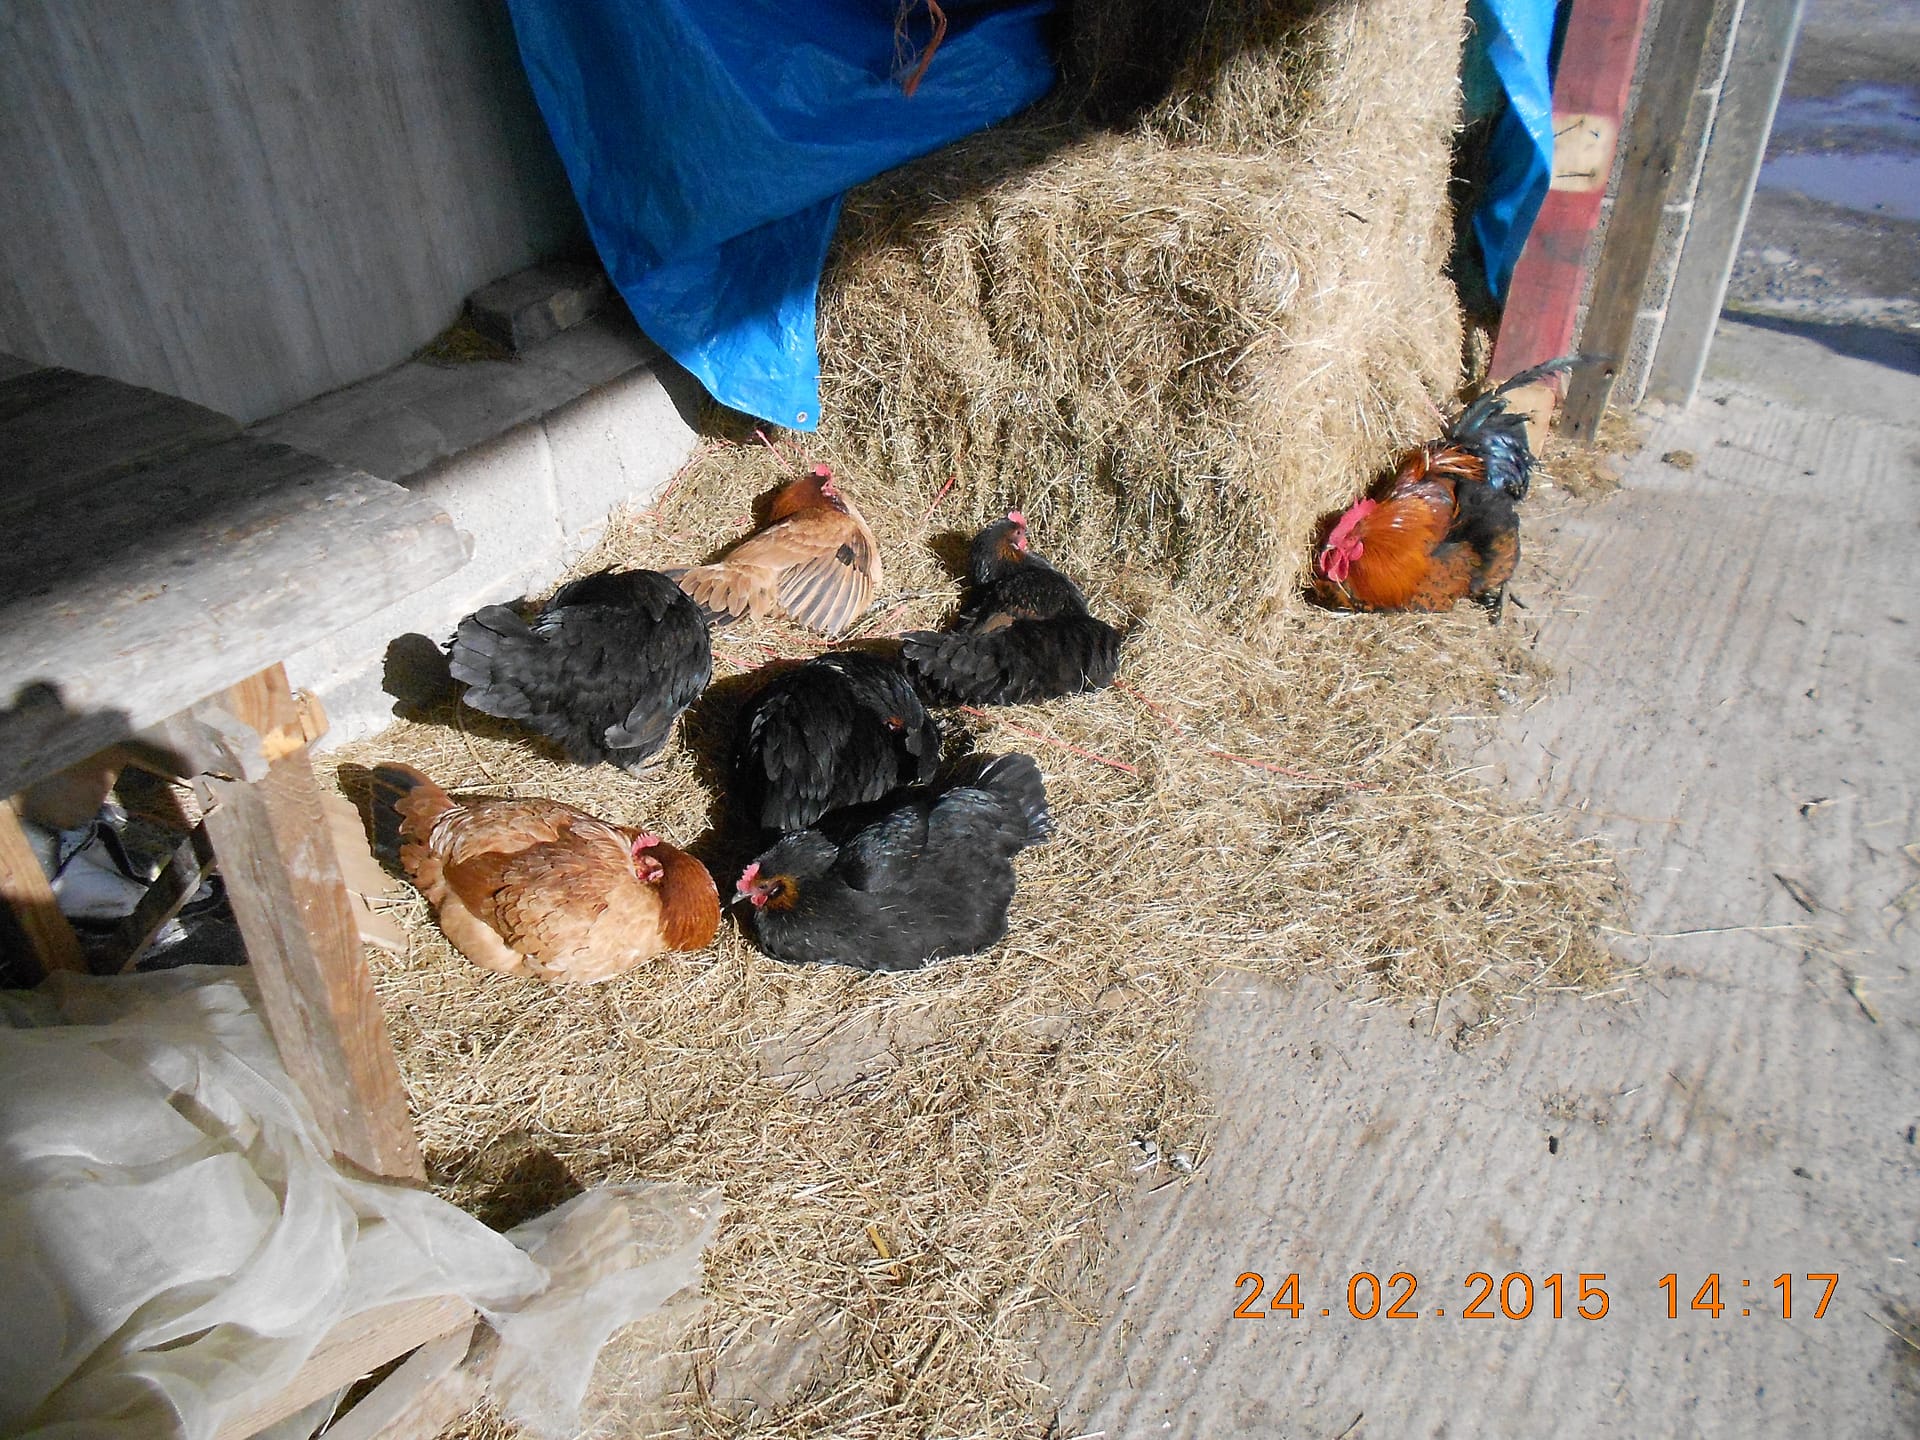
This is one of the warmest spots on the farm so the hens and Henry the cockerel make a regular visit if the sun is out.
The roof pallets are from Somerlap who are a local firm in Mark who make pallets and fence sections and garden sheds and stuff. They are kindly giving us a good deal on them so we said we would officially mention them and say thank you.
The pallets for the roof are lightweight euros which are the same 1200 x 800 dimension as standard euros but about half the weight.
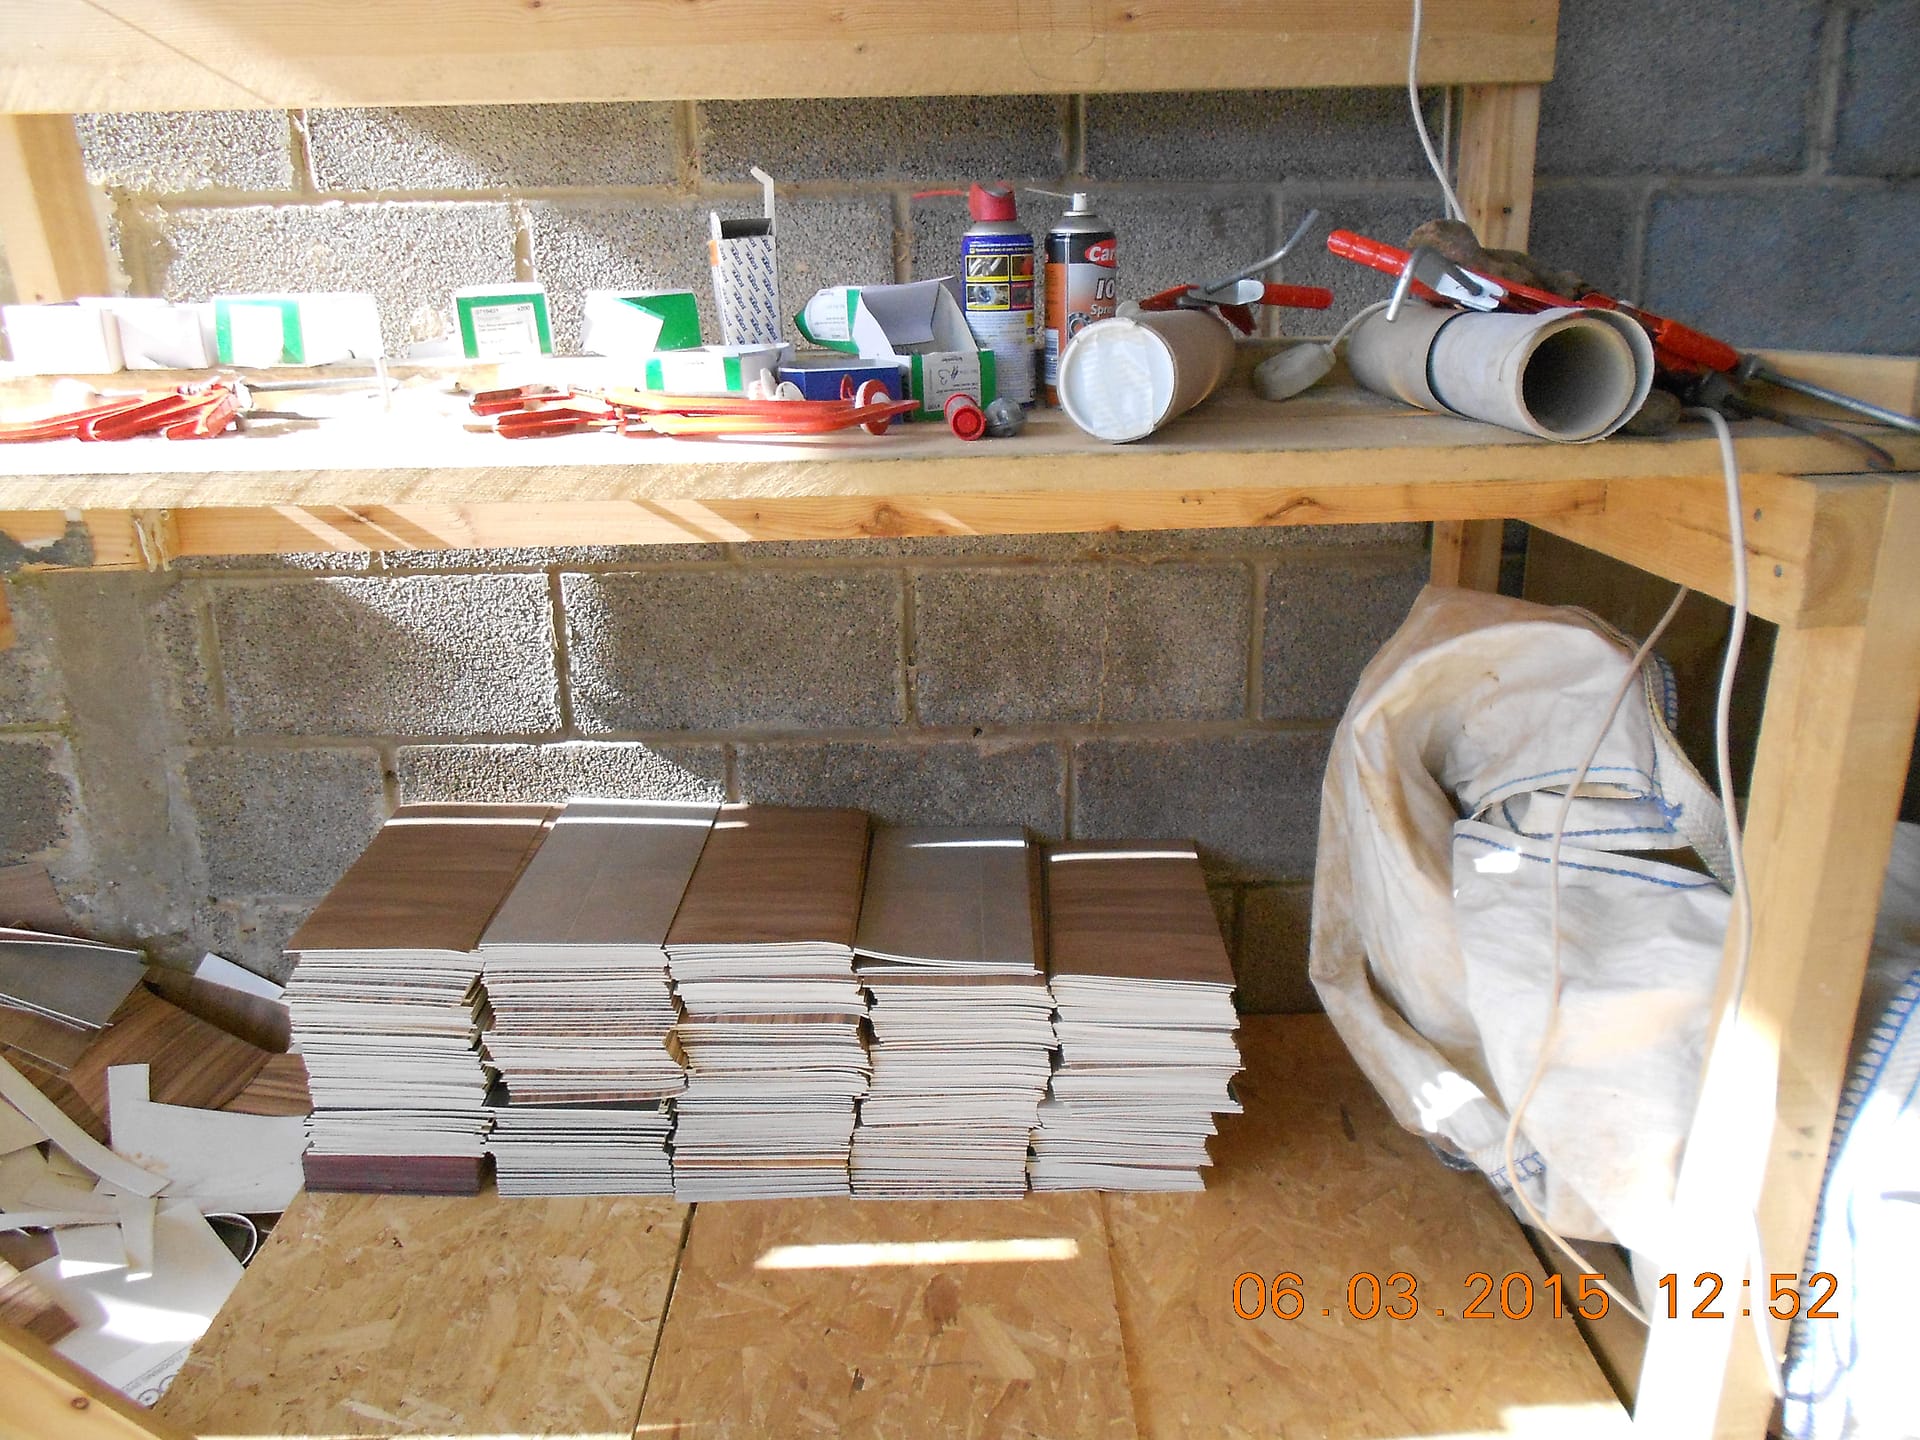
C and H Flooring in Highbridge rang me to say they had some offcuts for us so I went and got them in the truck, which was just as well because they had loads.
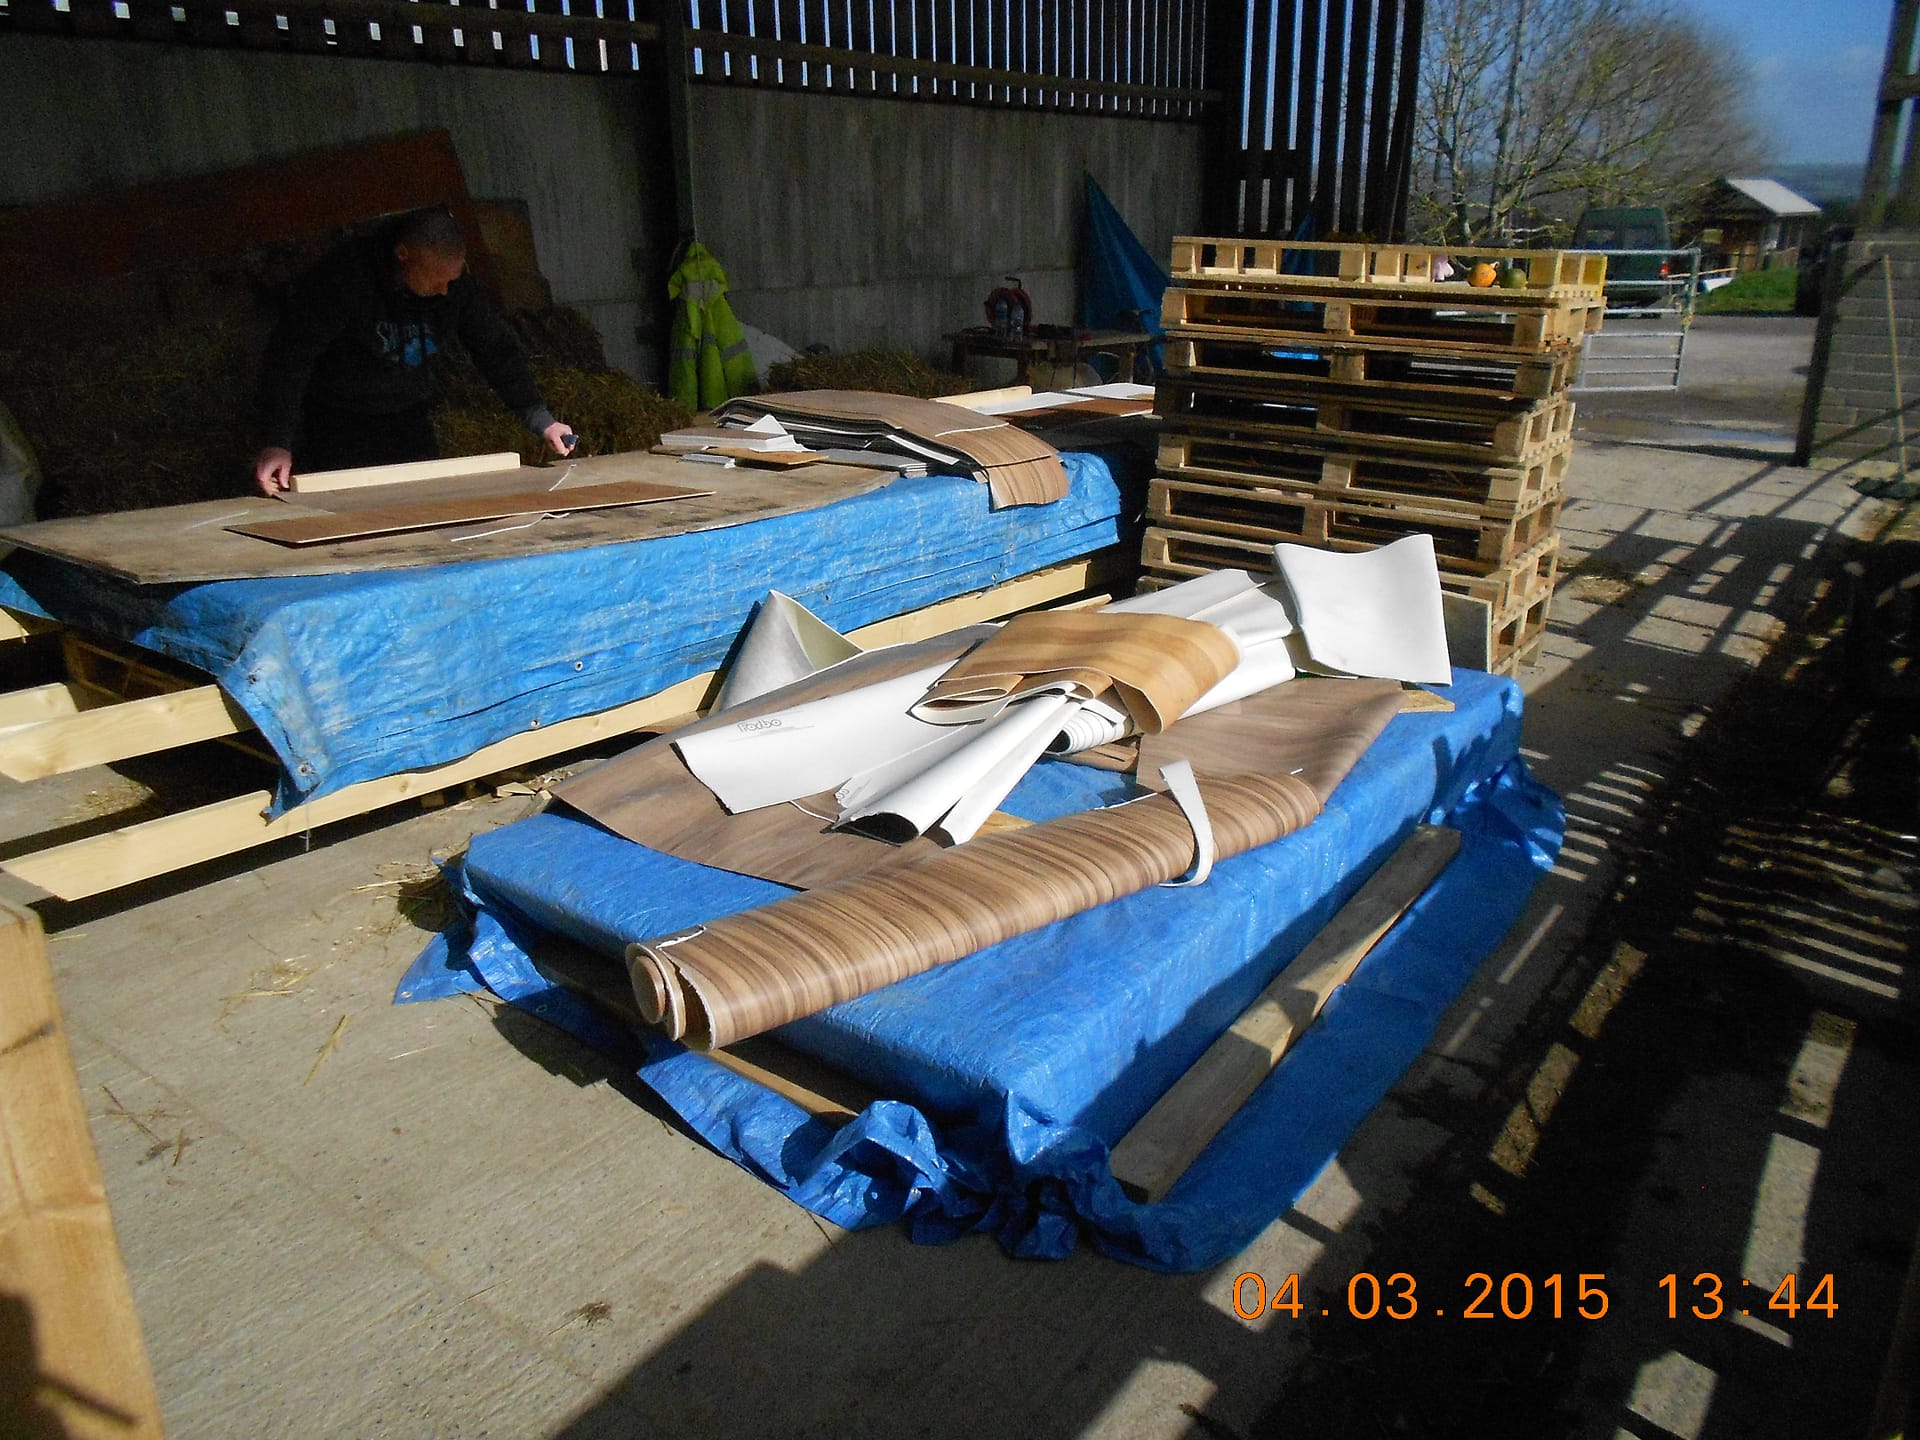
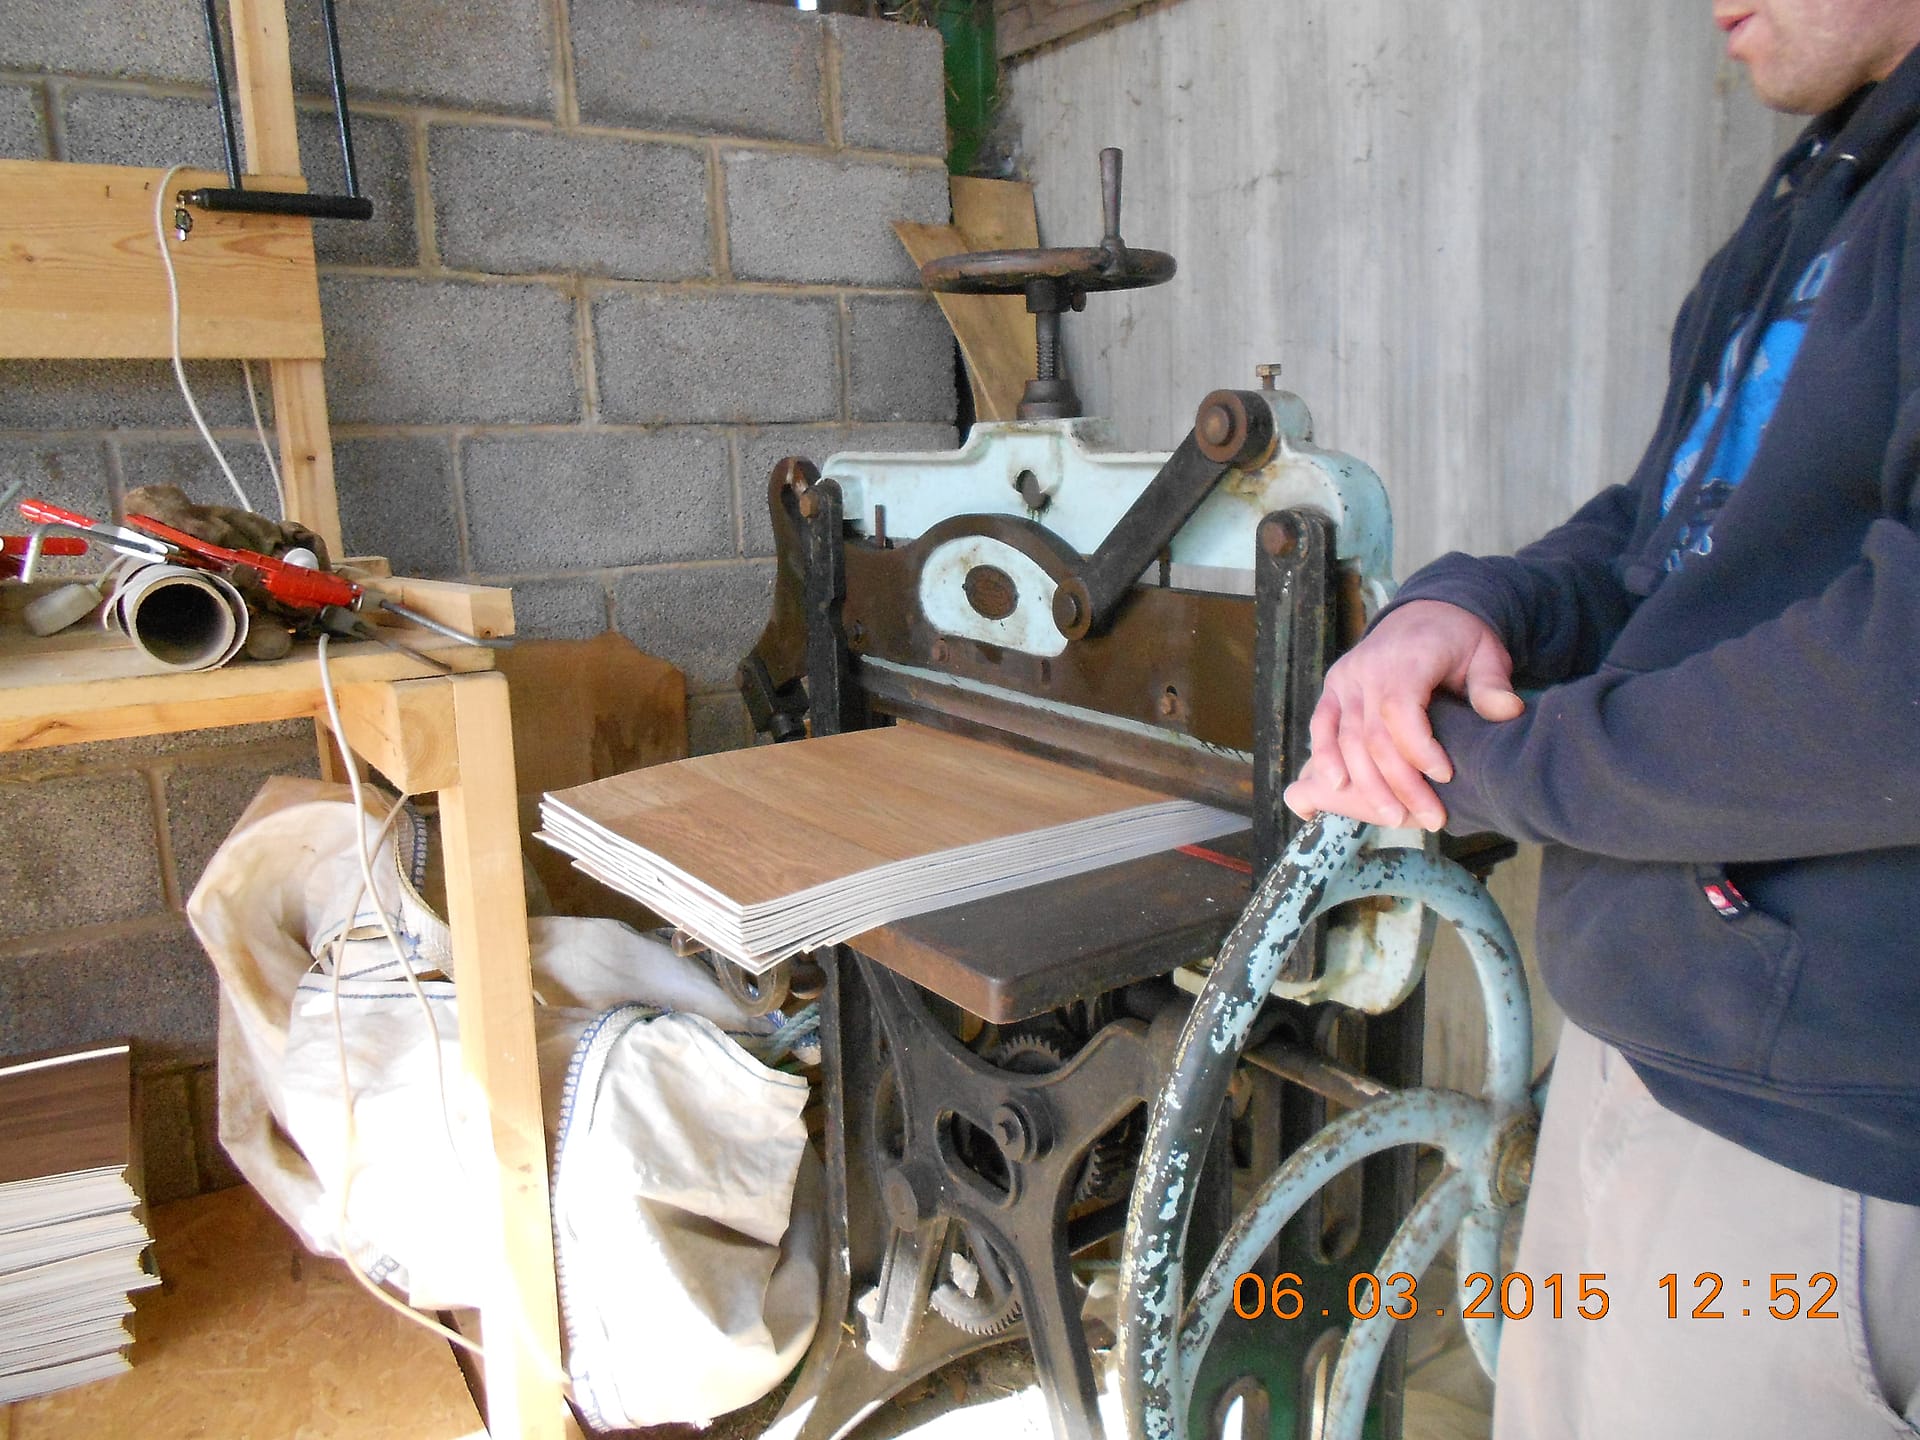
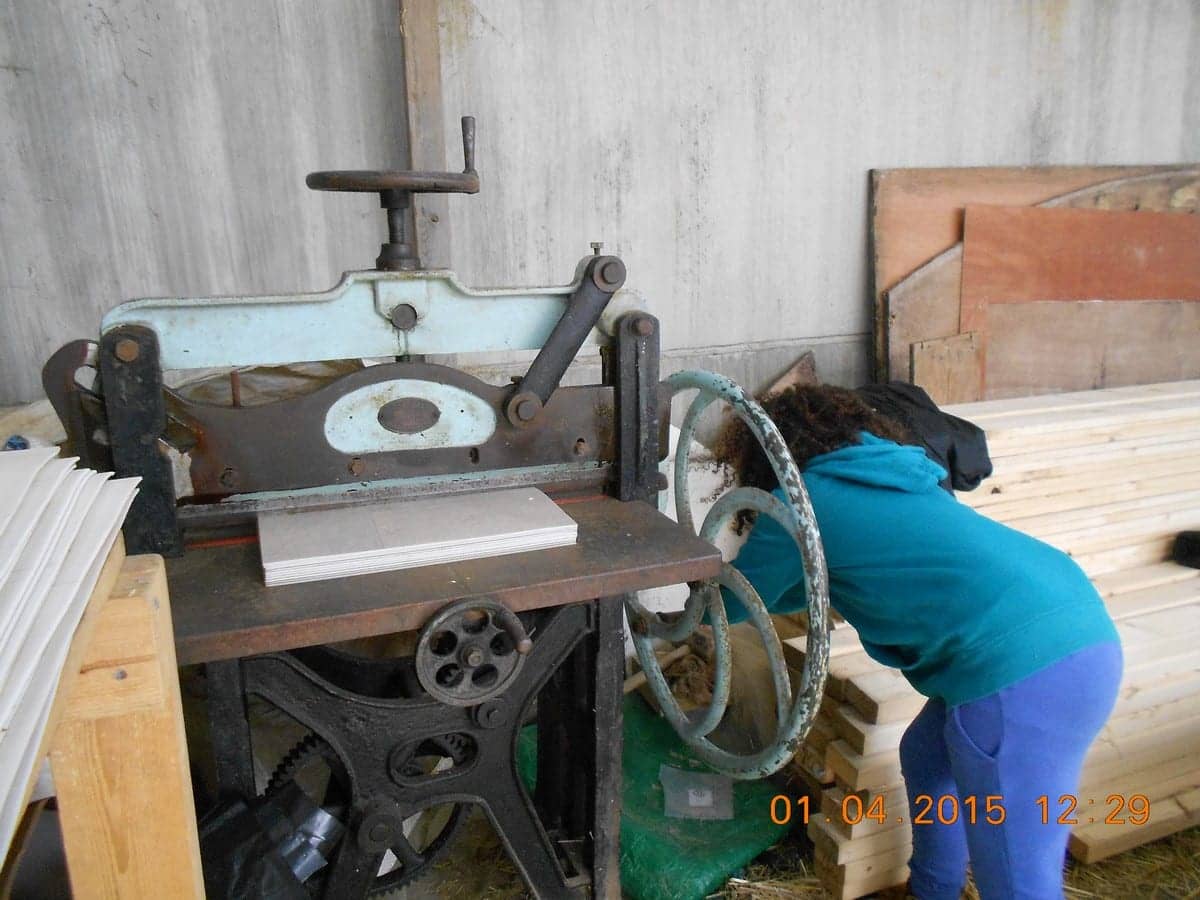
Last year I bought an old printer’s guillotine on eBay. The idea was that it was safer than an electric one, probably cheaper, certainly more reliable, and the chances are that we can get our money back when the project is over. It has turned out to be brilliant. We cut up small bits round a 400 mm x 200 mm template but cut larger bits into 400 mm strips and put them through the guillotine against a 200 mm stop.
It is very important that the blade is sharp, and we can get it sharpened if necessary via Walton Press, our local printers who get a specialist firm in Bristol to do it.

I am not sure how many we can cut at a time but I think this is about fifteen which is easy so I am sure we could do twenty .
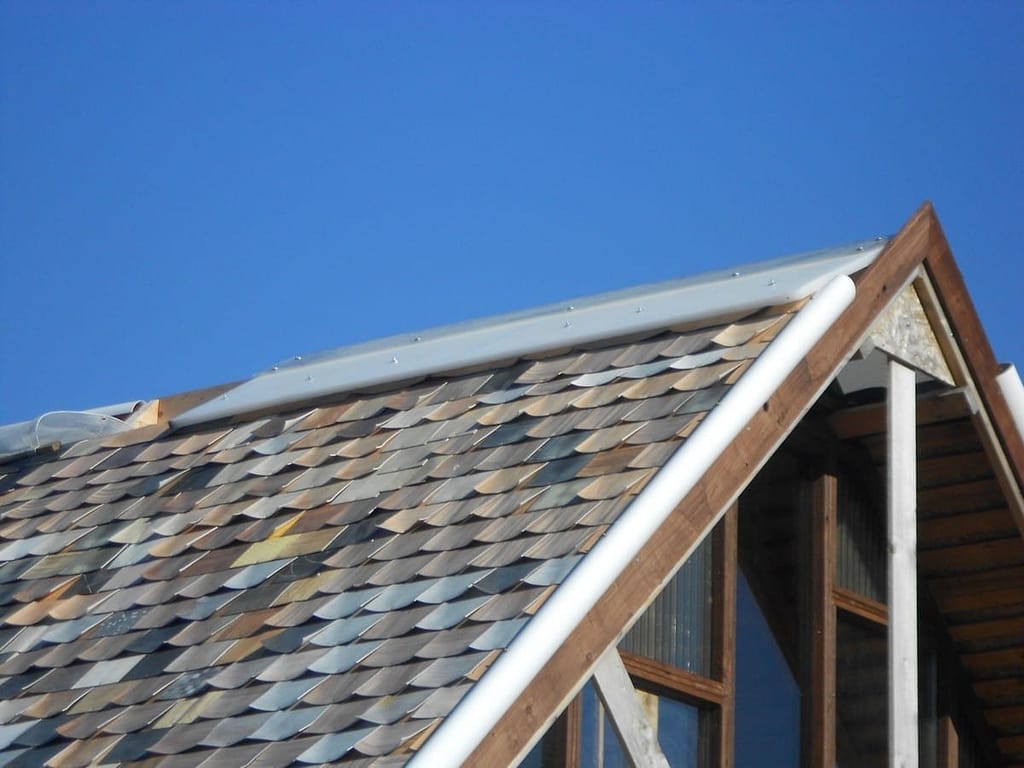
Sunday March 15th
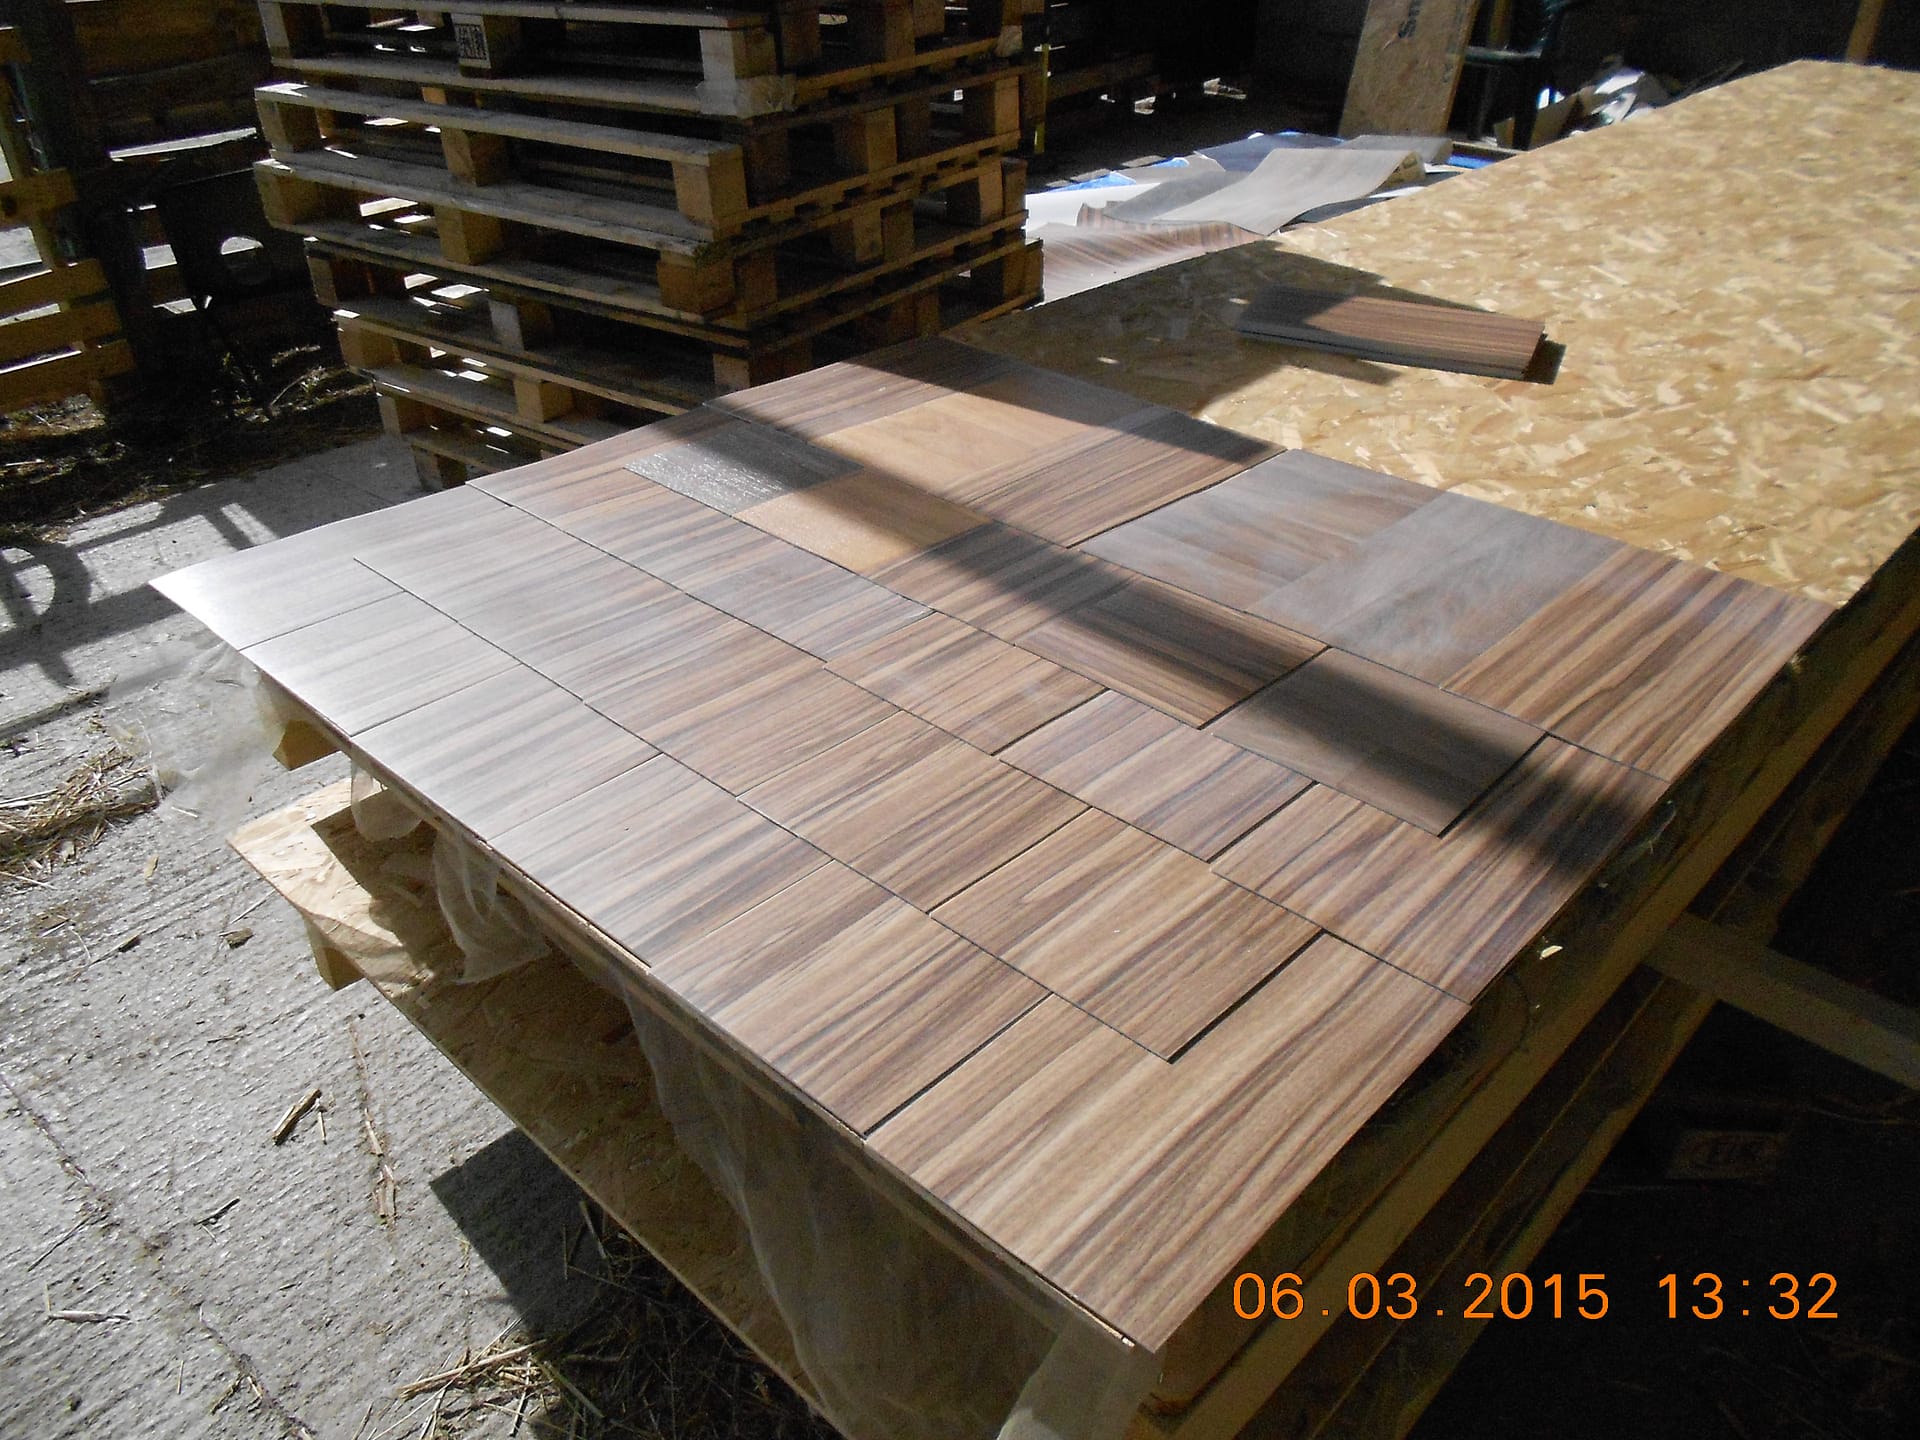
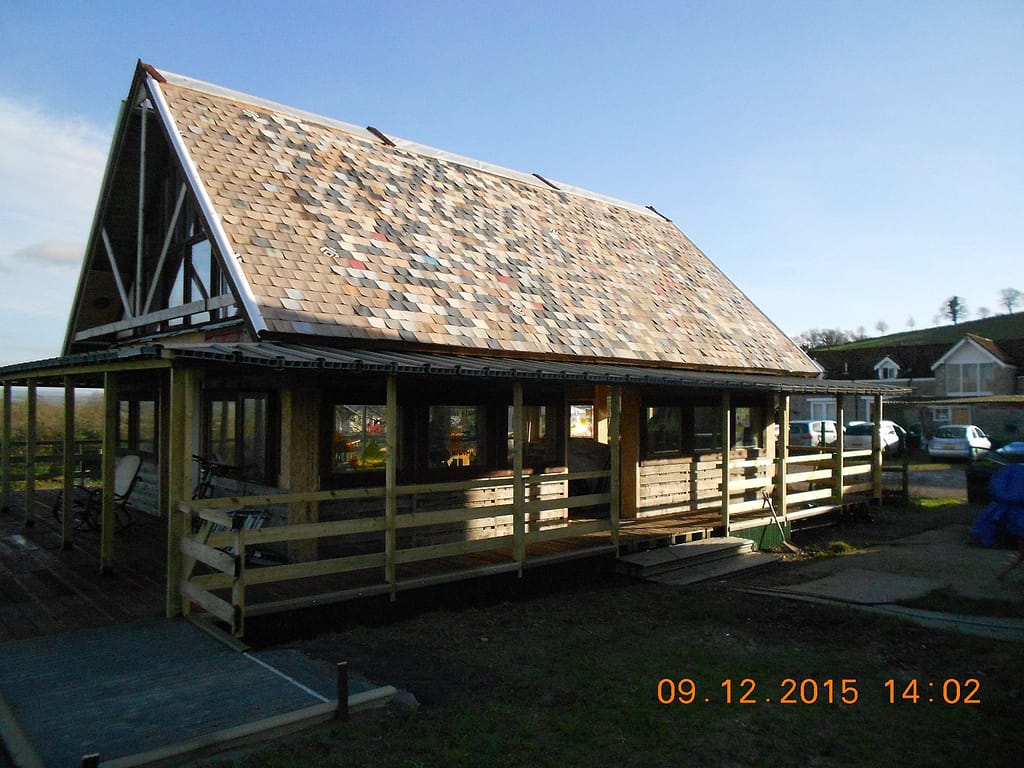
The slate pattern is exactly the same as for a conventional slate roof. However, because we are doing this in sections which will be next to each other if it all works, I will fill in the “joins” after the roof is up.
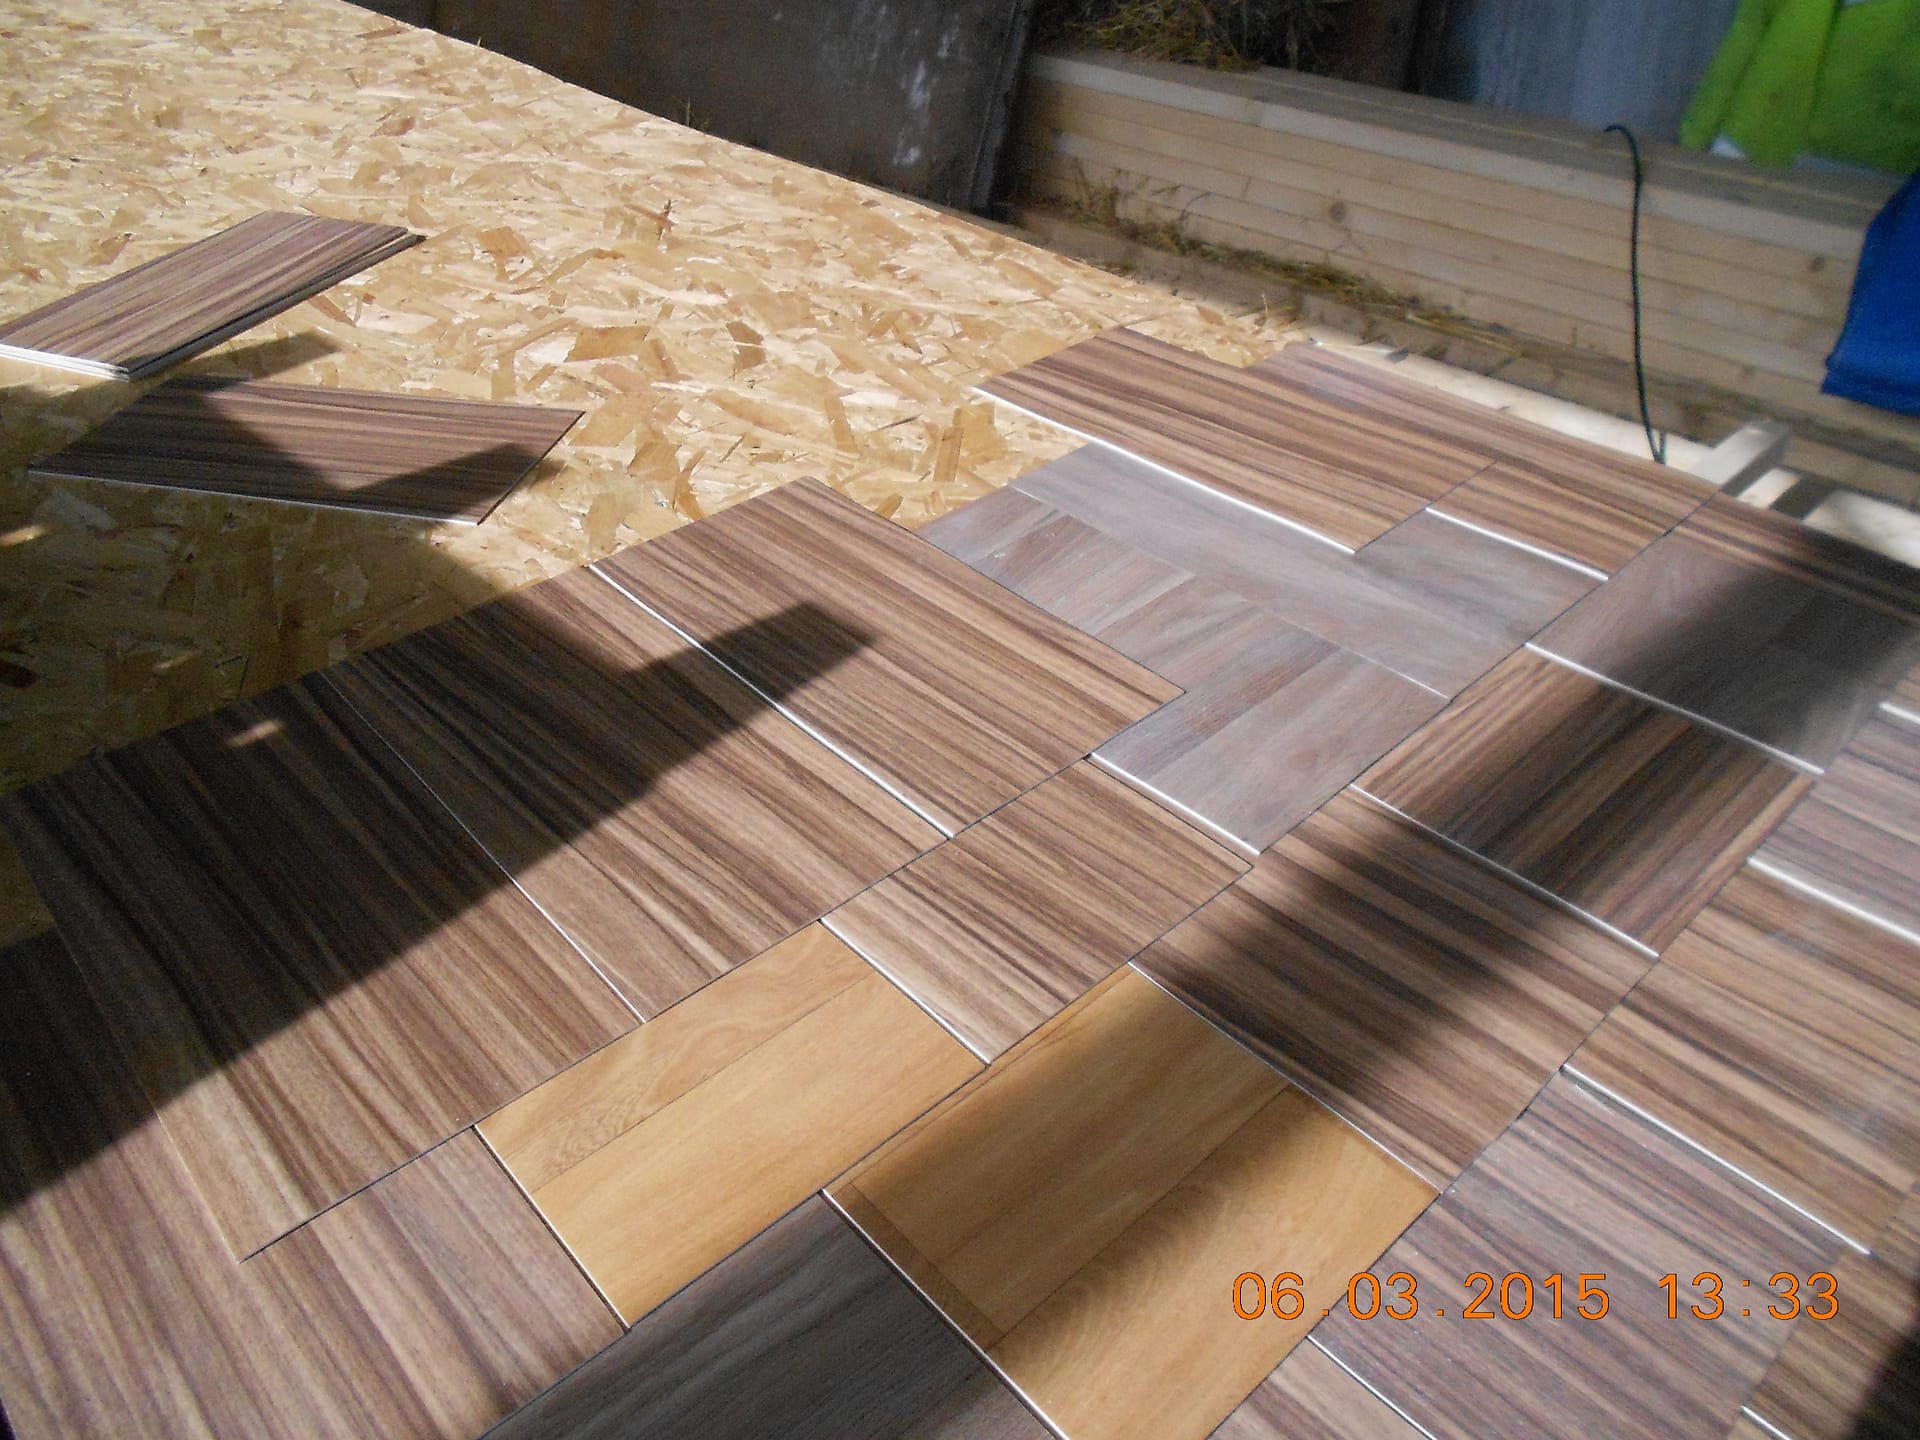
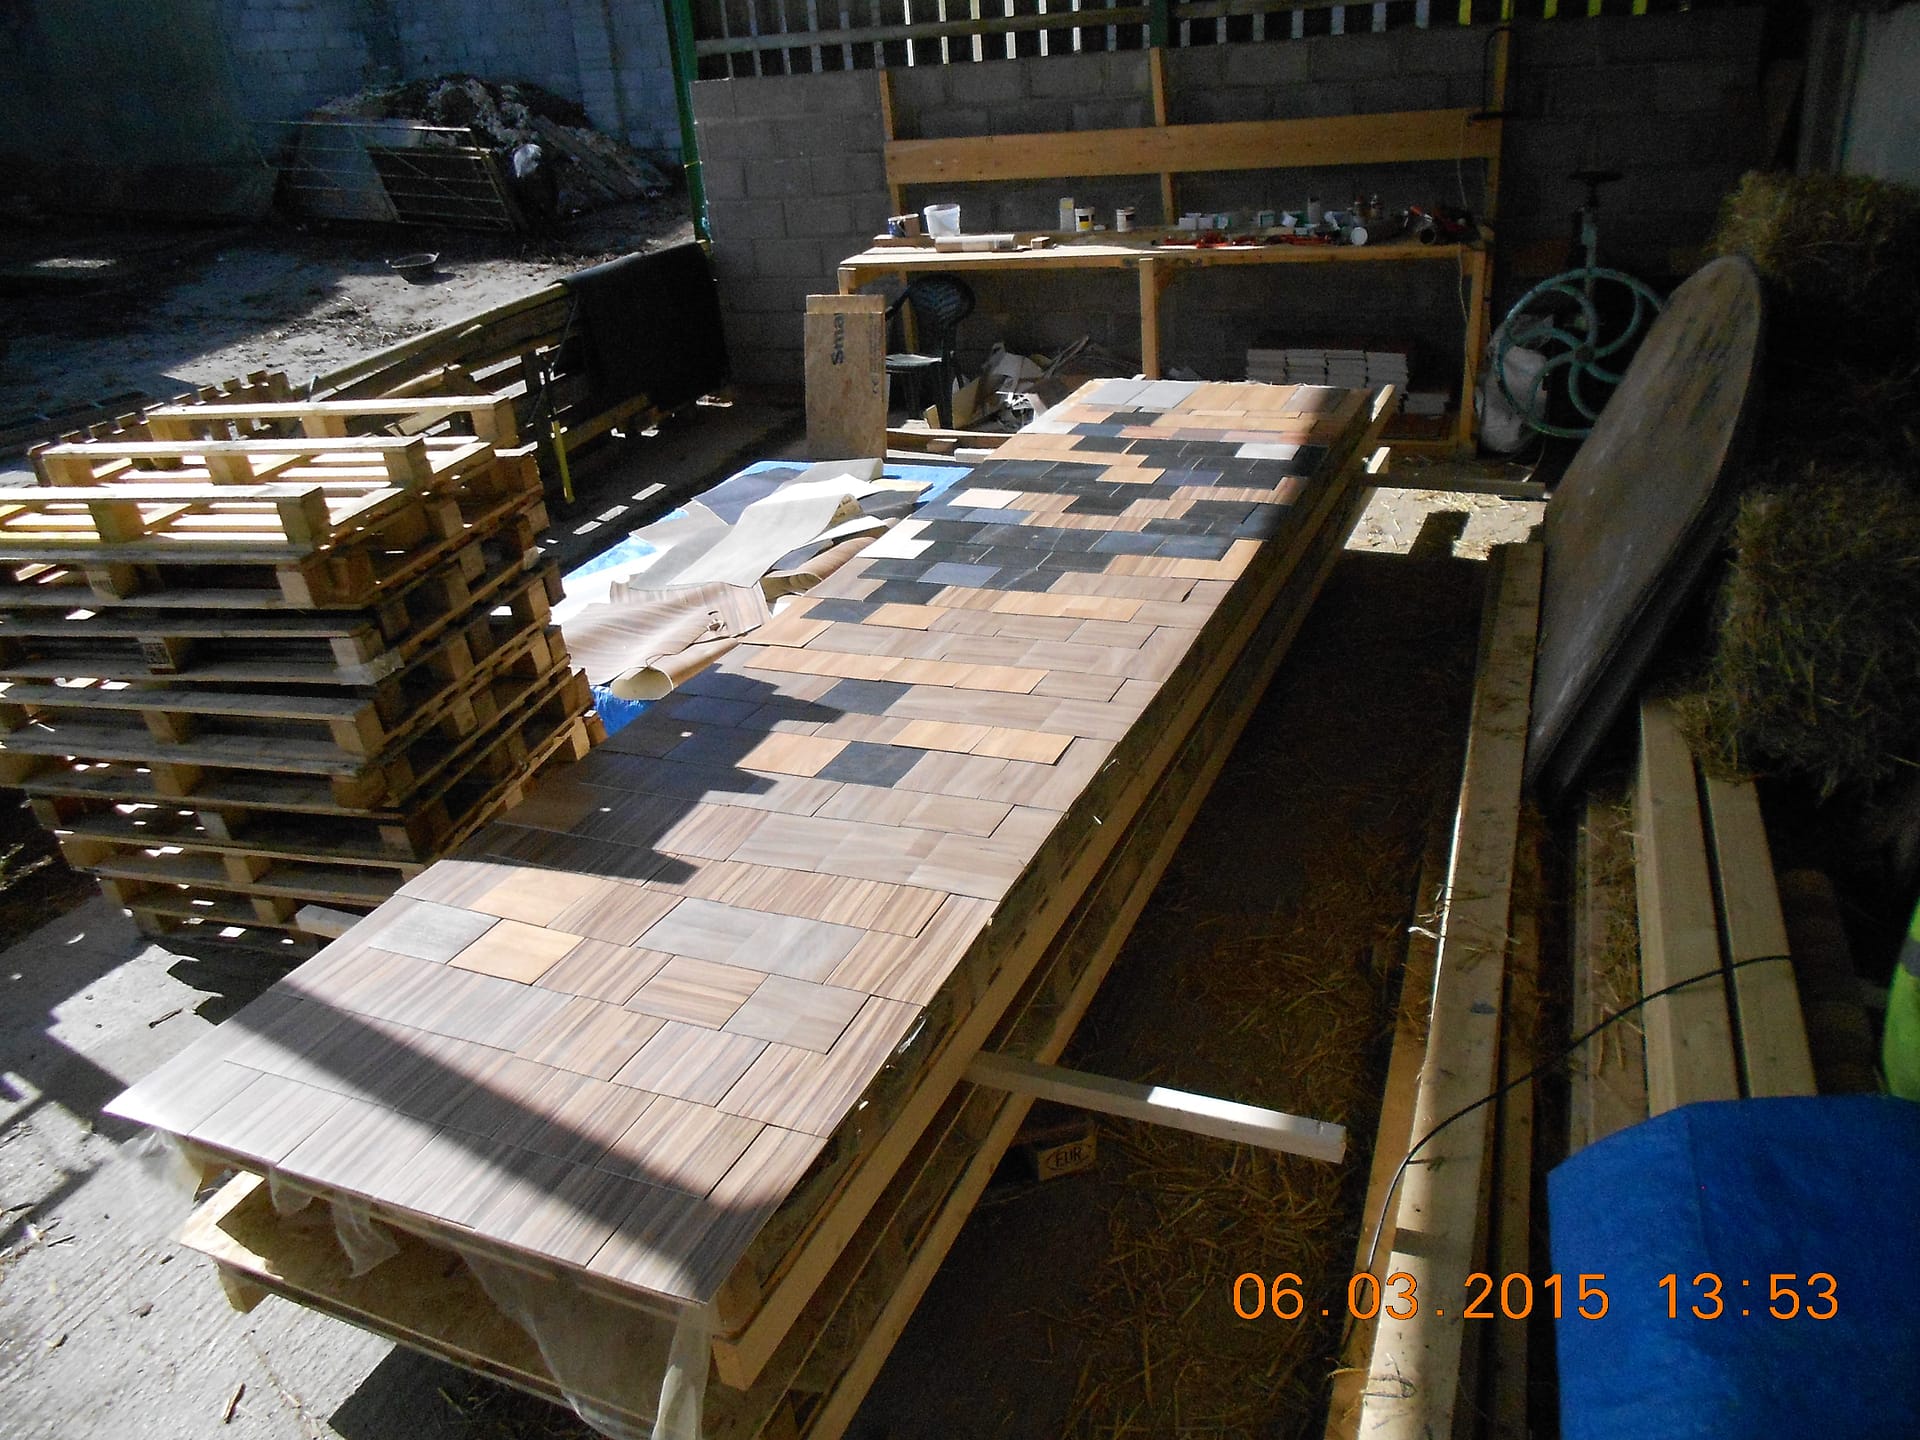
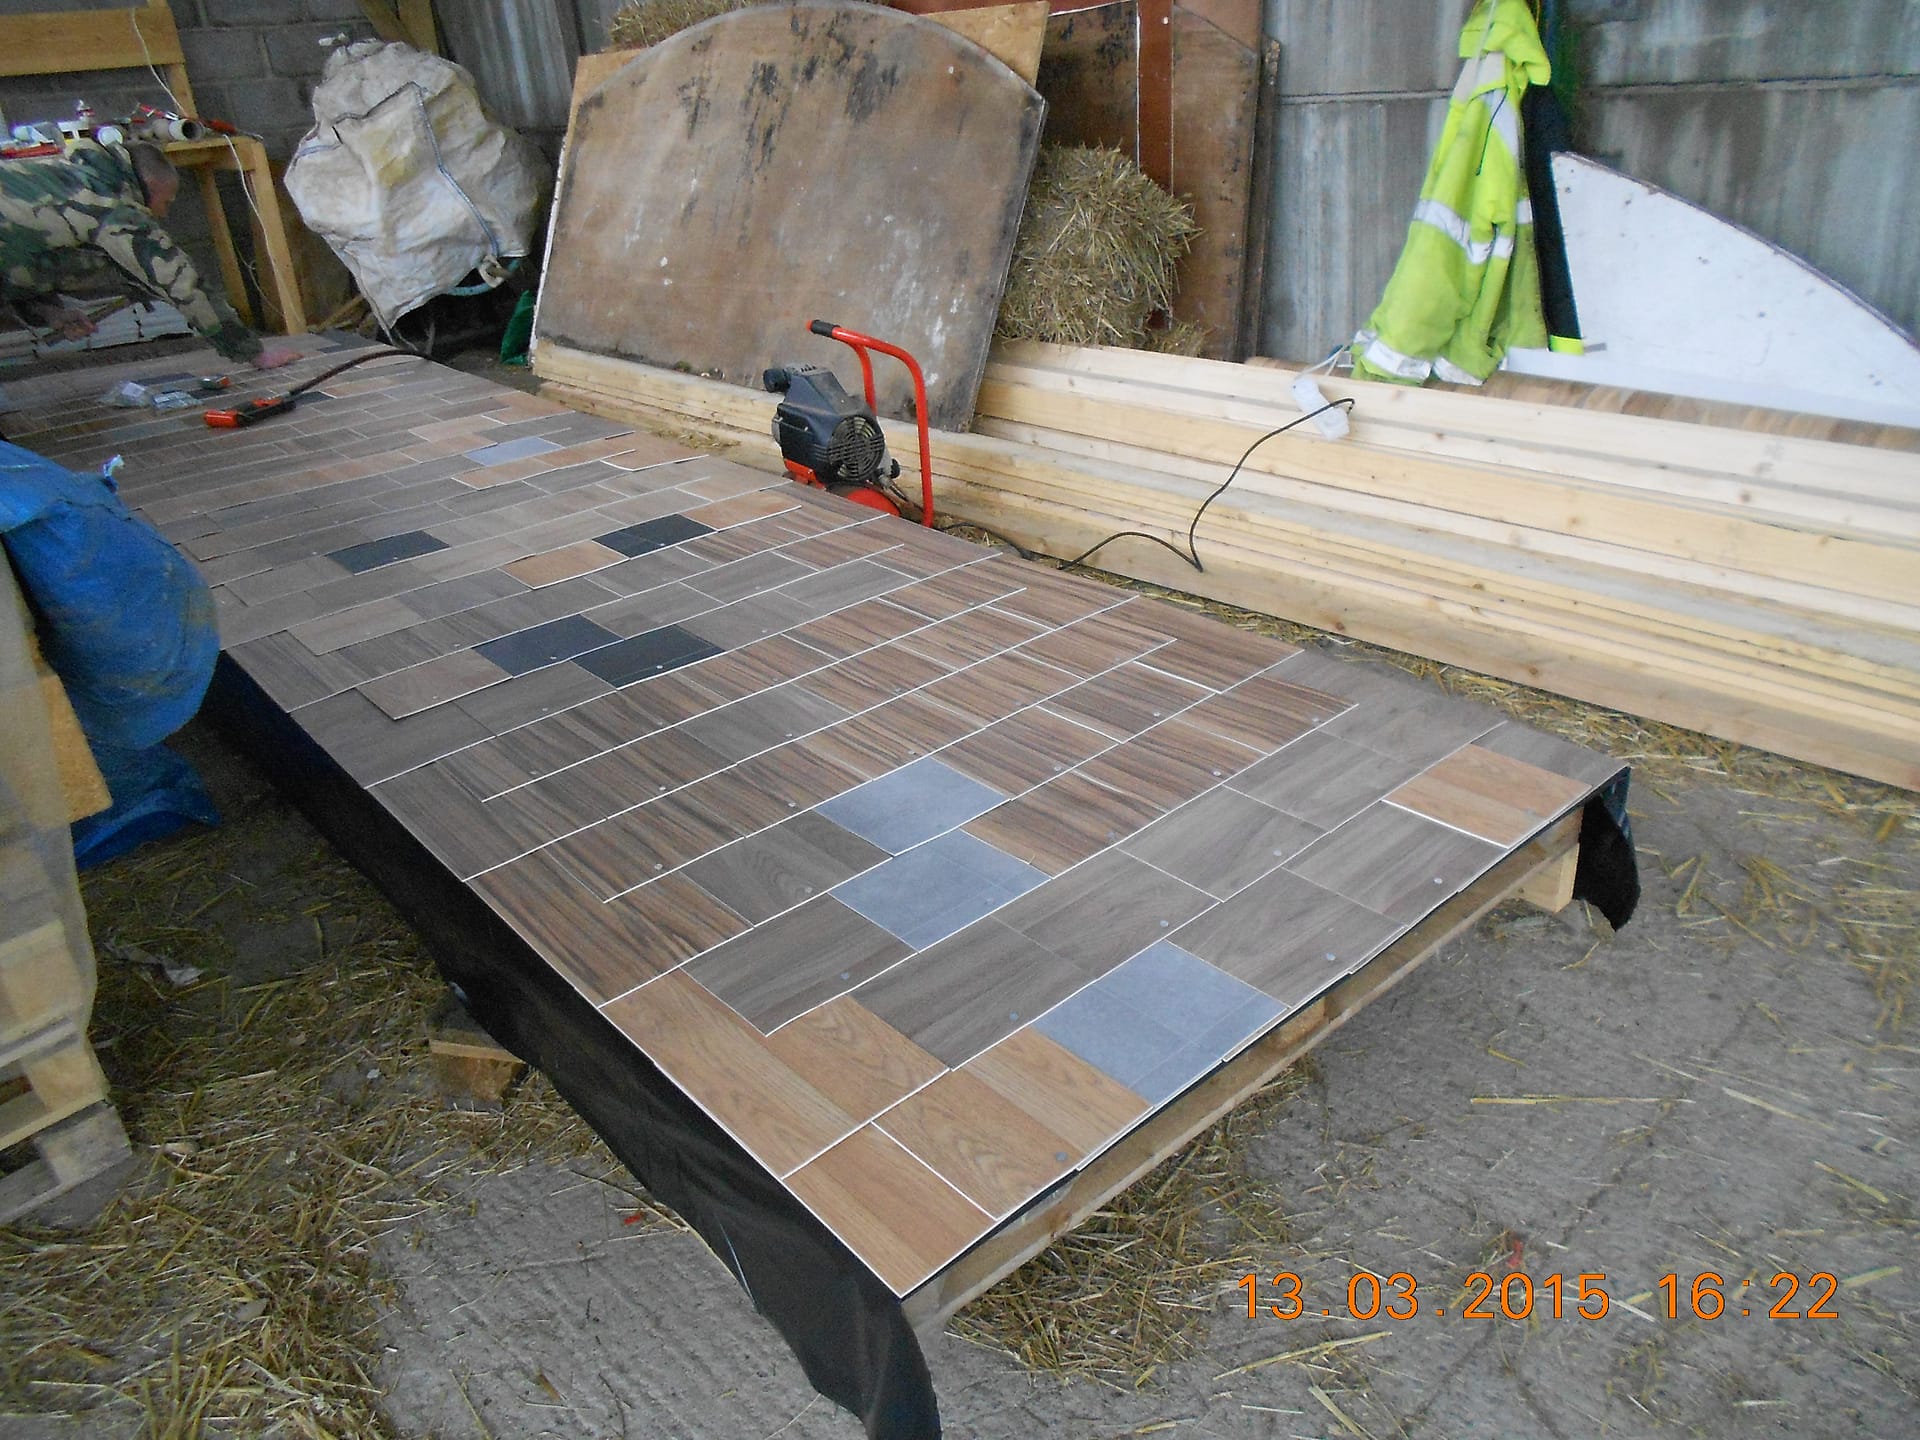
There is one fundamental difference between this and a slate roof. This is a nail smack through the centre of the bottom of each slate which is exactly what you wouldn’t do with slate. The reason is pretty obvious because the vinyl is so floppy. But because the vinyl is basically squashy, I am hoping that the big headed nail will almost seal itself and any leaks will be so small as to not matter.
In fact this may be the second area where it could all go horribly wrong. I was going to glue them down so I went to Mike Bancroft at Bancroft Carpets in Glastonbury to talk about it. He has always supported my projects and given us stuff if he had it. He reckons the whole thing won’t work at all. Firstly, he reckons the vinyl backing will absorb moisture so a water based adhesive won’t work. A solvent or epoxy type adhesive will cost around £1000.00 so that is out, and in any case I am now going off glue altogether because of expansion and contraction problems in the hot and cold. In fact Mike says they won’t survive being outside anyway because moisture will get into the backing and they will delaminate. If he is right we are stuffed. Still, I have spent my life doing things people say won’t work so I still reckon it is worth a go. In any case I have got a fallback. If in six months or six years they do all delaminate or blow off or whatever, we can very cheaply re roof it in green garden shed felt. This won’t be free or recycled, or nearly as much fun but it will work.
Once we had abandoned glue, we got the problem of holding them down in the wind. So this is why there is a nail through the front of each slate.
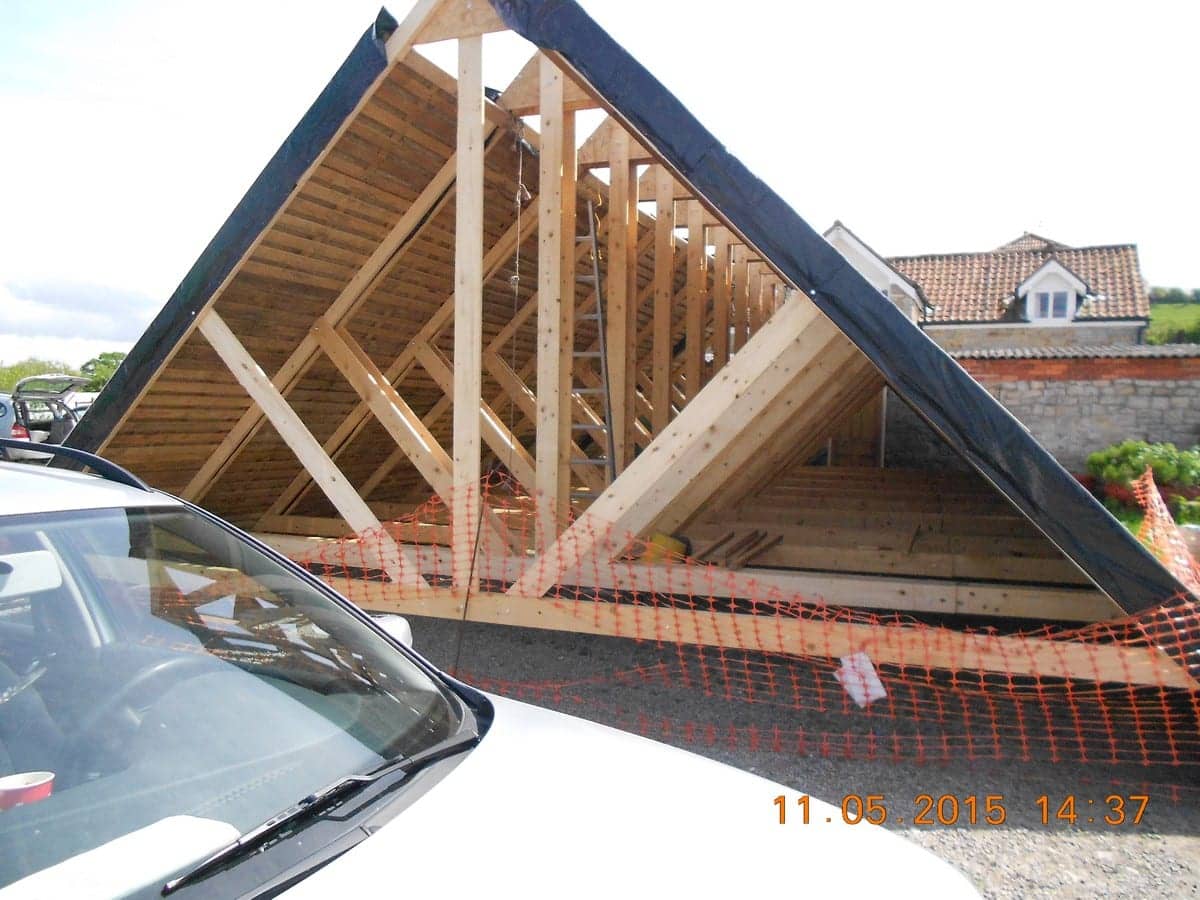
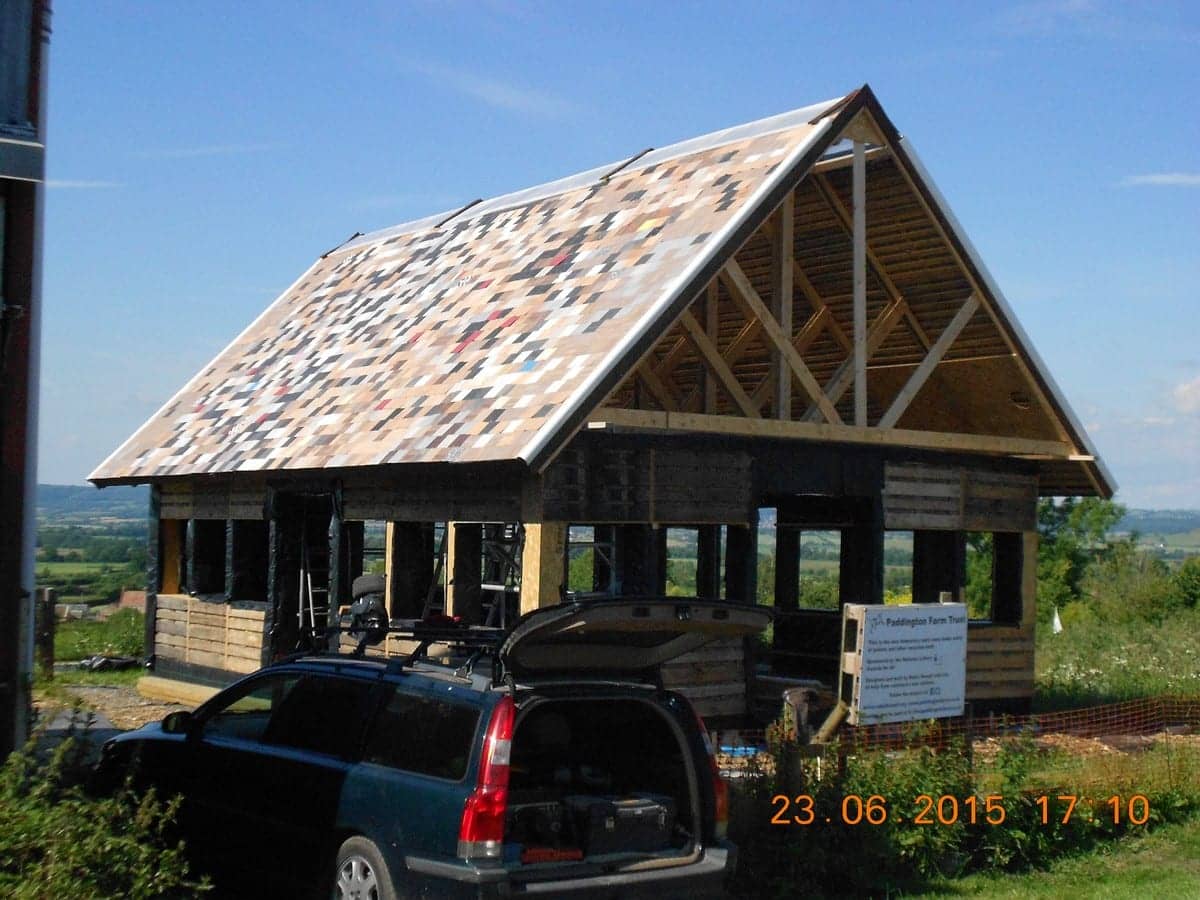
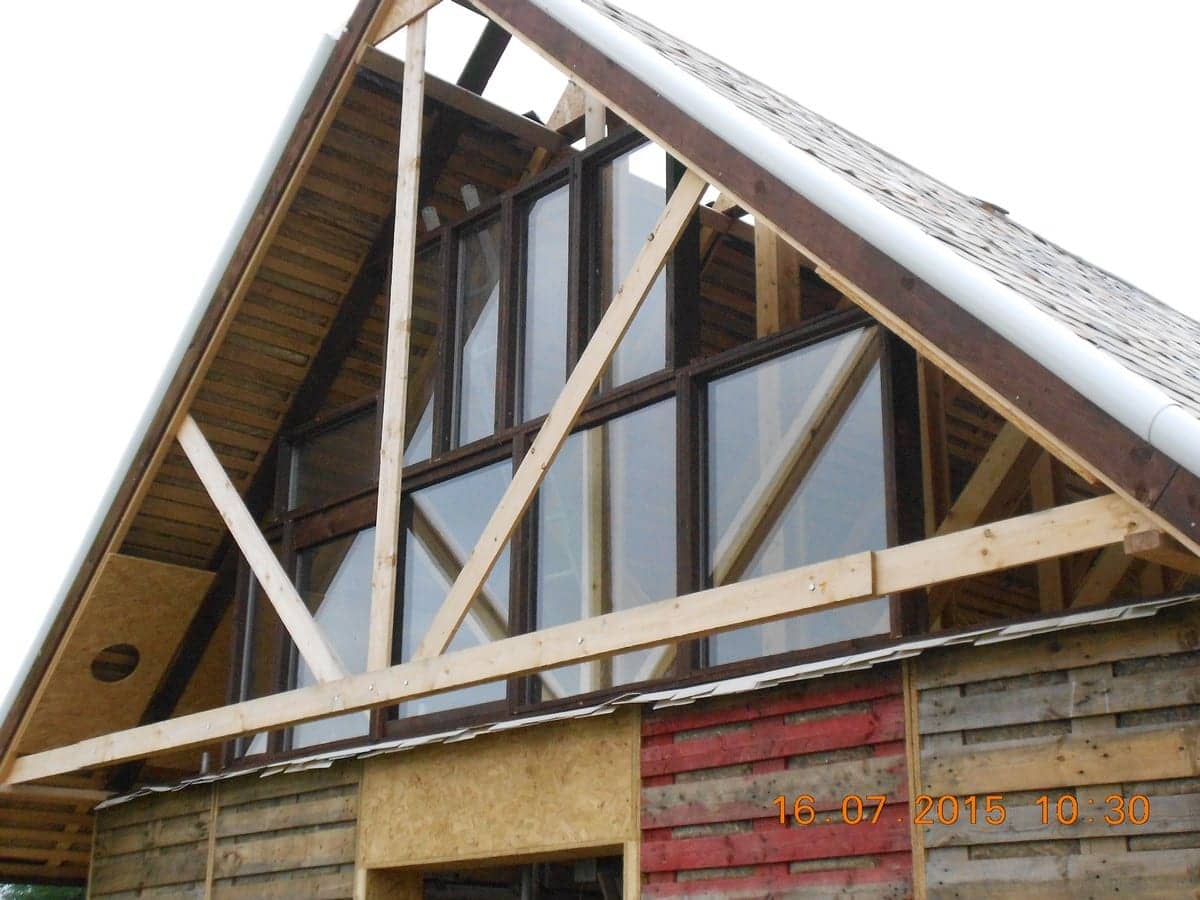
By the end of this coming week I am hoping we can complete an “A” frame section so you can really see for the first time how the roof is supposed to work.
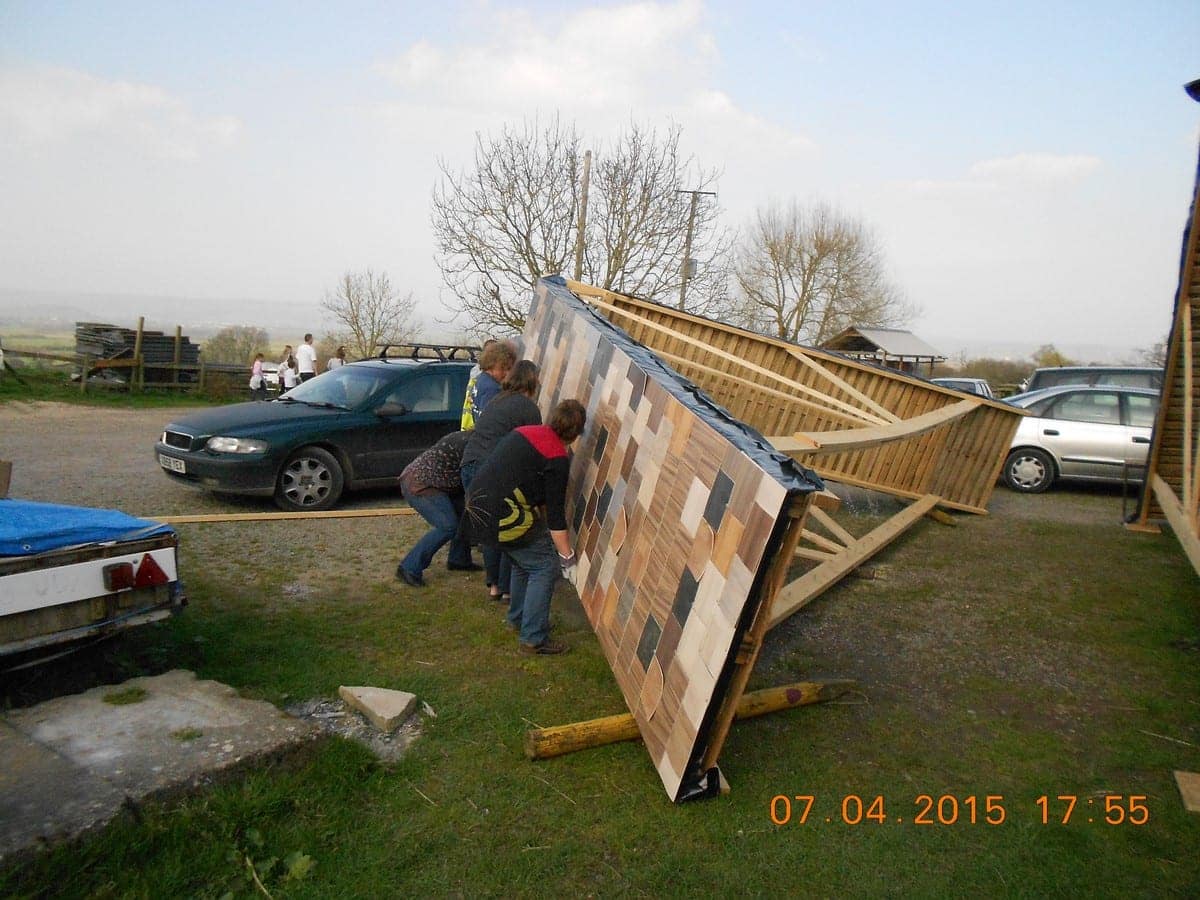
Sunday March 29th 2015
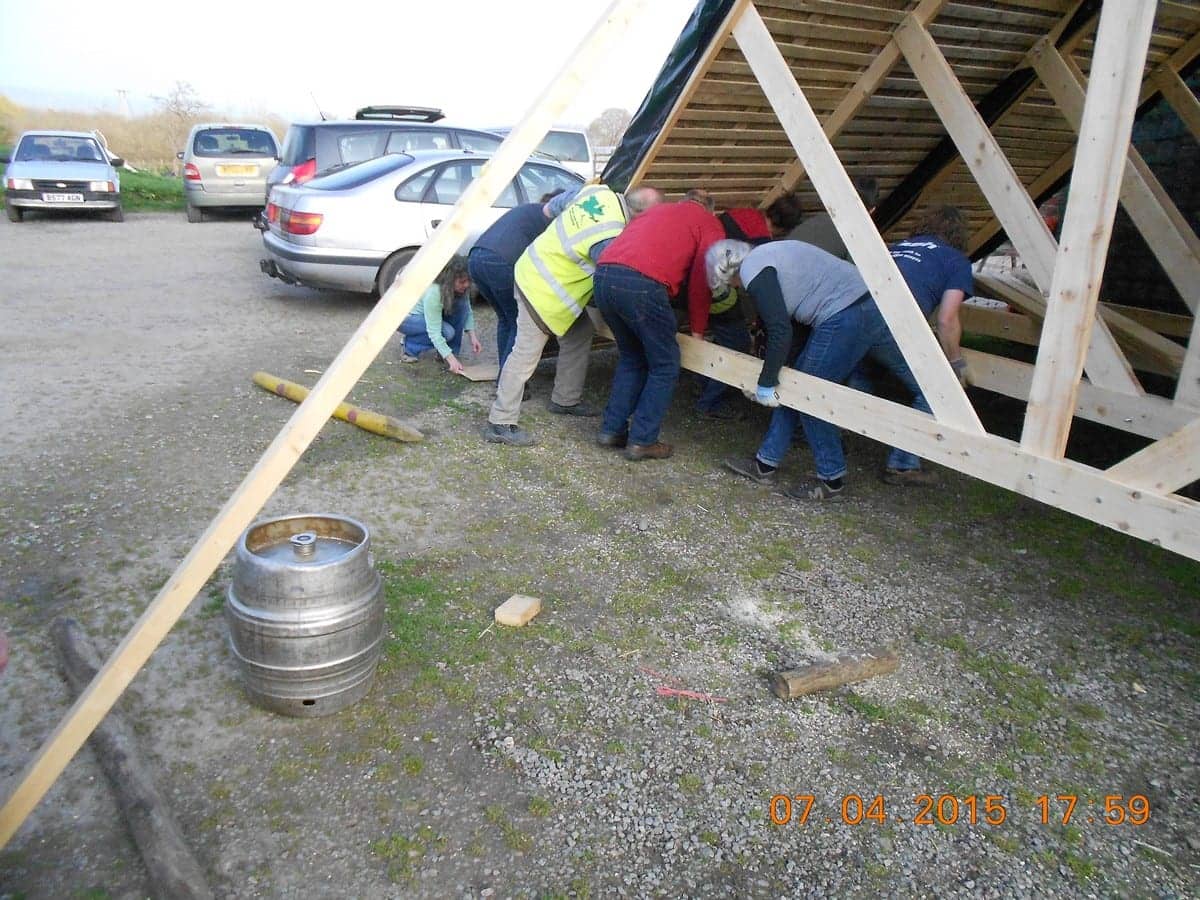
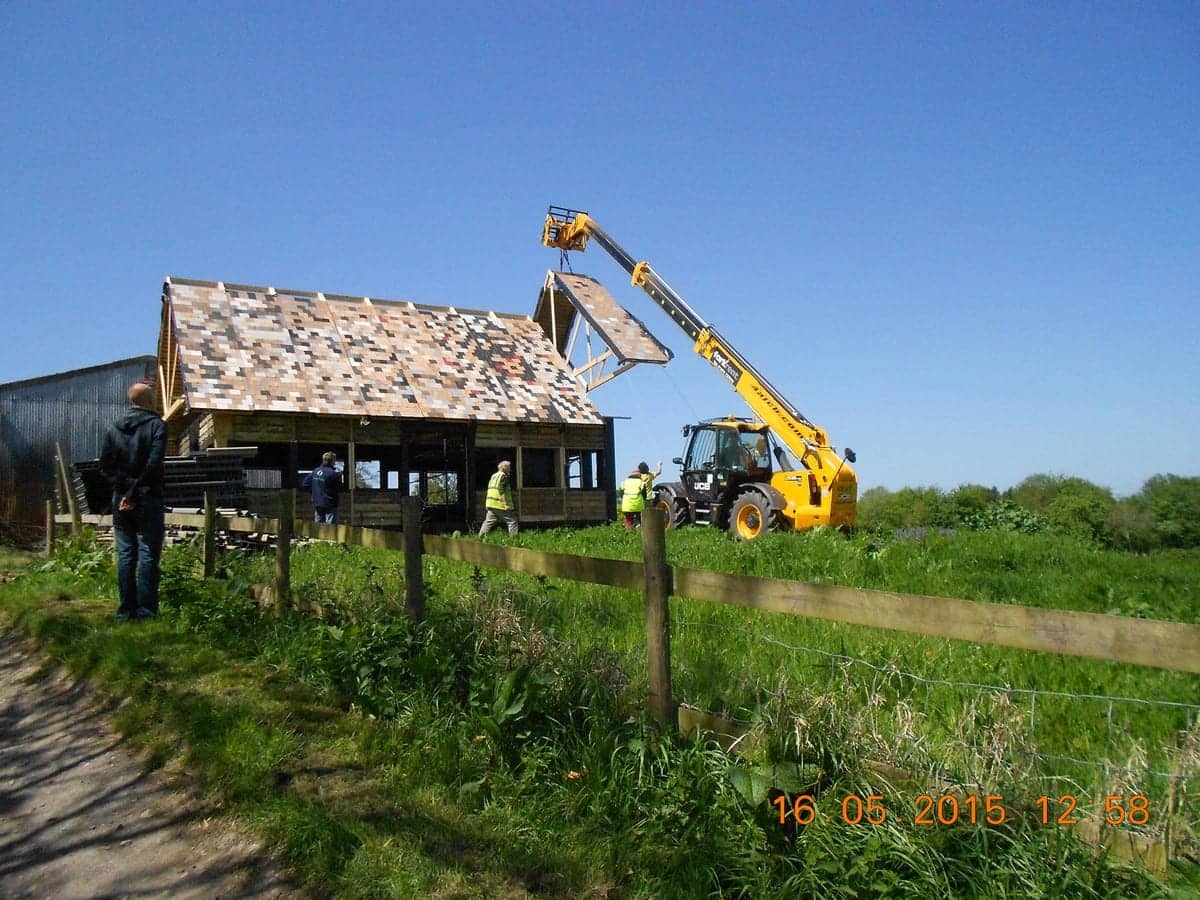
Originally I had thought we could build each “A” frame section under cover and then carry it out and set it up in one go. That plan didn’t last very long. This was partly because they were going to be too heavy, and partly because I realised that once built they were going to be very difficult to get out of the barn at all! It turned out there was another good reason as well. I had always planned to get the “A” frames mechanically lifted on to the building all in one go rather like the Argos office roof at the Red Brick Project. There, Snows timber had kindly volunteered to do it and it worked really well. But these are a lot heavier and the only people I know who could do it easily is Eagle Plant. However I also knew that they were going to cost about £80.00 an hour and were going to charge two hours for travel. This meant we were going to be lucky to do it for less than about £500.00.
Rog has capitulated over his idea of doing it with infinitely long levers and Egyptian slaves partly because he hasn’t been able to find any of either. However, a chap called Ben was building a yurt in one of the other barns and suggested I contact Robert Kearle, who might be able to help. He and I emailed each other and he kindly offered to have a look as soon as we could get one frame finished. The net result is that he and his team are keen to help and will do it for us for free which is fantastic. But it turns out that he is the head of the whole site crew for Glastonbury Festival, so can only help if we are ready for the big lift by half way through May because after that they will be totally tied up with Pilton. So, we have now got about six weeks to make nine roof sections ready to go!
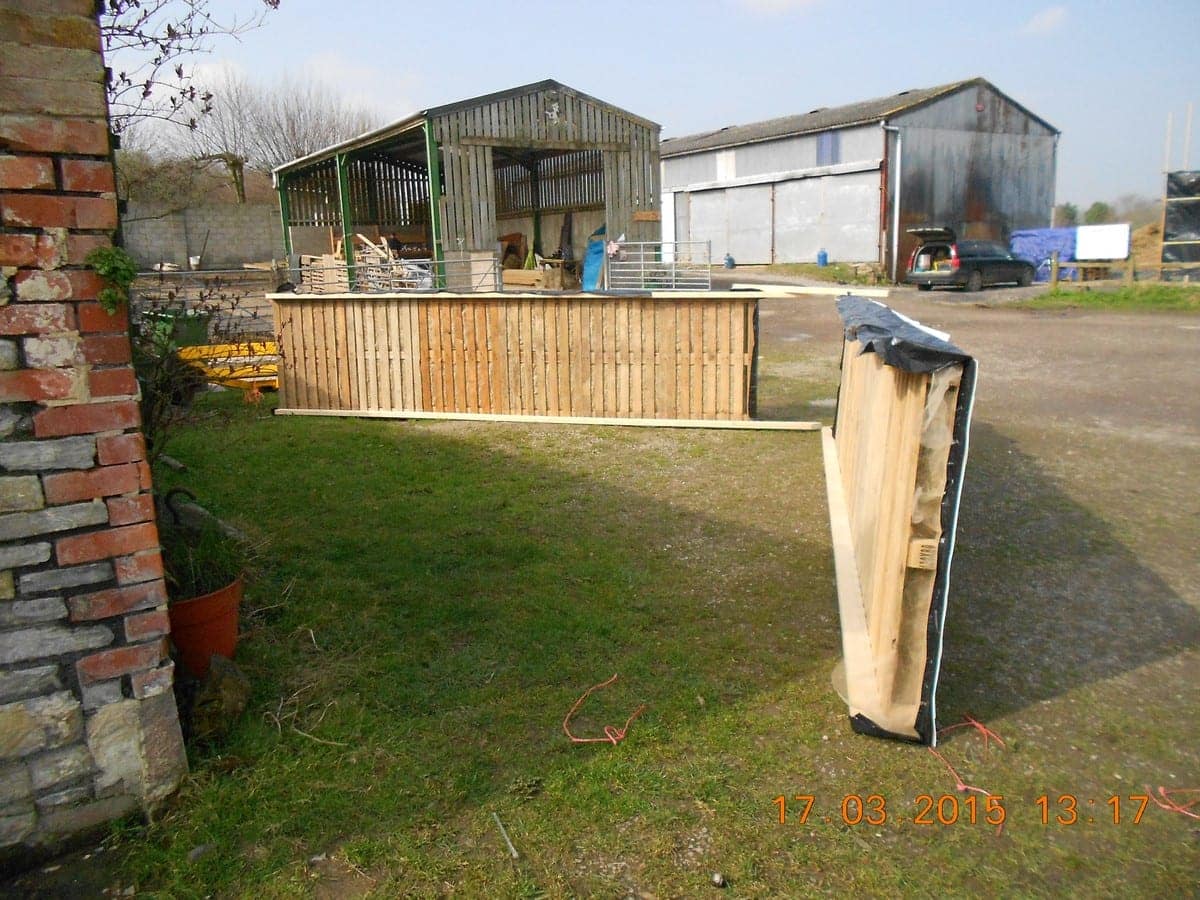
Here are a pair of roof sections which are not too difficult to handle ready for me to brace up as an “A” frame section. In the background is my new “builder’s Volvo” which although about fifteen years old is the poshest one I have ever had and I love it. I bought a Toyota estate six years ago on eBay for £200 because the synchro mesh on second gear didn’t work so you had to double declutch to change down into second. Once you find out that it will cost about £1000 to fix the gear box it is surprising how quickly you can learn to double declutch. It had done over 250,000 miles when the whole clutch went which would cost £500 so I nursed it to Thomas’s scrap yard in Glastonbury and weighed it in for £100. I am only telling you about this new one because I am inordinately chuffed with it, and it comfortingly satisfies my lifelong love affair with all the anarchic freedom that a car of any kind brings to my general feeling of happiness. I know it shouldn’t but there you are! My only excuse is that almost every car I have bought has been more than twenty years old by the time it died and this one is 100% recyclable and does over 45 miles to the gallon. er….that’s it.
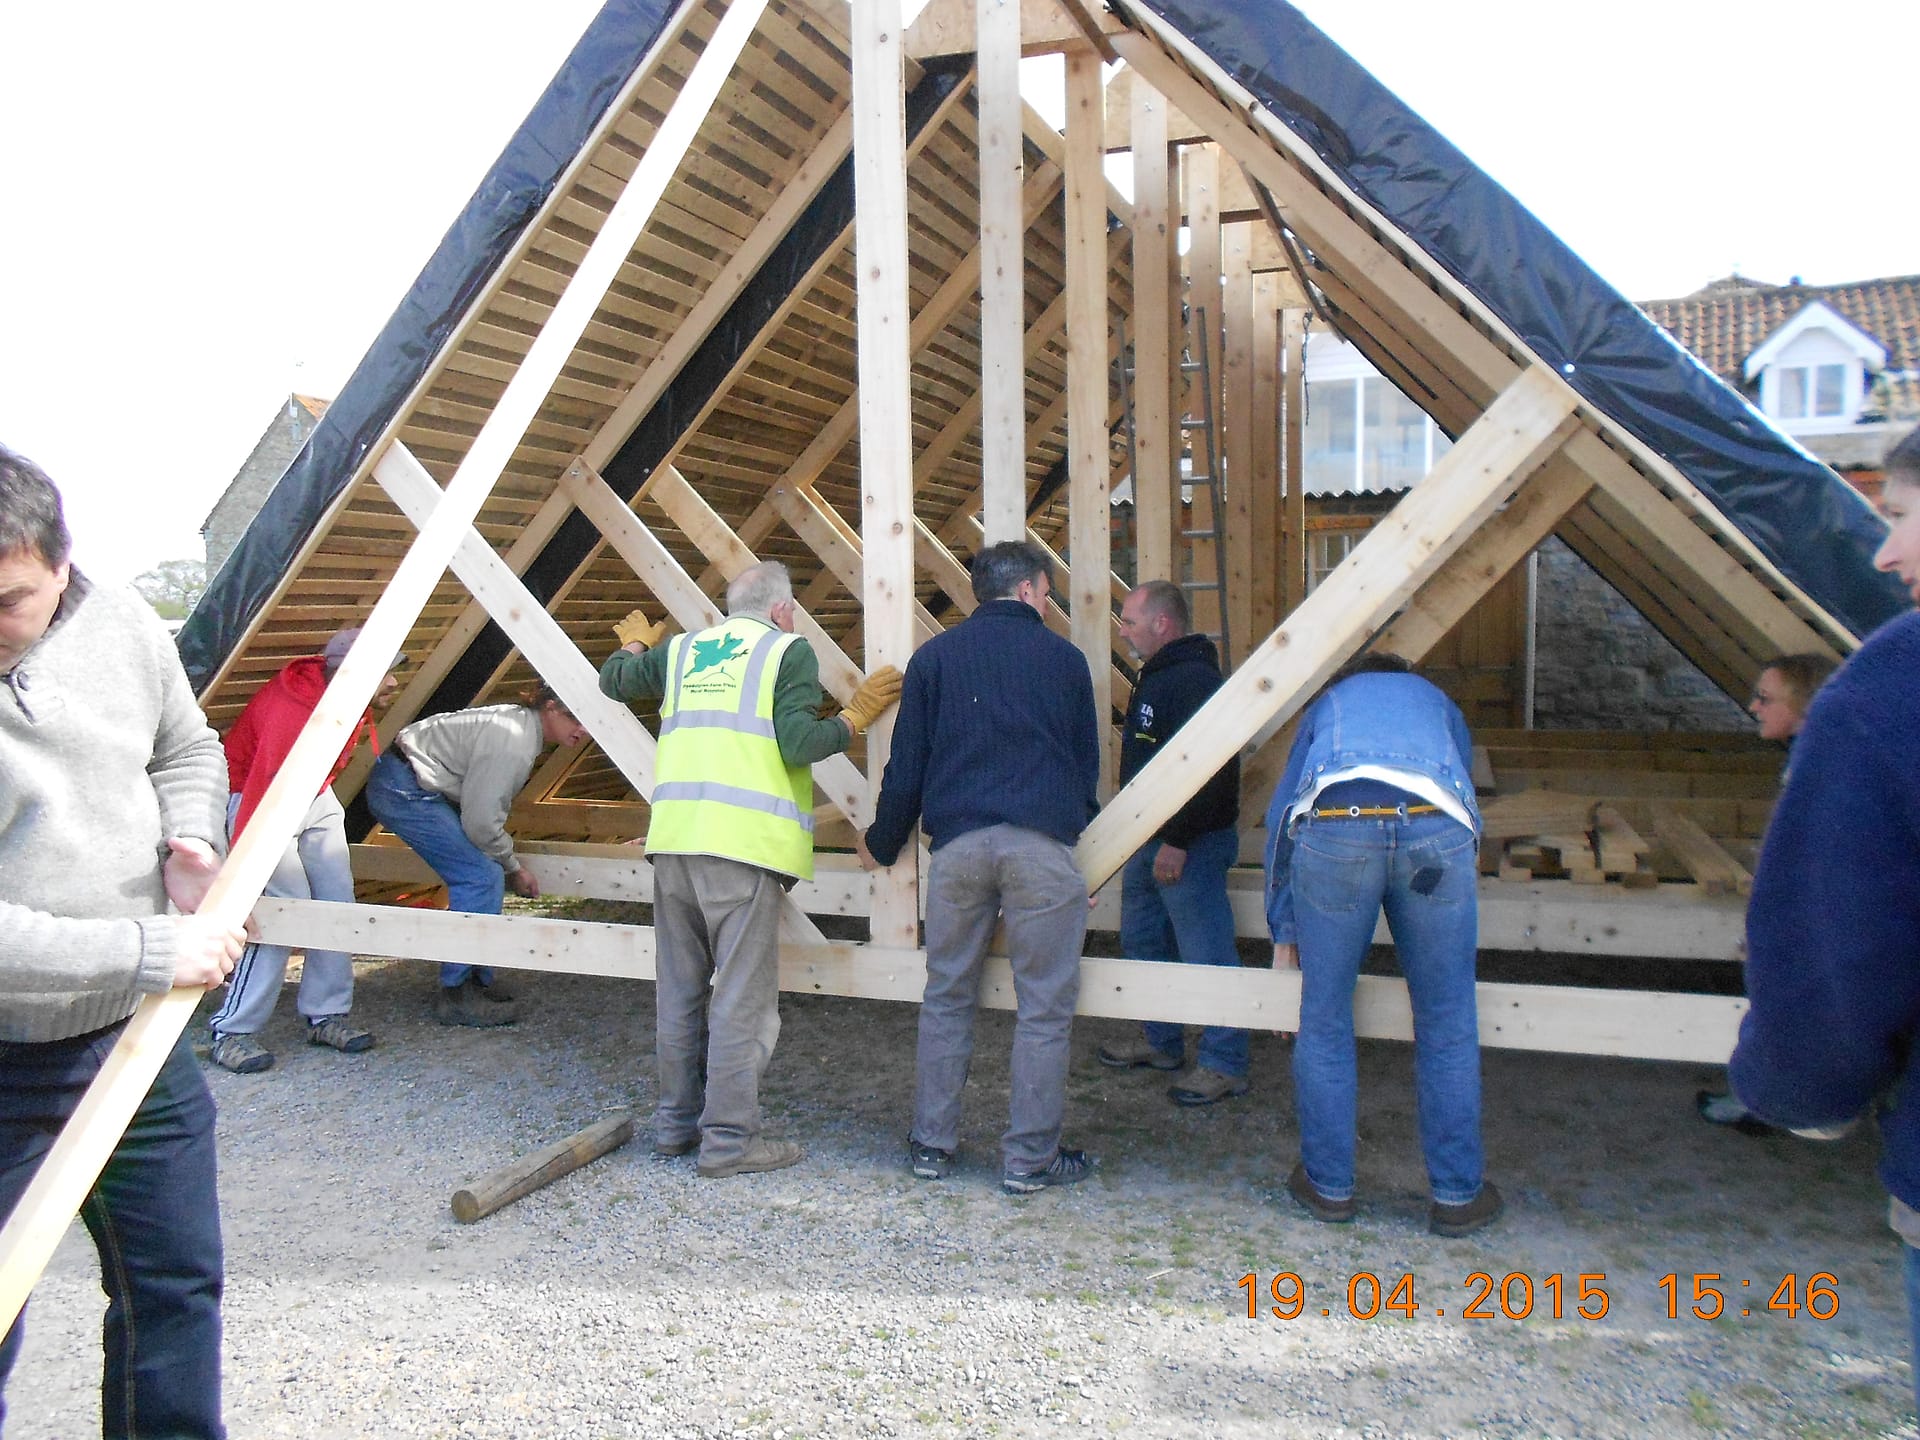
As you can see the A frame itself is quite simple. The joints are screwed and then bolted. I can build one of these in a morning once I have the two sections . I should have taken some more pictures of me doing it I suppose but I forgot and it isn’t very difficult.
However, there is one crucial dimension to get right. This is the length of the bottom of the A frame so that it sits EXACTLY on the wall plate 4 x 2 rails on the walls. In this case it is EXACTLY 6600 mm and I reckon I am within 5 mm each time. If you get this right the rest of the A frame dimensions are all fixed by that one measurement.
This is a good example of where “Good enough” has to be pretty much spot on.
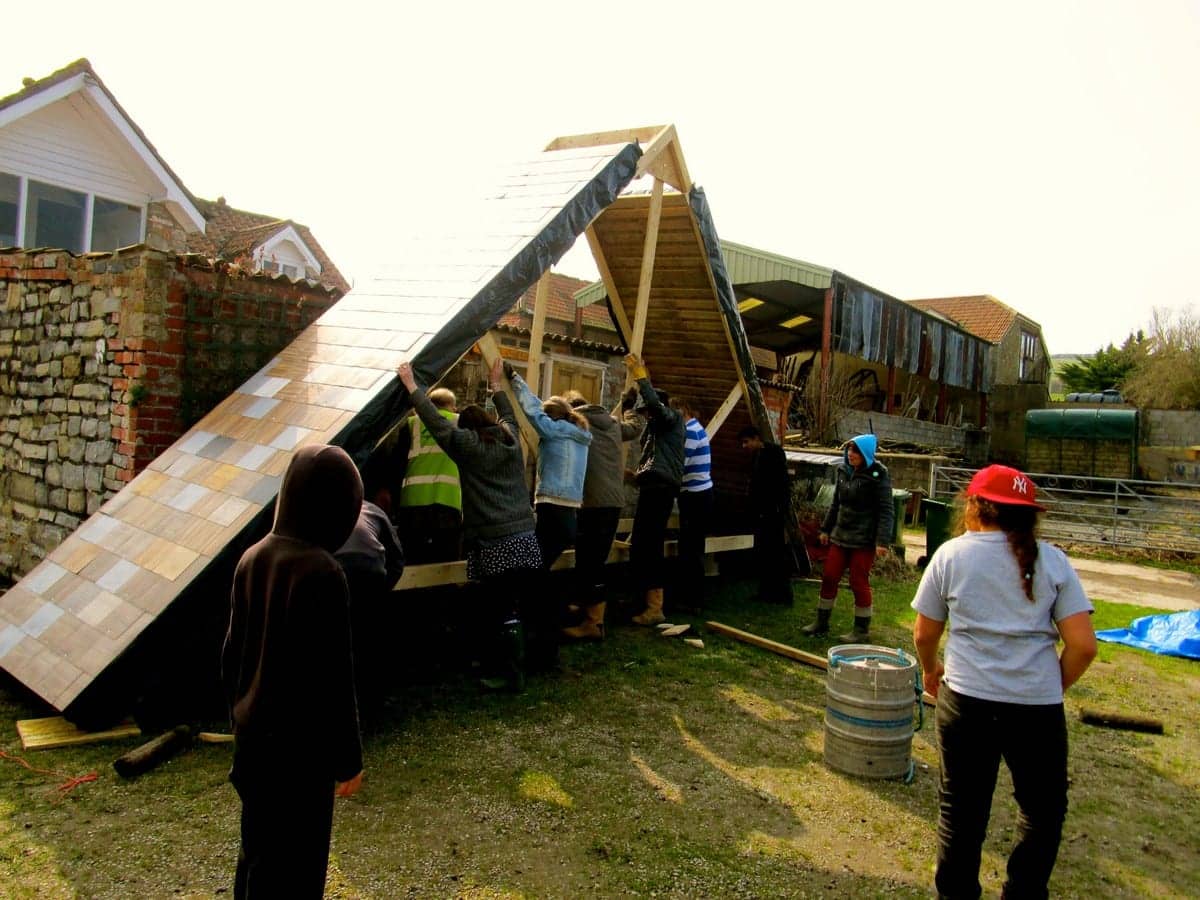
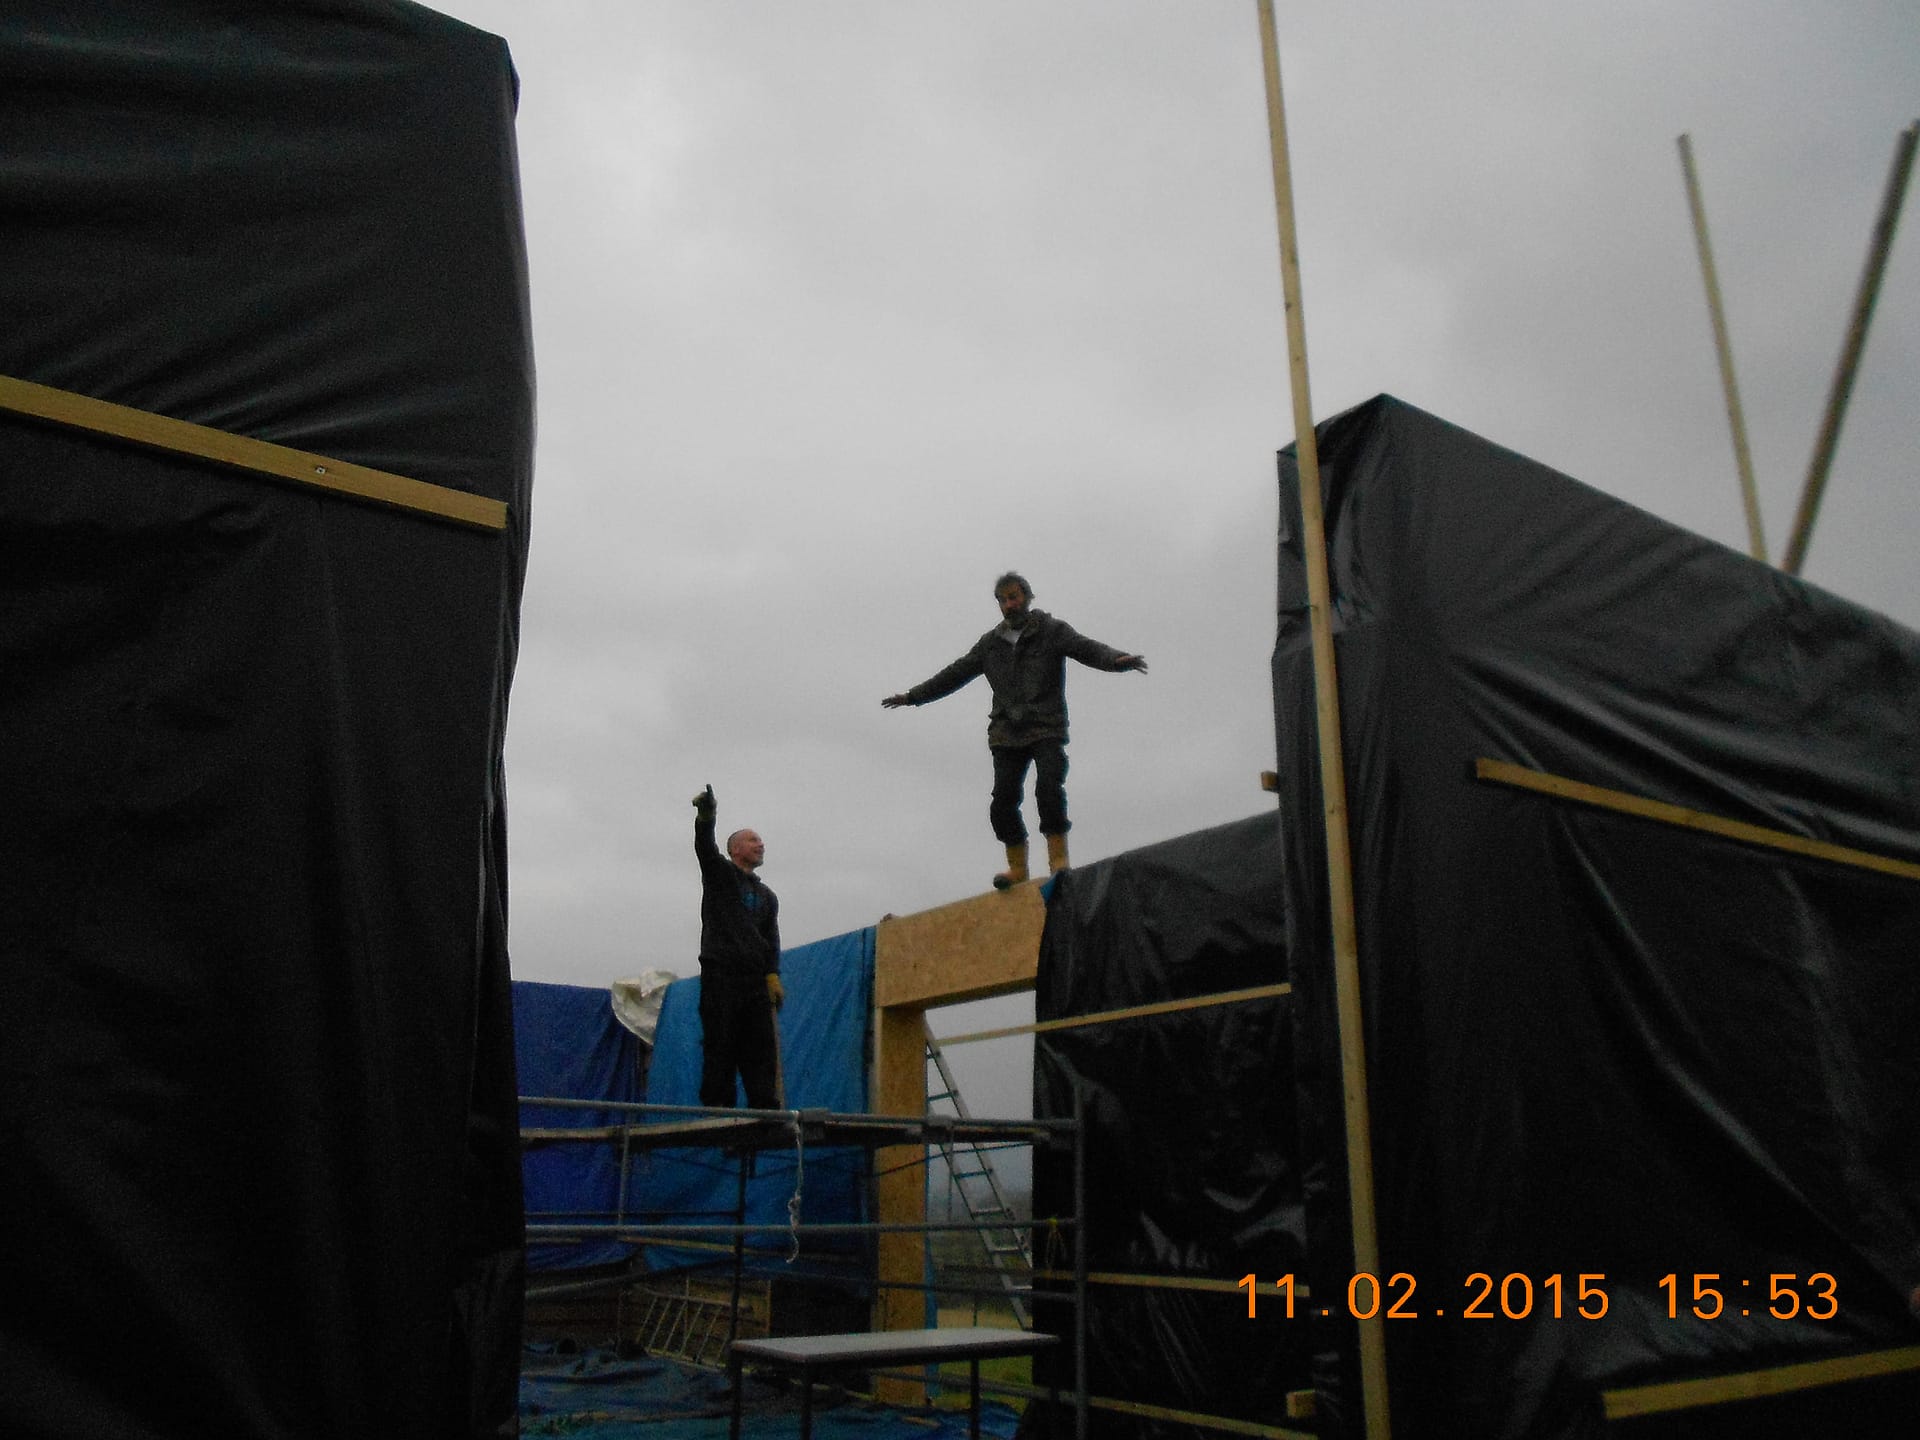
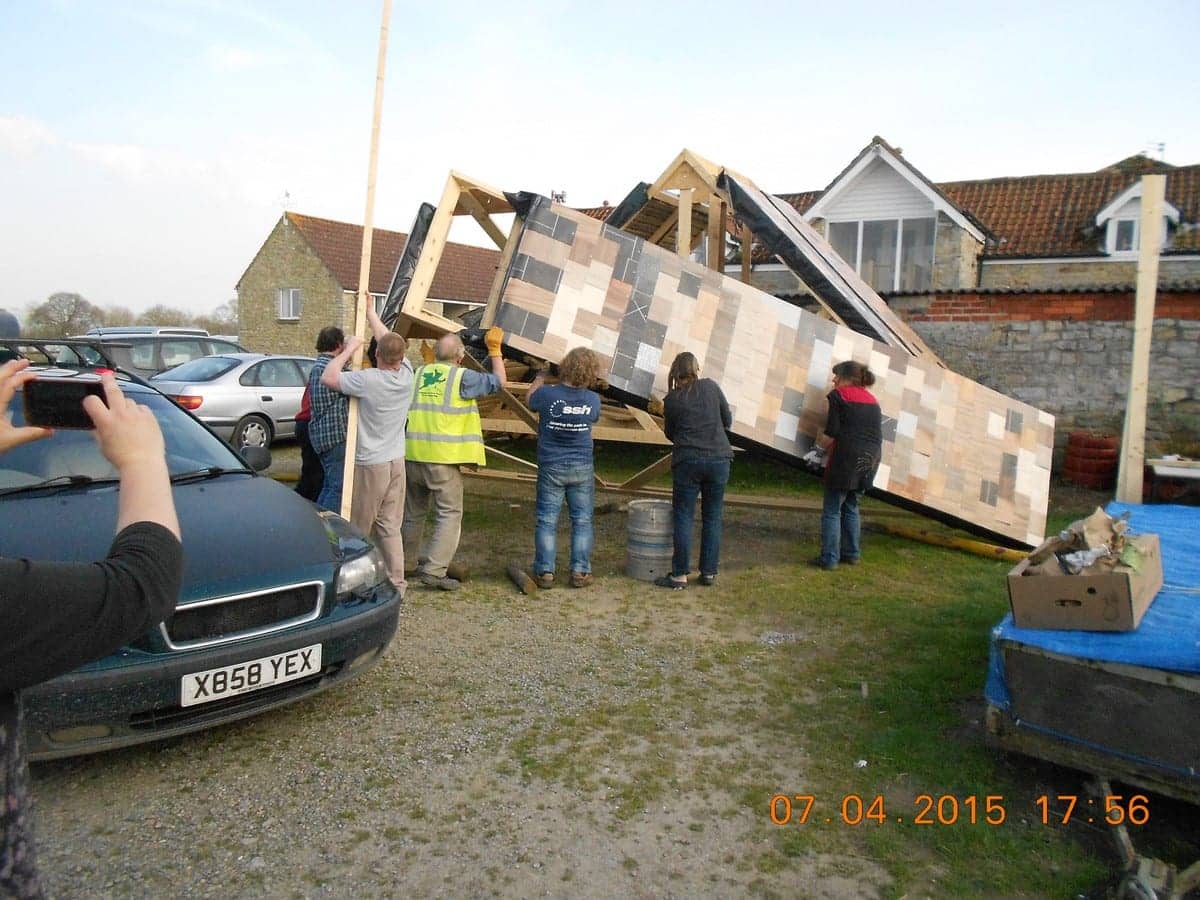
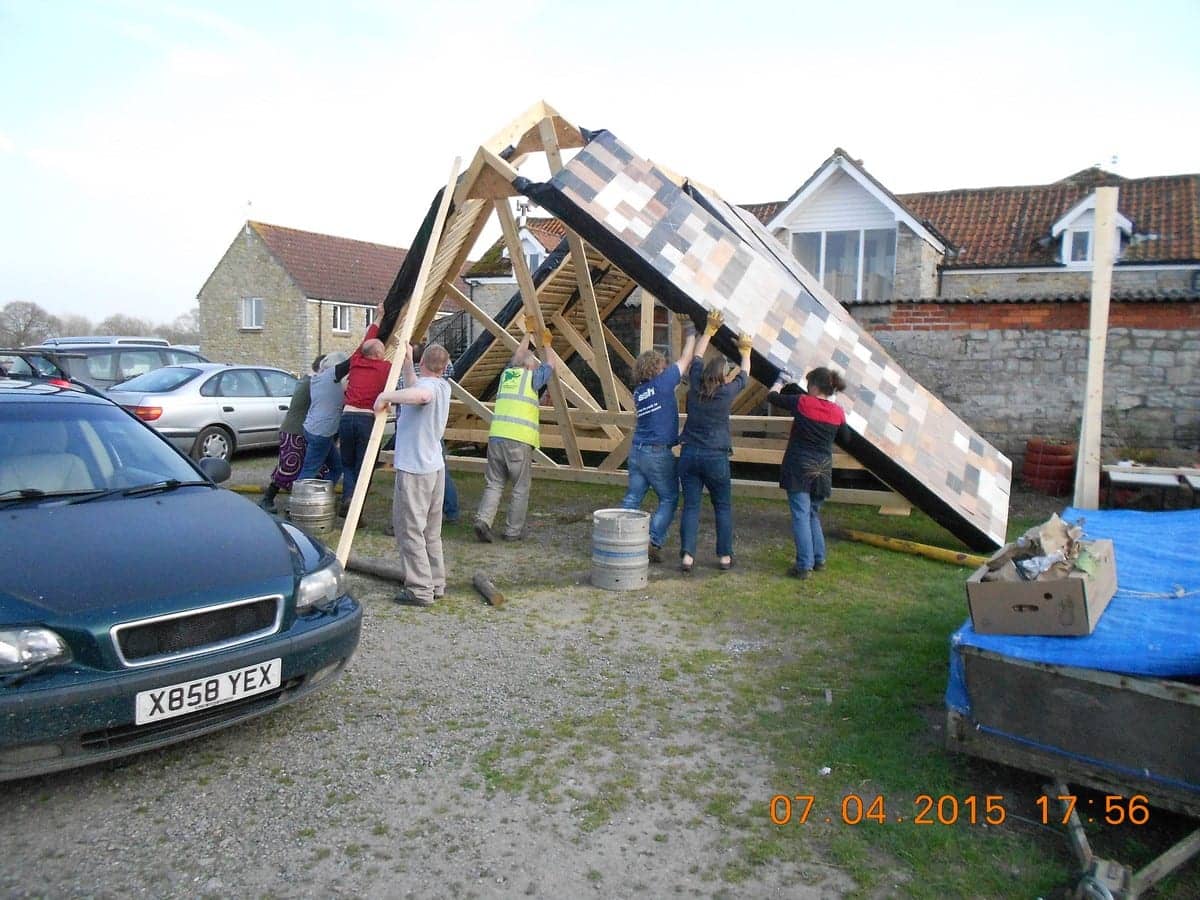
This picture is taken by Lil , and shows me, Asher, Alex, Luke, Michele, Tiff, Veejay, Michael, Rog, Wills, and Chrystel pushing up the first section. Actually, I think any five of us could probably do it.
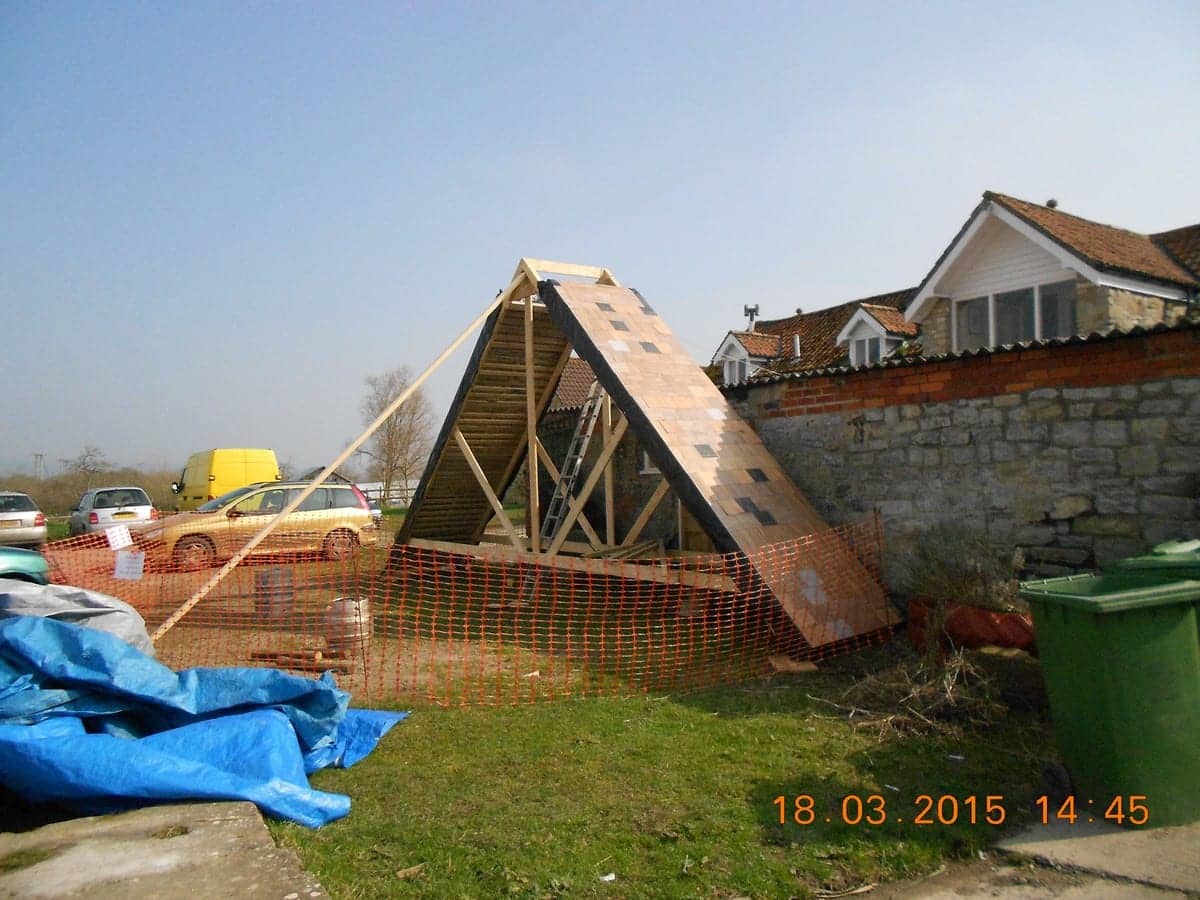
One up and complete. Eight to go!
The two bars across the top are designed to be the “sling points” and Robert, Steve and Lee, who are the lifting team reckon they will be OK.

Until a couple of weeks ago I had no idea what the veranda roof was going to be. I knew it couldn’t be vinyl slates because the pitch is too low for slate of any kind. The wind can just blow the water up underneath them. When I did the Argos office I had decided that I would do the roof using second hand guttering that I could scrounge from building sites and from the fascia and gutter contractors. This was fine but a bit slow, so I Googled plastics recyclers and trawled round the lot. By sheer luck I found one in Bridgwater that had got loads of it so that is where most of the roof came from. Whilst travelling around these places I was staggered to find how much stuff was in these places so this time I decided to tackle the problem the other way round. With no idea what I might use I went round to see what they had which might work. And just as important, whether I could get enough of it.
The place in Bridgwater came up trumps, and once again Kevin was keen to help. This stuff is apparently some kind of fencing although I have never seen it anywhere. Some of the sections have manufacturing faults you can see and the rest are “seconds” of some kind but I can’t see the fault. The sections stand together vertically and the channel goes top and bottom to hold it all in place. In any case this isn’t how I plan to use them so with a small modification I think they will be great.
And I have got enough to do the whole job!
This is a very good example of being very lucky but being prepared to work for your luck!.
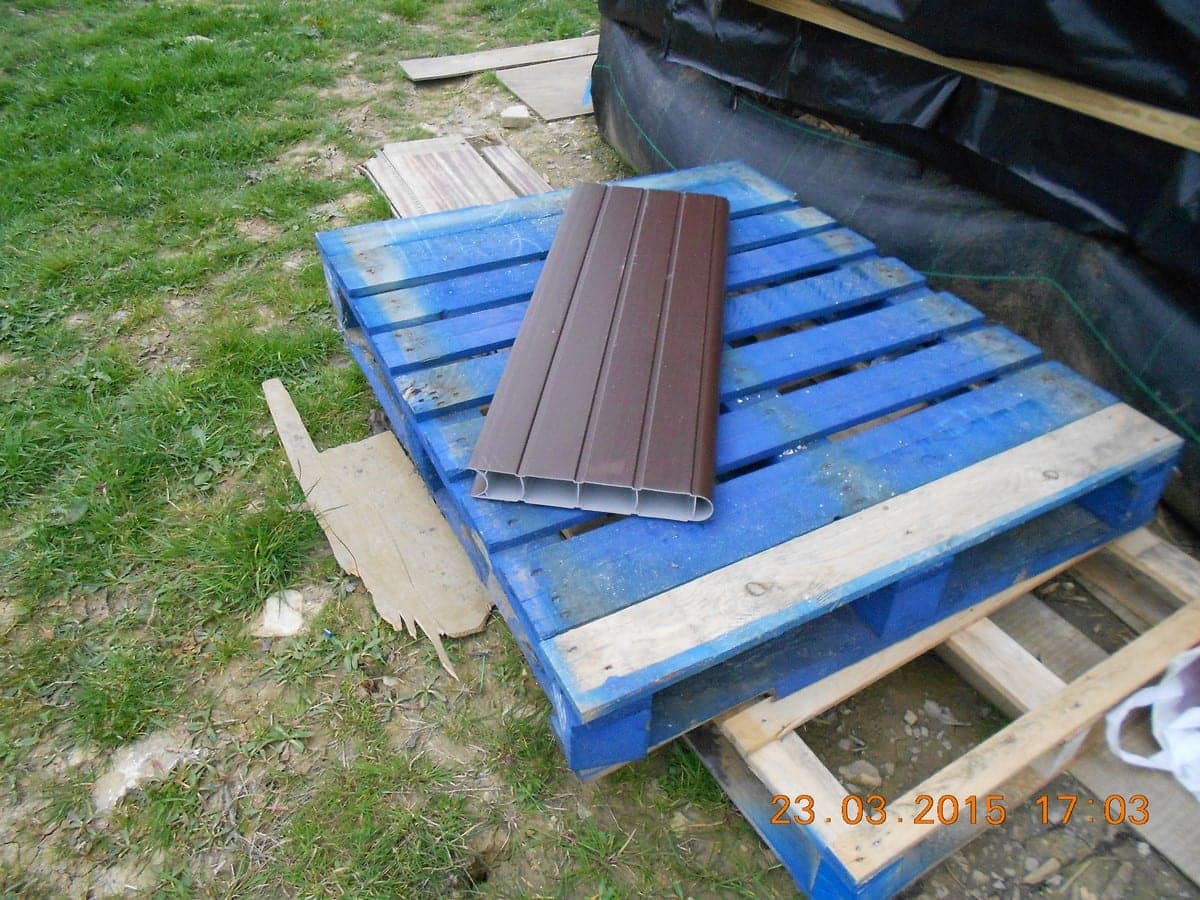
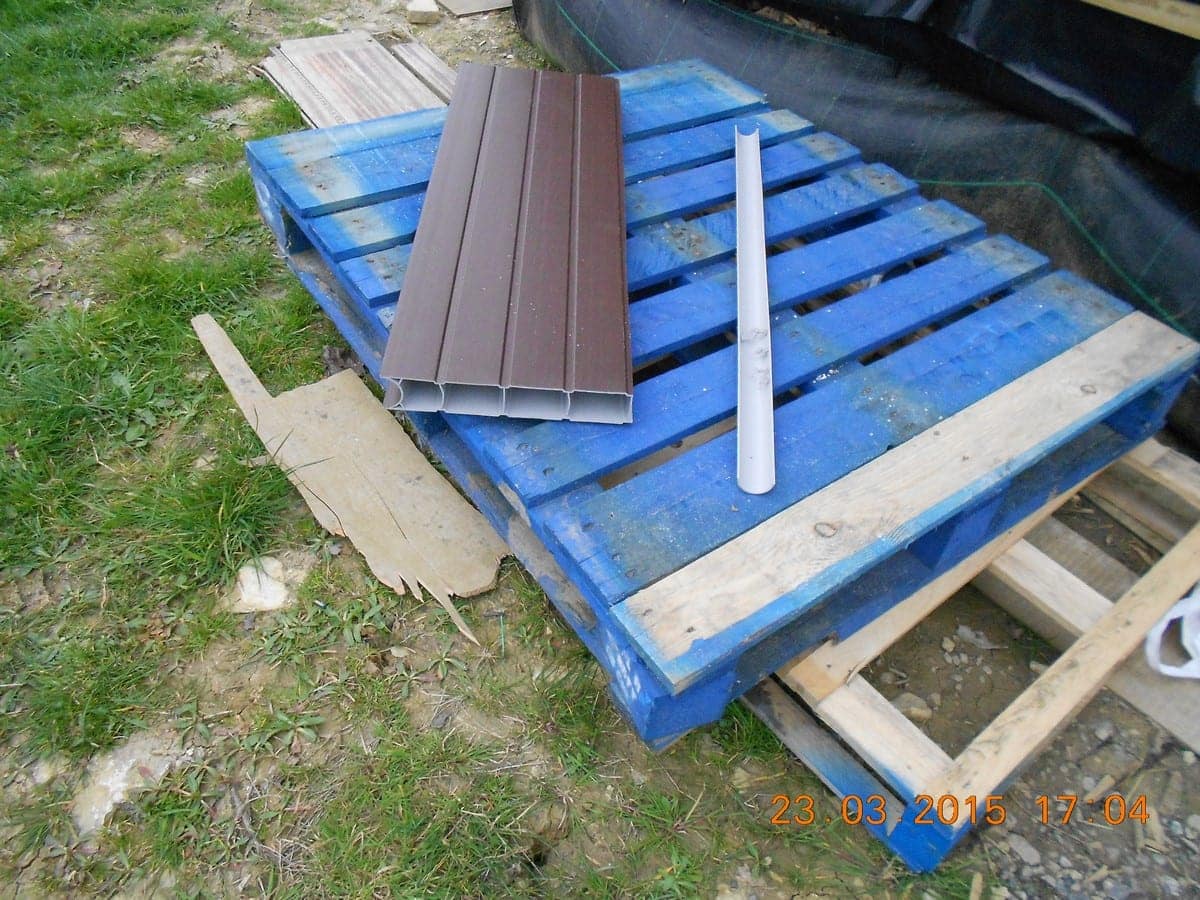
If I just trim off one edge they will sit in the channels very nicely. These will act exactly as glazing bars and the little channels in each side of the section will act as a “drip channel” which will happily run any water out even at a very low pitch. It is practically perfect.
Roger Lane and his wife live in the house at the bottom entrance to the farm. He has offered to lend us his bench saw so we can process the sections when we get to that part of the job.
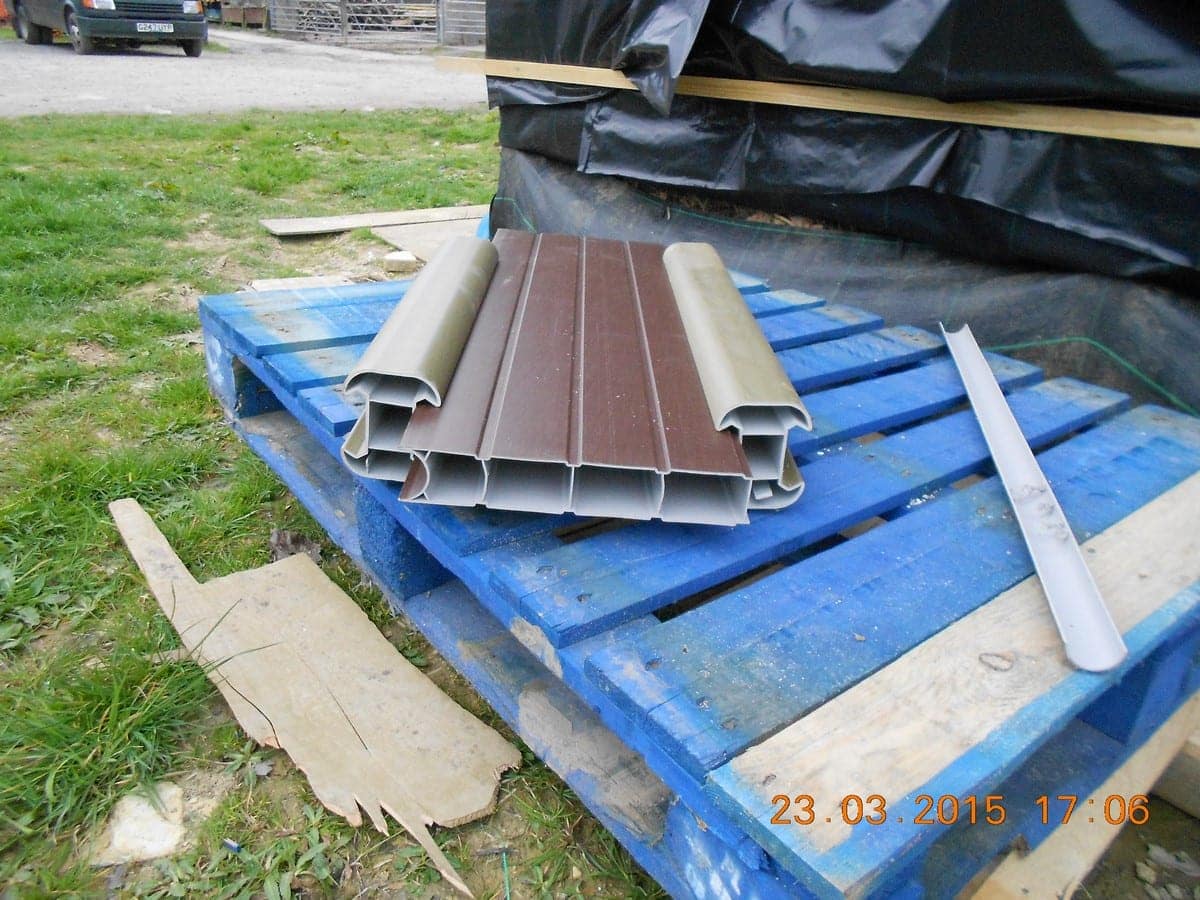
We did need to buy them because Kevin had to pay for them but he charged us £200 for the lot which is a complete bargain. They are so strong they will save loads more than their cost because they are a “single element all in one roof system”.
But we don’t need them yet. Our current problem is to build nine complete roof sections by May 16th.
Wednesday April 15th 2015
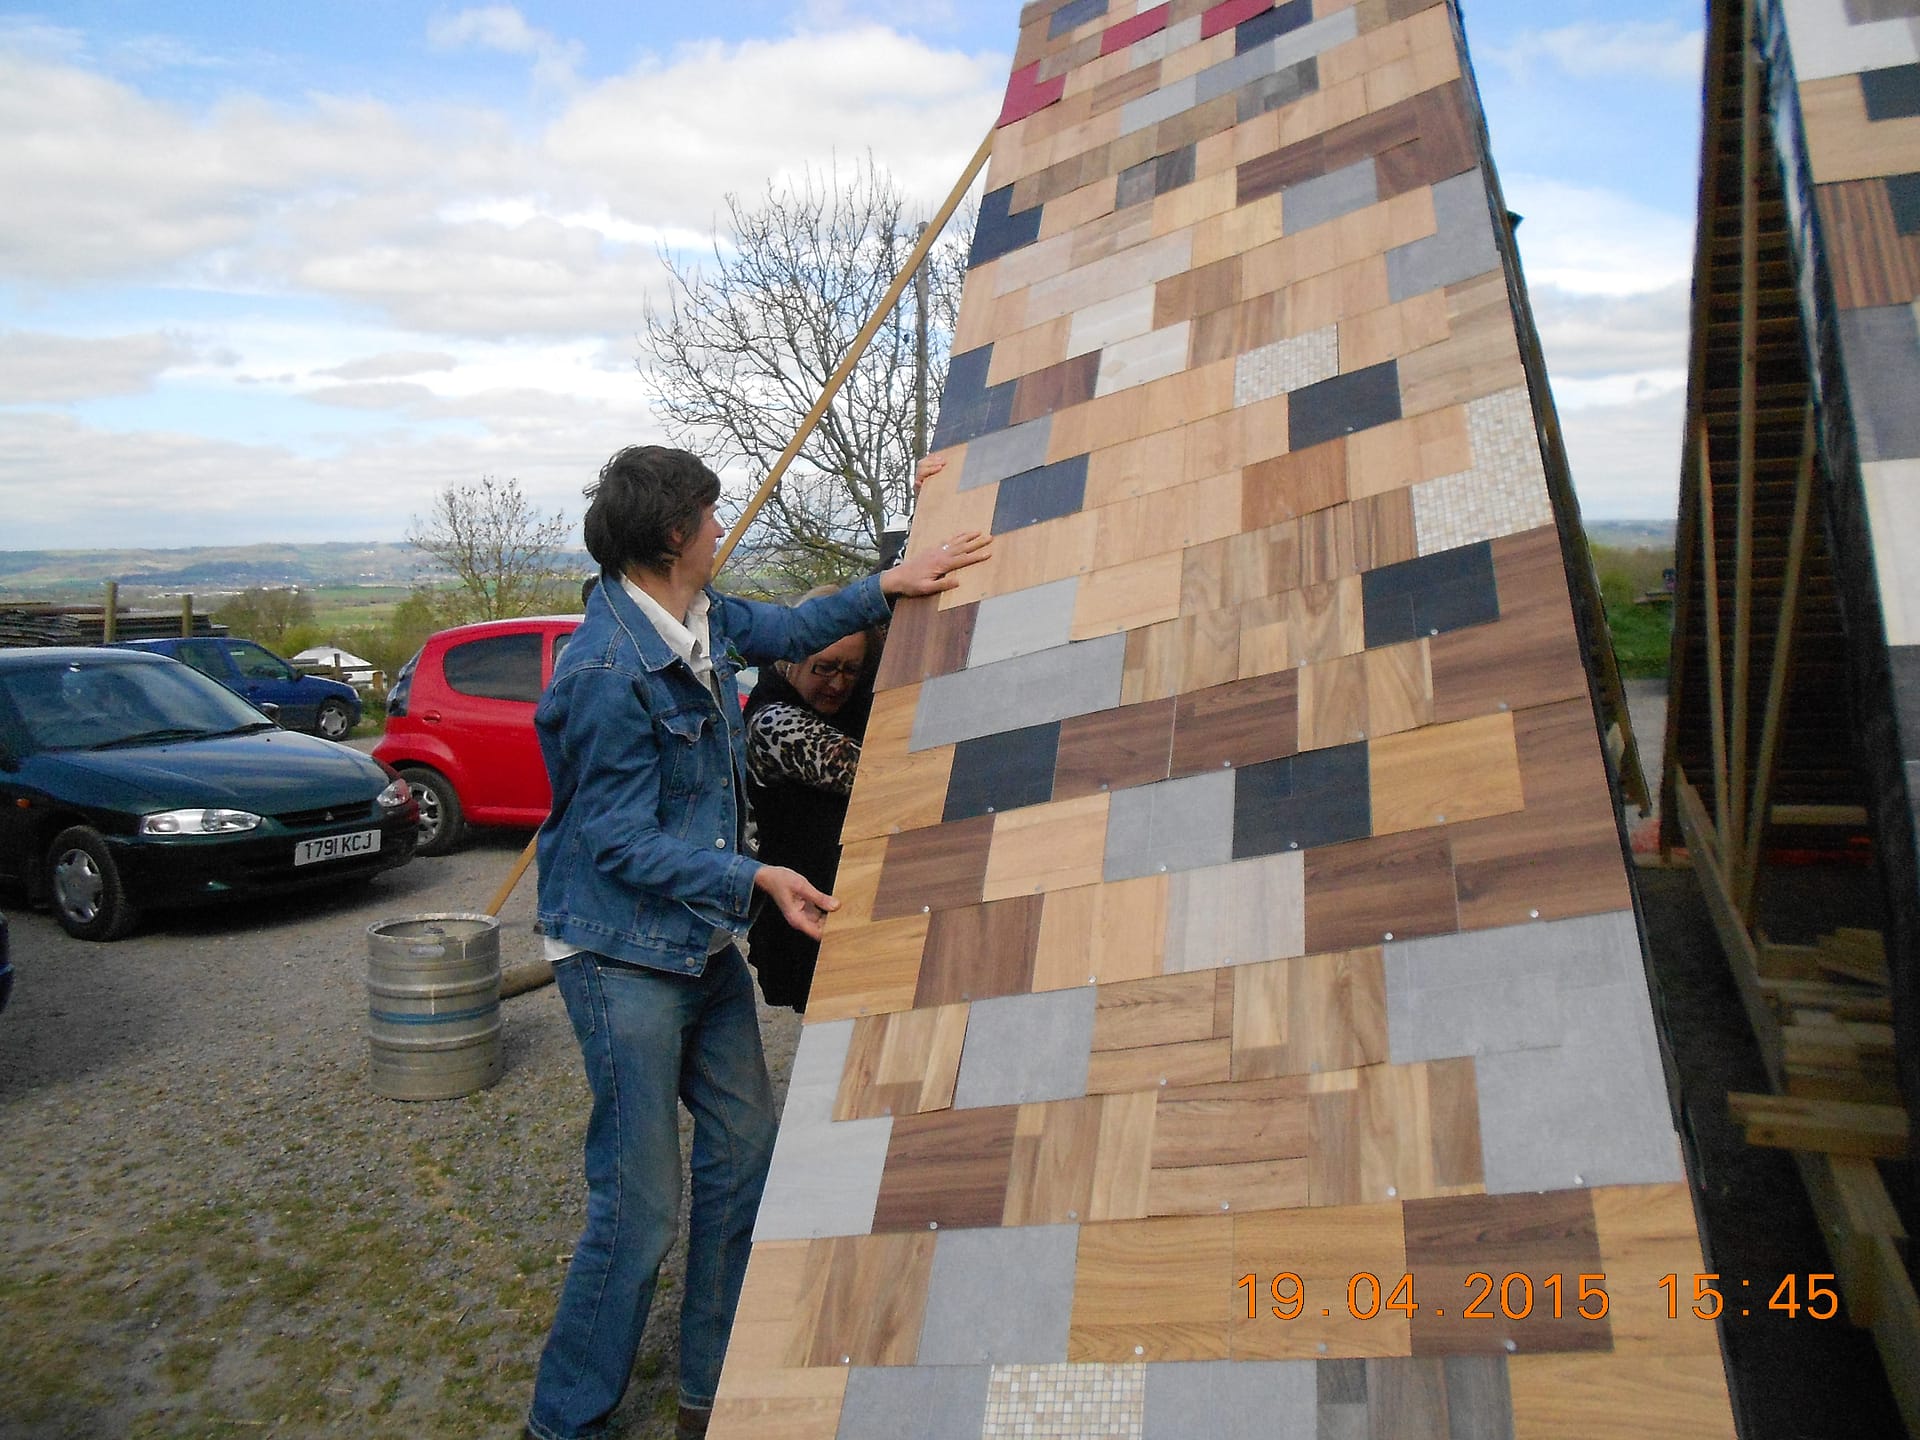
The last week or so has been great. C&H Flooring have provided us with just about all the vinyl offcuts we need, and have promised that they will find us some ends or bits if we need to panic at the last minute.
I have managed to dragoon guests who thought they had come here to relax to help push roof sections up when I need a bit of muscle, and my fantastic wife Claire is pitching in to help make the roof sections. She is a traditional upholsterer so we have requisitioned her compressor and staple gun to staple the vinyl slates on. Getting her as well is a real bonus because she is faster and more accurate than the rest of us put together.
These pictures are not in exactly the right order but it is a real faff to change them round and I am sure you get the idea!
This is Jolie winding the handle on the guillotine.
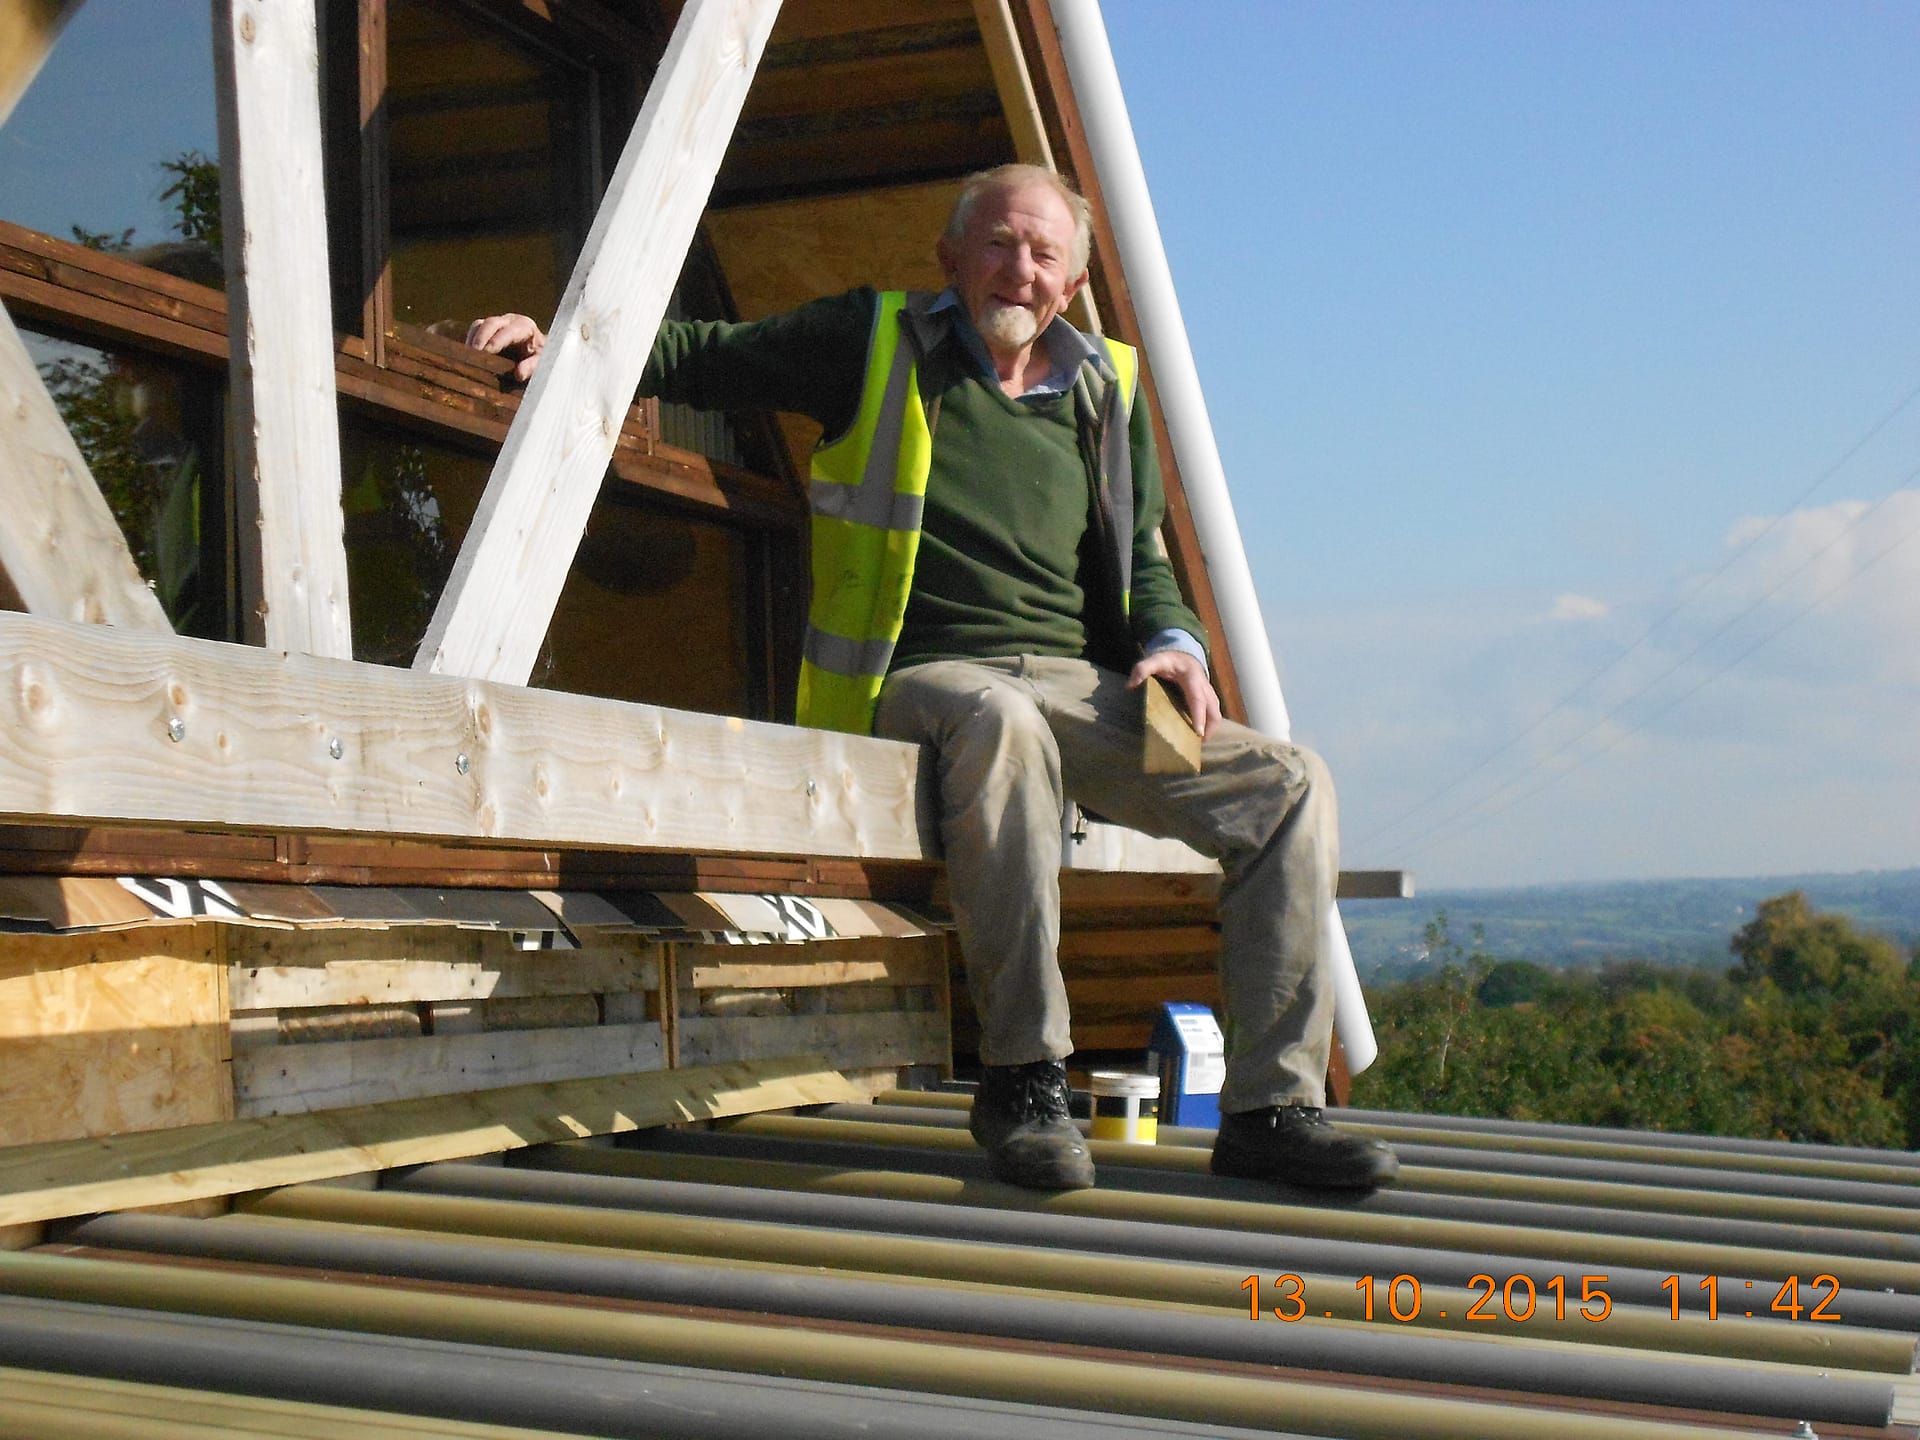
Saturday May 2nd 2015
Nearly there!
One more section to make which will be the nine we need.
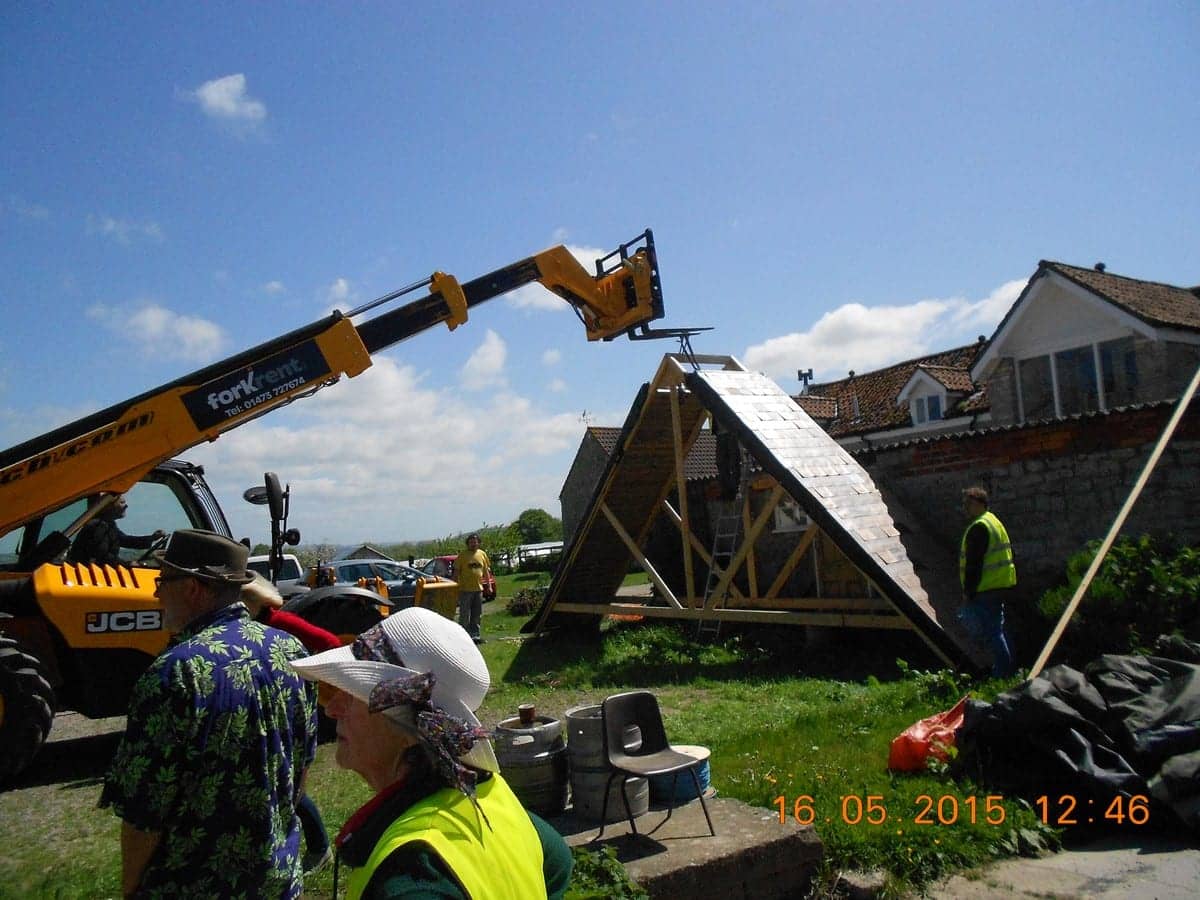
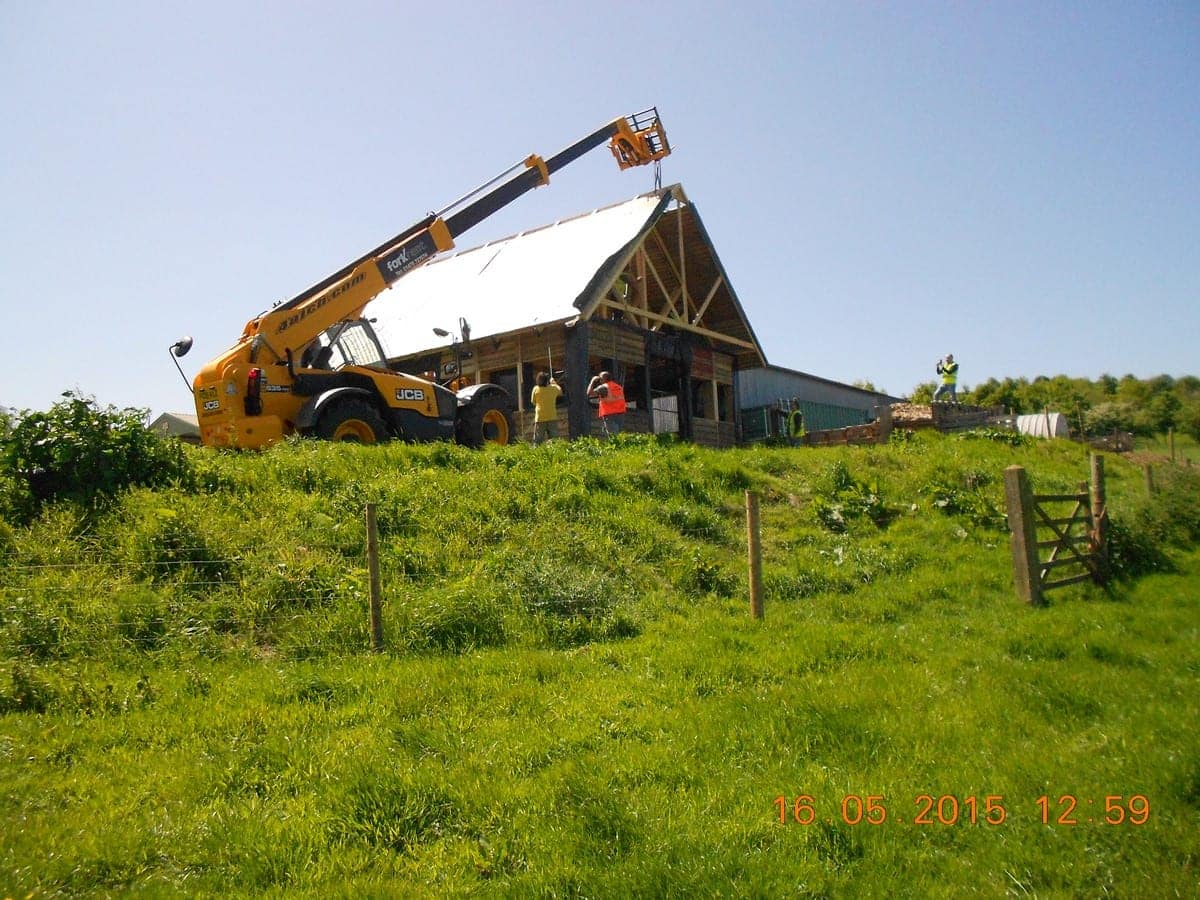
ROOF RAISING DAY IS SATURDAY MAY 16th
Robert Kearle is arriving with lifting gear at 10.00 am
You are welcome to come and help or watch.
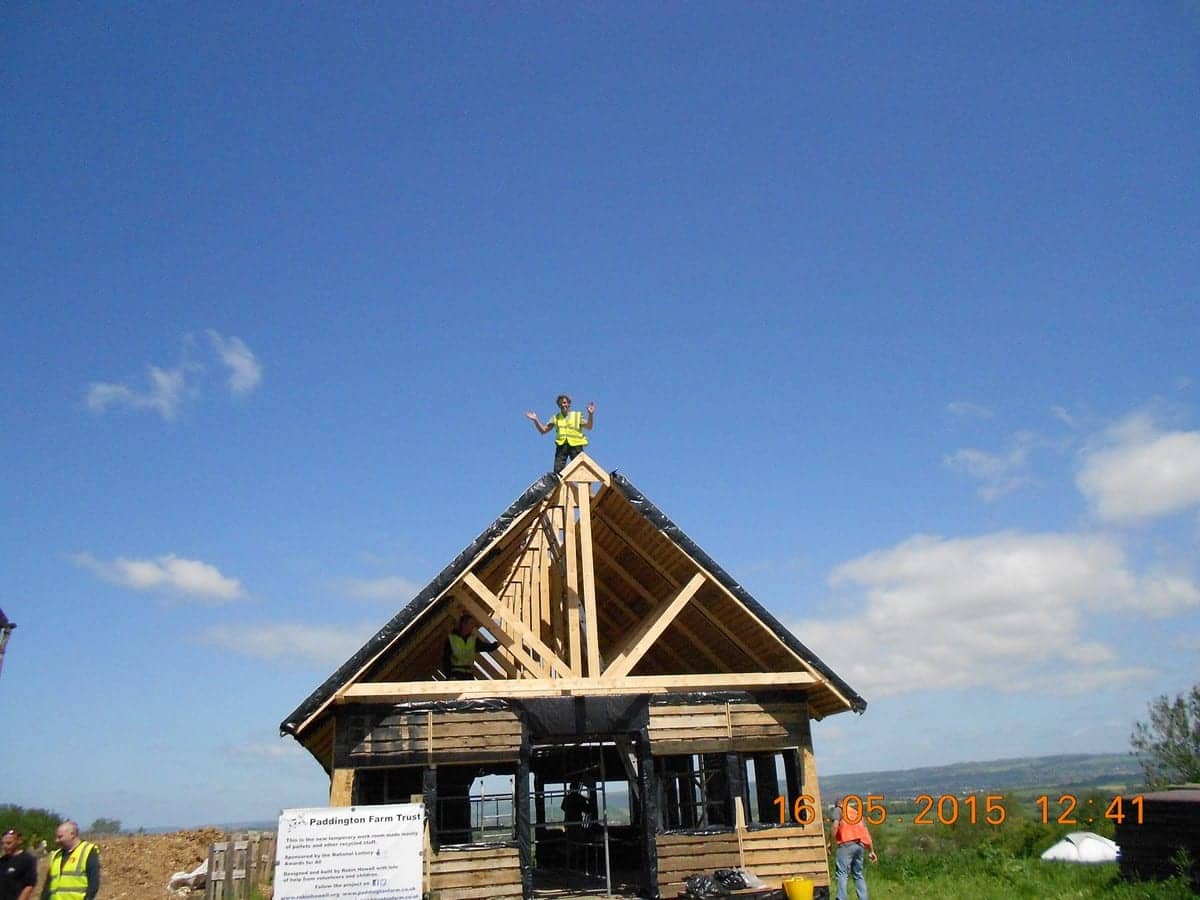
Roger on the roof!
RESULT!
Special thanks to
Robert Kearle and The Lifting Team, Steve, Lee and Cloud.
Martin, Roger and Edwin who did a fantastic job on drilling and bolting.
Kaz on Ladders and rushing about stuff generally.
Tony on ropes and Tethering
Alex, without whom there would be no roof to lift.
Neil and Claire for being official photographers.
Amanda and Lil for a brilliant lunch which fed everyone.
All those who helped keep everyone safe and those who came to cheer.
Here is a link to Neil Clarke’s video of the day. Thank you so much, Neil.
It is brilliant.
XXXXXXXXXXXXXXXXXXXXXXXXXXXXXXXXXXXXXXXXXXXXXXXXXXXXXXXXXXXXXXXXXXXXXX
Sunday May 17th 2015
I am going to put a few more pictures up , but I will fill in the writing later and put up some more pictures, because I now feel the need to go and lie down quietly for a bit.

Sunday June 28th 2015
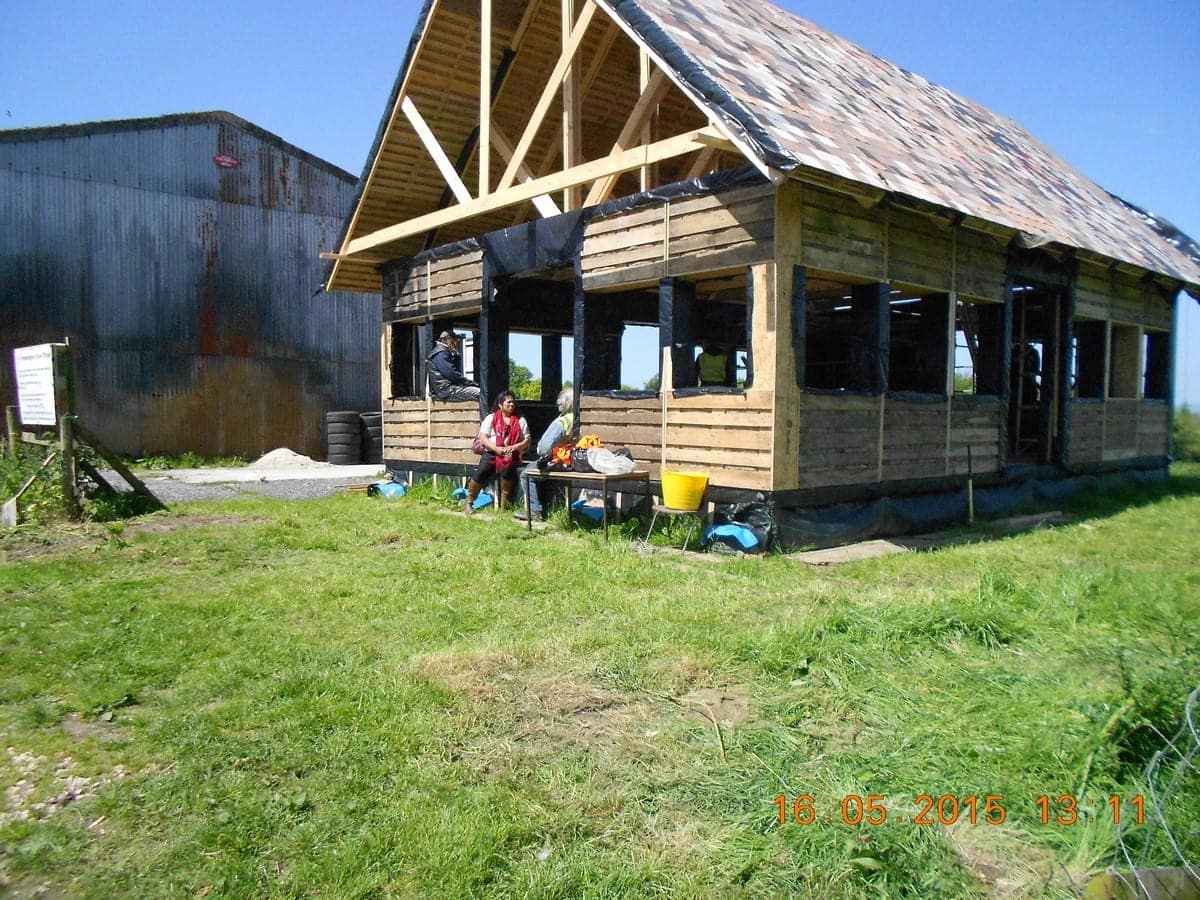
I know I said I needed a little lie down after all the excitement of getting the roof on, but I am really sorry it has taken so long to update you with progress since. In fact I don’t think we even took a day off, but we slowed down and did a bit more chatting.
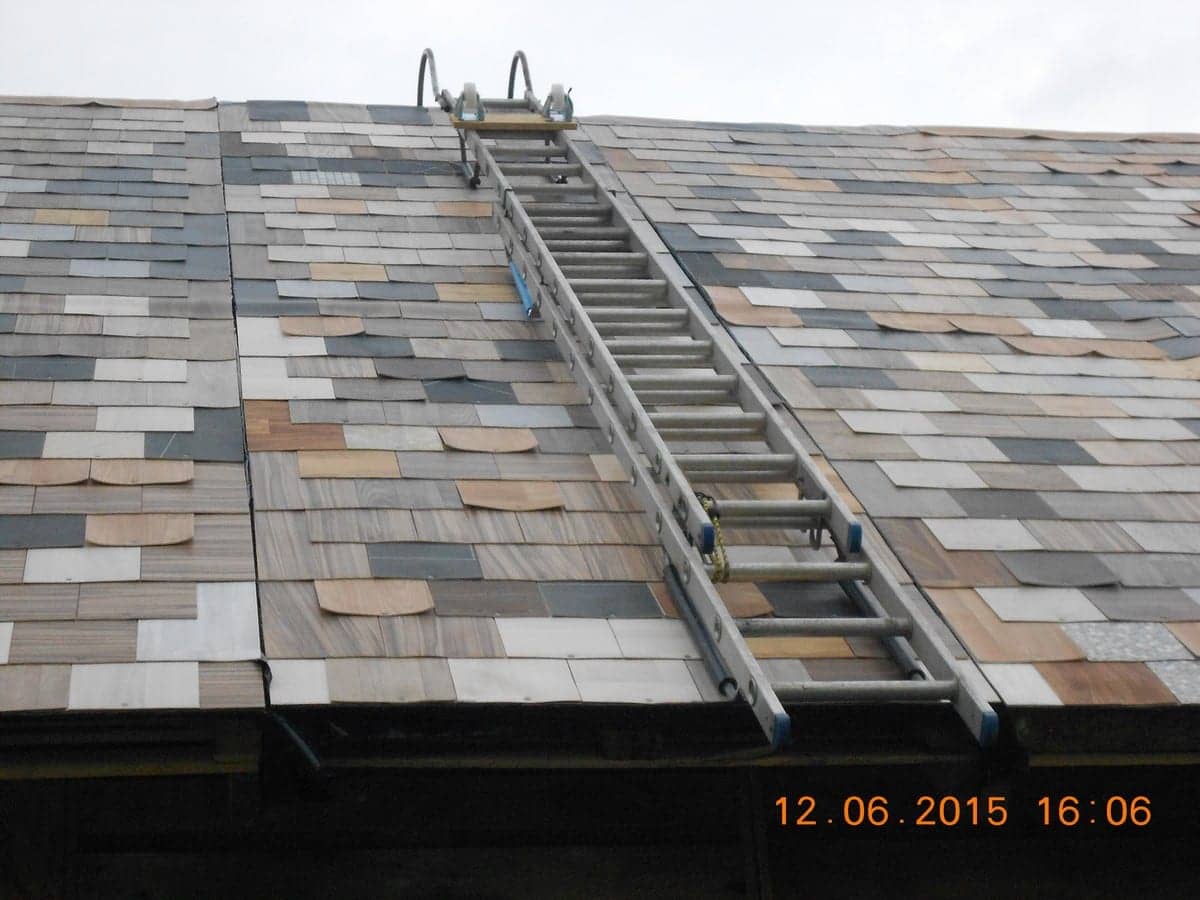
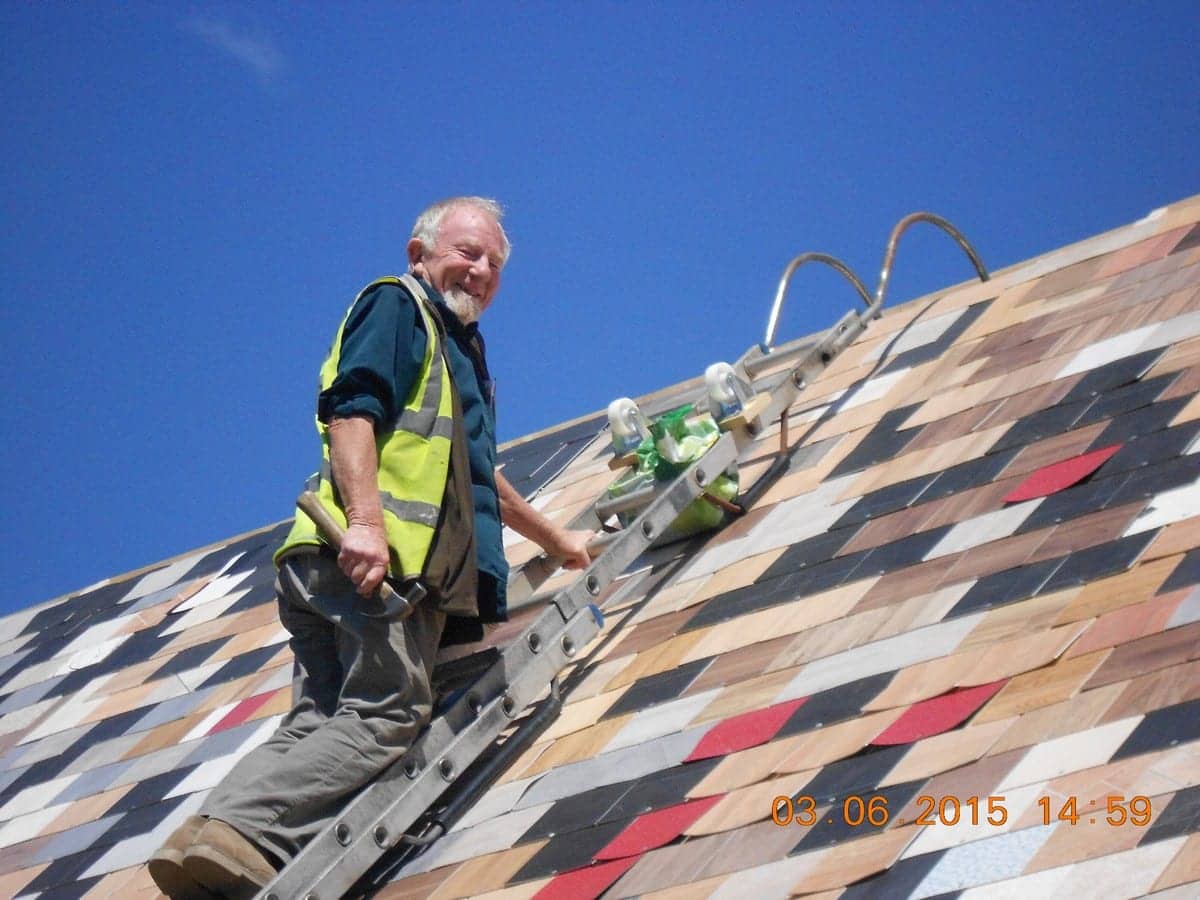
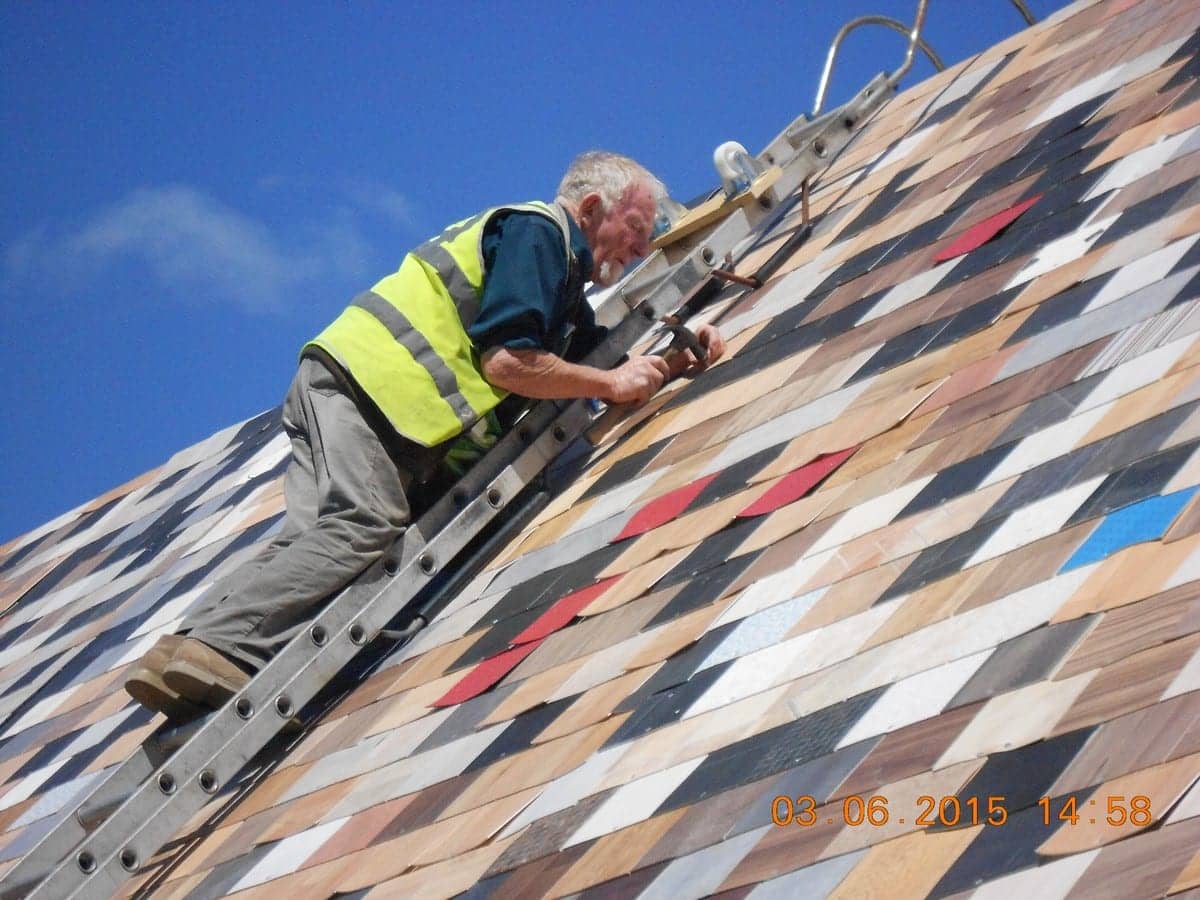
Because the roof went on in sections we now have to “Stitch” the joins to make it waterproof. This was all part of a cunning plan to leave one “slate” out all the way up. With a bit of luck you can see this. I bought the roof ladder quite cheaply on eBay because the wheels were bust and it had one skid missing, but it didn’t take much to mend it.
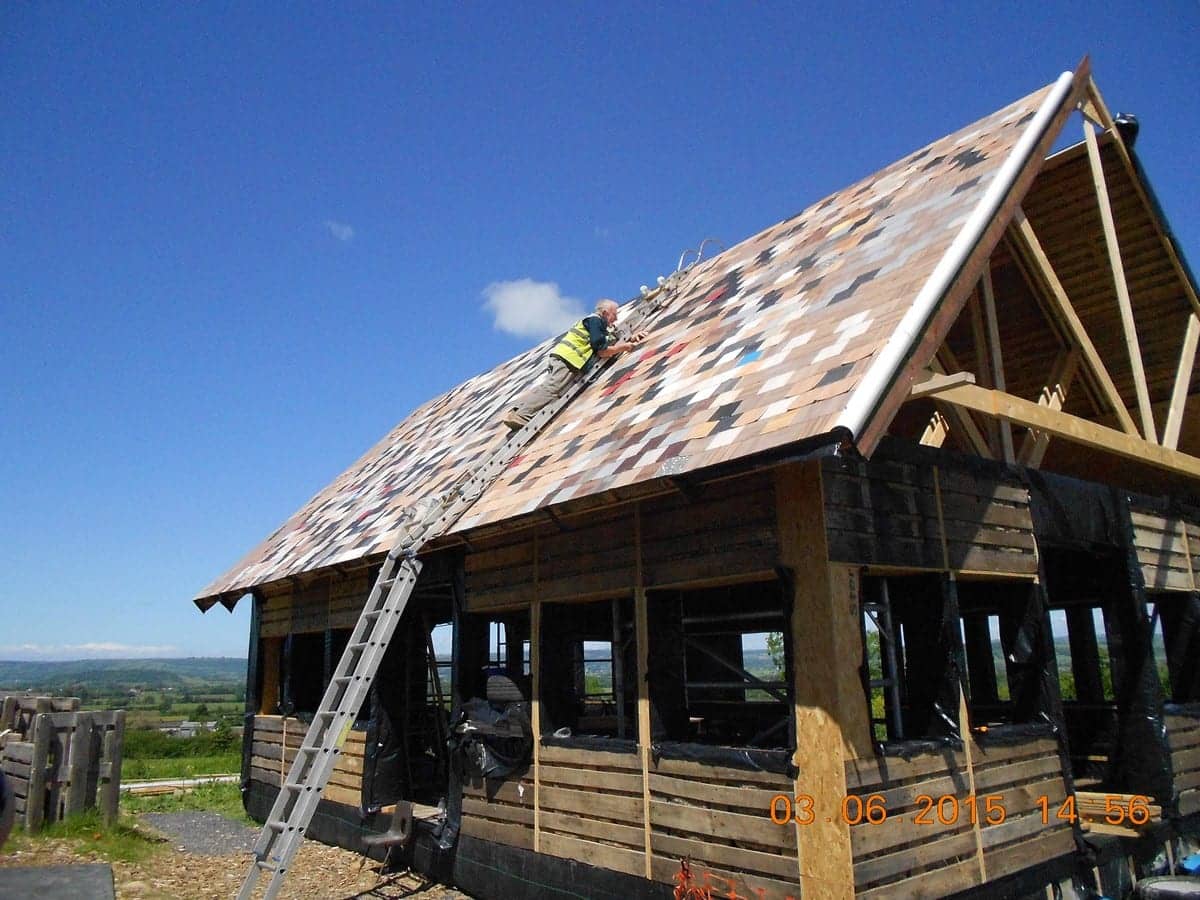
To be honest, it doesn’t look as if I am up very high in the pictures but it does feel a lot higher if you are up there, especially if it is windy. They say that the way to become an old builder and roofer is to be very frightened all the time. This means that I should live forever. The ladders are all tied off but Alex and I had a deal not to go on the roof unless both of us were around.
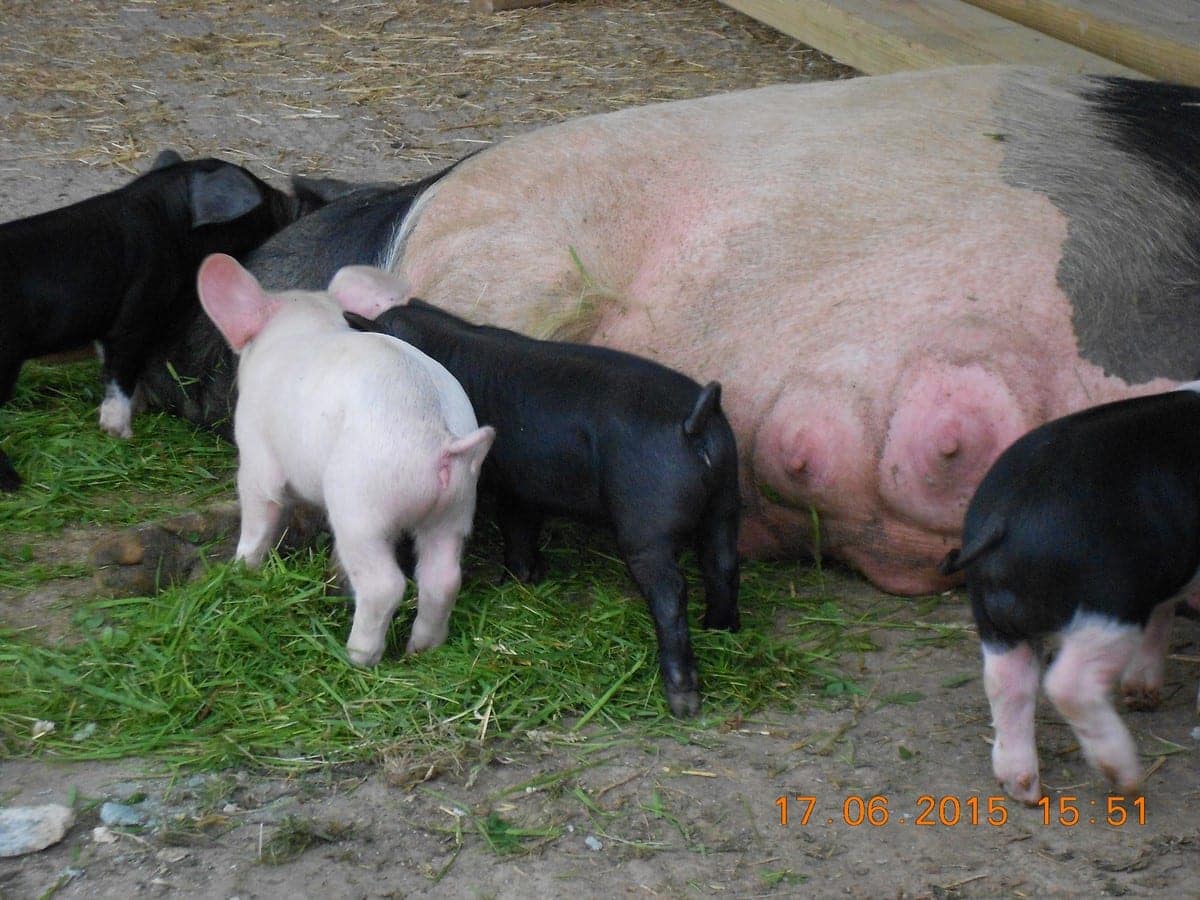
Here are some of the piglets we now have as a result of an incestuous relationship between the farm’s weaners it bought last year, which got kept longer than planned. If we were breeding a thoroughbred herd this would have been a bad idea but for one generation there is no real problem.

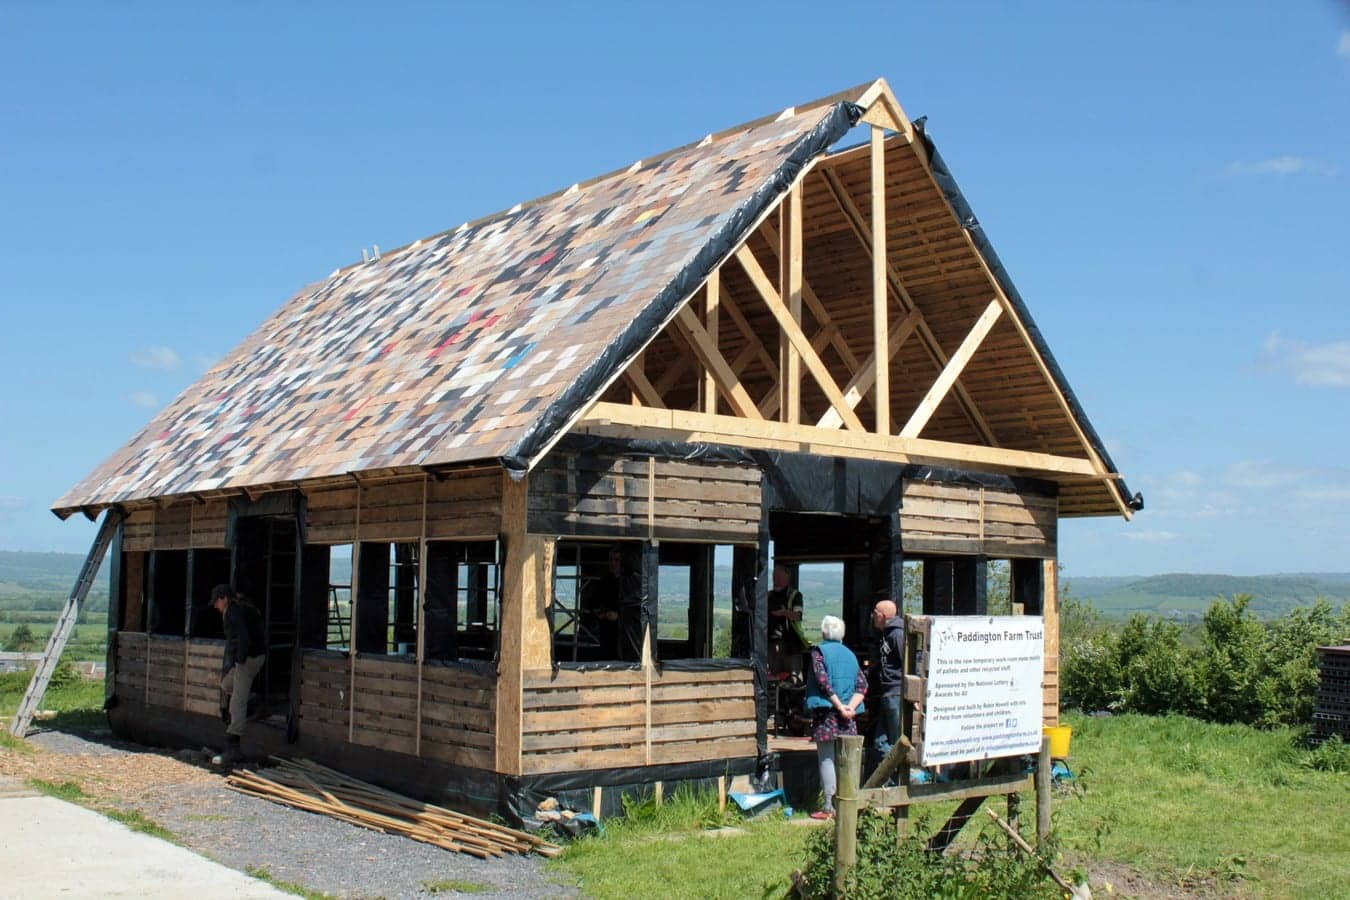
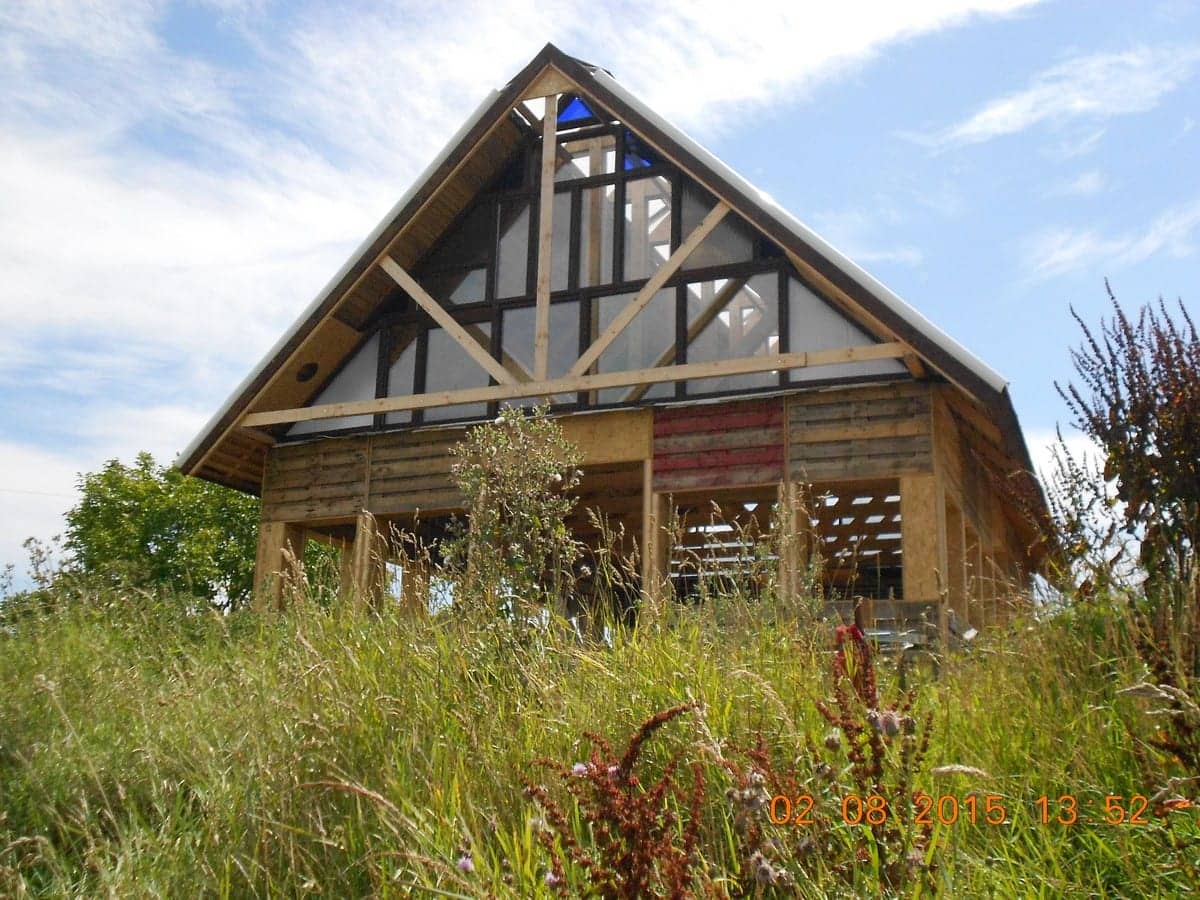
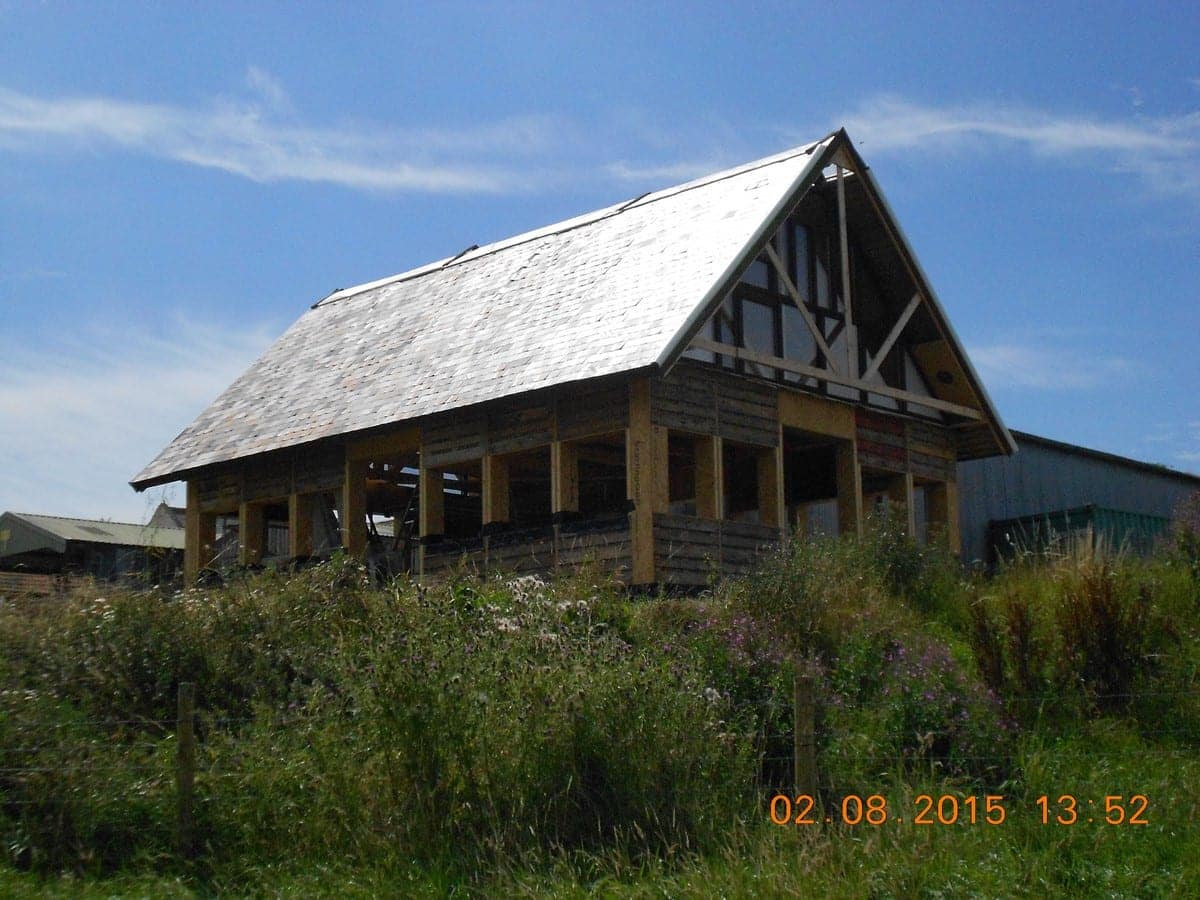
You may remember that the roof sections were also cunningly designed so that they provided sling points and then an apex we could glaze to let the light in. We haven’t managed to scrounge the bits we need yet, but because I wanted to get us watertight I have stretched some transparent reinforced tarpaulin over it. This will last for at least a year.
The verges of the gable ends are “cloaked” with some white 4″ half round gutter I have been sitting on at home since we did the Argos office because it was the wrong colour! I knew it would come in useful!
So now we are watertight
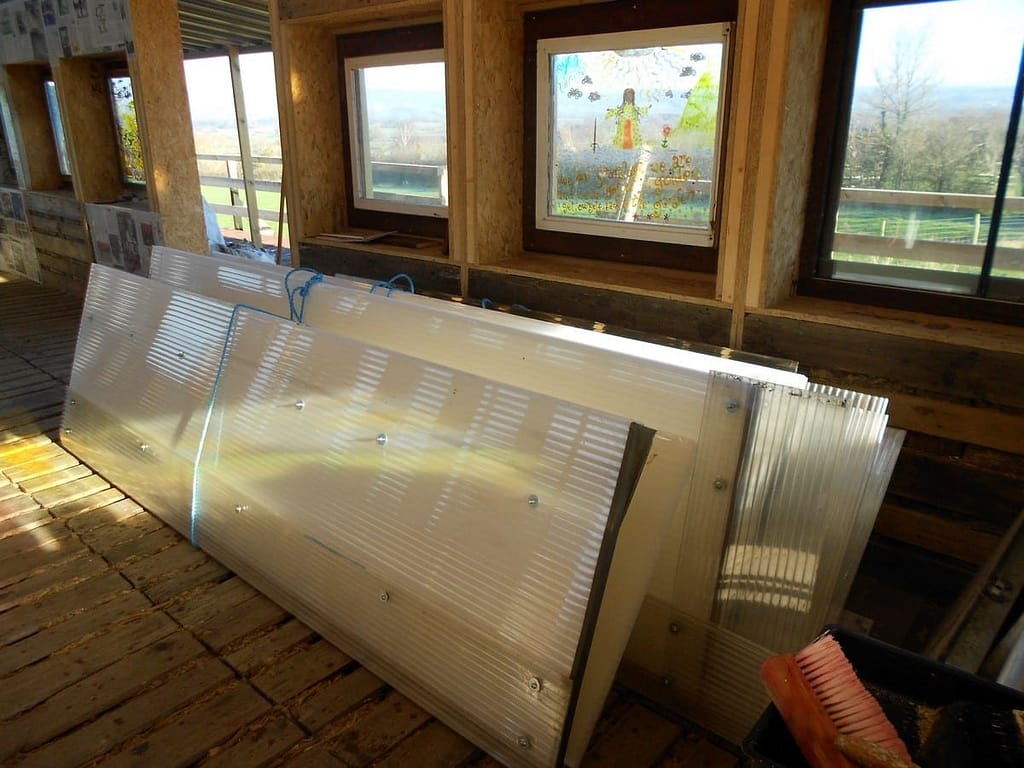
Well, nearly. I have to fill in the gable ends, and windows, so I am seriously on the scrounge for glass units and polycarbonate.
It looks as if Mark Robbins Windows in Glastonbury and Castle Improvements in Bridgwater are going to come up trumps
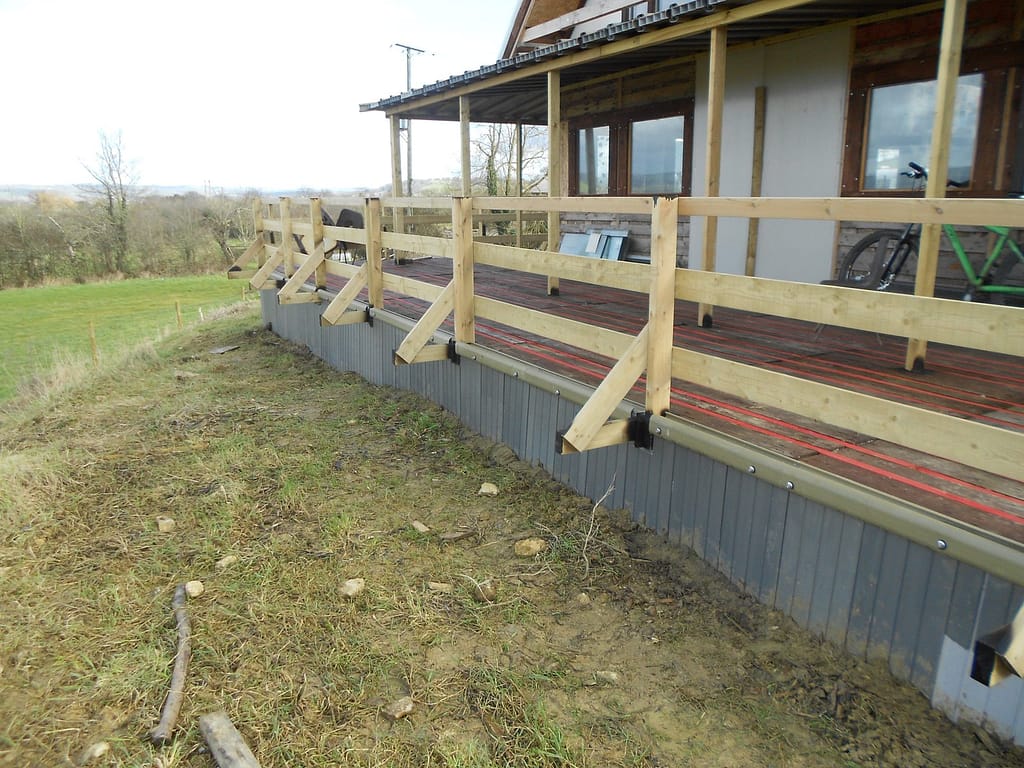
In the meantime, Alex is filling the tyres for the foundation pads for the veranda.
You may notice that the tyres are not dead level and not exactly the same height. I don’t care! As long as the concrete is roughly level we will simply pack up each pad to the right height which we can easily do with laser accuracy. The concrete pads are another good example of “good enough”.
We were going to use the chipped up pallets in the roof sections but it turned out to be too heavy so we used straw instead. However, since we have the wood chip we are going to “lose” it round the tyres where it will act as an additional weed suppressant.
Wednesday July 15th 2015
We have now “lost” the rest of the woodchip round the tyres, and the foundation is ready to go. As with the original foundation tyres the idea is to get them in roughly the right place but not worry too much because we will pack them all up level before we put the veranda floor down. We have recovered all the pallets we used to corall the woodchip and use them in the veranda together with some more that we will need.
We wrapped a lot of the building in cheap silage wrap before we put the roof on, but I have been dying to take it off as soon as possible. So Alex is doing this whilst I get on with filling in the gable ends with free double glazing units which are chucked away and smashed when people replace their windows. The double glazing contractors have to pay to get rid of them. This means that by having them we are saving them money and doing them a favour, but rather like the tyres it is inconvenient for them to save them for us, so we are very grateful.
So far all the units have come from Mark Robbins in Glastonbury, and Castle Improvements in Bridgwater.
Neil at Castle has also given us a lot of second hand polycarbonate as well. Last week he rang me up to say they had got about sixteen old units in wooden frames which are great. I will take some more pictures tomorrow and put them in. All second hand of course but we will finish up with windows that are all free and would have cost a few thousand if we had them made.
Of course the downside is that you have to make do with what comes so it is always a bit of a jigsaw but when you see how it looks I hope you agree it is pretty good considering it’s free!
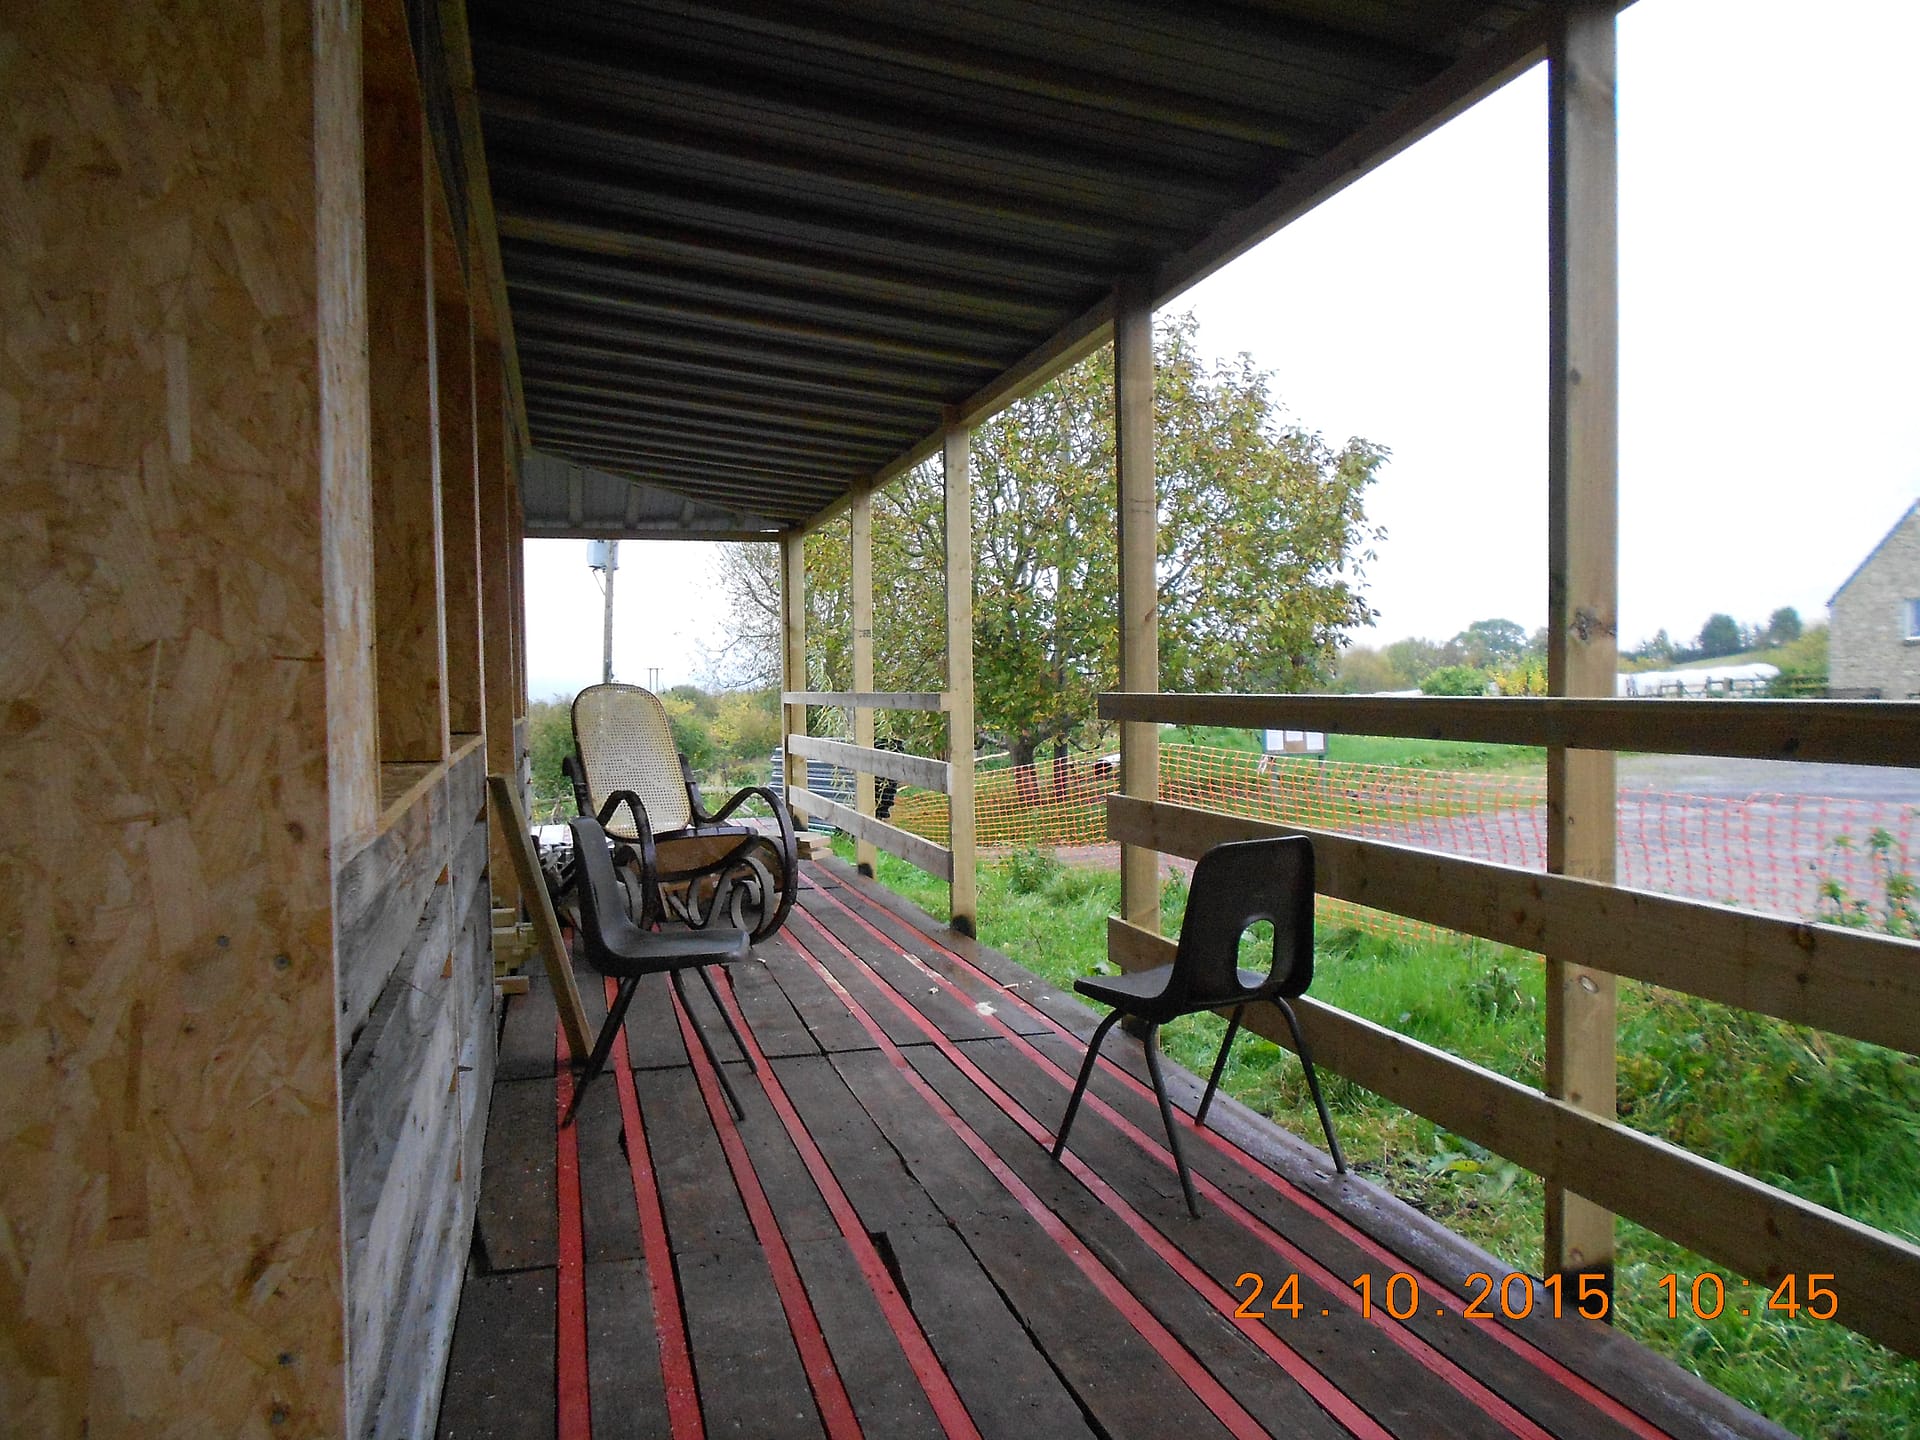
This is where the wide veranda will be
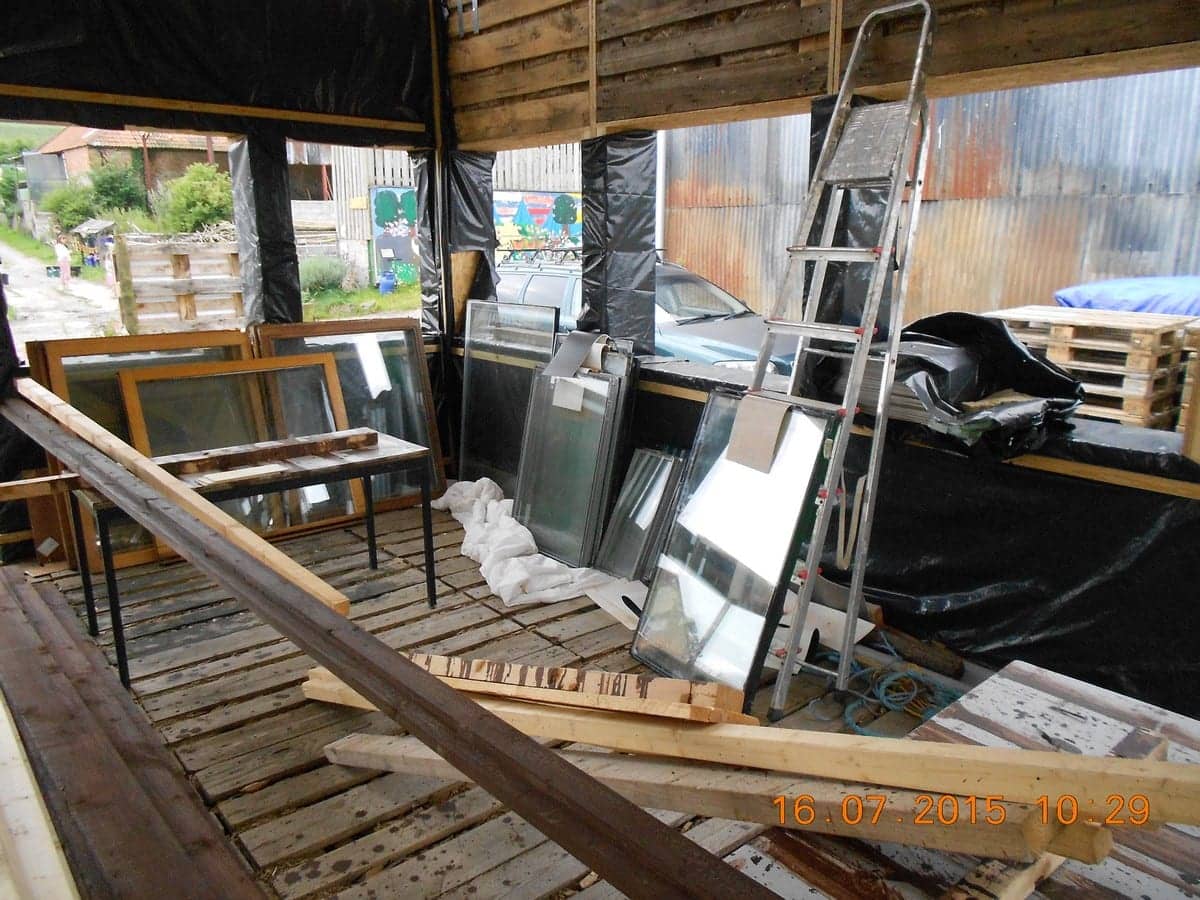
This is part of the selection of glass units we have been given by Mark Robbins and Castle Improvements. In fact, rather like the tyres we have used, giving them to us saves them money which they would otherwise have to pay to have them taken away. Nevertheless, it is good of them because it is a lot less hassle for them to just pay to chuck them as opposed to having to put them aside and save them for us.
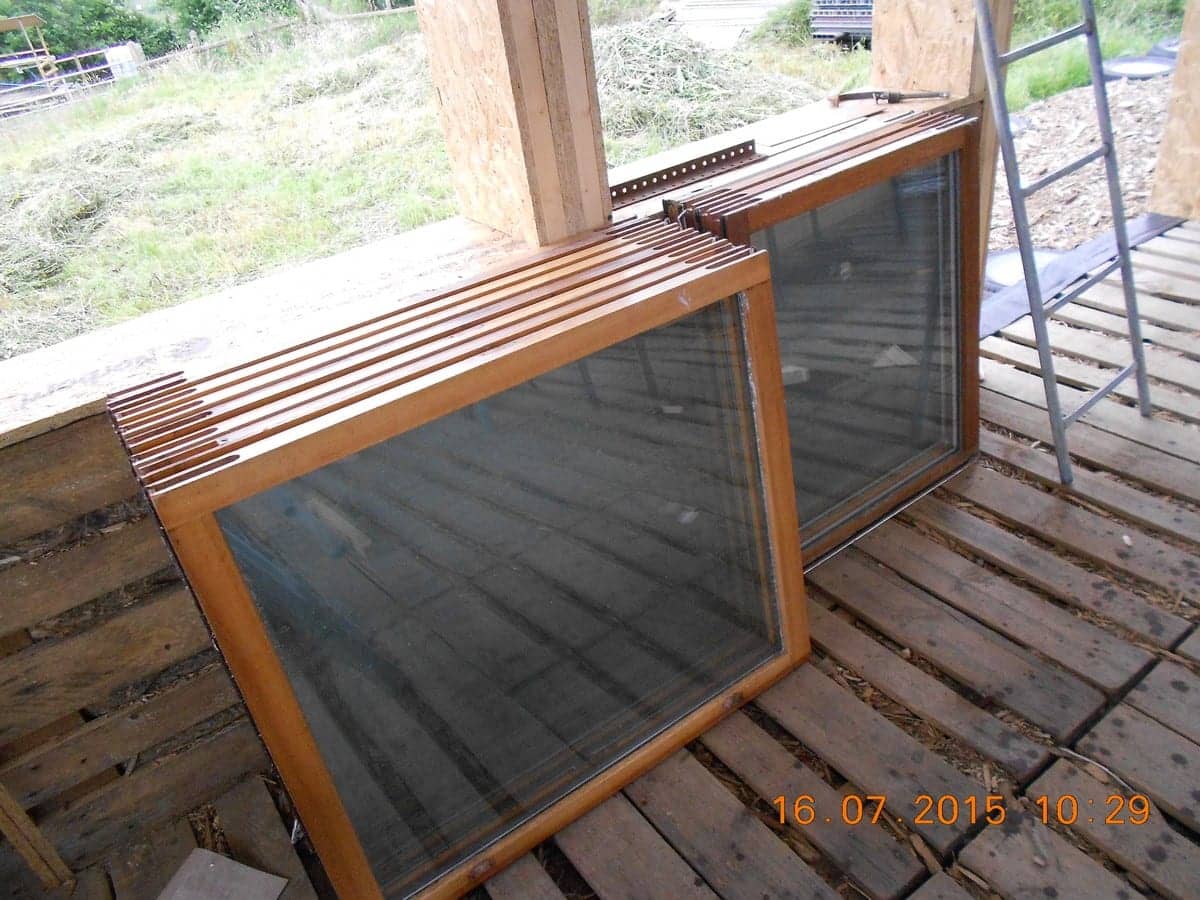
These glass windows from Neil at Castle improvements are a great find because we can use them for the kids to decorate windows. I have got at least about sixteen of them, so that should keep a few kids busy over the rest of the season.
The pictures above show the selection of glass and poly that we have got so far from Mark Robbins and Castle and the picture below gives you an idea of how we jigsaw them in using stained 2 x 1 roofing batten as glazing beads. It is an incredibly simple system, but it is not perfect partly because it breaks one of my golden rules about how to avoid wooden constructions rotting.
The golden rule is that you should design any wooden construction exposed to the weather so that all water runs off it and there is nowhere that water can hang around or be trapped. It is a very difficult to do but it is the only way to avoid even treated modern timber rotting in double quick time. It is the reason that most conventional wooden windows rot, the bottom glazing bead going first followed by the bottom edge of the window frame.
My gable glazing system is pretty poor by these standards. I try to reduce the exposure to weather by having a good overhang at the gable ends, and the windows in the walls will be completely protected by the roof over the veranda. Nevertheless, ten years is going to be a maximum lifespan for all the vulnerable wooden elements of this building without serious maintenance, so it is just as well that it is basically a temporary structure.
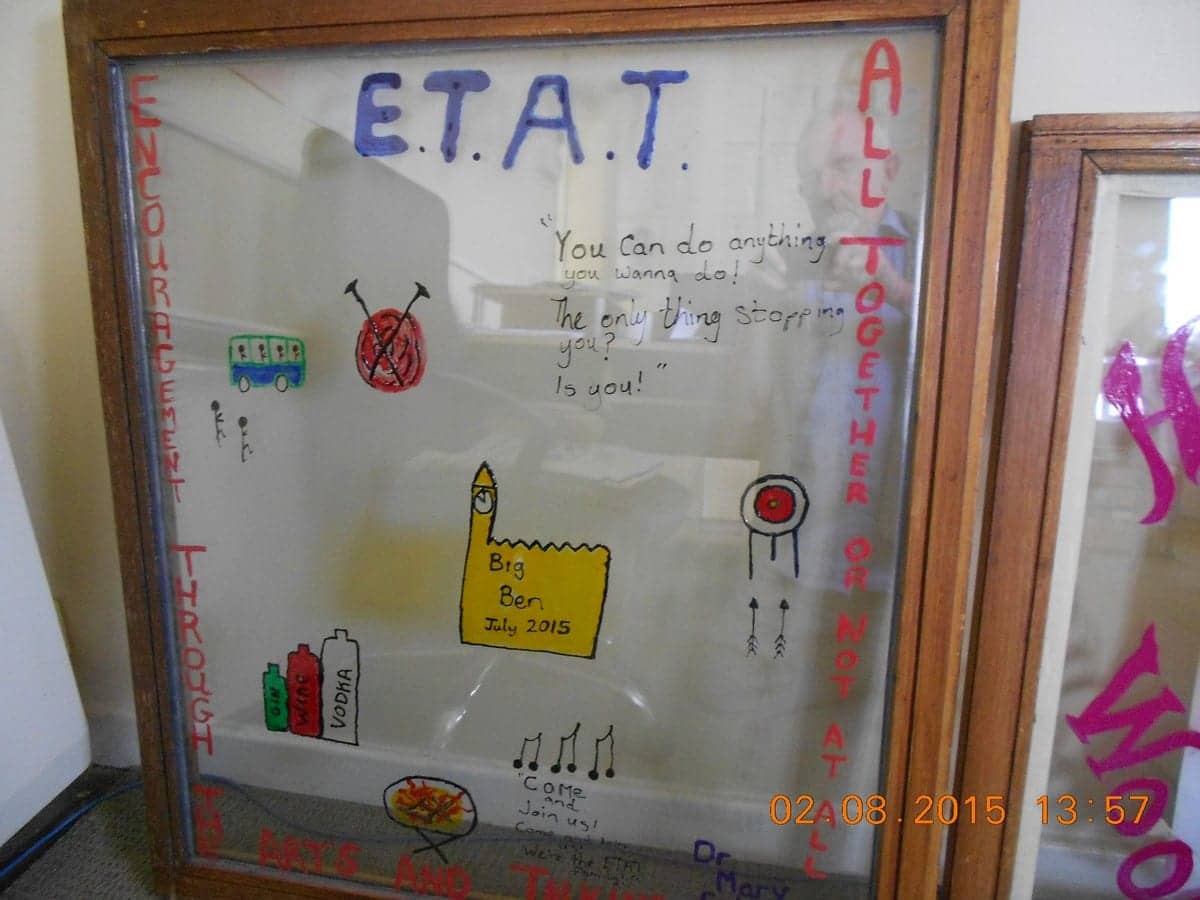
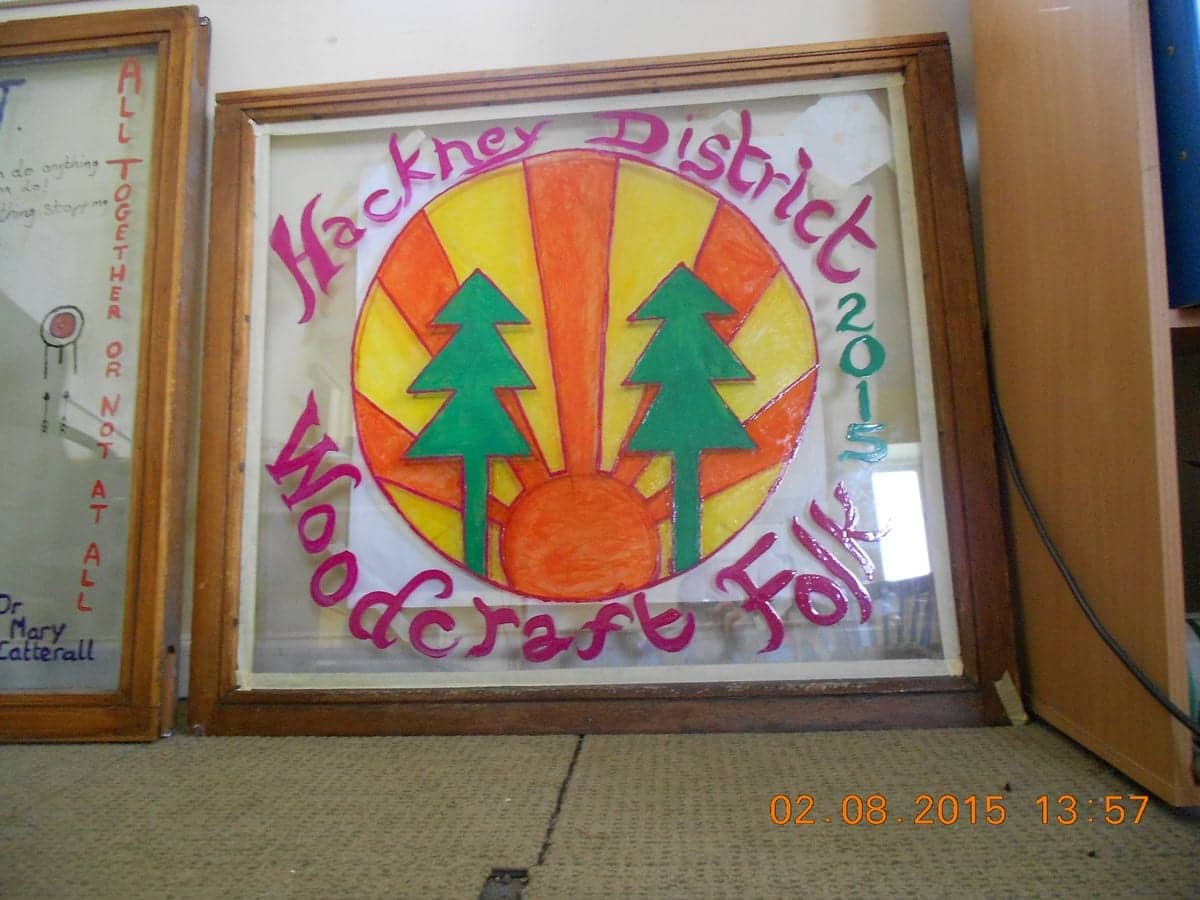
Sunday August 1st 2015
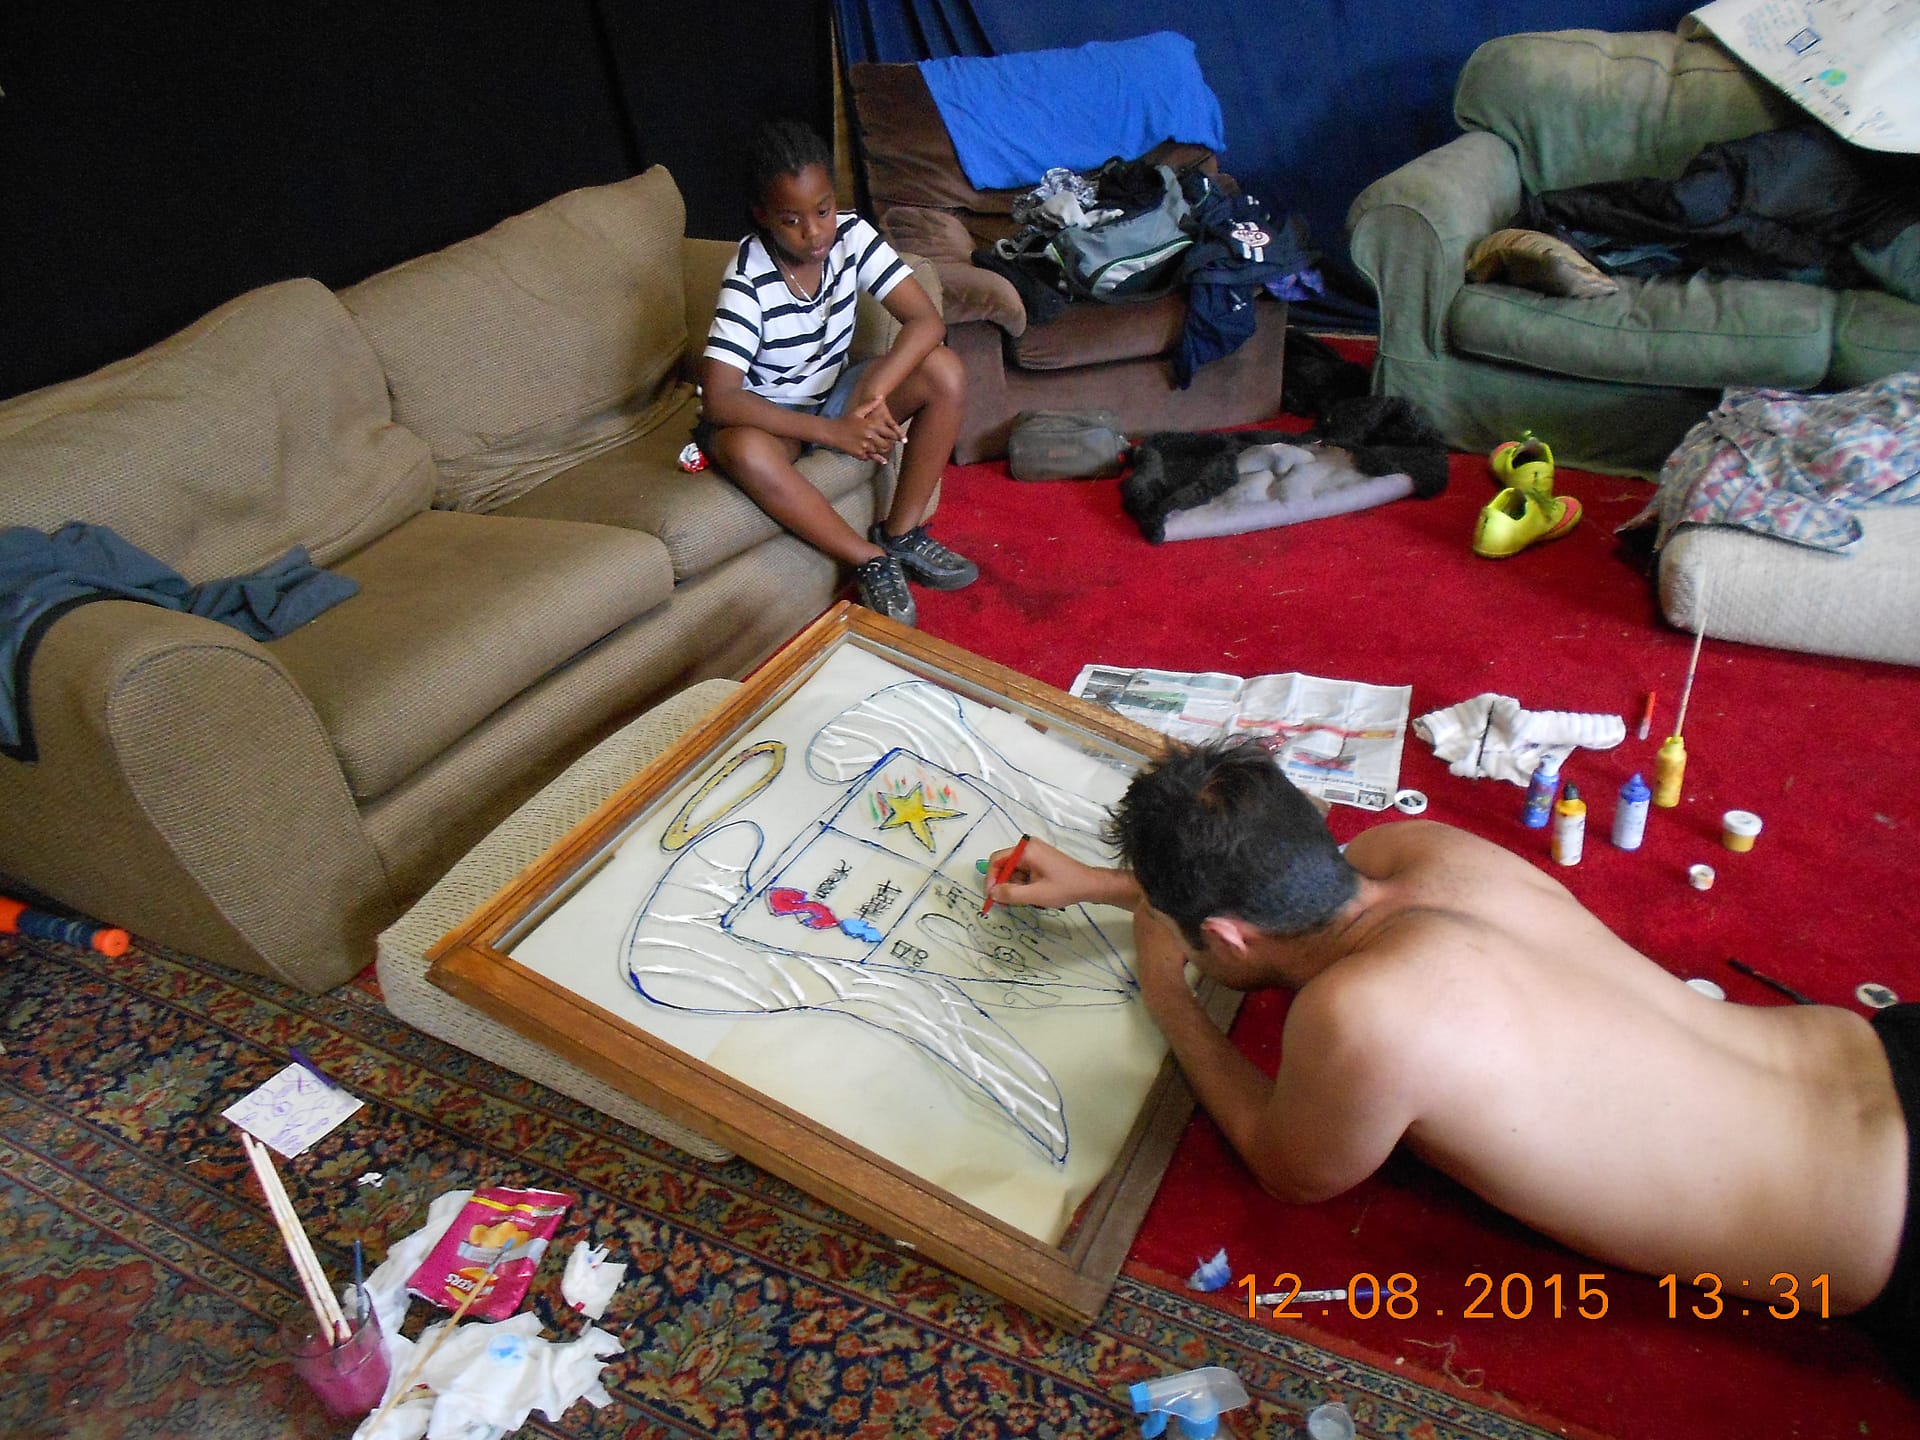
Here are a few pictures I took on Friday of a window being done by The Wood craft Folk from London. I am just putting them up so you can see them and will edit them in properly soon.
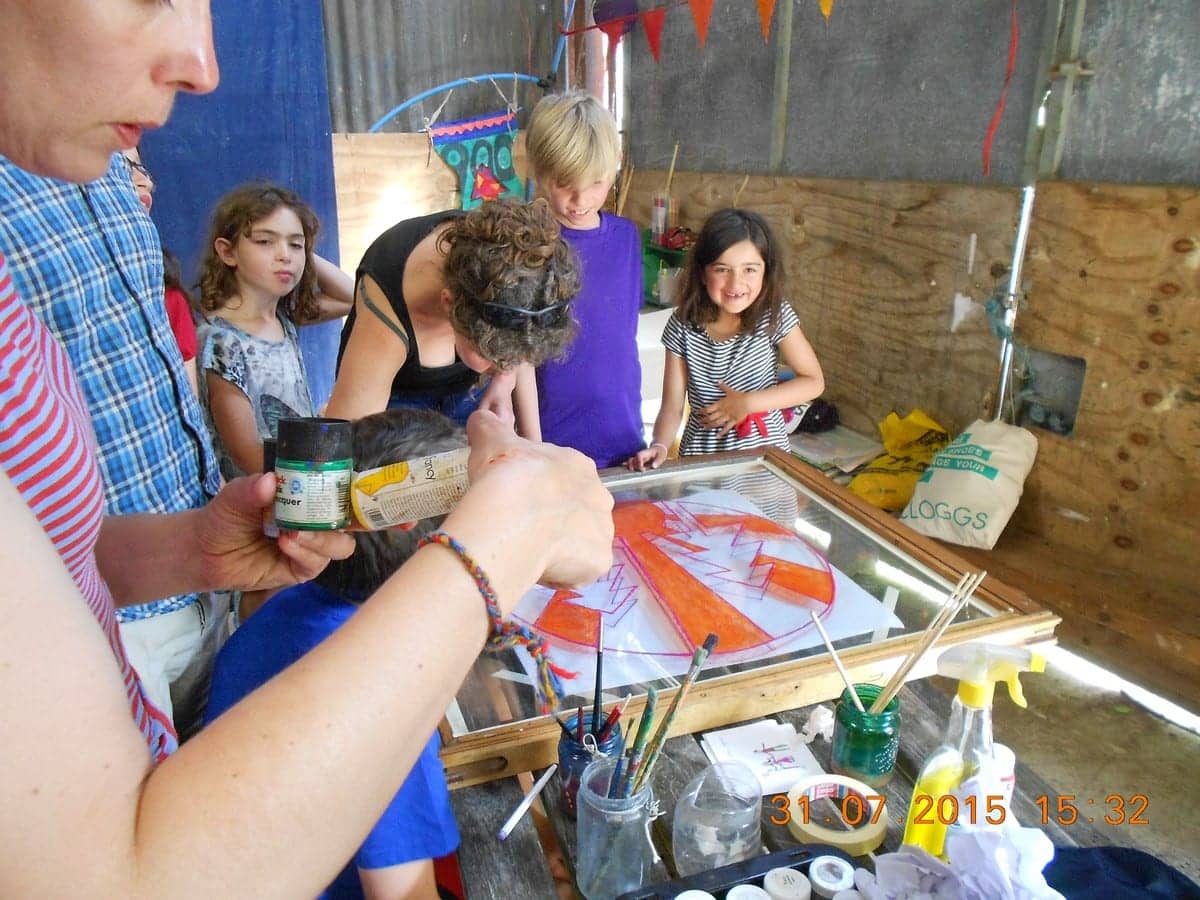
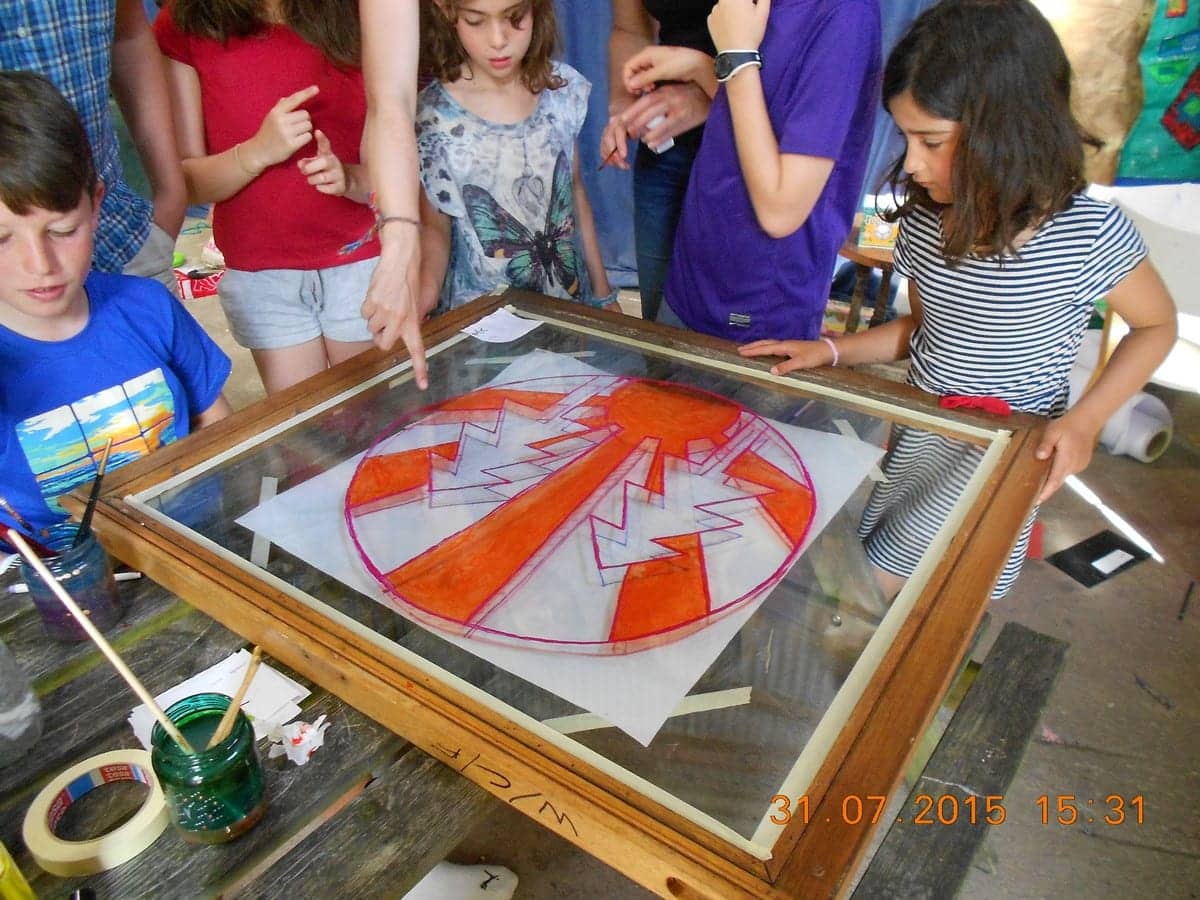
I decided not to edit them but just to let you see what they did. I think I am going to put them in the window gaps temporarily so that everyone can see what we are trying to do and then we will fix them properly when the veranda is done.
Saturday August 8th 2015
Here is another of the window pictures and some of how the gable ends are coming on. Things have been a bit slow on the build for a couple of weeks because I am also still running the scrap metal scheme and we have to look after that as well. During the summer holidays, the schools chuck out stuff they are replacing including desks and filing cabinets and about 200 polypropylene chairs. To be honest I think it is a waste of money. The old ones are mostly fine. They may have rude words and chewing gum under the seats but otherwise they would be OK except that the school says “they don’t match the new ones!” I think it is a symptom of how wasteful we are especially with public money even though public money is ours!
Wednesday August 12th 2015
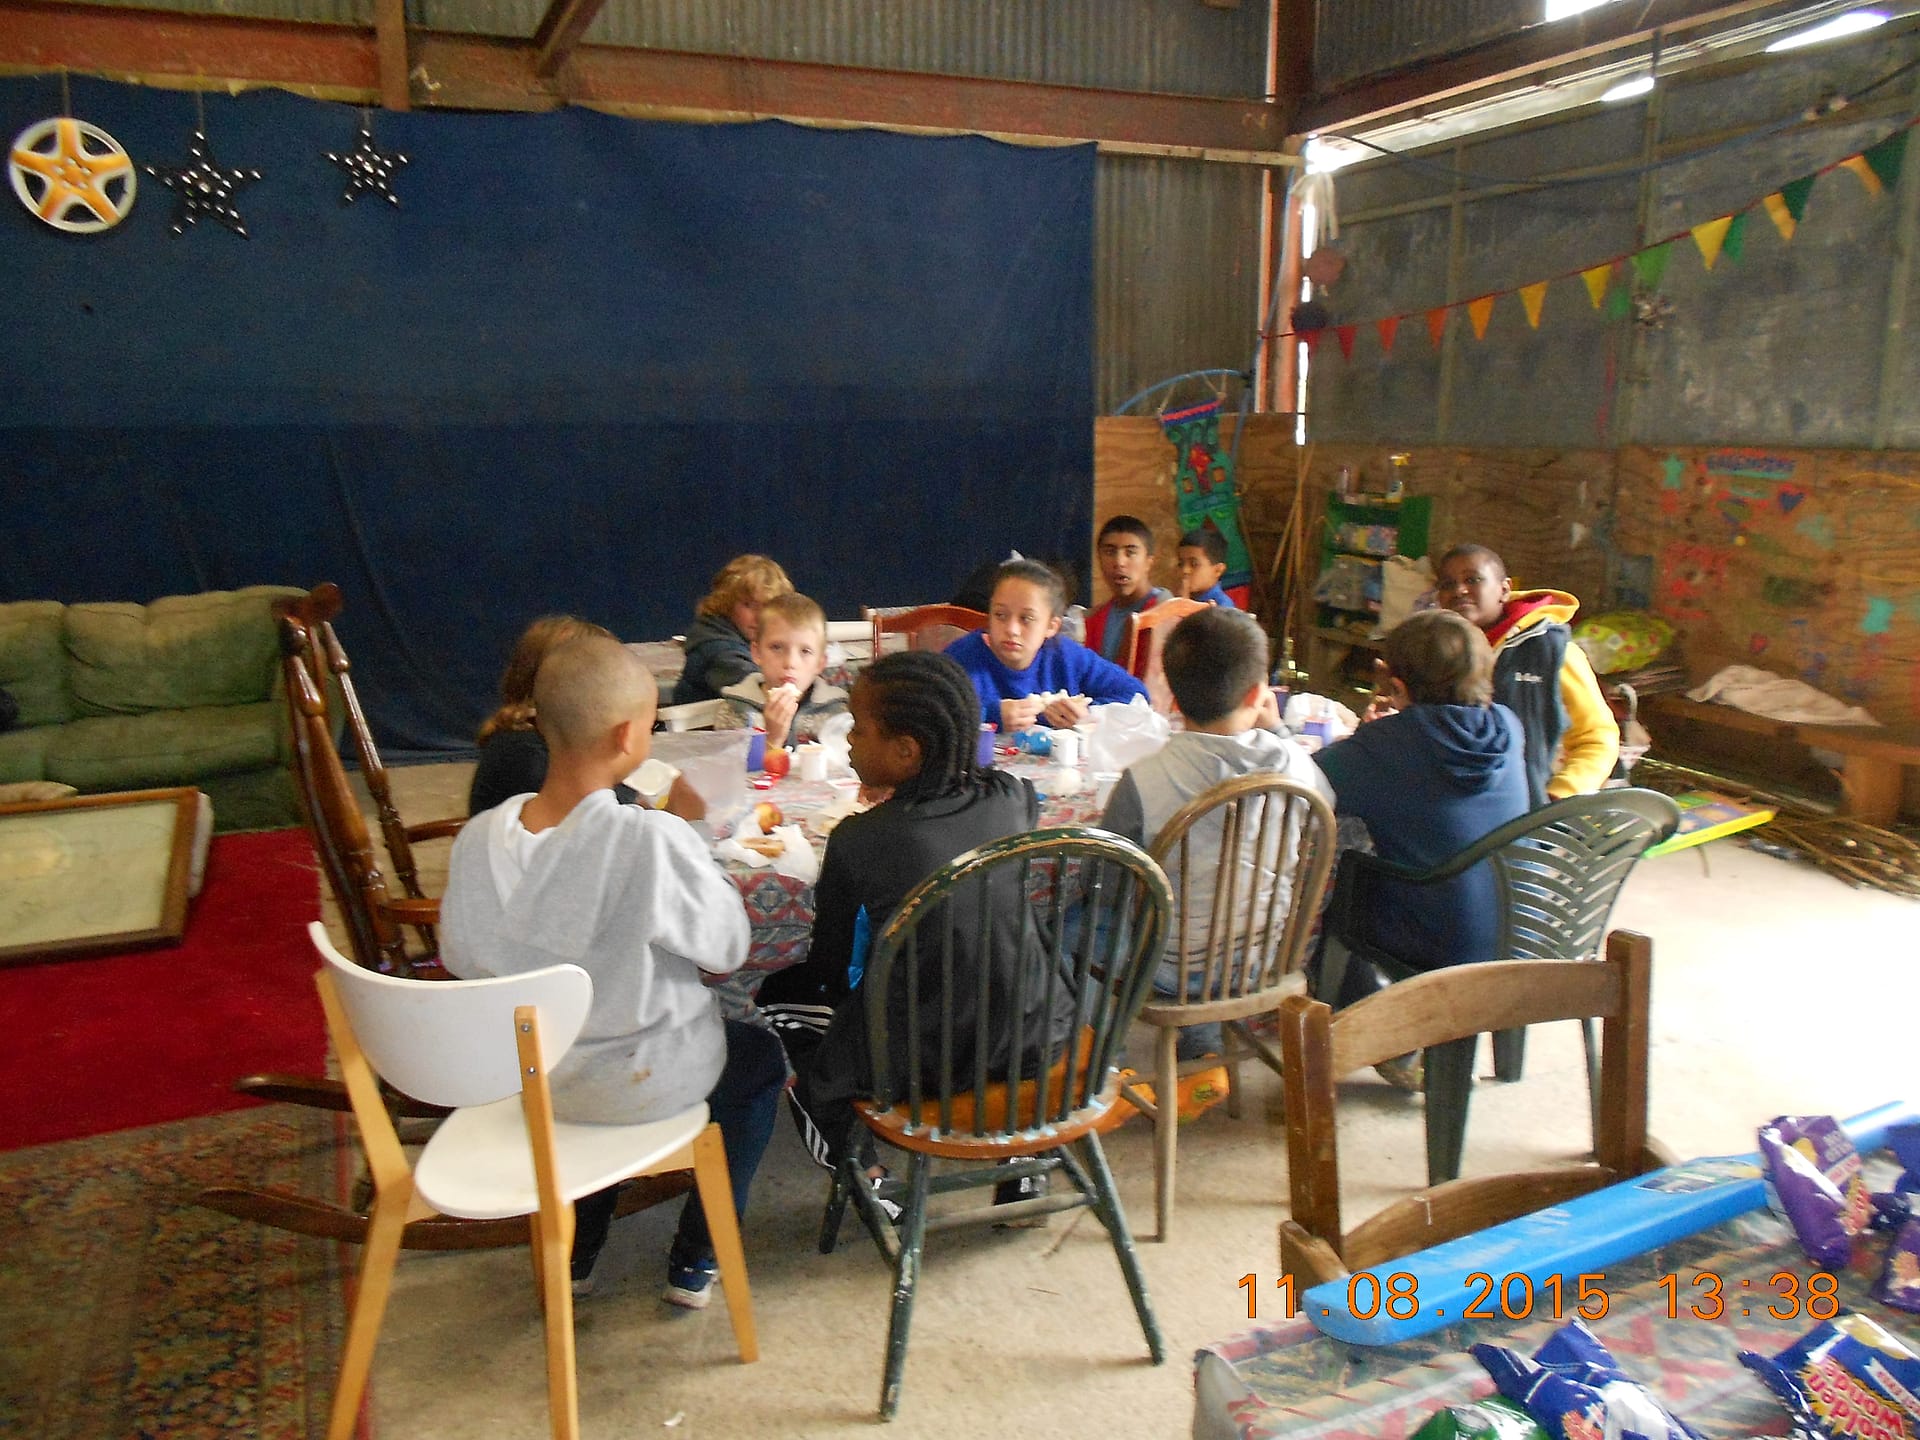

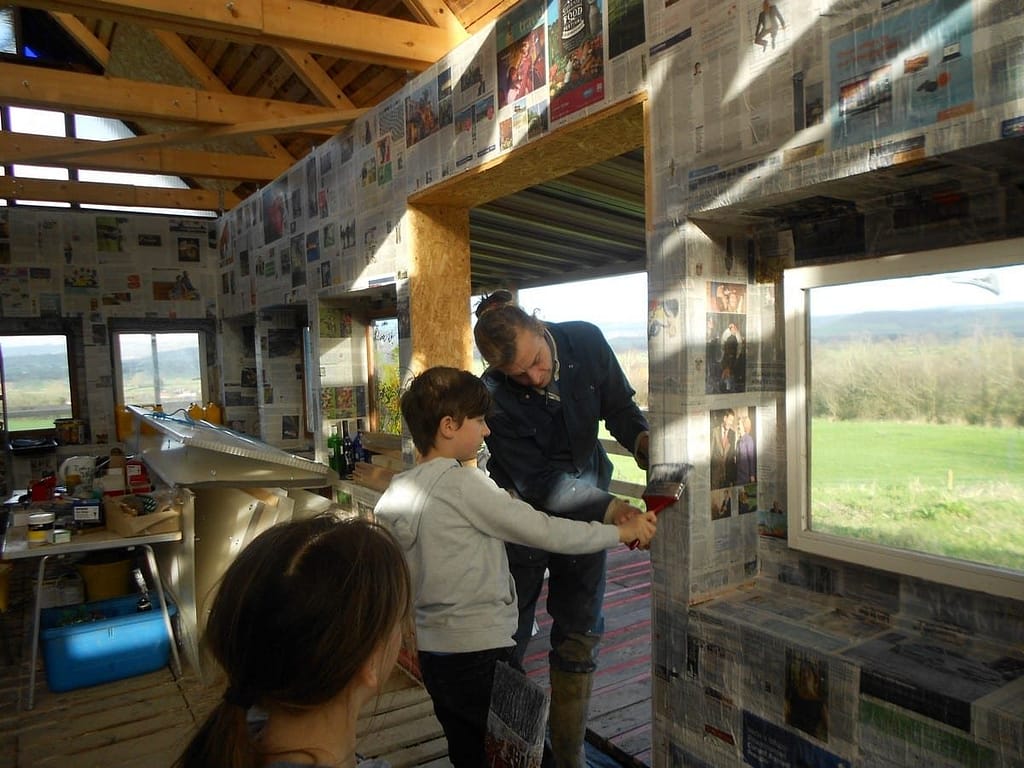
This is Yuseff with a bunch of kids who have done a window and below is one of them who insists that he was in the picture above but you can’t see him so here he is, definitely not obscured. I feel really bad that I haven’t got everyone’s names, but we are really busy and each group is here for such a short time.
Sunday August 23rd 2015
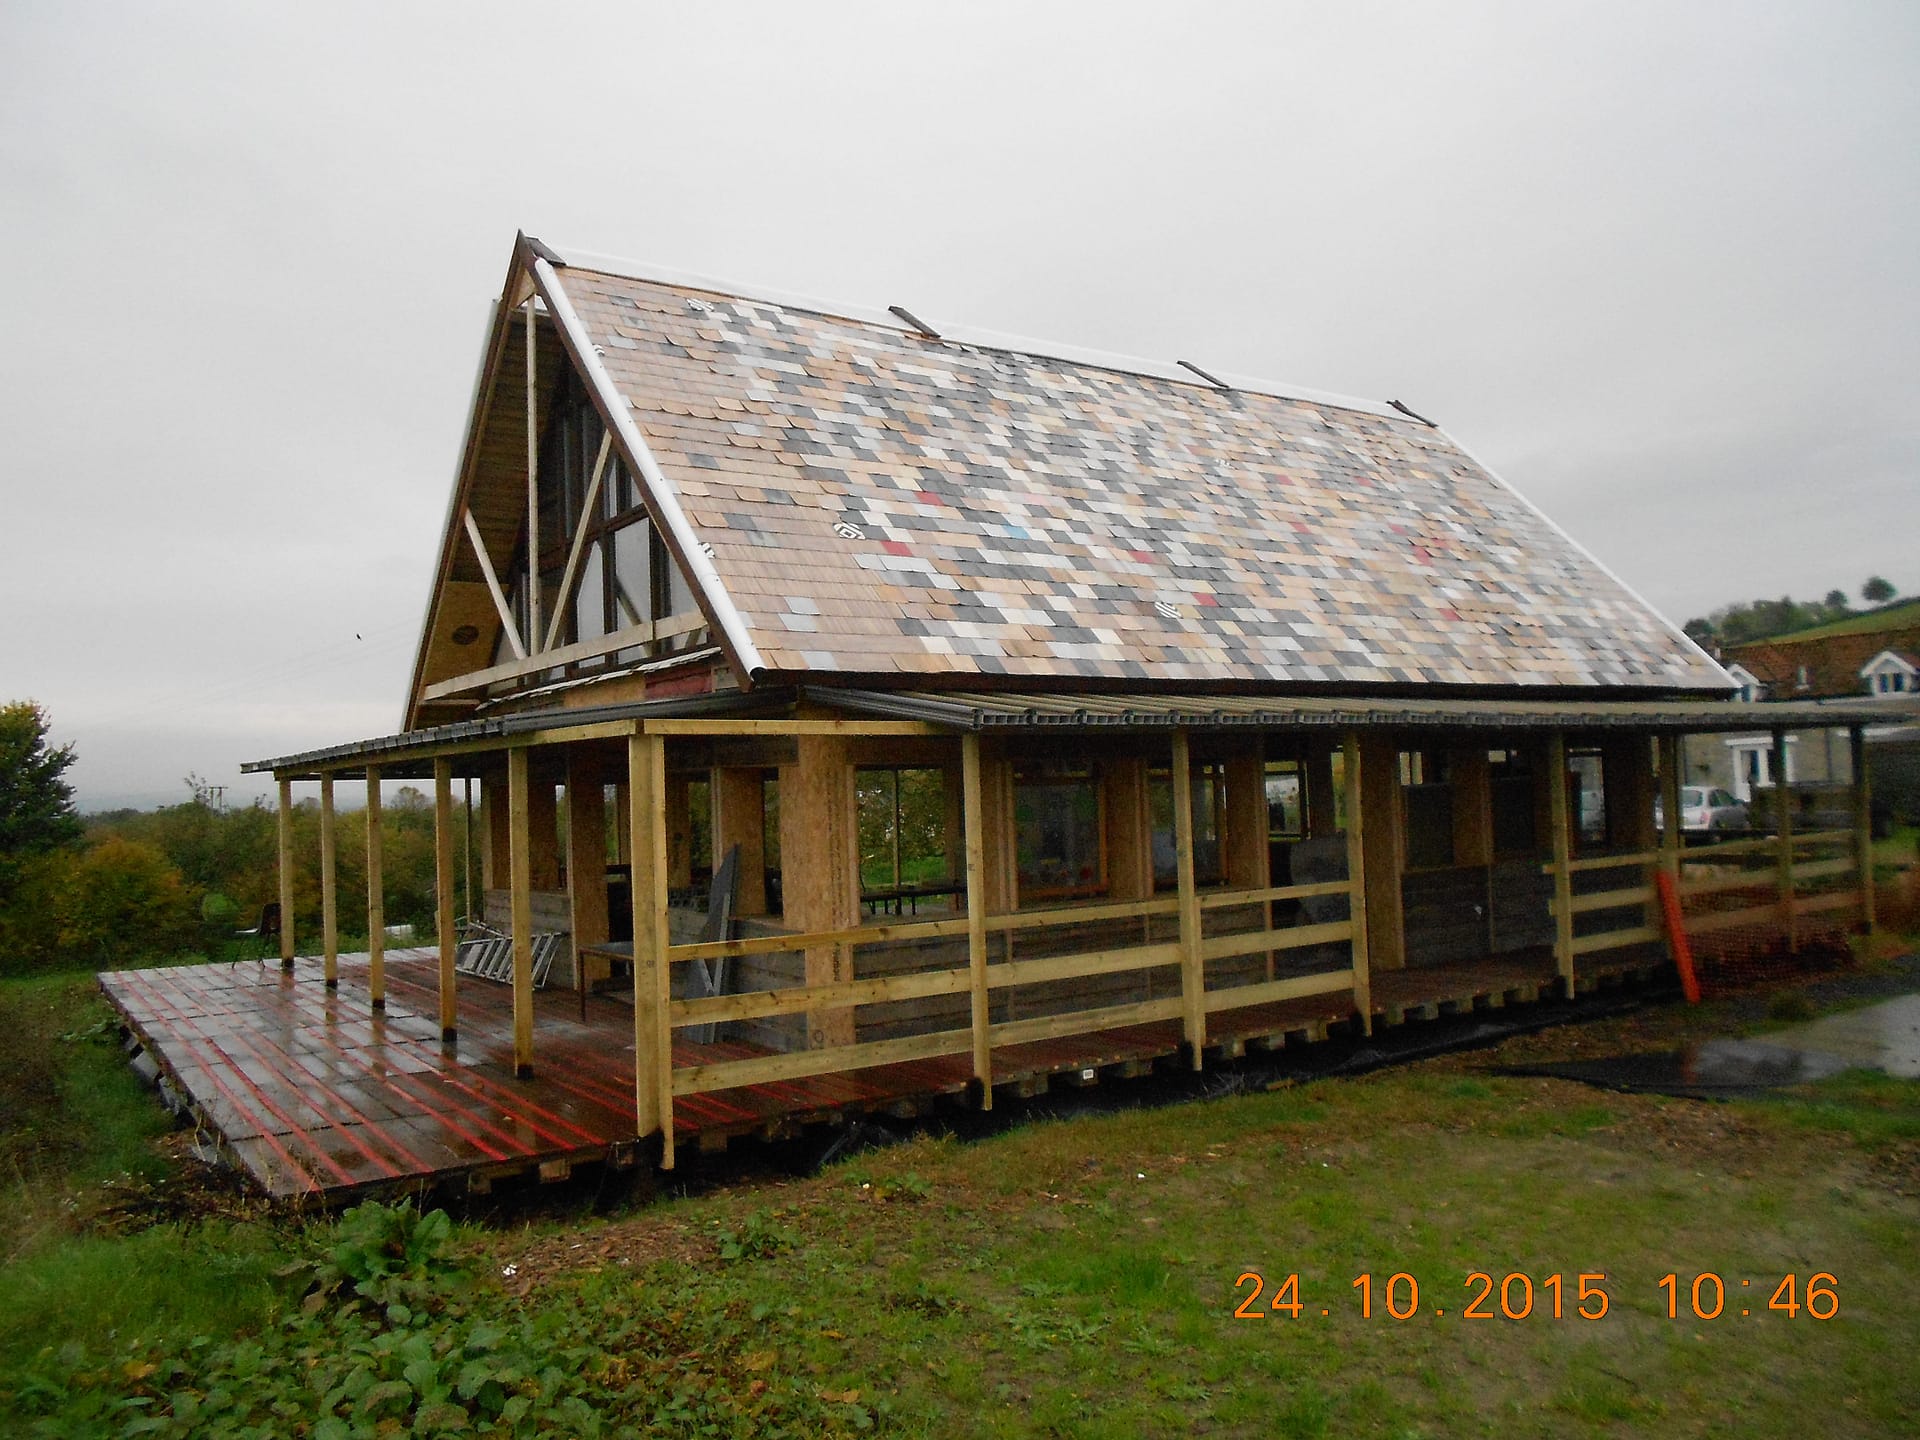
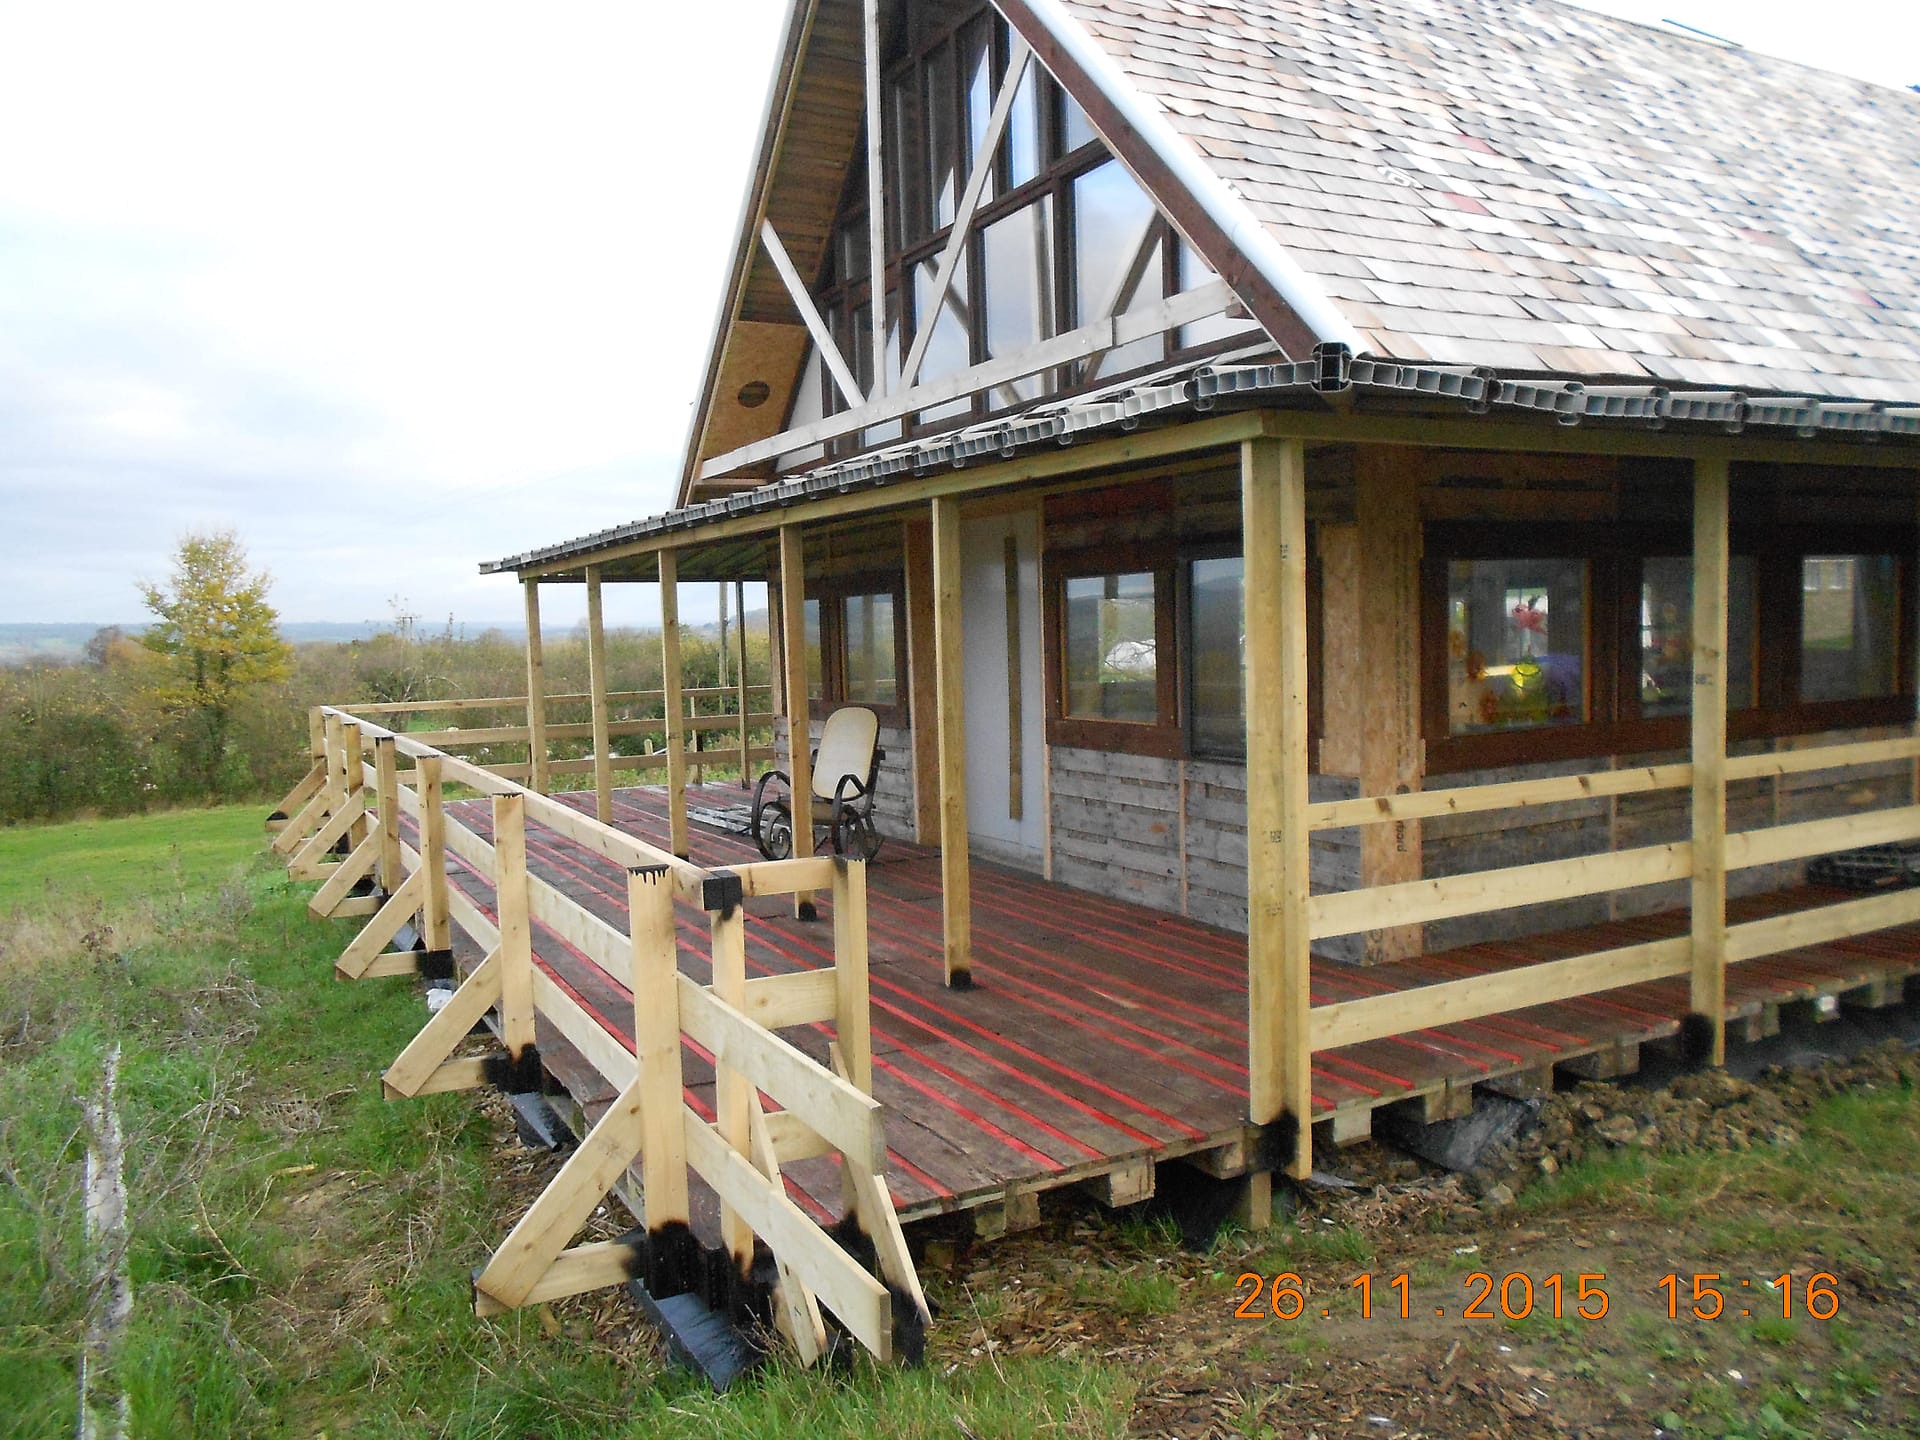
We are finally on to the verandah. Well, it seems like finally, because the gable ends were quite hard to do because you have to fit in whatever you have in the best way but it seems to have gone OK. There is a bit of fiddly measuring to do to get the levels right on the verandah. In the end we will put a “proper” floor inside. It would be nice to leave it as pallets, but it really isn’t good enough. It would also be really good to find something recycled or free but I can’t think of what. So it will probably be tongued and grooved chipboard which is pretty cheap and easy to put down and is a reasonably “eco” product despite the glue in it because it is a pretty efficient use of sustainable softwood. Anyway, it is 18 mm thick so my packing up for floor timbers needs to be so that the top of the verandah pallets are exactly 18 mm above the current floor level. Although I have carefully done this, it may turn out to be a bit academic because I have a horrible feeling that my whole building may have sunk more than that in places because it is on newly made up ground, but we shall see. I am not too worried which is just as well! Being wooden the whole thing will stand a lot of distortion without falling down, but it will be embarrassing if it finishes up looking wonky.
Sunday September 6th 2015
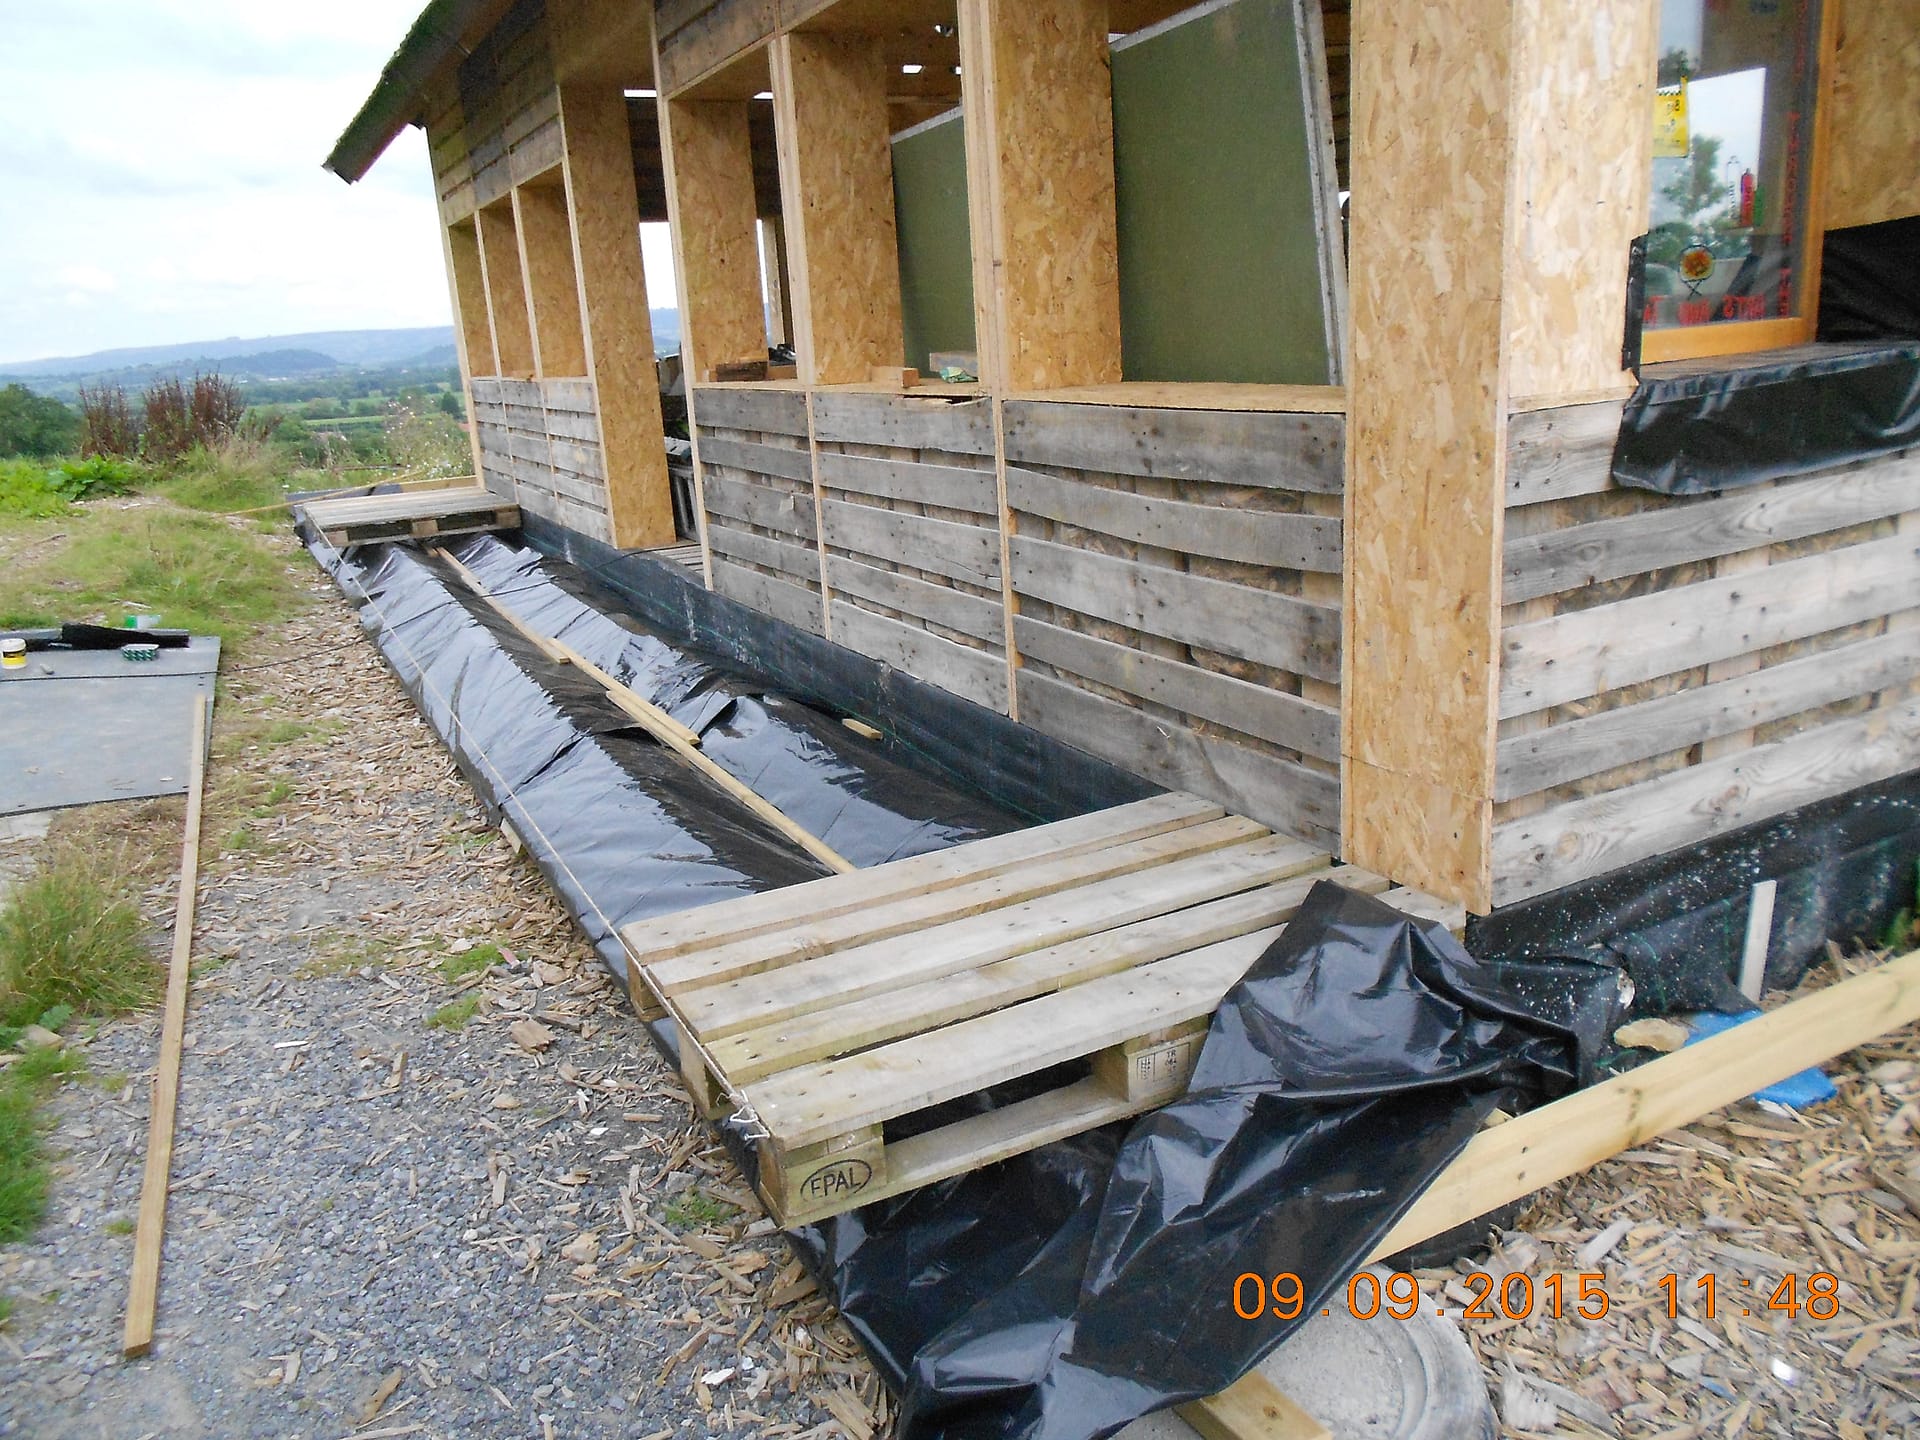
The base tyres for the veranda are fine, but I hadn’t realised that because the rain will go through the veranda floor the “foundation tyres” will fill with water which I am afraid will quickly rot the piers that the veranda joists are sitting on. So we are going to cover the tyres with some of the plastic we first used to keep the wet out of the walls.
Although we are going to cover the tyres with plastic we thought it might make sense to drill a few holes in them to drain out any water that did get in. Normally this would be fine, but our building is built on clay. Clay has this extraordinary ability to be “waterproof” and self repairing. It works like this. Grains of clay are incredibly small and when they get wet, surface tension coats each one and it forms an impermeable gel. If you damage it, each grain does the same thing as soon as it is exposed to water and seals the damage. So you can see on the tyres in the picture above that they are still full of water even though we have drilled quite big holes right through and in to the ground.
Sunday September 13th 2015
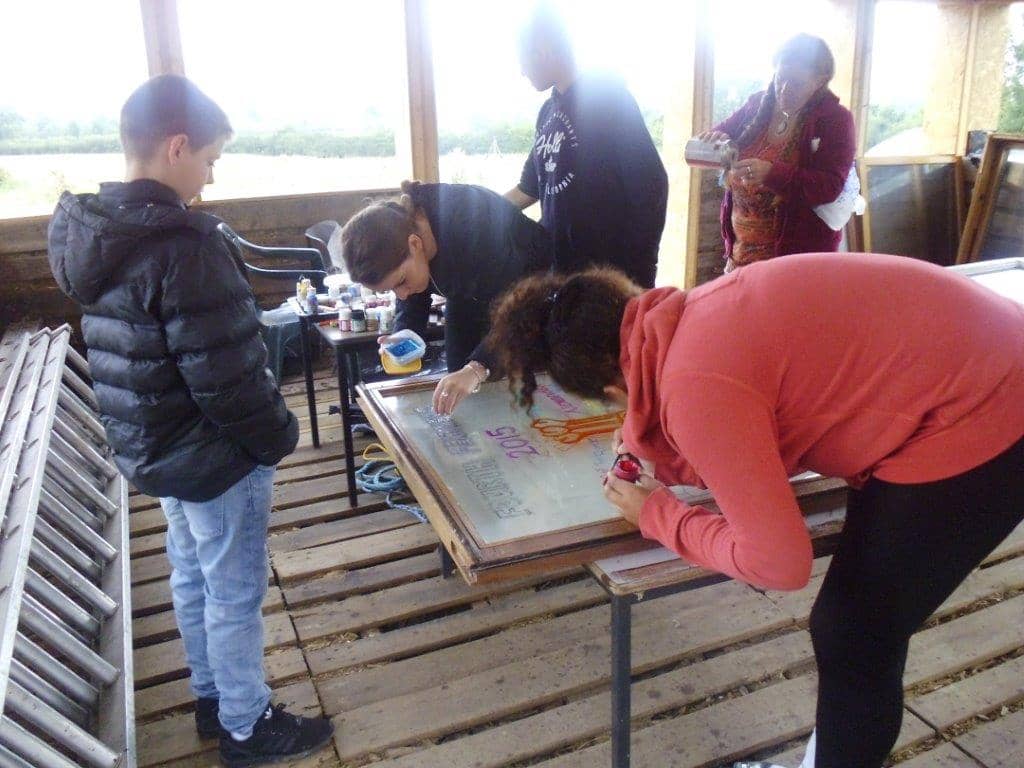
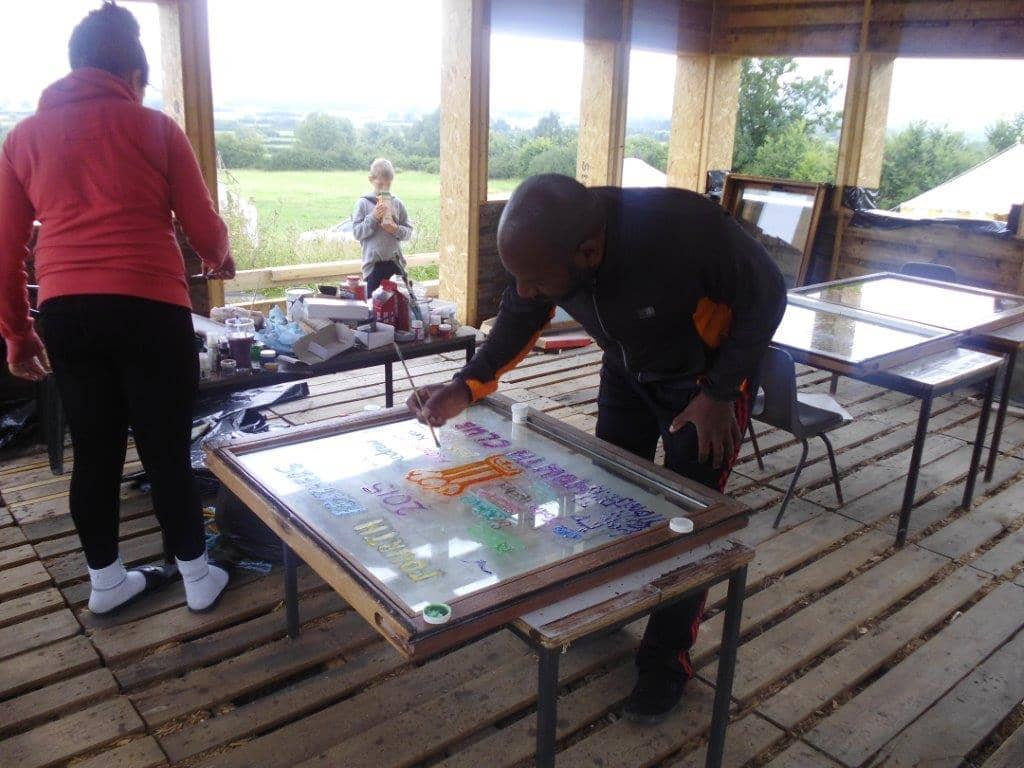
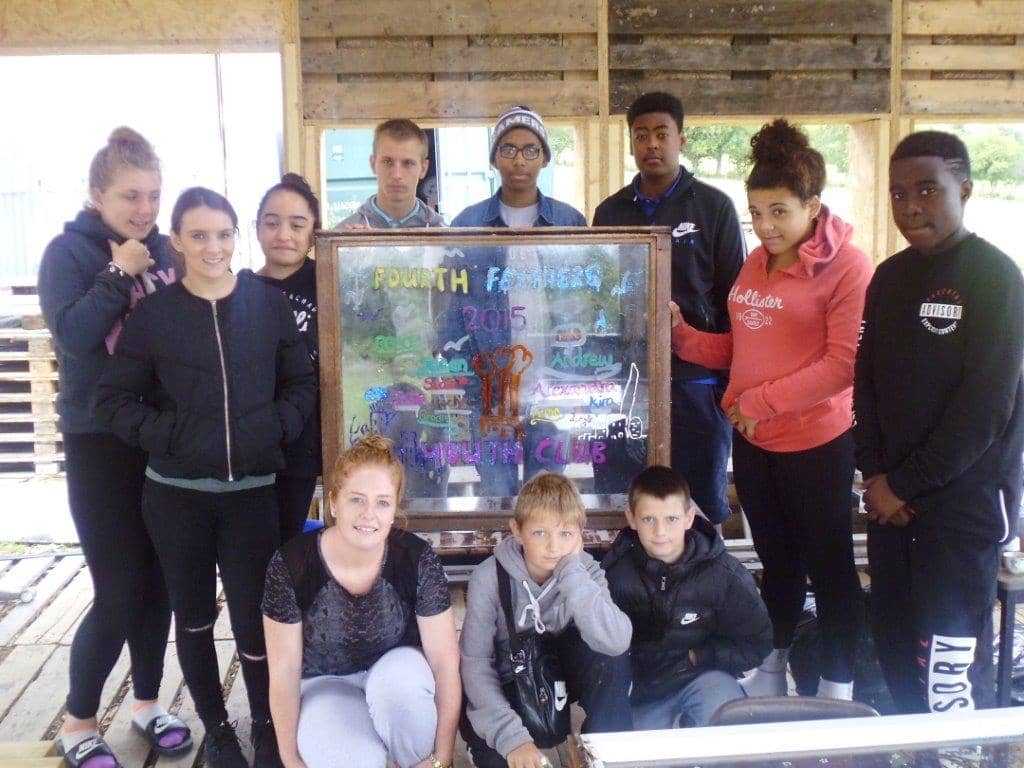
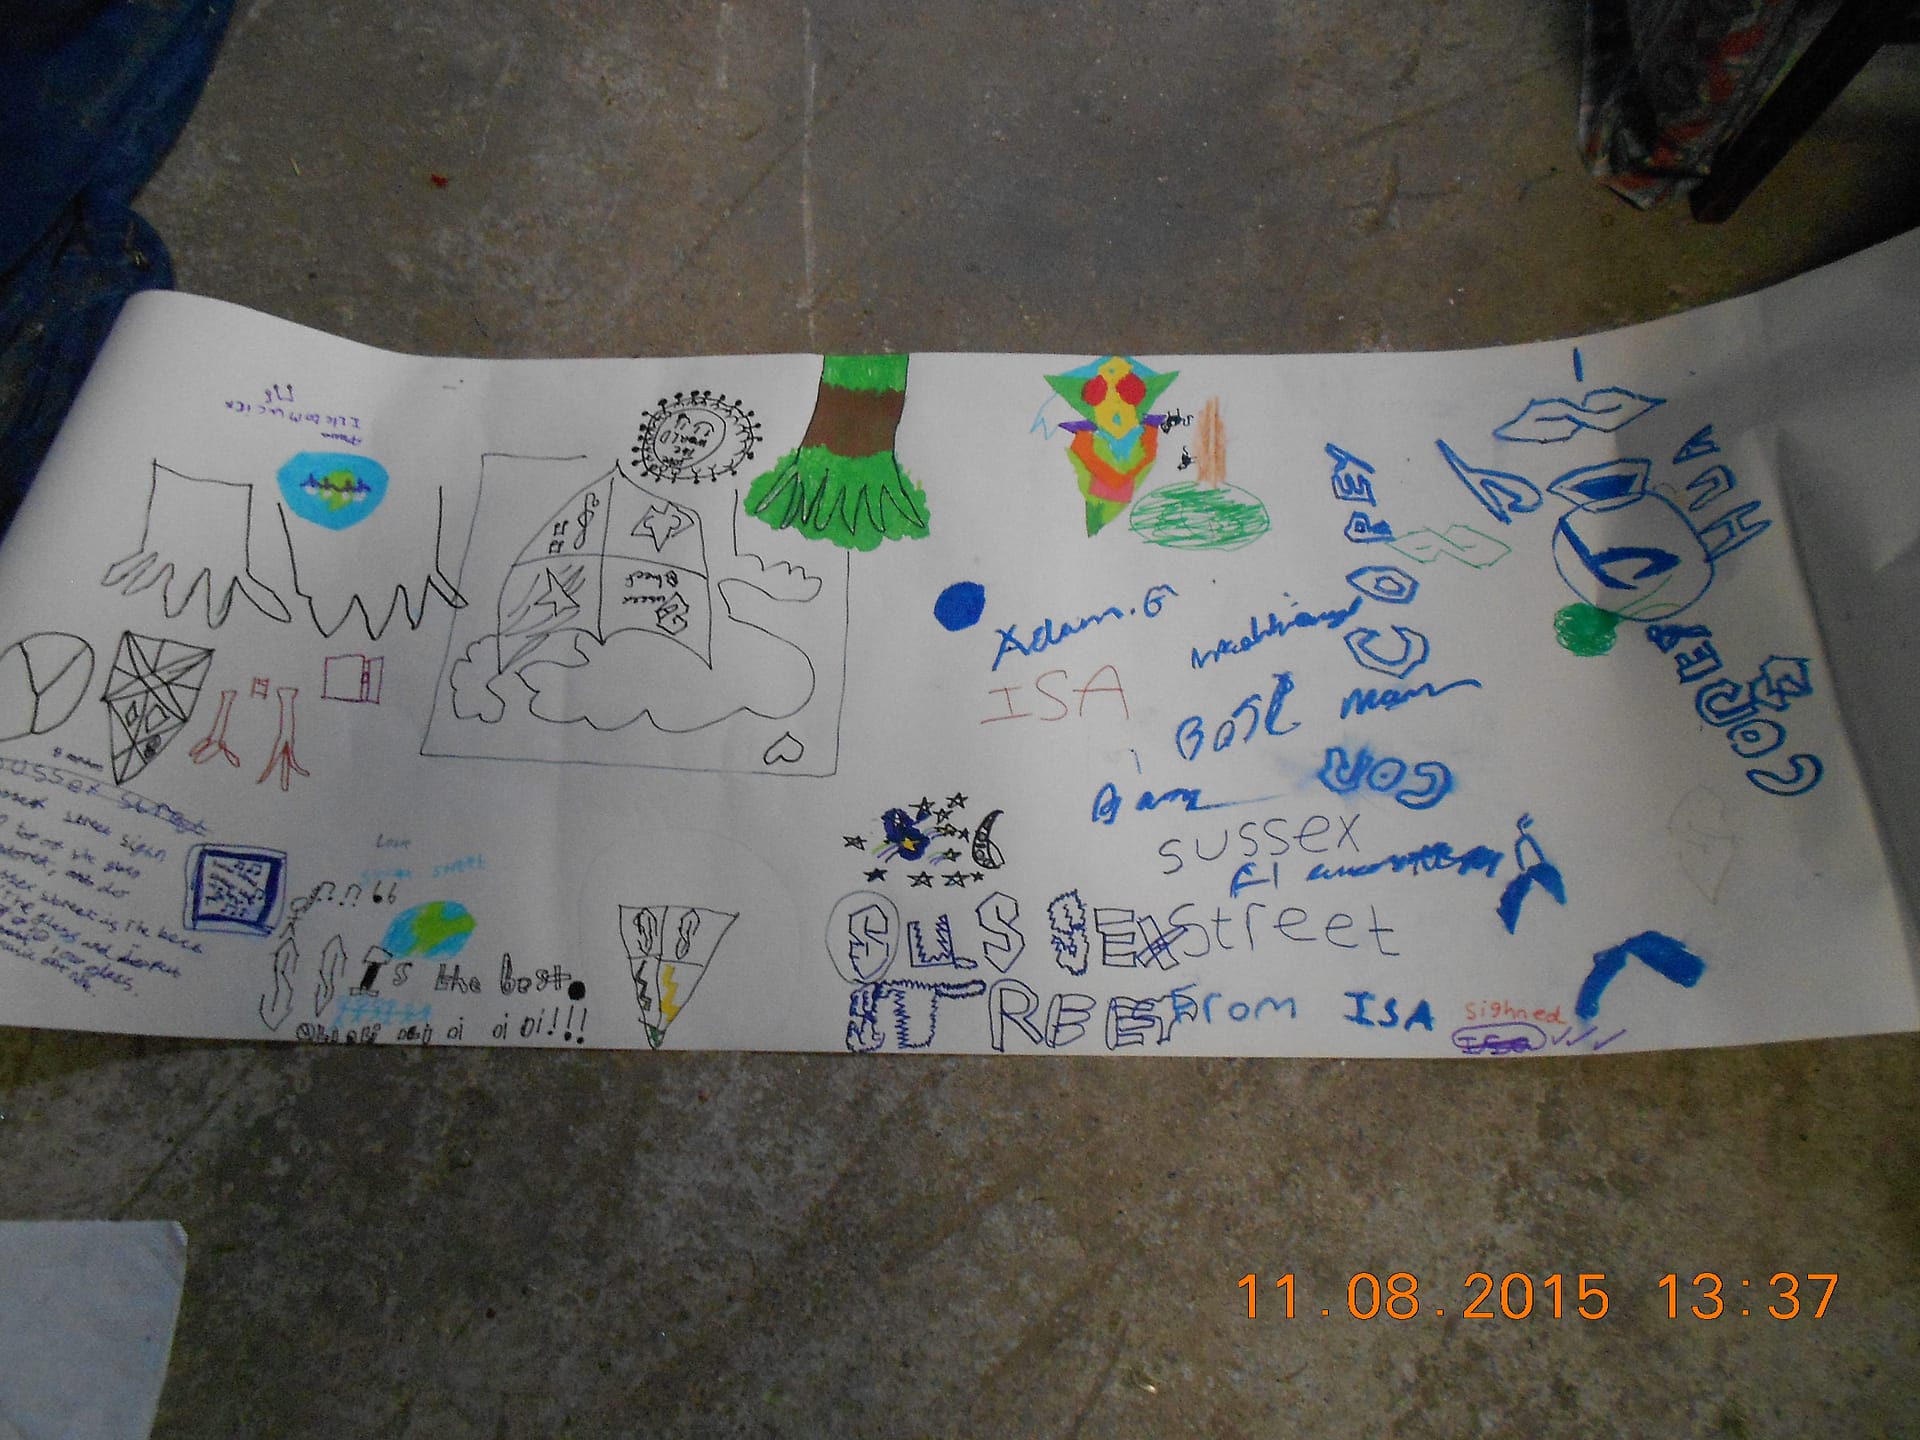
Here is the window the Fourth Feathers group from London did last weekend when I wasn’t there. They sent us the pictures but didn’t tell us who they all were so I am afraid I can’t tell you.
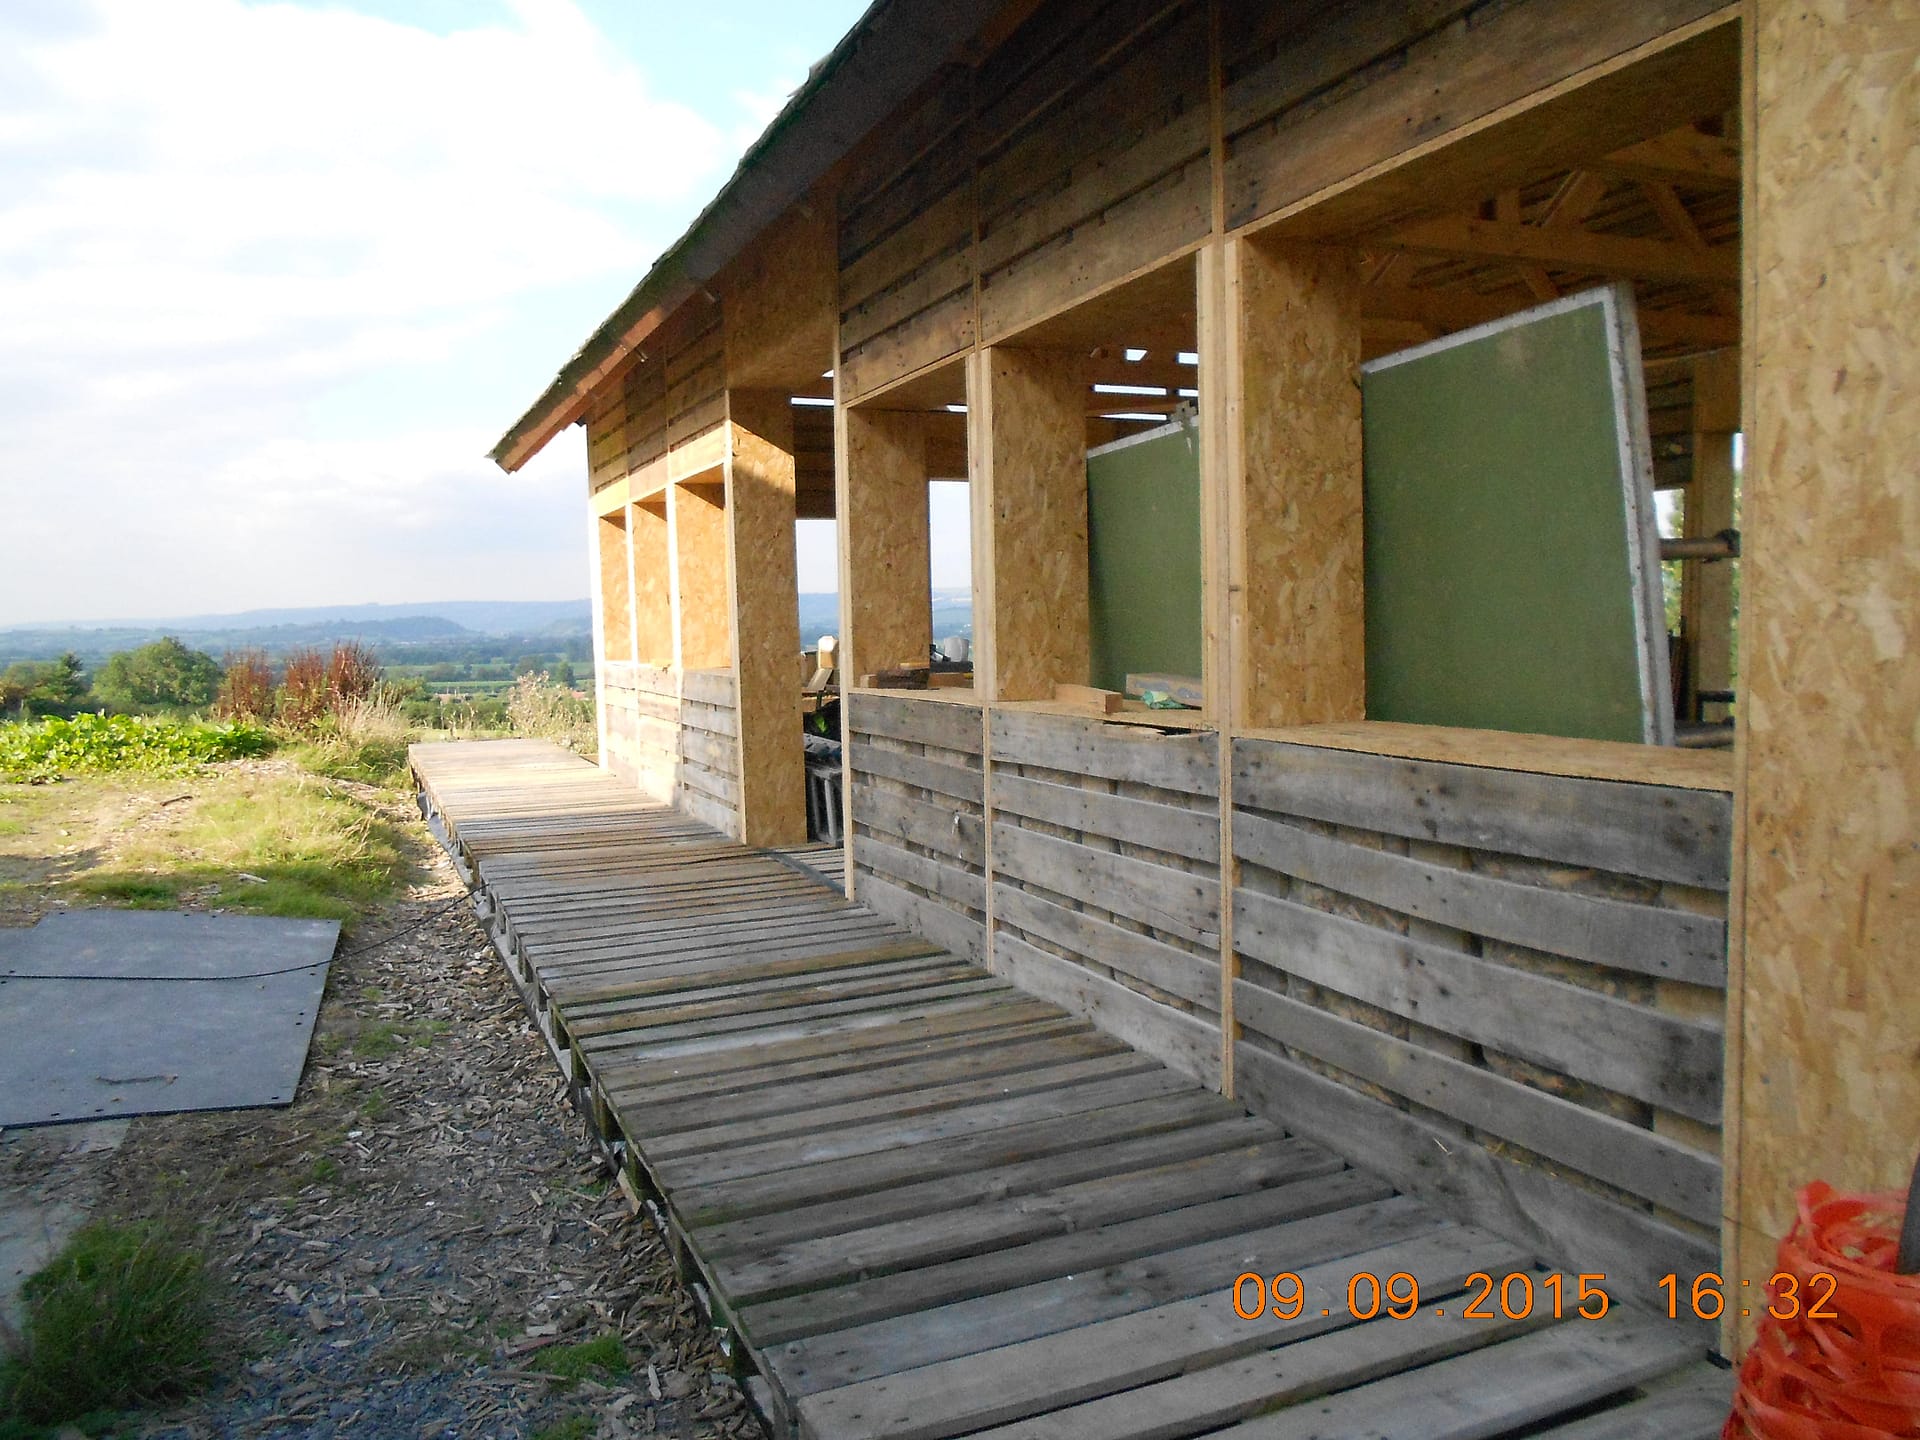
Last week Alex and I started laying the verandah pallets. Well, I did while he finished off the plastic covering of the foundation. Euro pallets are meant to be all exactly the same dimensions, but of course they are not.
They are pretty good on the 1200 mm x 800 mm but not nearly so good on height. They should be 144 mm but we have found that while they are seldom less they are quite often over 150 mm and up to 165 mm. This wouldn’t normally matter but it does if you are using them to make a floor, since this is a variation of more than half an inch, which in health and safety terms produces a trip hazard for goodness sake. My Mum would just tell everyone to pick their feet up. but times change! We are picking up the last batch of pallets next week and we have warned Somerlap at Mark that we are going to have to be a bit picky. They are being very helpful so I am sure it will be fine.
So here is the first run. I must say it looks good so we are really pleased. The only problem is that the plastic underneath doesn’t look very nice. We will think of something. Perhaps we can persuade someone to knit us some mini willow hurdles!
Saturday September 19th 2015
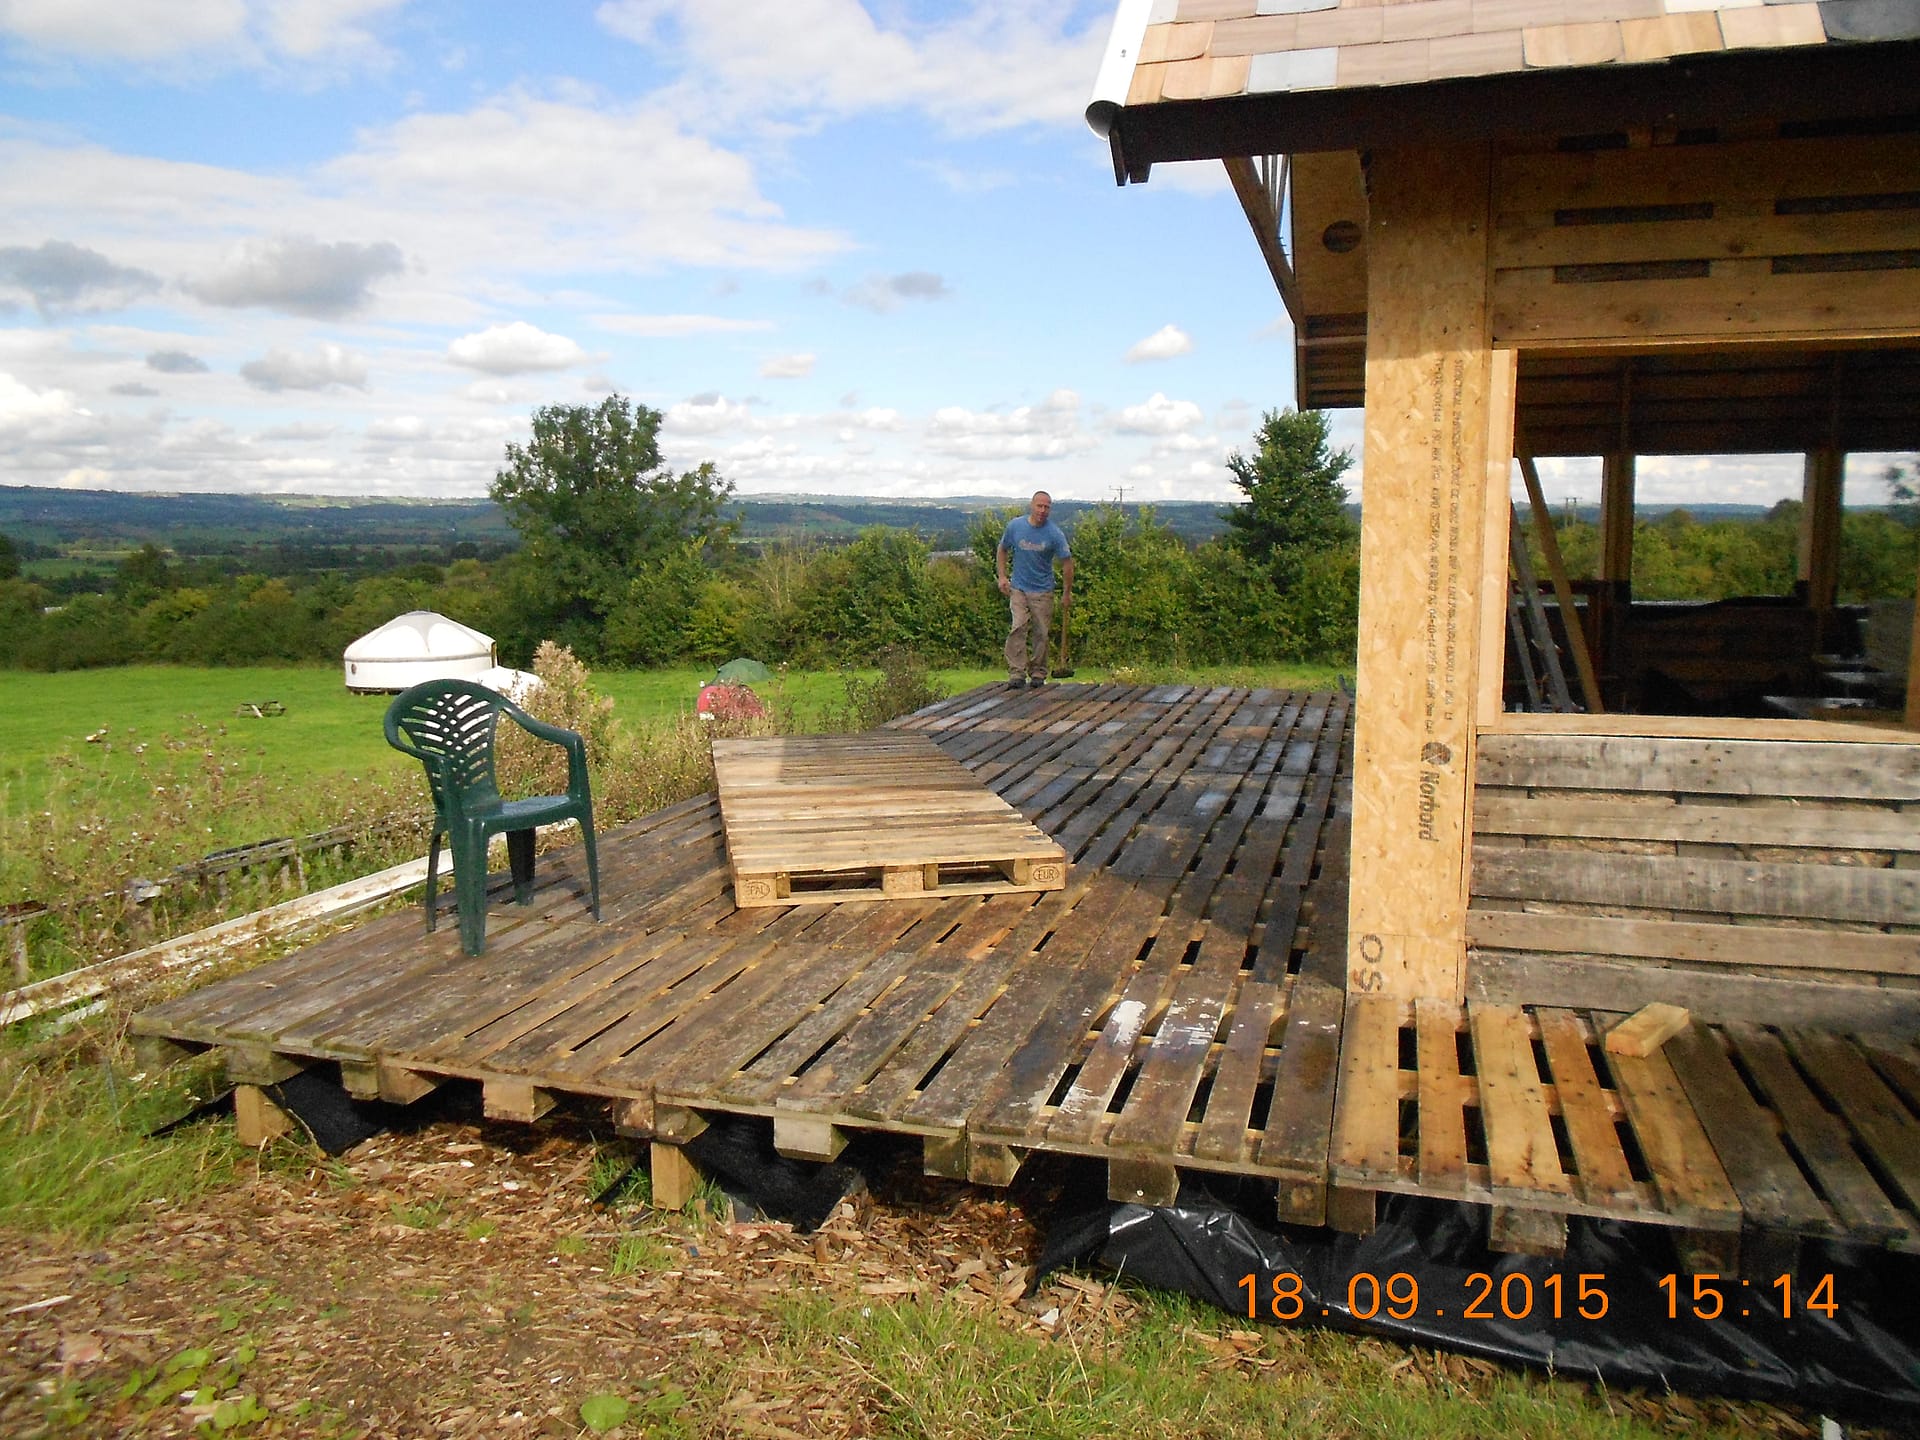
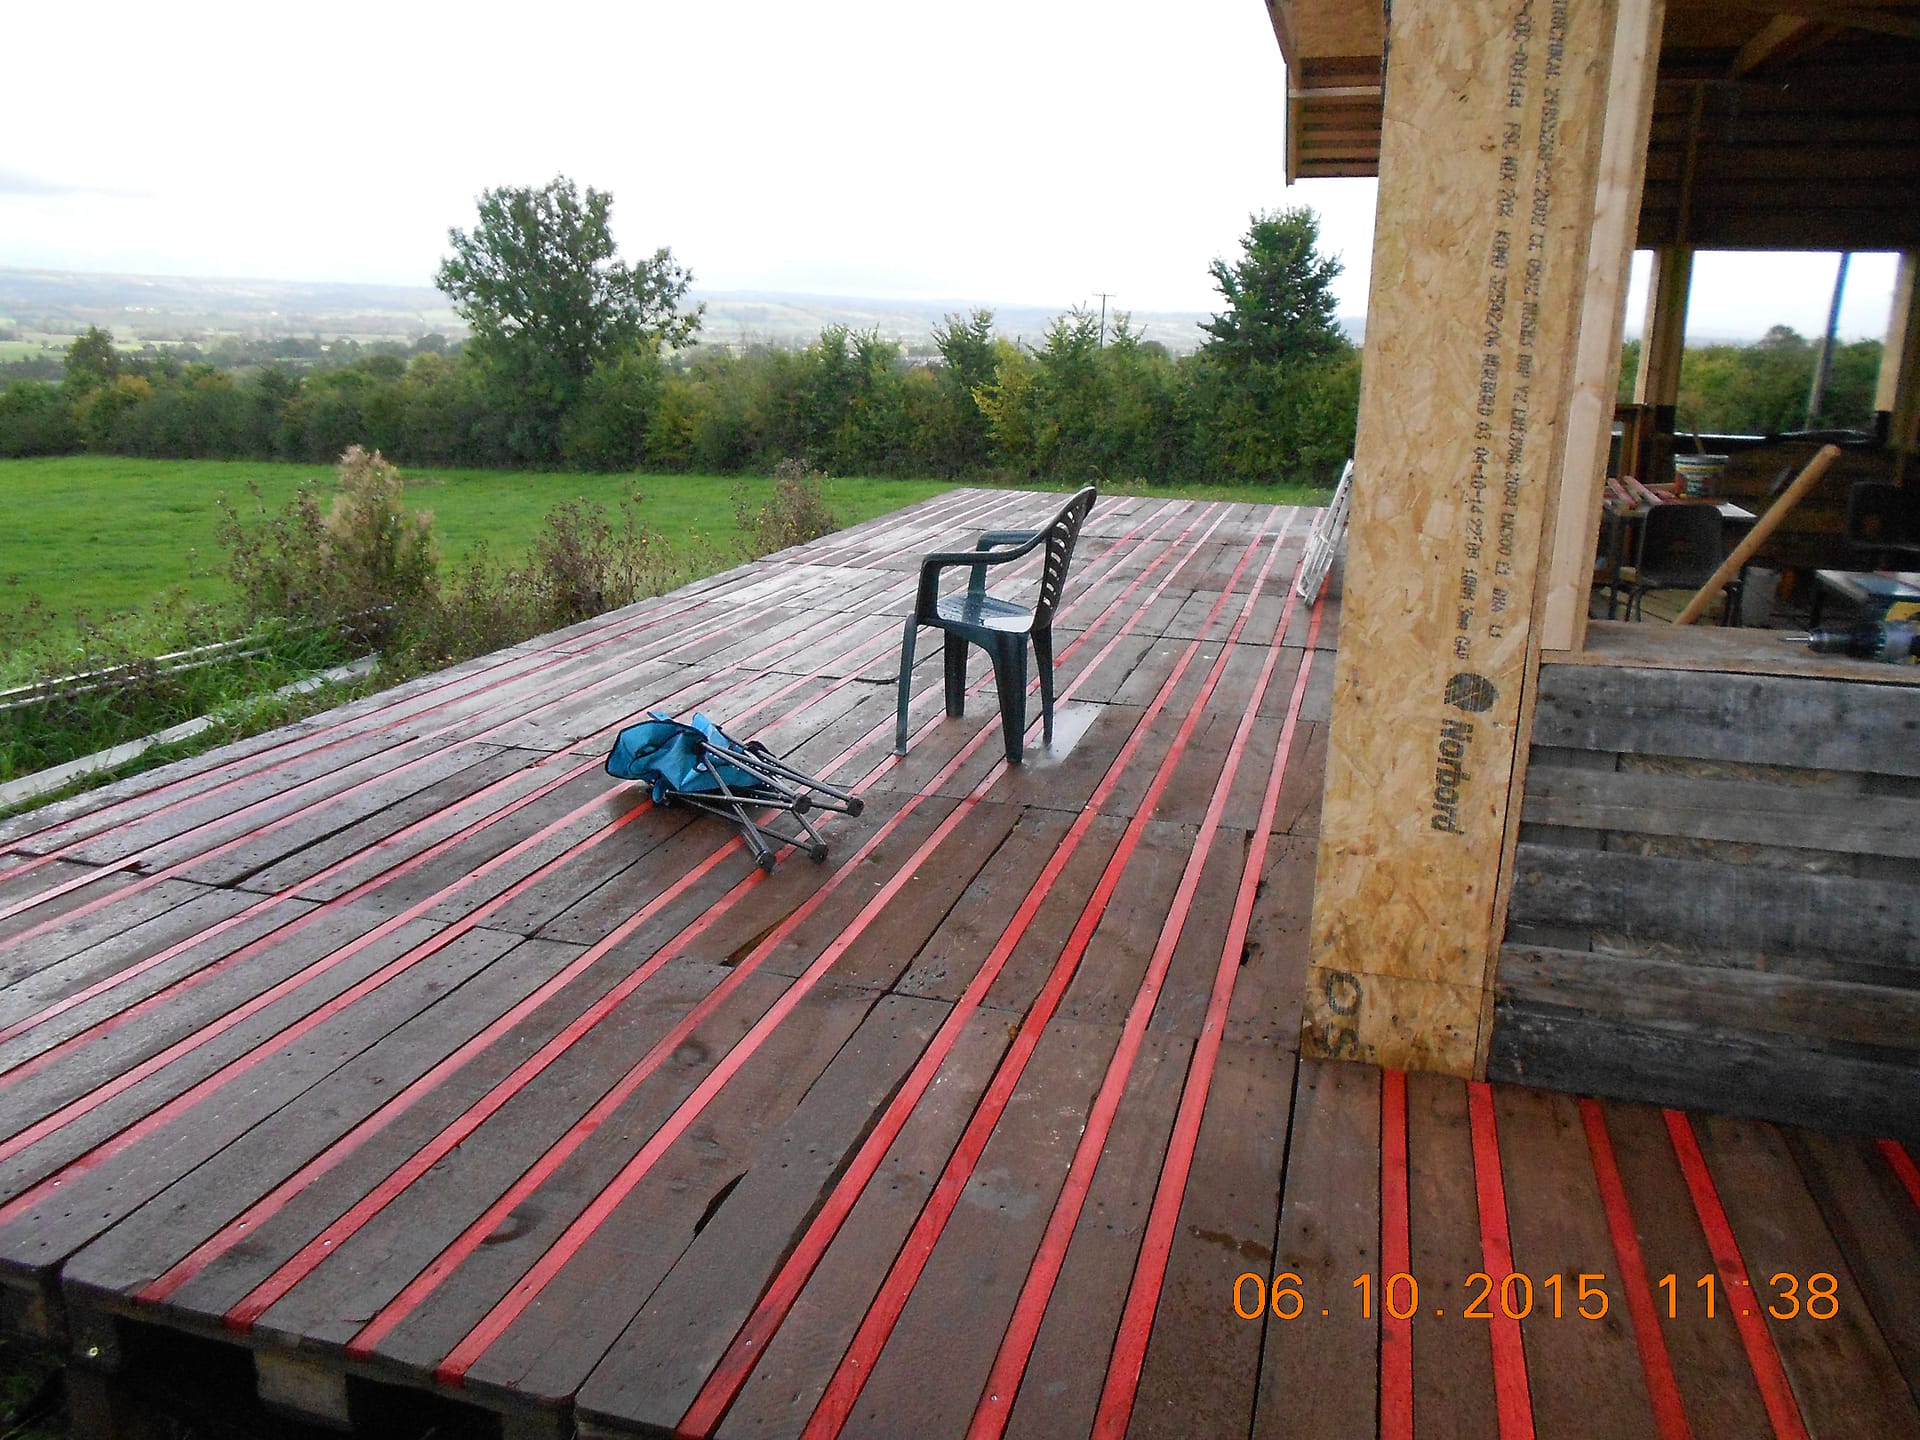
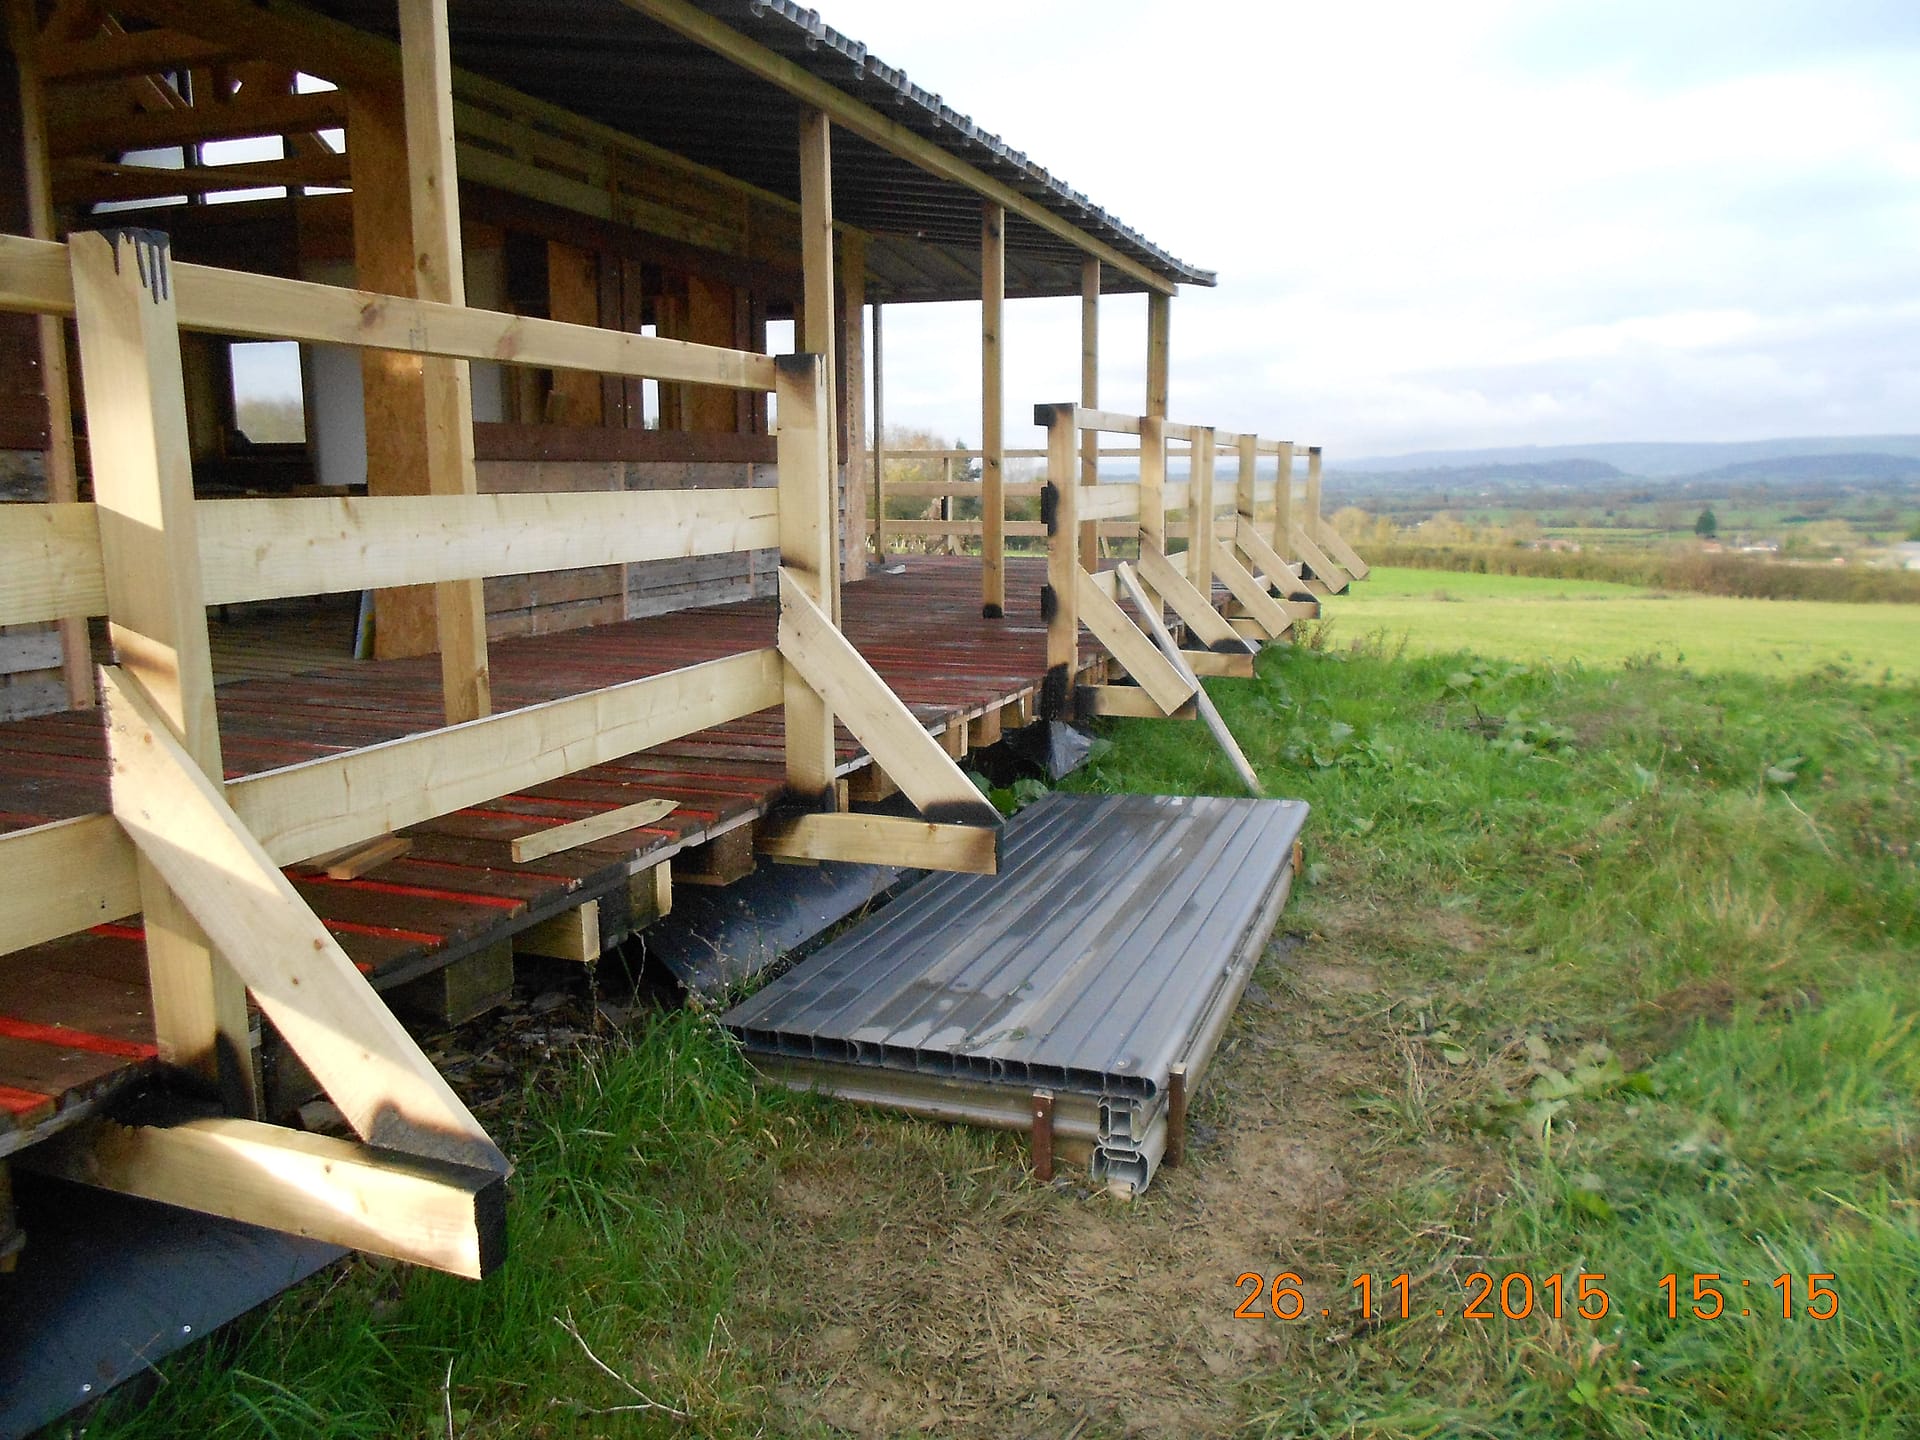
The deck at the back has gone really well. We made it in sections of four pallets with 4 x 2 timbers through to hold them together and act as joists. This is exactly the same system as we used to make the original base for the main building. We should have the whole thing in by the end of next week with a bit of luck.
Then we can work out how we are going to roof it with the fence plastic I bought that seems to have been sitting around forever.
Sunday October 11th 2015
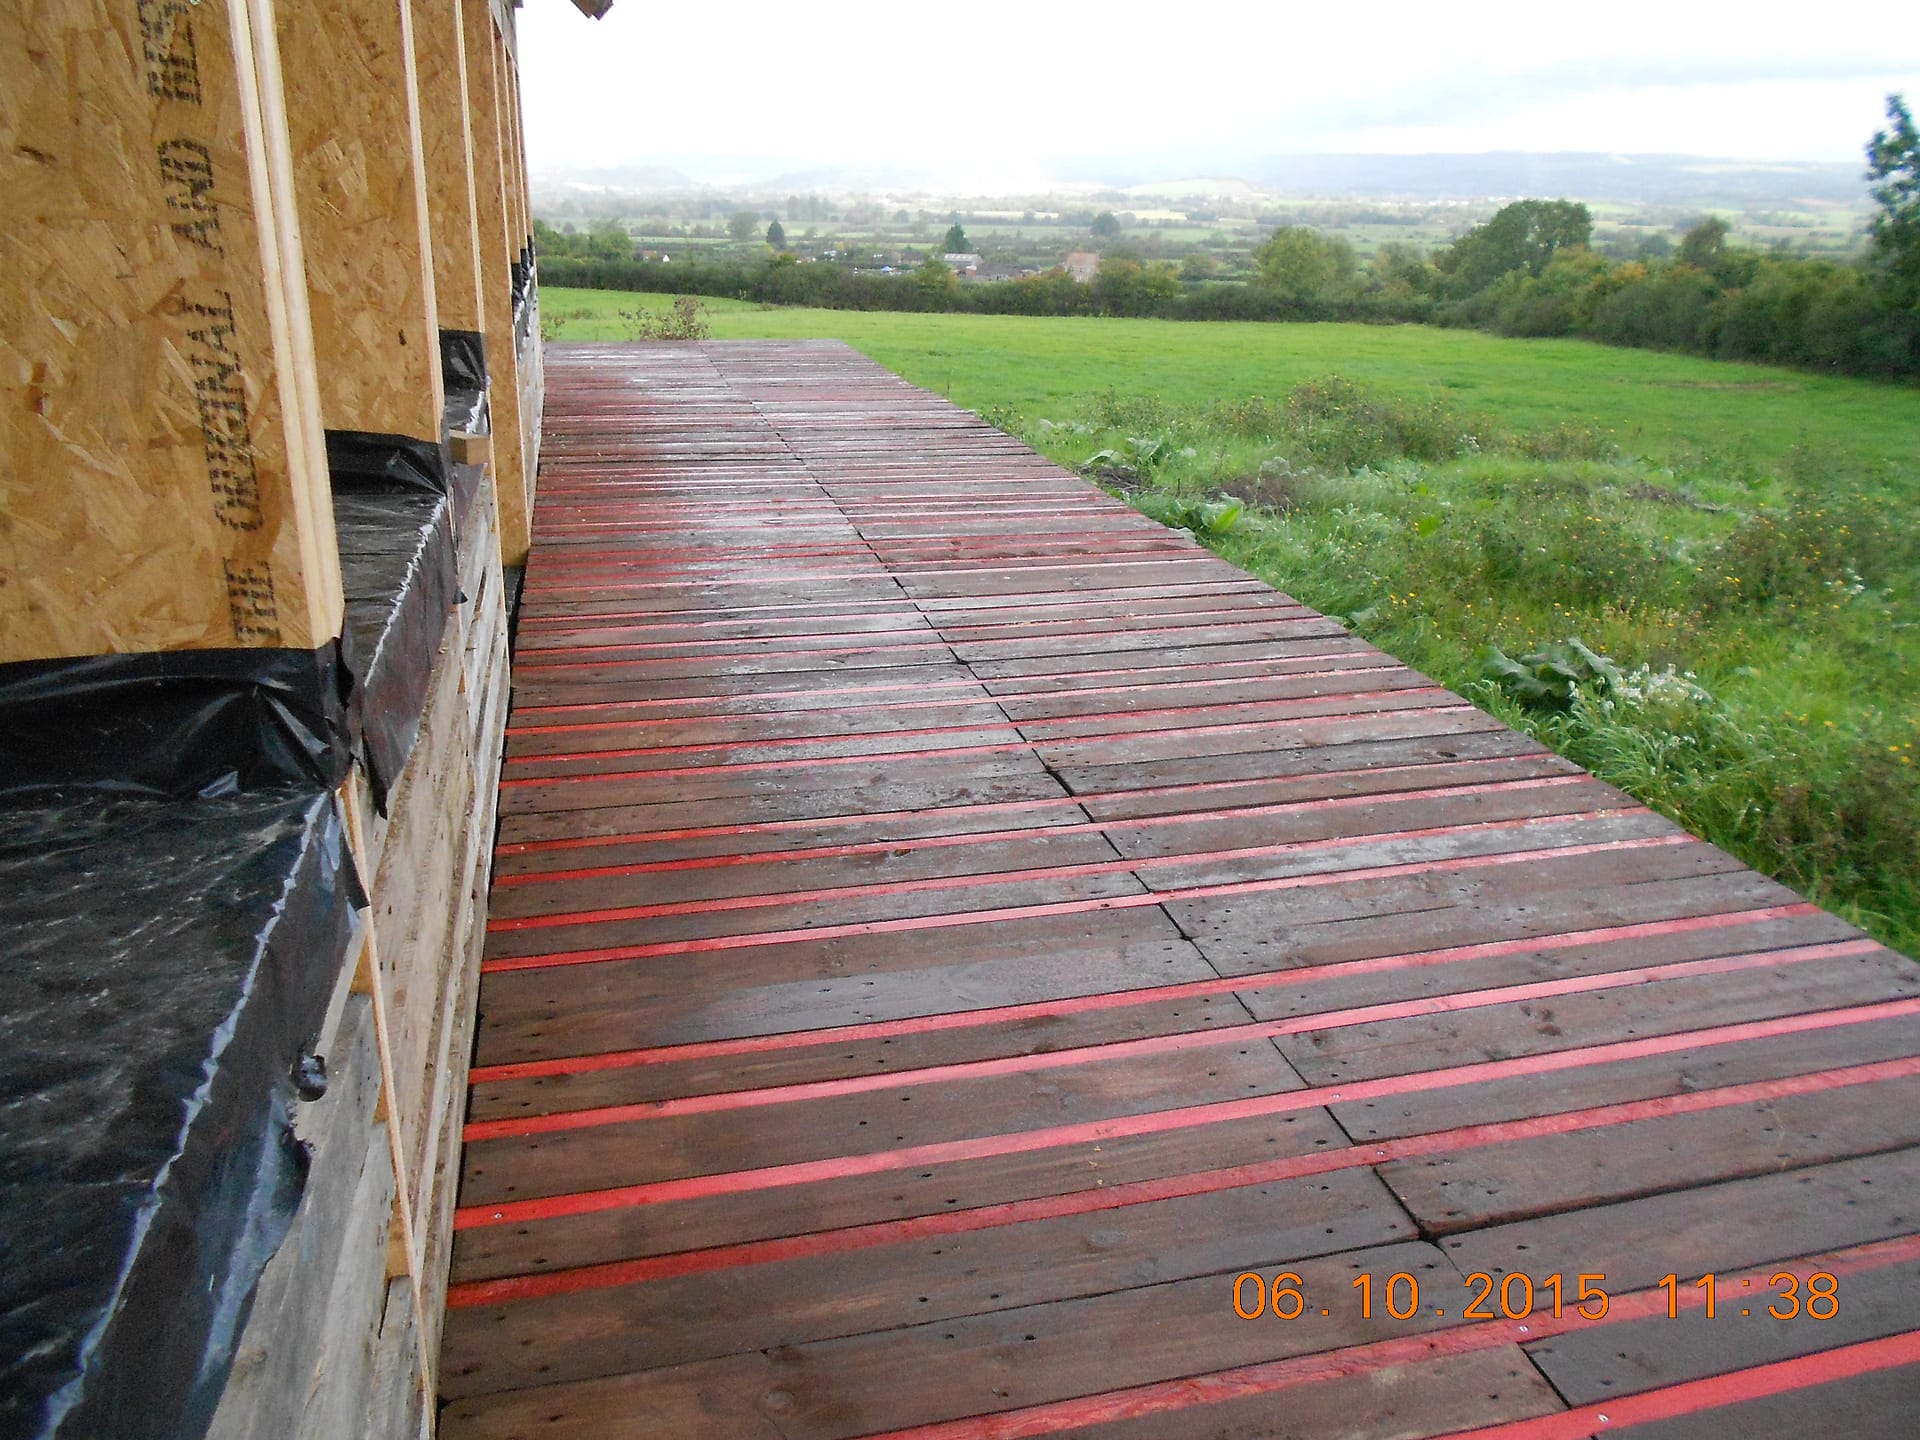
If we just used pallets for the deck the spaces between he boards are too wide. So, on a previous project I found that 19 mm x 38 mm treated batten between the boards does the trick and they are pretty cheap. We stained them red just because it looks good and I bought concentrated water based red stain off the net. Unfortunately the firm that I got it from doesn’t do it any more which is a bit of a pain.
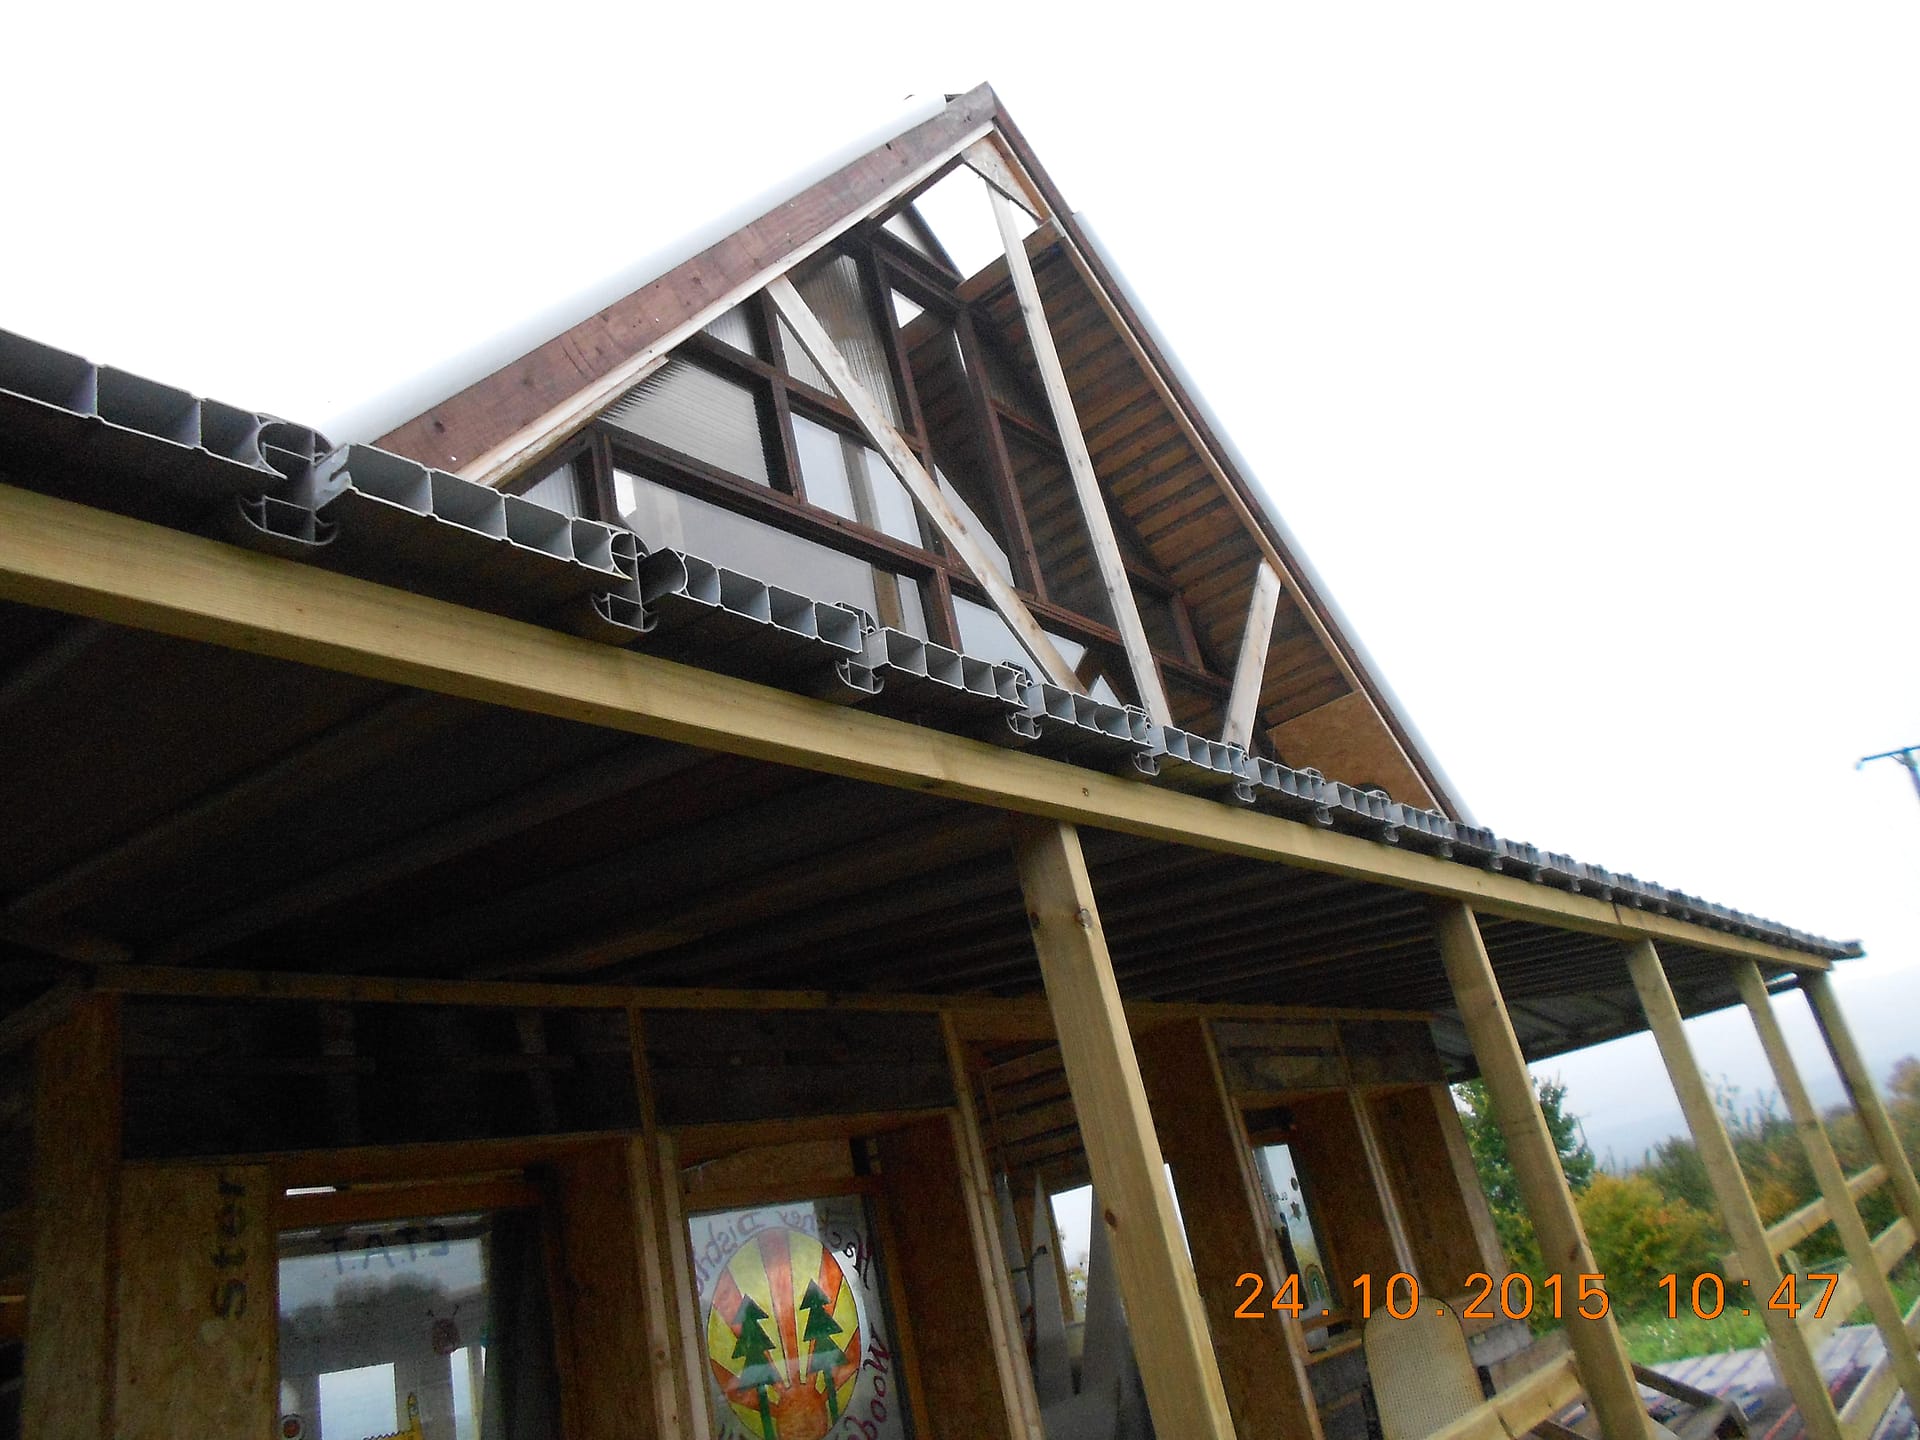
The next thing was to build the frame to hold the verandah roof.
And here is the first section of roof, which I think is going to work OK
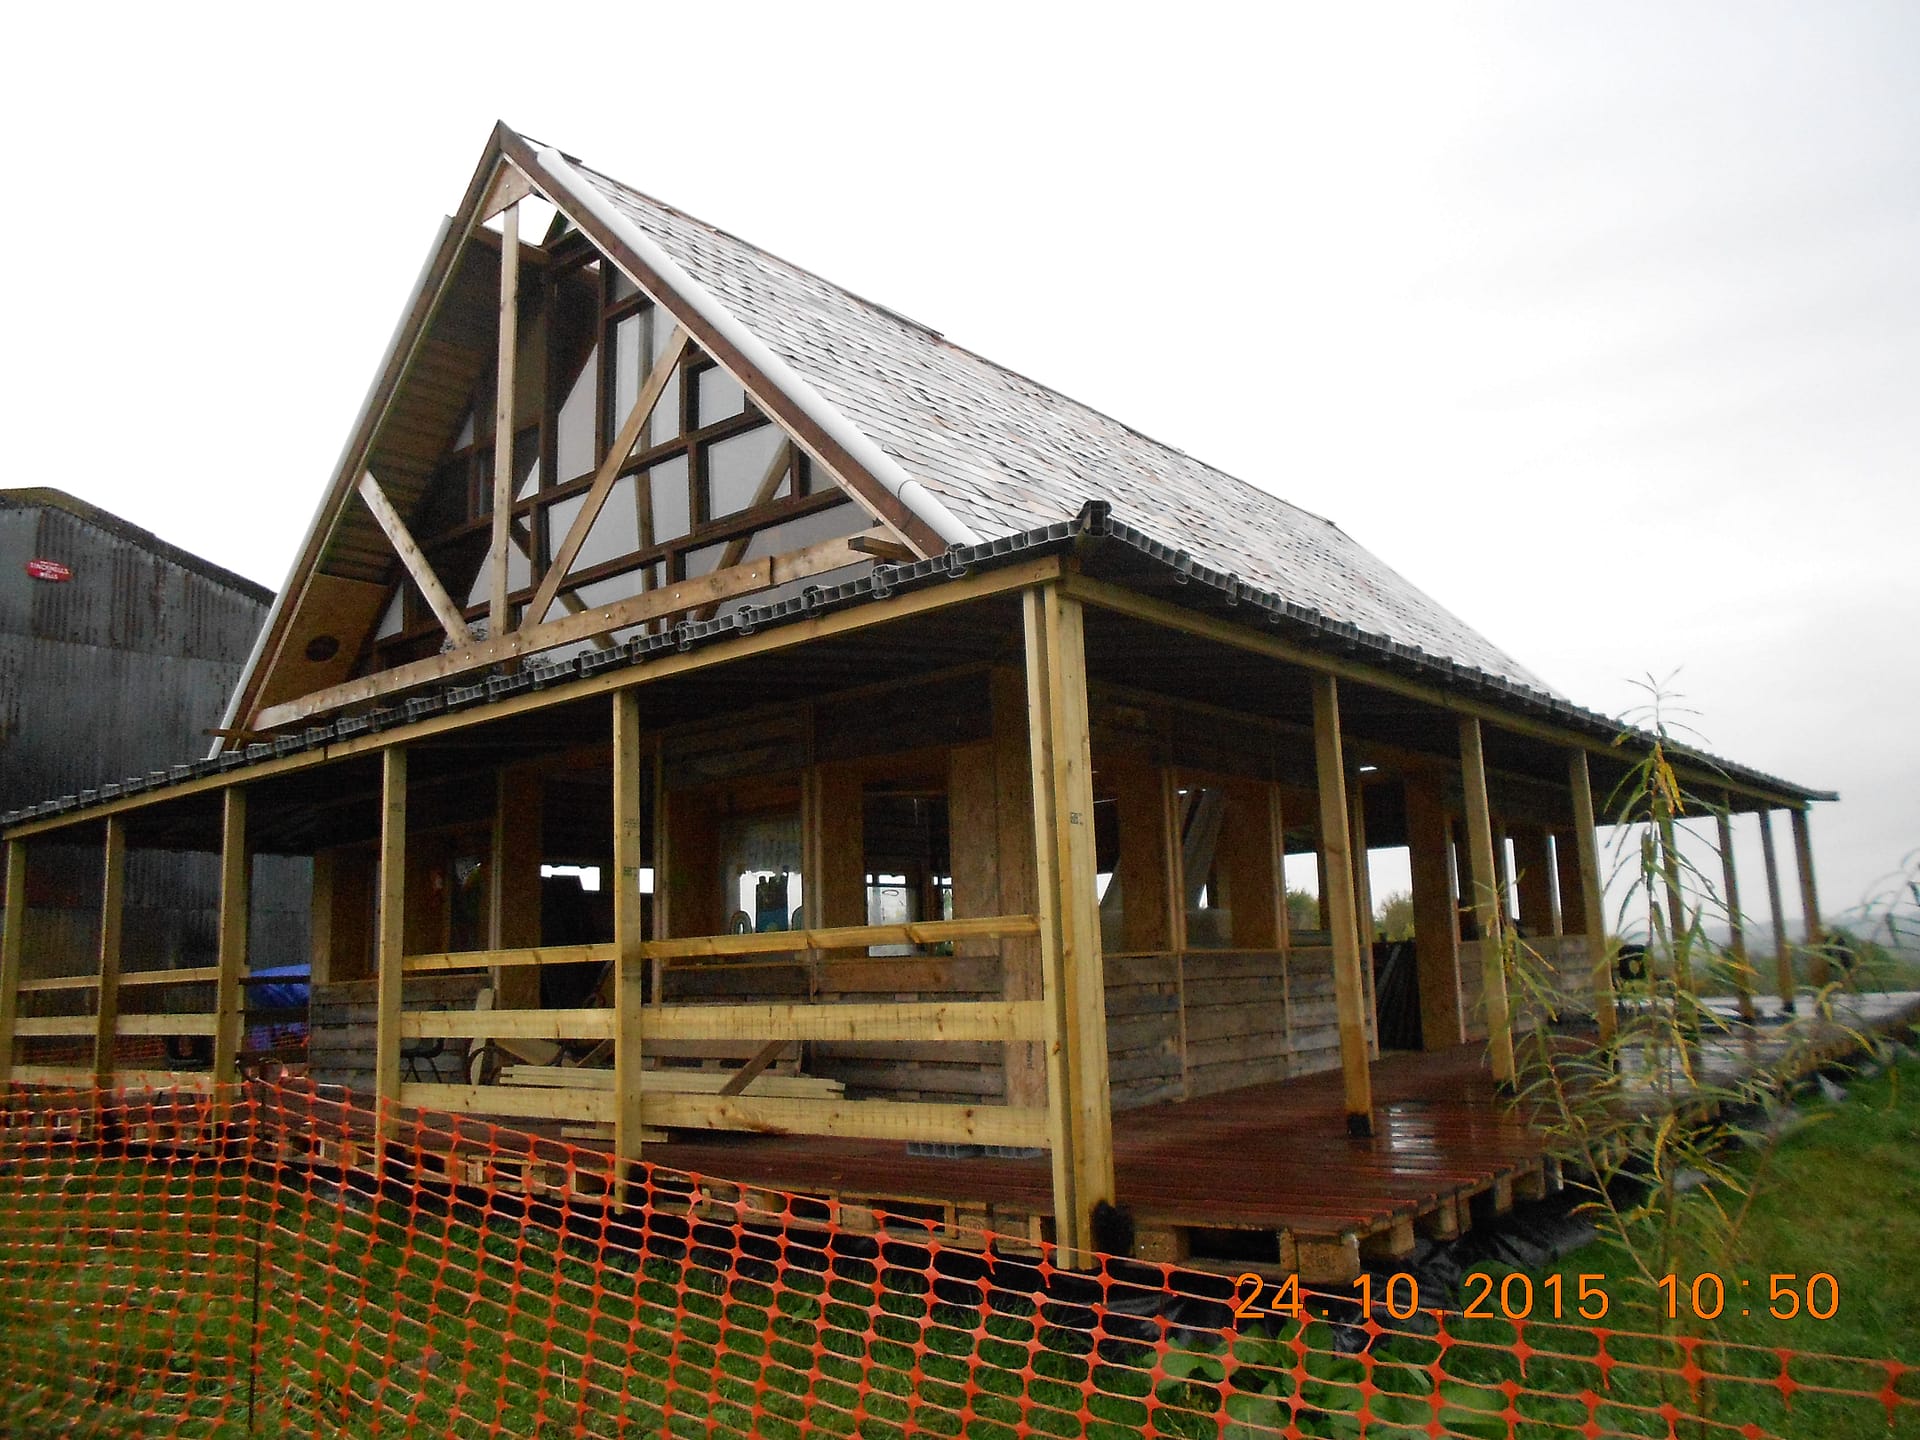
Saturday October 24th 2015
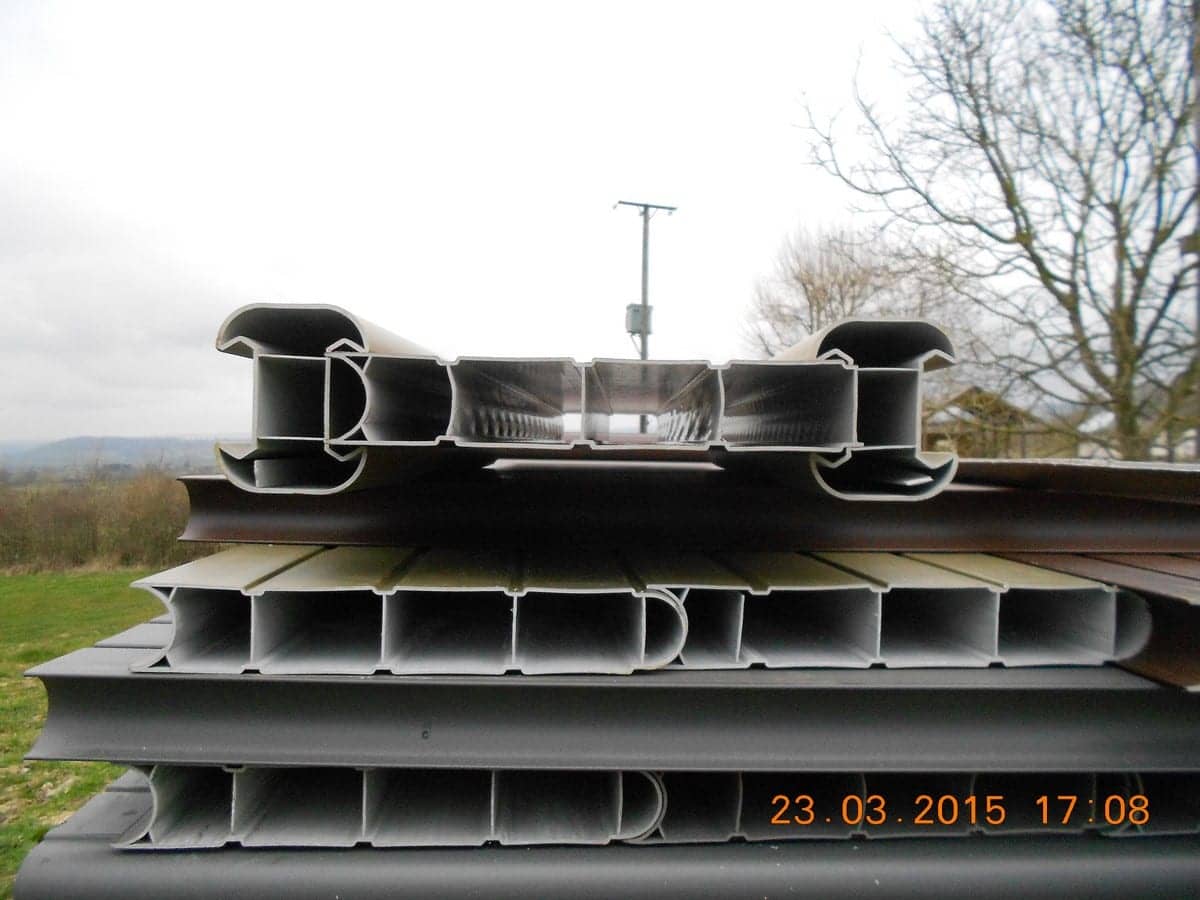
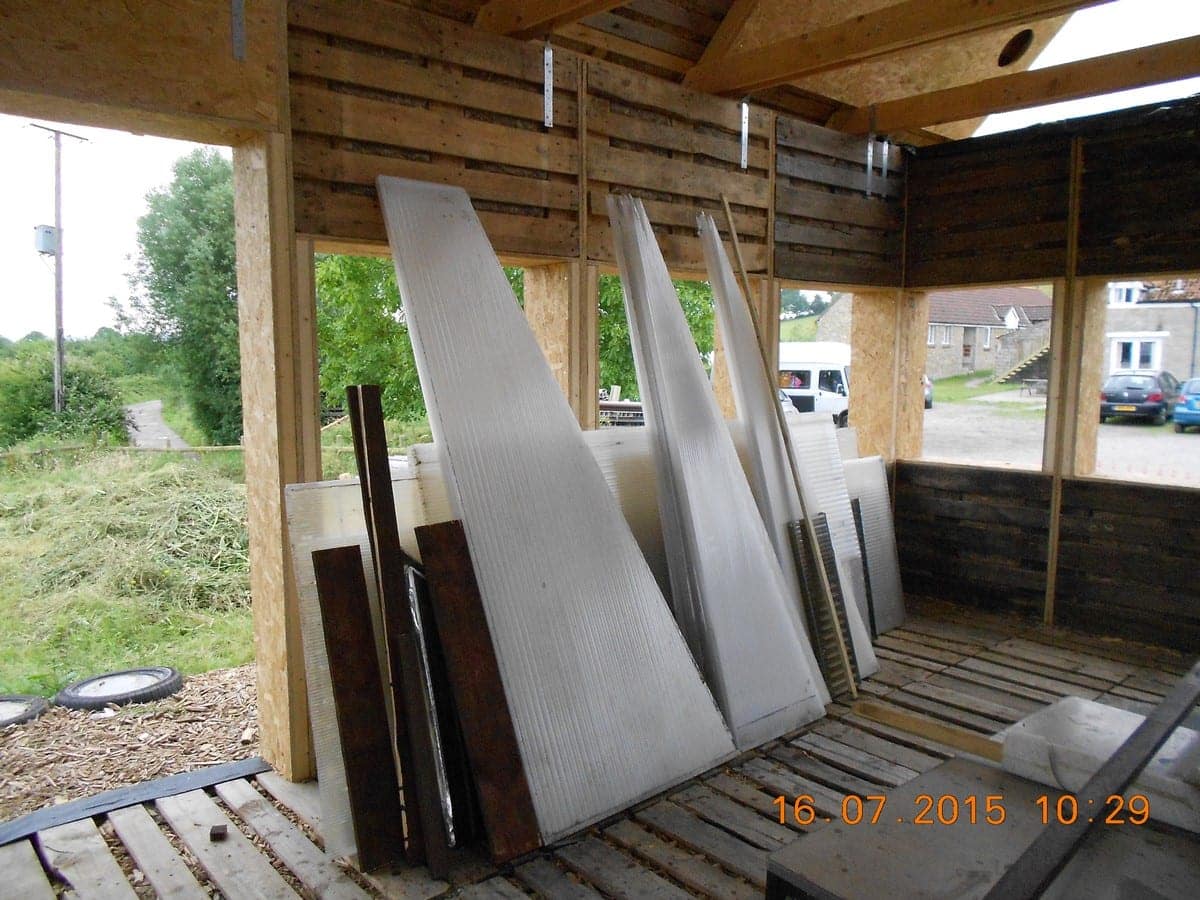
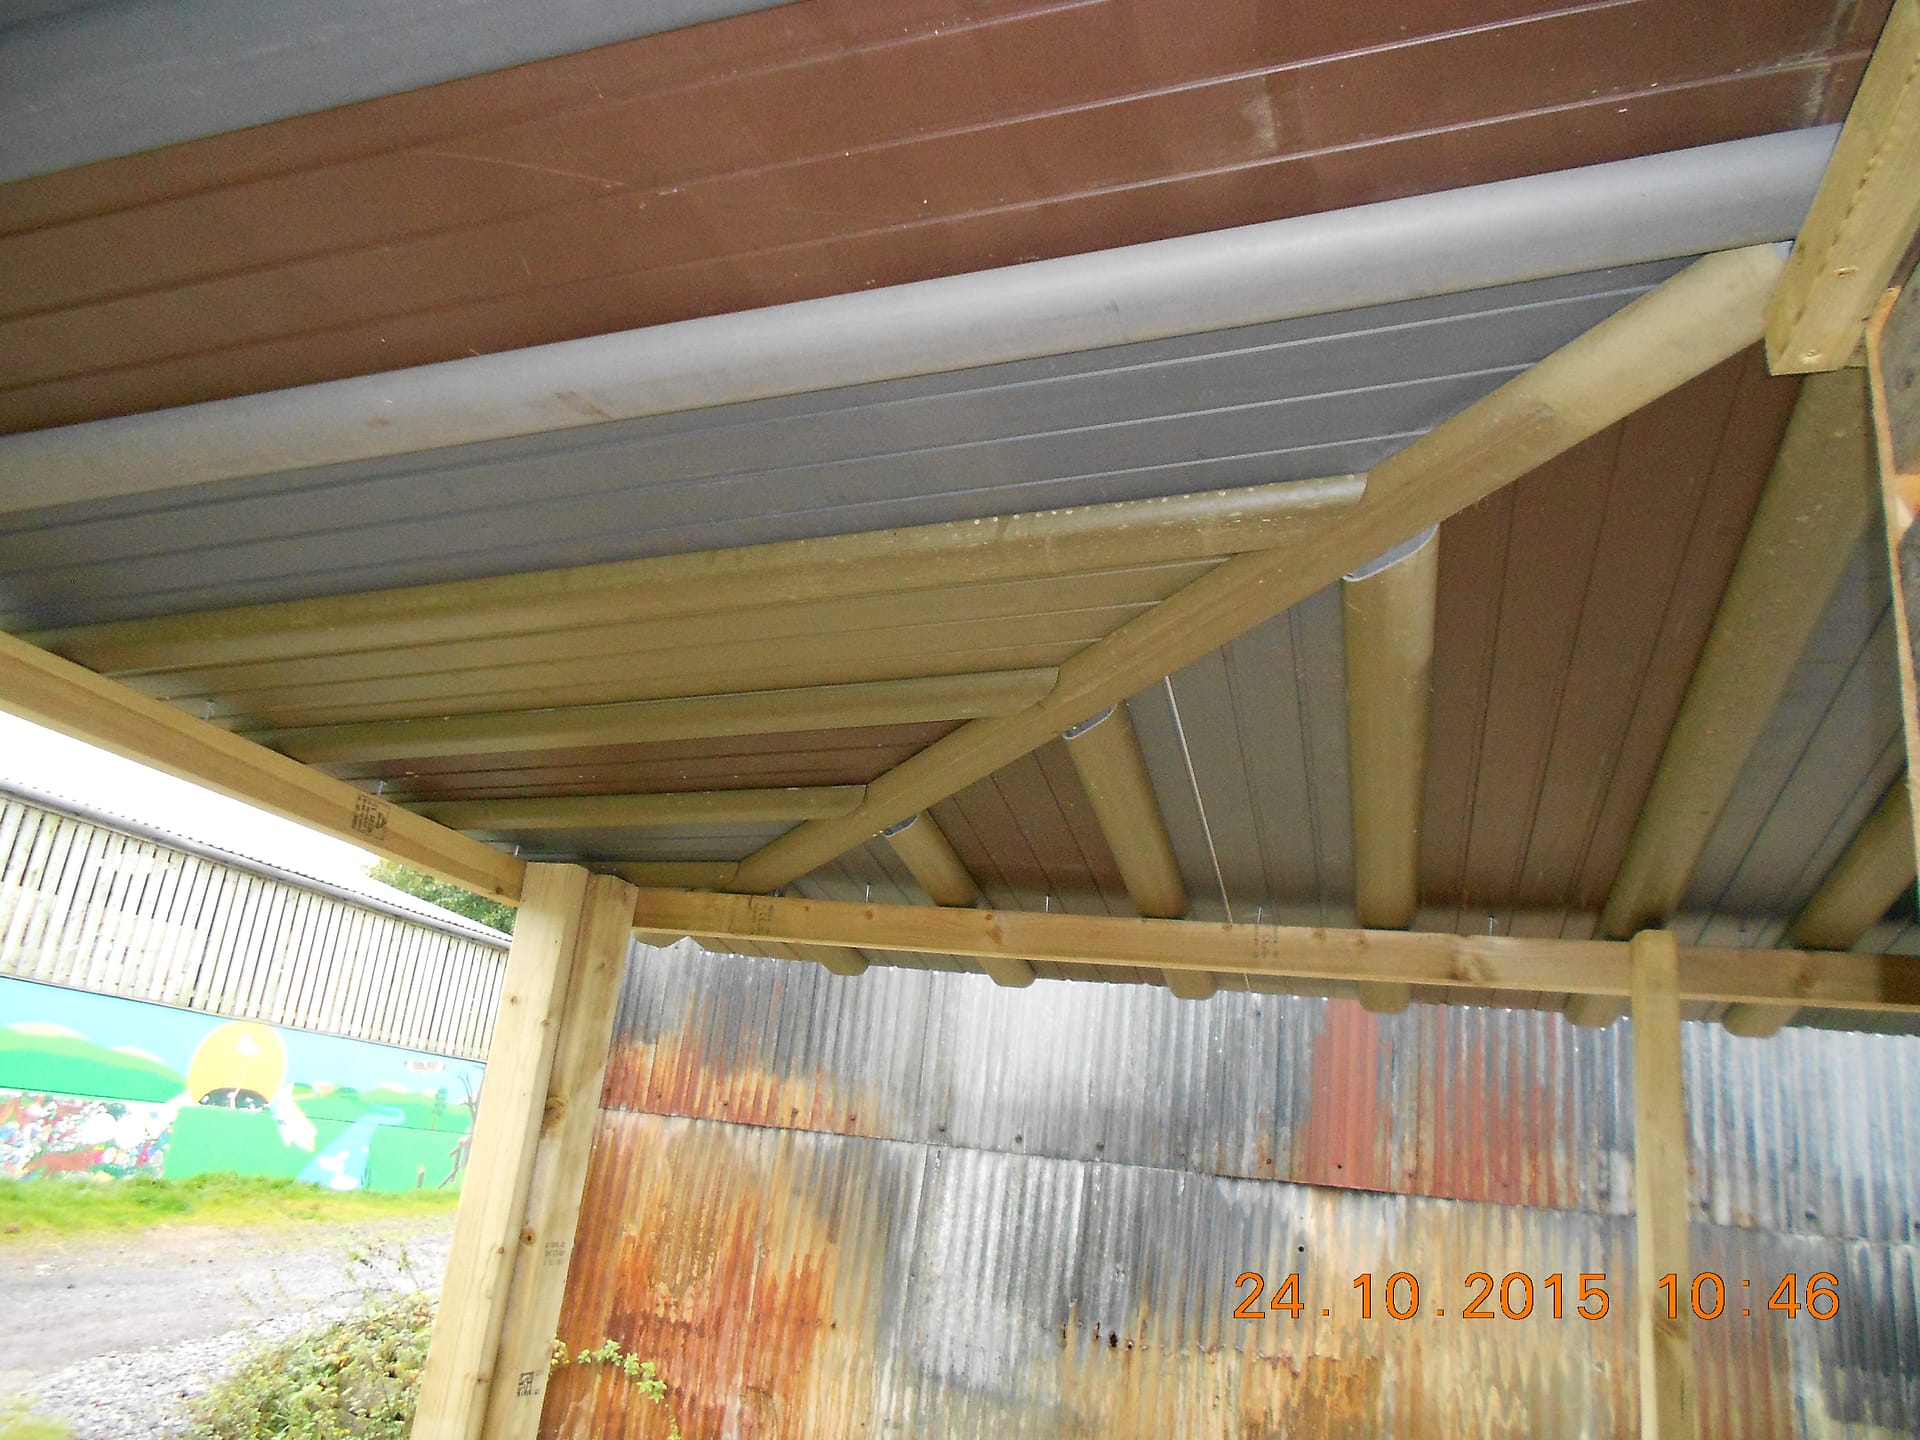
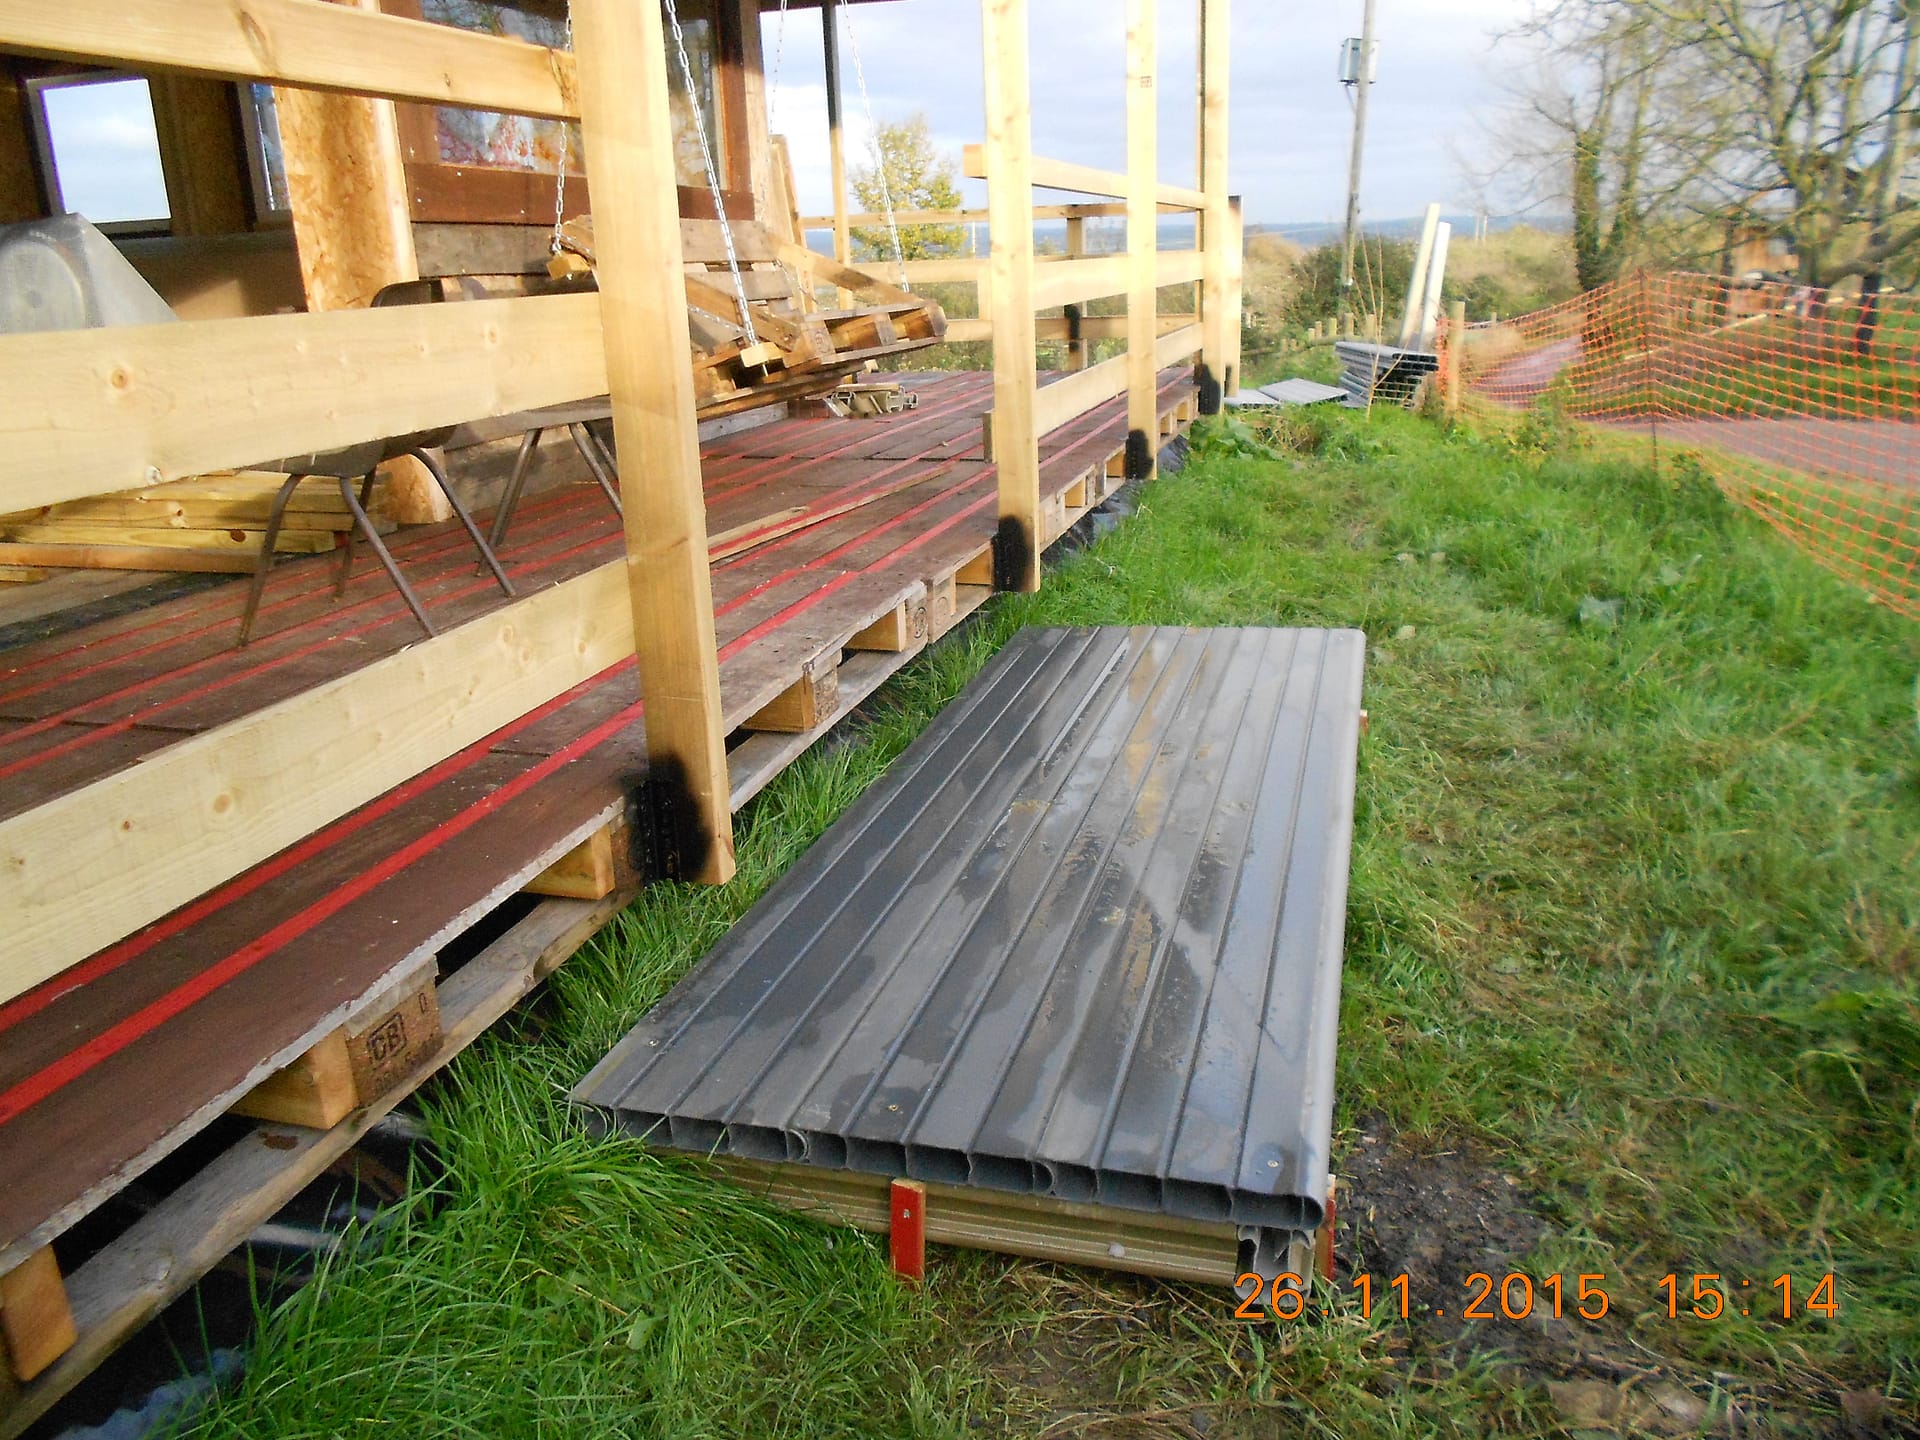
I thought it might make sense to remind you of the veranda roof material and how it came about. When we did the Argos catalogue office roof at the Red Brick Project, I conceived the idea of using old guttering, which turned out to be a great idea but quite difficult to get guttering in the quantities I needed it. In fact most of it came from a plastics recycling yard in Bridgwater, who I wasn’t able to thank officially because they were were contracted to destroy it as recycled plastic rather than let me have it. When it came to the veranda roof I did it the other way round. With no idea what I might use I just trawled around all the plastics recycling yards I could find looking for something I thought would work and also that I could get enough of to do the job. I found these manufacture rejects from a fencing system and they sold me the lot for a scrap price of £200.00.
It is supposed to work with the fence post sections vertical and the fence sections sitting on top of each other horizontally.

This shows a flat section with one edge trimmed off so that it fits neatly into the ” gazing bars” on both sides which happen to have a “drip groove” profile which makes them excellent for collecting any water that runs off the sides.
You can see in the picture above how they would sit together. Using a bench saw we stripped off the edge on one side. Now the fence posts make ideal glazing bars holding each section of fence and it works brilliantly. I might even contact the manufacturers and point out that they could sell them as a simple roofing system. If I do I don’t expect they will be the least bit interested.
Each glazing bar is fixed from underneath using gold 4″ number 12 screws that self tap into the plastic and are fine if you don’t overtighten them. Each actual roof section is held down using 130 mm self tapping screws with rubber washer etc that you would use for big section corrugated roof bolts. It is these rather than the glazing bar screws that hold the roof down so that with a bit of luck it won’t blow away in the first strong wind.
Here is a not very good picture of the corner detail and the only design weakness in the system. The 45 degree joint between the main bar and the glazing bars fundamentally leaks, although not much. Since it is outside the building I don’t much care so I think I will just bodge it with silicone. I usually regard the use of silicone as and admission of design failure. If you design it properly you shouldn’t have to fill holes with glop to stop things leaking. This is why most showers leak and go smelly but that is another story. It wouldn’t take a lot of effort to design this leak out and so I might come back to it later.
It turns out to be strong enough to climb on which is a bit of a result so here is a picture of me climbing on it.

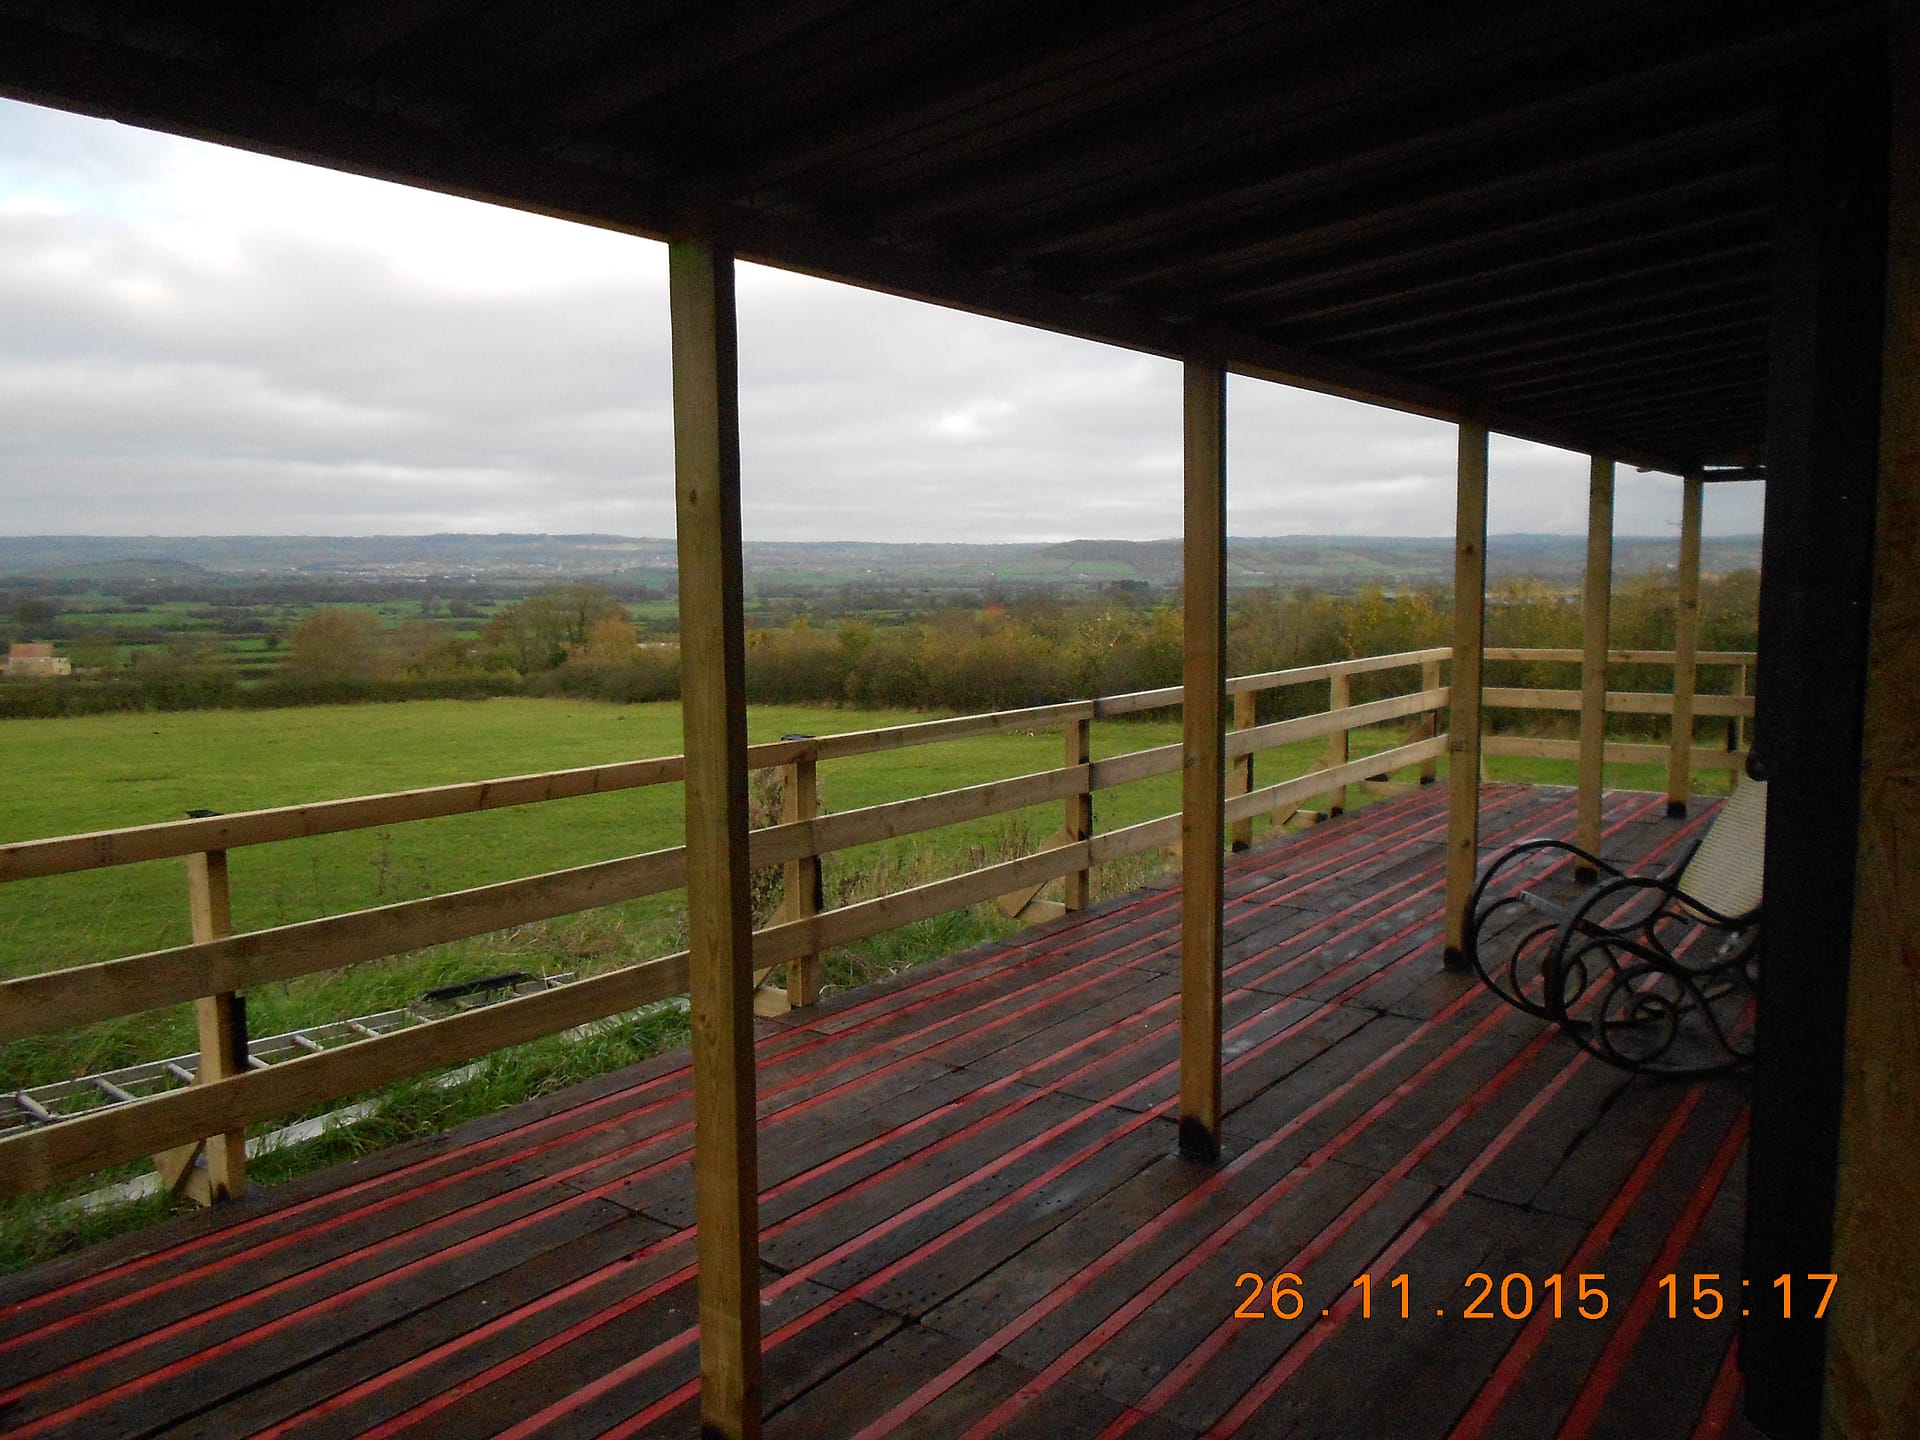
I had a series of cunning plans about how to do the railings. Originally I thought it would be rather nice if we could coppice the farm spinney and make a rustic balustrade out of free farm wood. This turned out to be a nice idea but a formidable amount of work and so not practical. Then I thought we might use metal tent poles. The scrap scheme chucks hundreds of them in the skip every year and of course this year I had already thrown them all away, so I would have to wait til next year for a new crop from Glastonbury. I did check to see if I could get away with no rail at all. This was on the basis that since the maximum height that anyone could fling themselves off is about two foot perhaps I didn’t need one. It turns out that if the drop is more than a step, then the stupid, and those who can’t be bothered to look where they are going have to be prevented from plunging to the ground from a knee high platform. The farm fence railings are simple, effective and quick but it did mean chucking money at it by buying new wood.
The moment we started putting the roof up it attracted various insects inspecting its end section orifices as potential winter homes so we may inadvertently be creating a refuge for things that need somewhere to go in the winter.
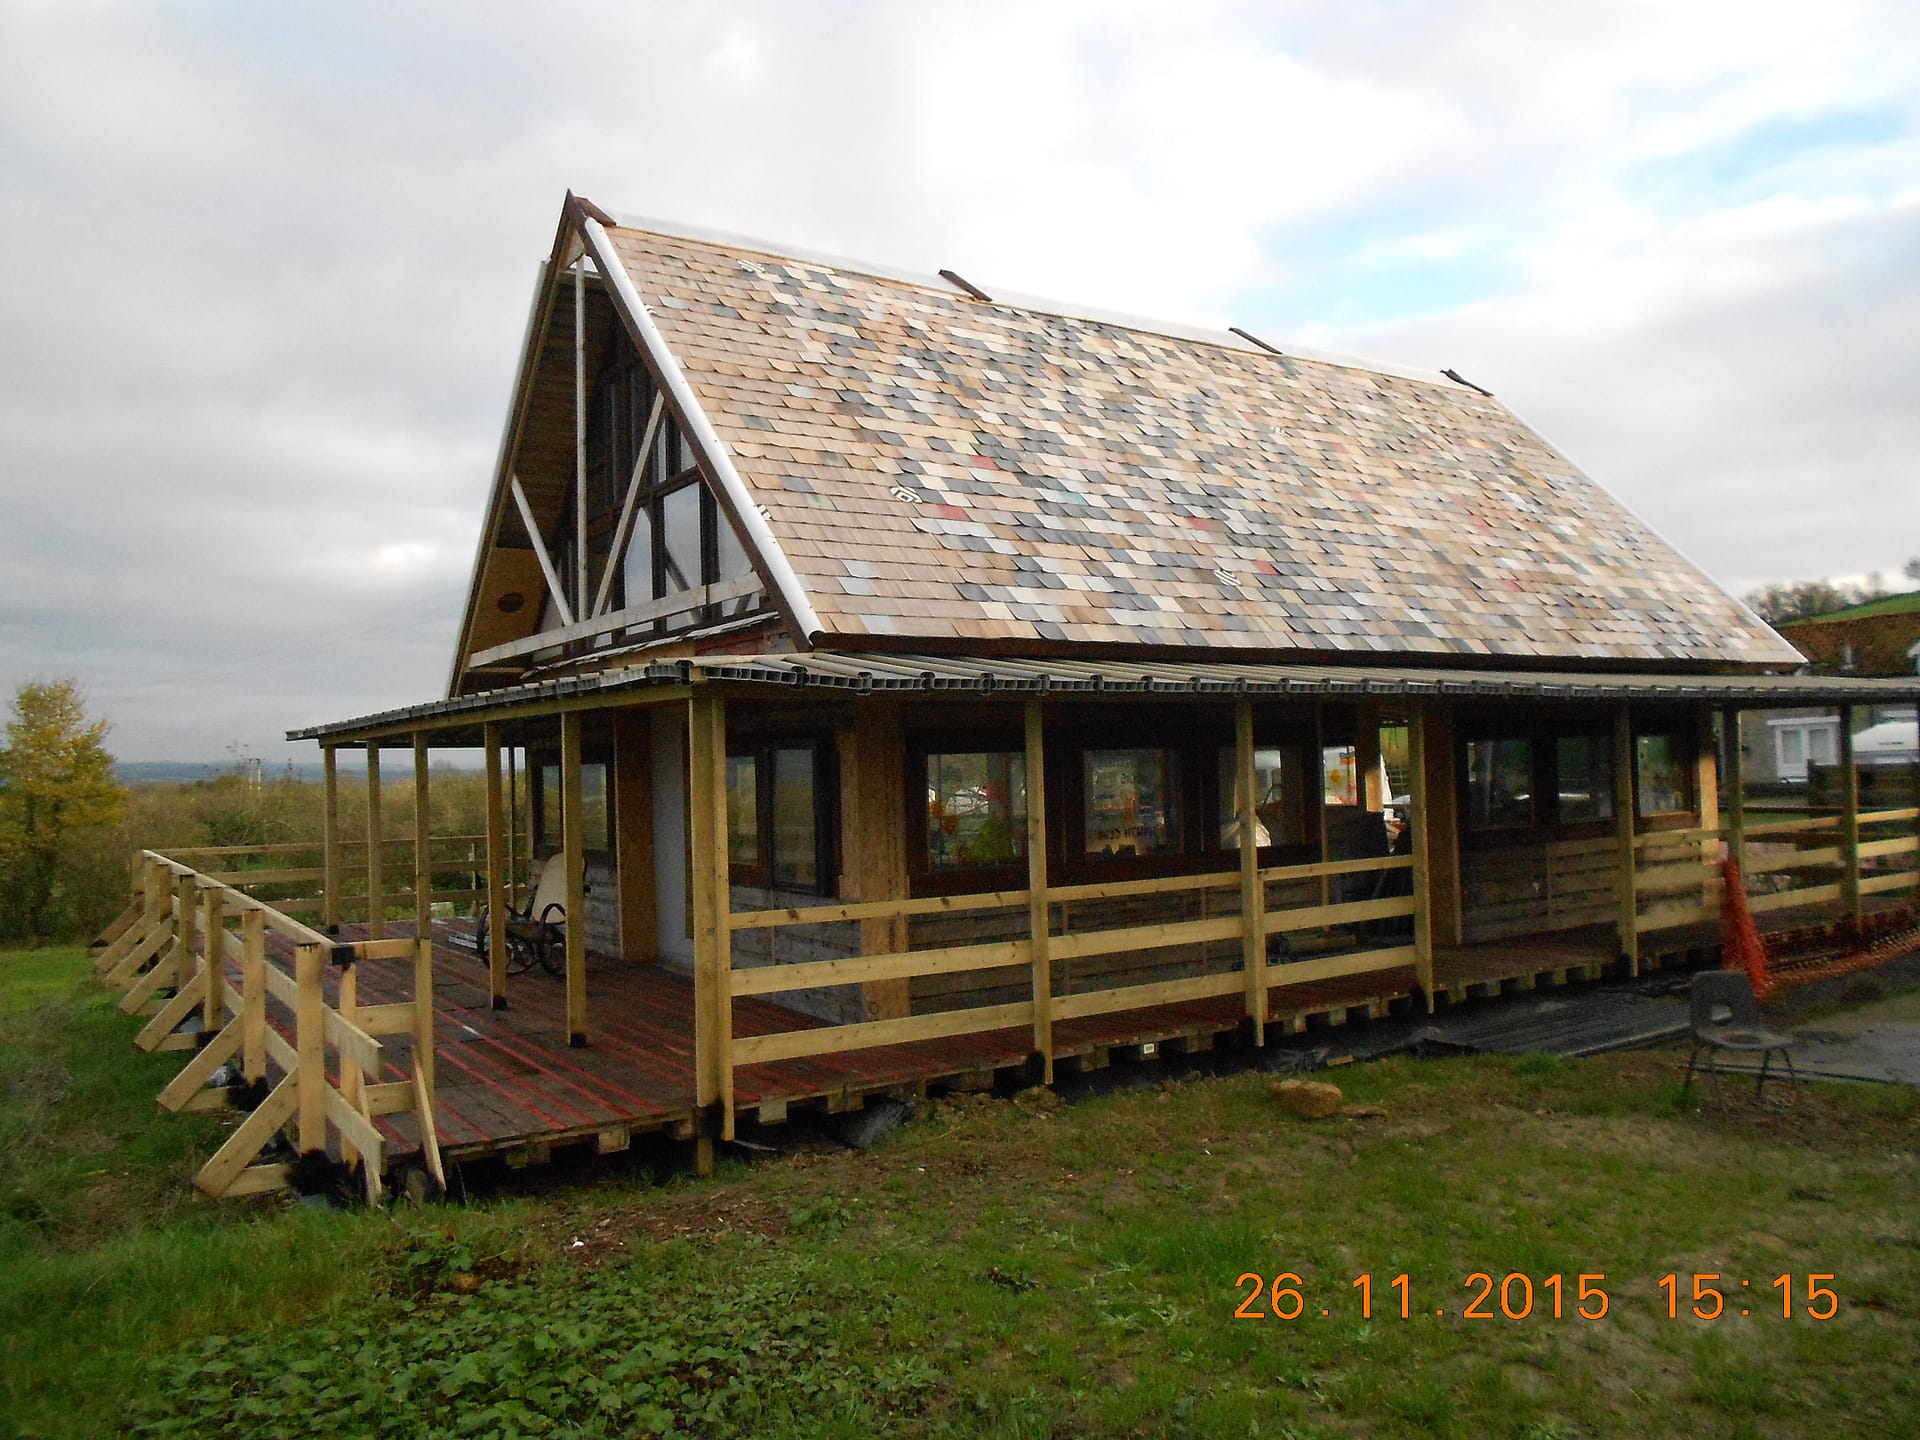
Thursday November 26th 2015
We have now completed the veranda. Someone gave us a rocking chair, and I made a swing seat out of a couple of pallets.
I pent my last “day off” trawling round the conservatory and double glazing people trying to rustle up some french doors. We have now got all the glass we need for the windows, so doors are the next thing we need.
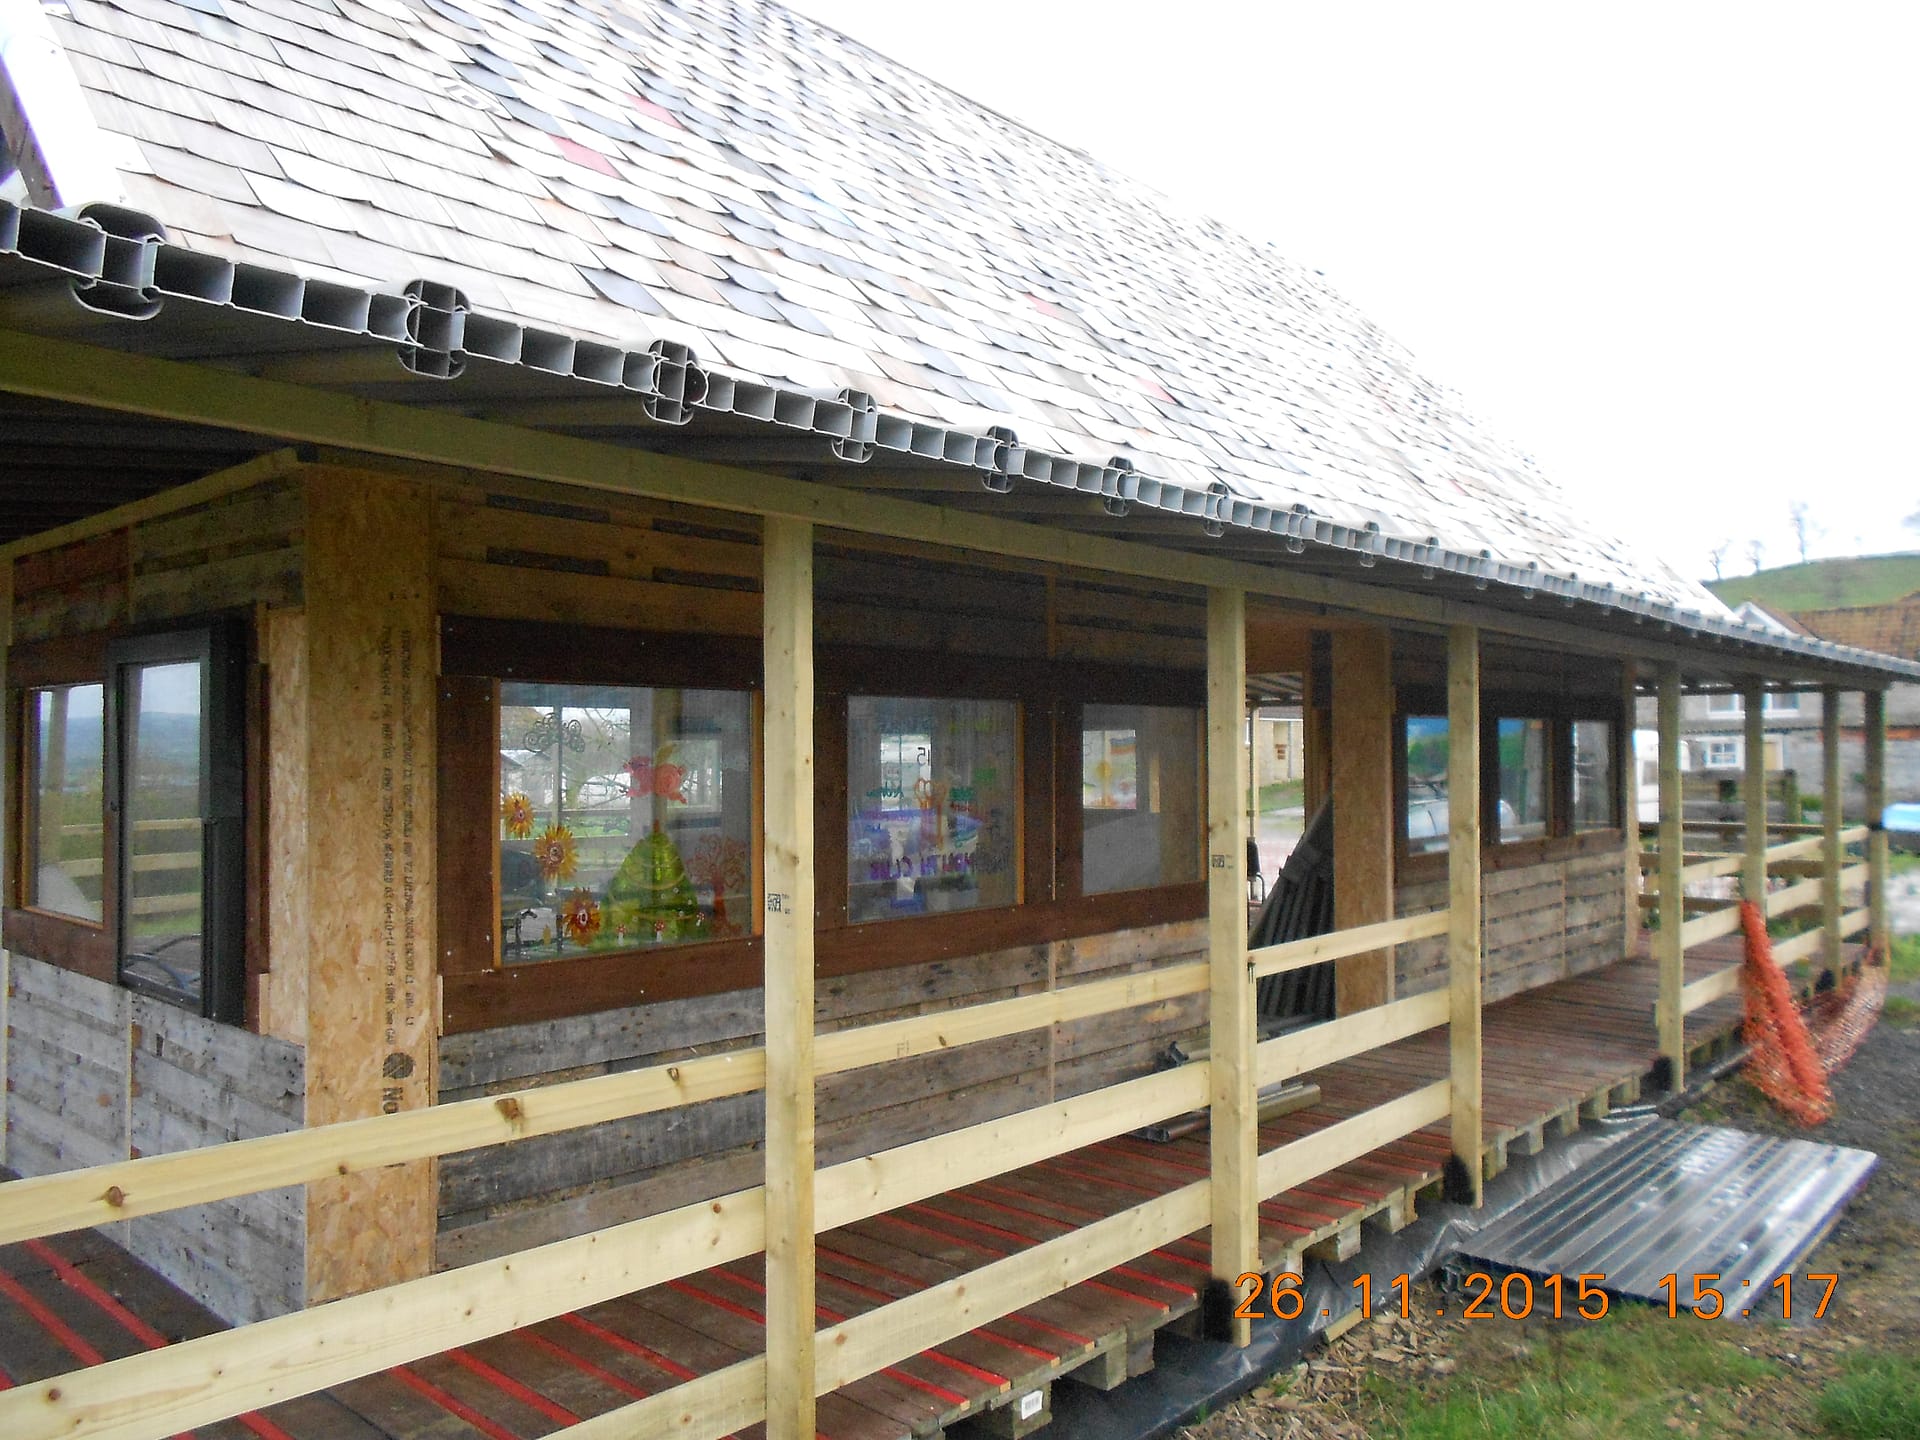
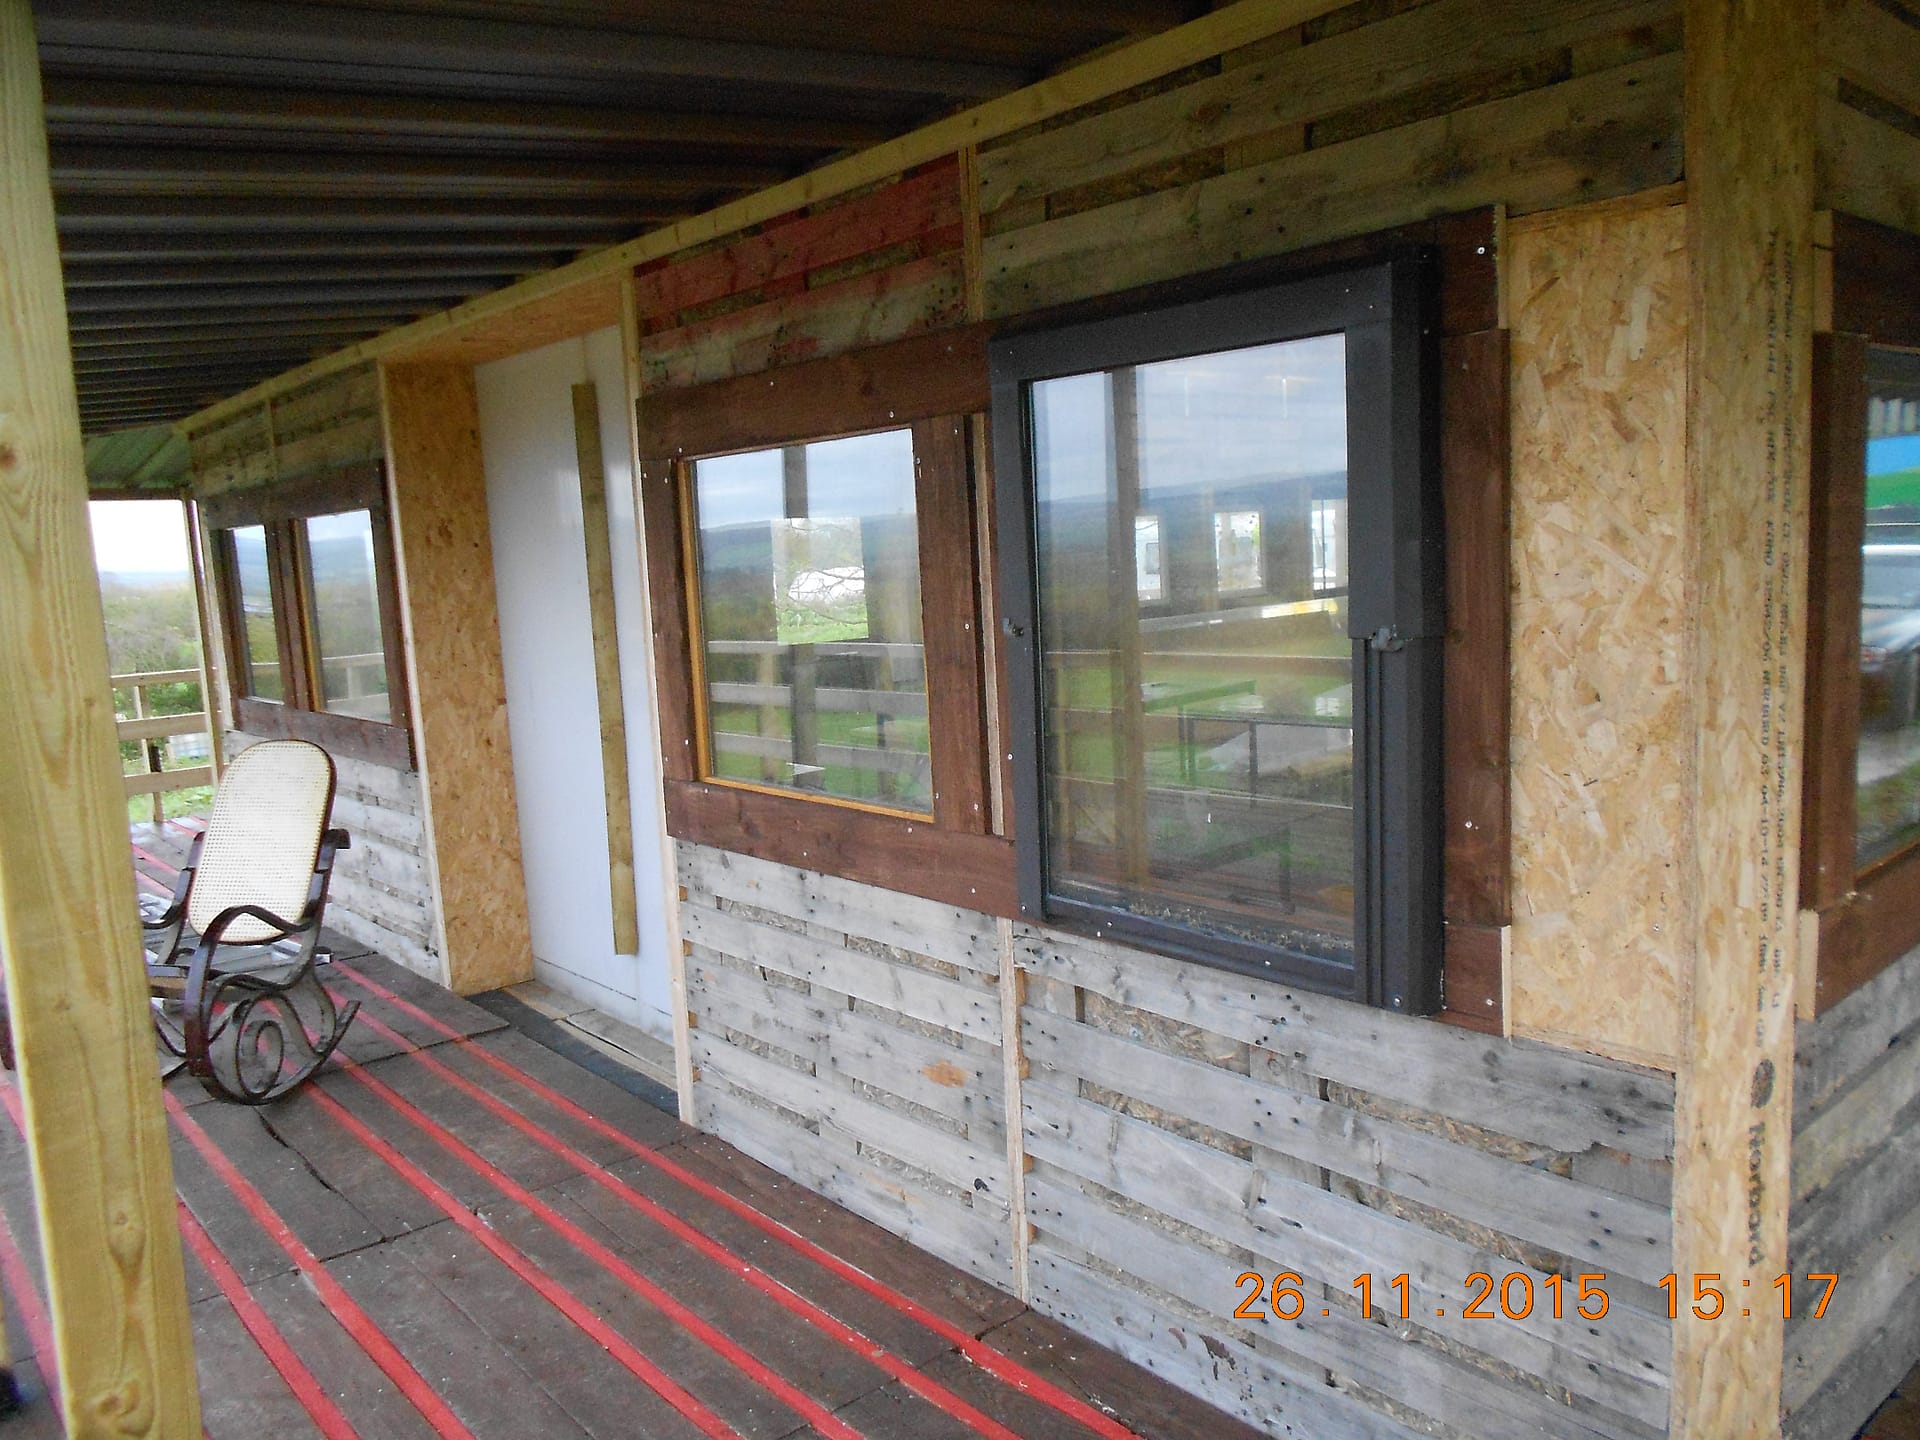
The windows have gone in really well. Mark Robbins offered us a Velux which I initially refused because we weren’t going to have any in the roof. Then we realised that it would work just as well vertically and it would open which none of the others do. In fact I am not very worried about any of the others opening because if you really need ventilation you can open the doors. If subsequent users don’t agree they can always swap a window for a louvered vent.
The window installation and detail are ludicrously simple. This is partly because they don’t open and partly because they don’t have to be weatherproof. The covered veranda means that we are going to add no further protection to the exterior of the building because we don’t have to! I have a plan to use newspaper and PVA to papier mache the interior and that will deal with cracks that would be very draughty.
This is a not very good picture of the swing seat, and the bottom step of cunning entrance steps. It occurred to us that the fence system we used for the veranda roof would work for the steps. We used the posts to make shuttering for a base and filled each base with concrete. We put the base sections on wet and screwed them to the box shuttering. I was so keen to get the concrete in and covered in one go that I forgot to take any pictures .
Thursday December 17th 2015
I am obviously getting a bit lax in my dotage. Some old friends came to lunch the other day and complained that I was getting behind in keeping this diary up to date! It is not much of an excuse but I think I am going through a little patch of “Project Fatigue”. I reckon you want to get things like this done in a year because if it takes a lot longer than that then both you and your helpers and volunteers tend to run out of steam. Also, I am twitchy about the system I have devised for doing the roof ridge which has rather preoccupied me. We have to do something because the clear tarpaulin looks OK and was easy but I have used it before and I know it rots in UV light so in less than a year it will leak. Getting on the roof is also a pain so I have designed it so that we can do it all from the inside. I shall be much happier when it is done and works.
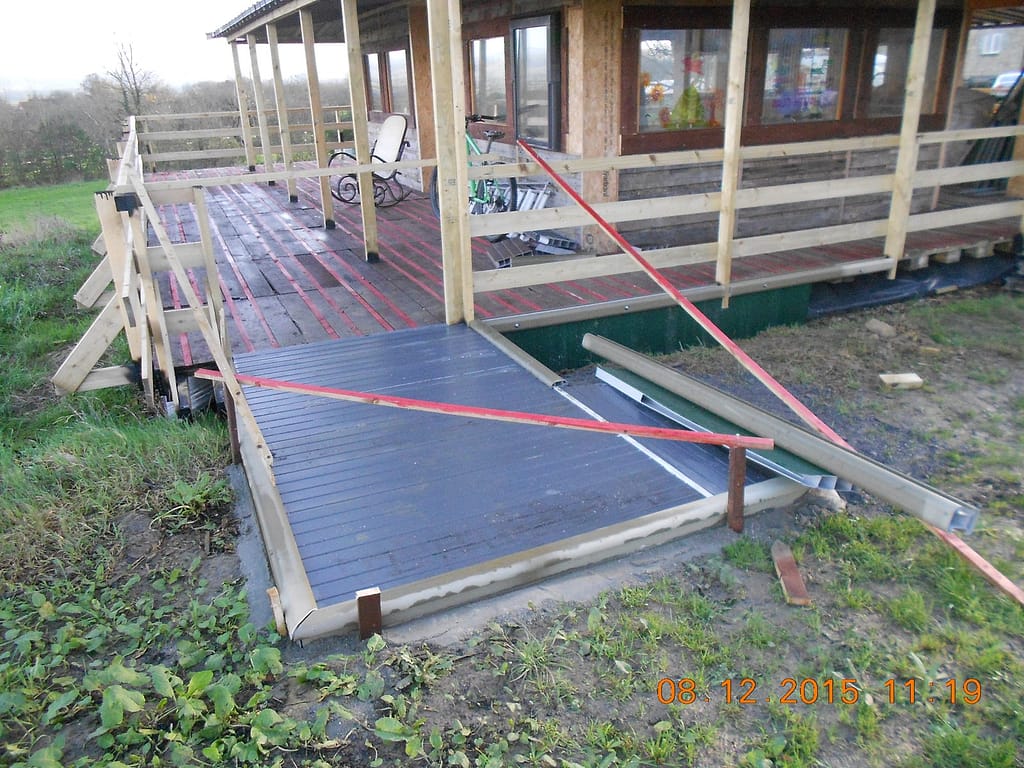
In fact the fence stuff worked well for the steps so we used it for a ramp entrance as well. And then we still had some so we have used it to make a “skirt” round the base which makes it look neater. These things are a good example of just using whatever you have got for whatever it will do.
These posts are exactly why we got this stuff so cheaply because some of them are very wonky, but as you can see most of it has been fine. I saw Keven at Avon Plastics the other day and he will take back anything we don’t want and all our offcuts for reprocessing, so there will be no waste at all.
Thursday December 24th 2015
OK, That’s it!
HAPPY CHRISTMAS
See you in the New Year
Tuesday January 19th 2016
OK, we are back, so Happy New year.
In fact we were back on the 4th but it took a bit of time to get back into everything.
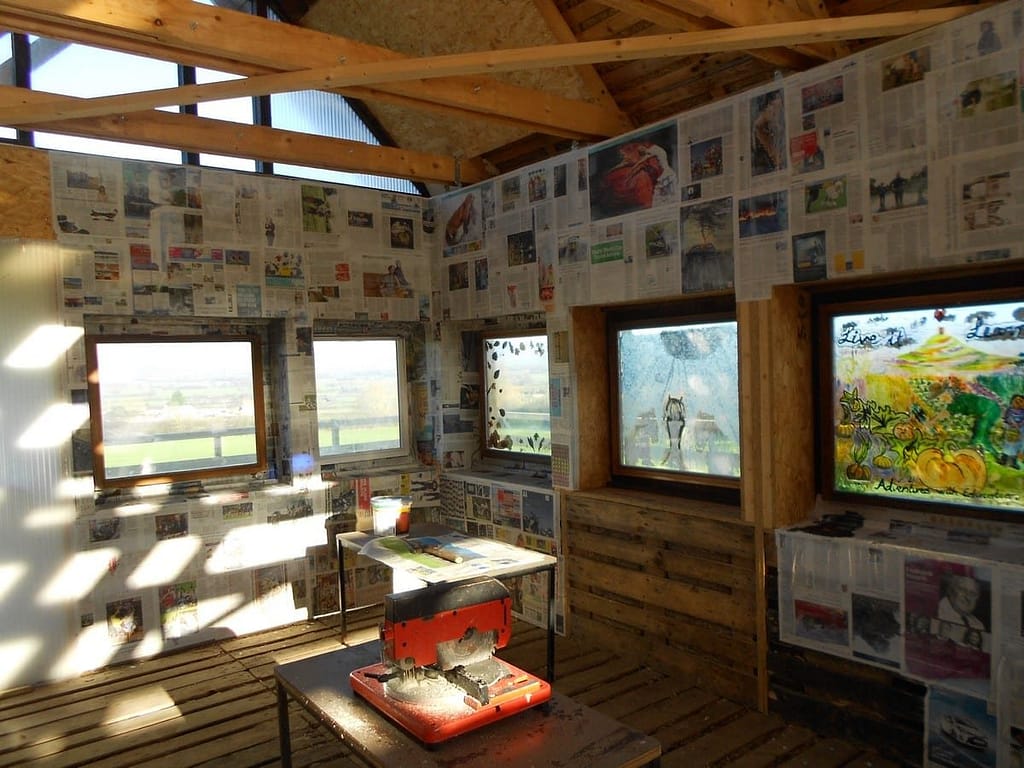
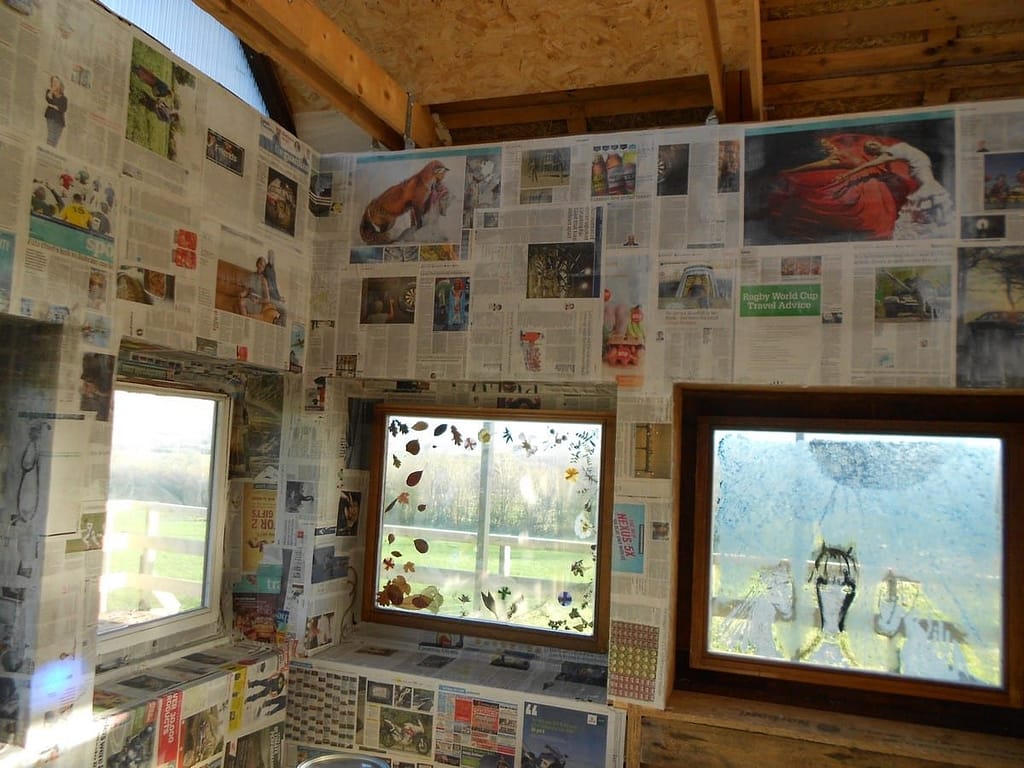
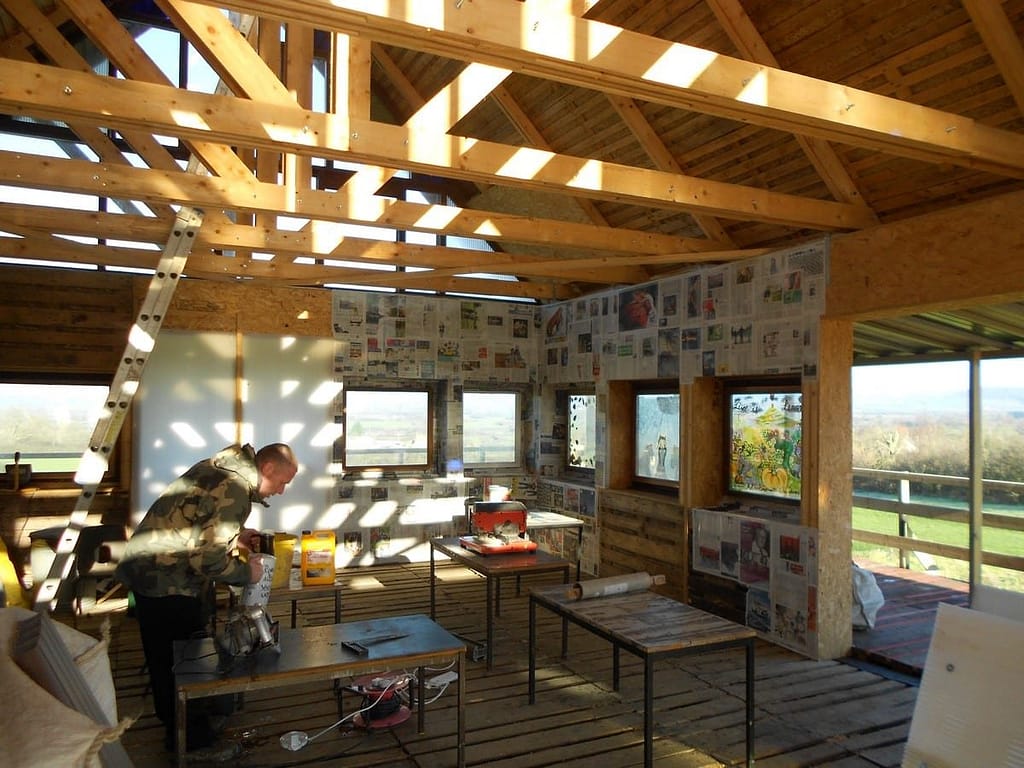
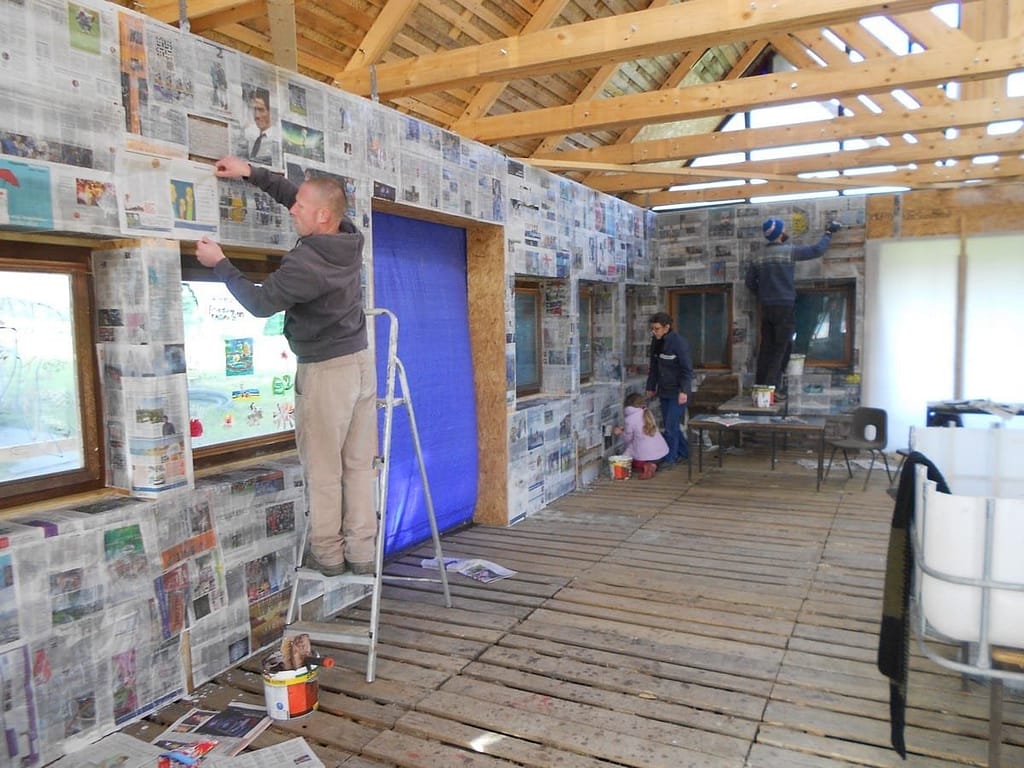
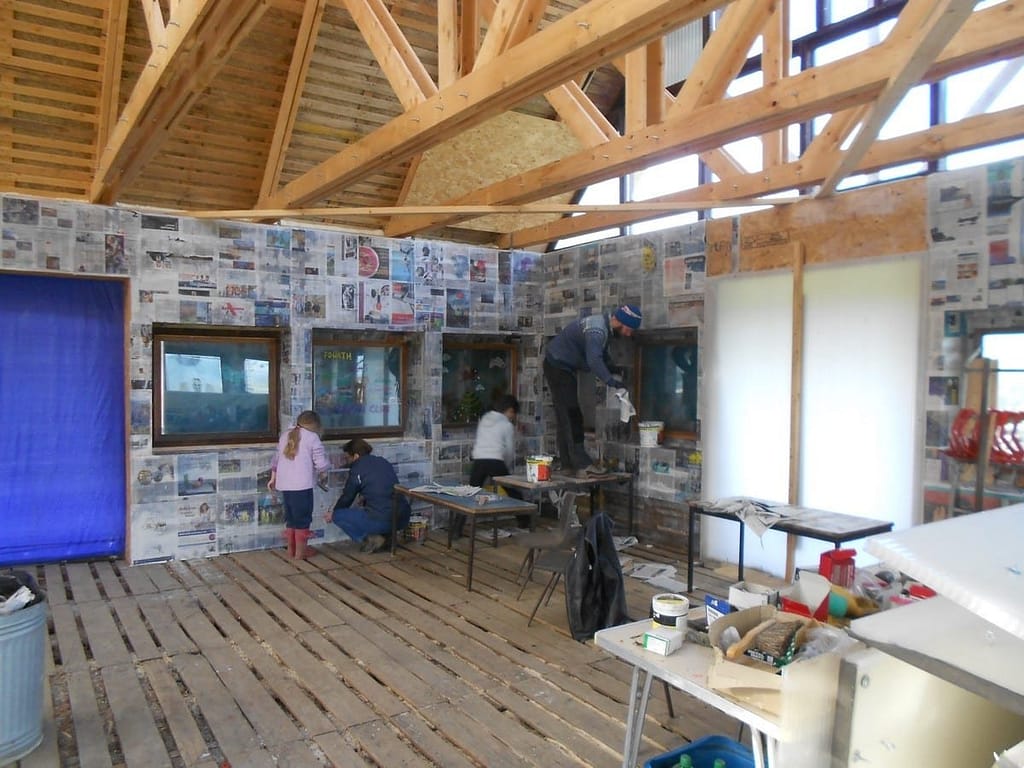
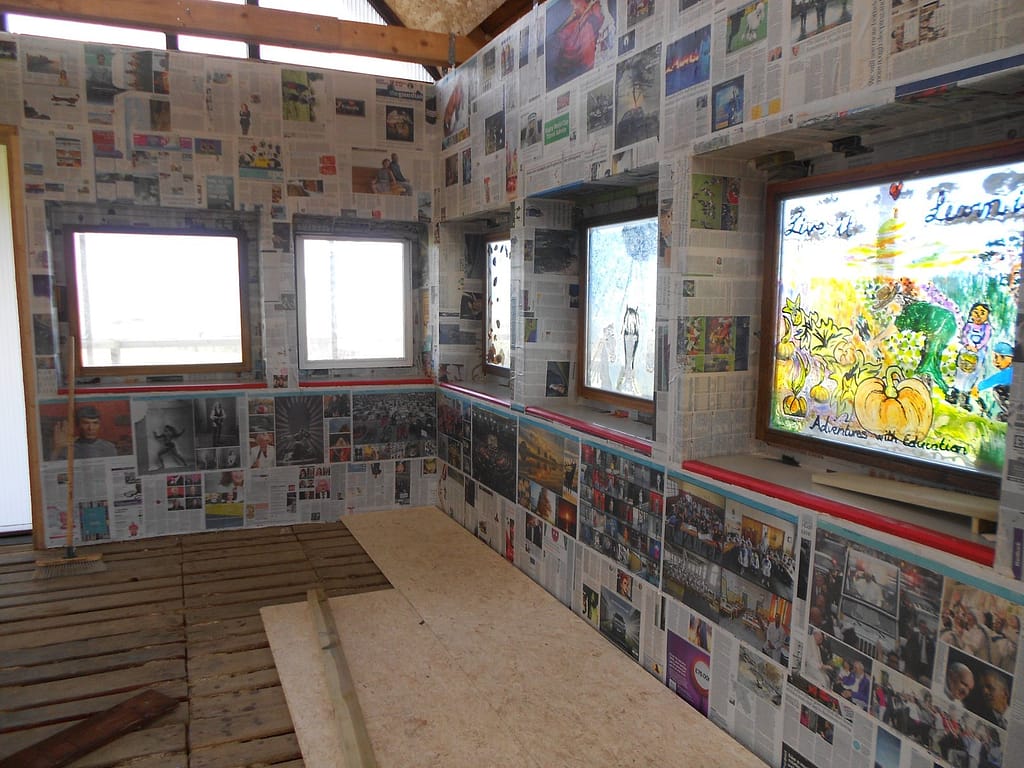
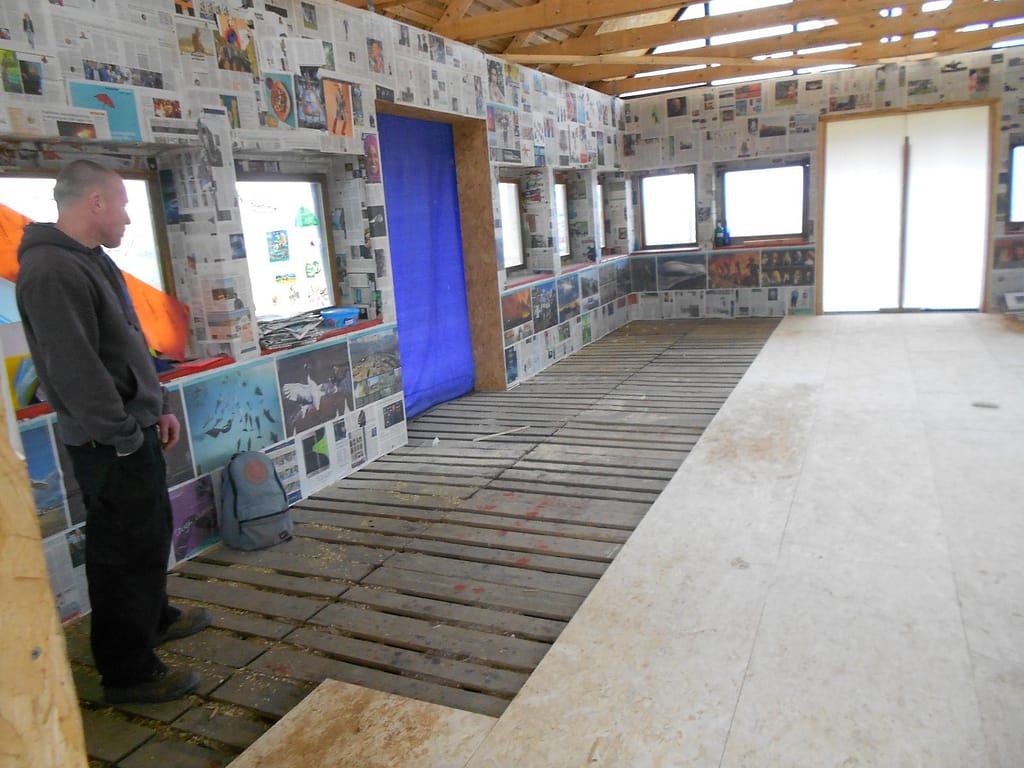
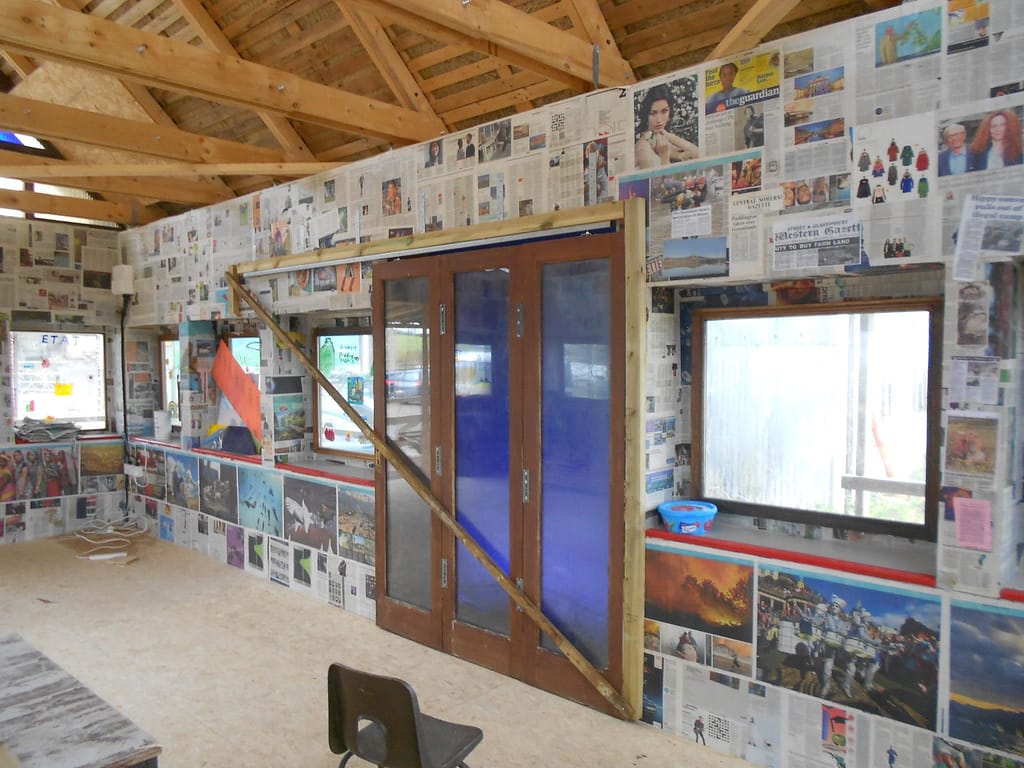
Here is the beginning of the “wallpapering” and some windows.The corner one is Tanya’s and very tastefully done with pressed leaves and stuff. the middle one is Hallow the horse, flanked by the two little Shetland additions to the farm who are called Muffin and Berry, and painted by Michelle. The right hand one was started by one of the volunteers but finished off by Lil and her two children Luke and Jolie.
There were several reasons for the “wallpapering”. Firstly, the inside finish is rather dark so I thought that it needed lightening up a bit. Secondly it is a bit “rough” and I thought the insulation might be a bit dusty so papering it would give the interior a more uniform finish and hold in the dust. Perhaps the main reason is that the windows are pretty crude and rudimentary and therefore a bit draughty. I thought that if we used the newspaper as a sort of papier mache we could mould and wodge it in the cracks. I think it is going to work really well.
Heather Clover from Burtle kindly volunteered to come and experiment with how to do it. We started using the newspaper wet and diluted the PVA which is what we are using as paste. We are using PVA ( Unibond ) partly because children are allowed to use it and partly because we were told that if we used flour paste it tended to ferment in a damp atmosphere and get smelly. It turned out that wet paper was too fragile and the PVA was too dilute so it all fell off. So here is what we found works.
Dilute the PVA with water 50/50, and use any big soft brush to generously coat an area you can paper in about ten minutes before it soaks in and/or dries.
Use the newspaper dry and only one sheet at a time. Unlike proper papering, brush over the top with PVA as well and overlap each sheet. I am the world’s worst wallpaperer. I have never been able to get a square foot of paper up properly lined up and without wrinkles so this technique suits me fine. You cannot get this wrong. Just enjoy it. I am not sure how many layers we will finish up with before we get bored. However many we do won’t stop the inevitable child or grownup child poking holes in it but they are infinitely repairable and life is too short.
We are having an open wallpapering day from 10.00 ish to 4.00 ish on Saturday January 30th.
We will provide something to eat like soup and sausages and stuff. Please come and help or watch. It will be fun.
Opinion is divided about whether we should paint it or not. We shall see what everyone thinks.
This is the prefabricated ridge in four sections folded up and tied so that we can shove it out through the top, open it up like an umbrella and fix it from the inside. You will remember that the clear tarpaulin was only temporary because it rots in UV light after about a year. We need a warm dry day with no wind and a bit of luck. I hope it works.
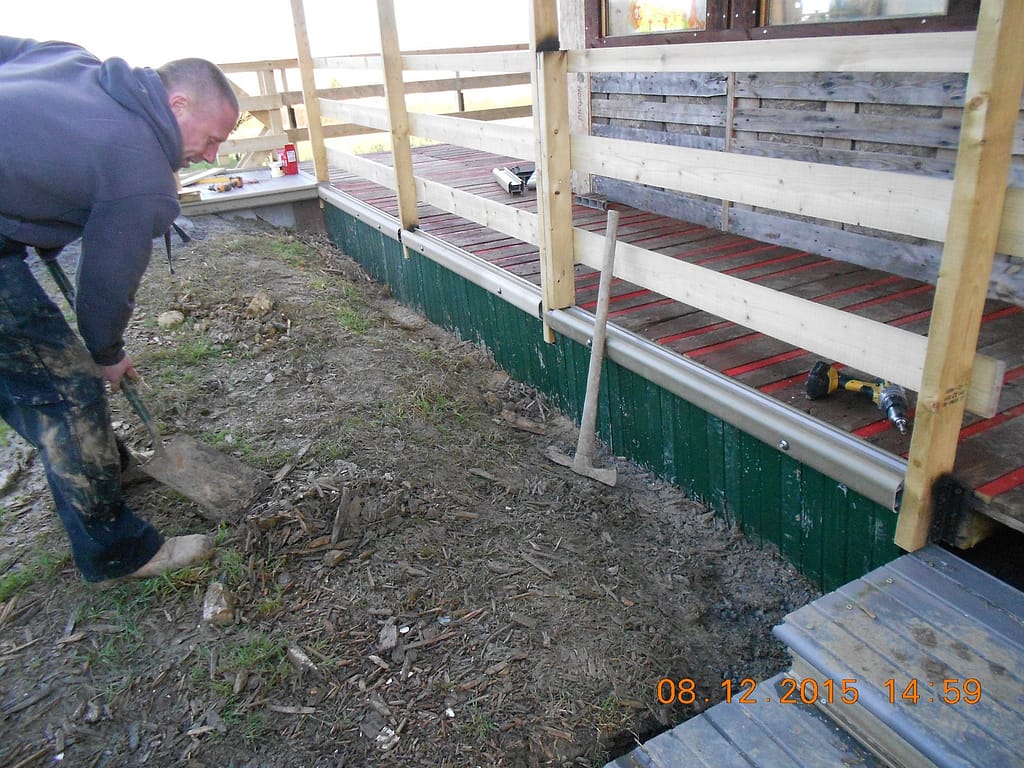
Alex is doing a great job using the incredibly versatile fencing to shutter in the foundations.
Monday Feb 1st 2016
The wallpapering day was great, but bloody cold.
I started in what I hoped was the least windy corner. This turned out to be a mistake. Although it wasn’t windy it was draughty through the wall itself, so when I had pasted on a few sheets they began to bubble and then just peel and fall off! Of course this was exactly why we were papering. I had several unsuccessful goes until we tarpaulined the outside . It was only that quarter of the building that was exposed to the wind so everyone else was OK. Now we have got a layer on and it has dried I think we will be OK..
With a bit of tidying up it should be fine.
We have now got a few more layers on all round and finished it off all round just below the windows with the nice pictures that the Guardian has in its centre pages each day.
Thursday February 18th 2016
The permanent ridge is now on, and I can’t tell you how relieved I am. Monday and Tuesday this week were cold but the forecast offered us little wind and no rain. As you know the plan was to push the prefabricated sections out from the inside, then open each up like an umbrella and sit it on the ridge having taken off the temporary clear tarpaulin so we were then committed. I had thought of fifty things that could go wrong and planned to ask Rog to be a third pair of hands just in case. In fact Rog was busy and a fifty first thing went wrong. Once again I am afraid there are no pictures of the tricky bit of squashing a section through the slot having slid it up the ladder, because Alex and I were both tied up being the tricky bit. The most dodgy bit was that we had to push it straight up and then catch it carefully when it toppled over once through the slot. We got the first two sections on and safe on Monday and went home to thaw out, and nurse aching muscles from tottering about on ladders and working at silly angles. On Tuesday we got the third up, in place, and secure, with one to go so we stopped for a celebratory coffee. Only after coffee did we realise that we hadn’t got a free slot big enough to get the last section up through. In fact I think I had thought of it as round about problem thirty seven and then forgot. So we had to undo the third section and slide it back, get the last one on and then slide it back on. Using zip ties made it as easy as it could be, but it was still a time consuming pain because we had to keep moving the ladders which meant taking them right down to get them back up in a different section.
But it is now safe and we spent yesterday beginning to put on the rest of the zip ties, trimming them off and generally tidying it up.
We are cutting back the temporary ridge as we go.
Each section is zip tied onto the original sling bars on each roof section so I reckon it is pretty secure.
We are using both ladders section by section which is laborious but it works.
Monday March 7th 2016
The ridge is now done thank goodness so the next job is the floor.
We would really have liked to have been able to do the floor out of recycled stuff. However, it didn’t seem possible in a sensible time frame so we just bought tongued and grooved OSB flooring which is probably the cheapest sensible option. T&G is a great option because once slotted together it acts as a single sheet and takes out any minor lumps and bumps. Someone suggested that we might have used laminate flooring offcuts. This was a really good idea and I am really sorry we didn’t think of it earlier. you would need to get all the same make otherwise they wouldn’t fit together but it is a really good idea for next time.
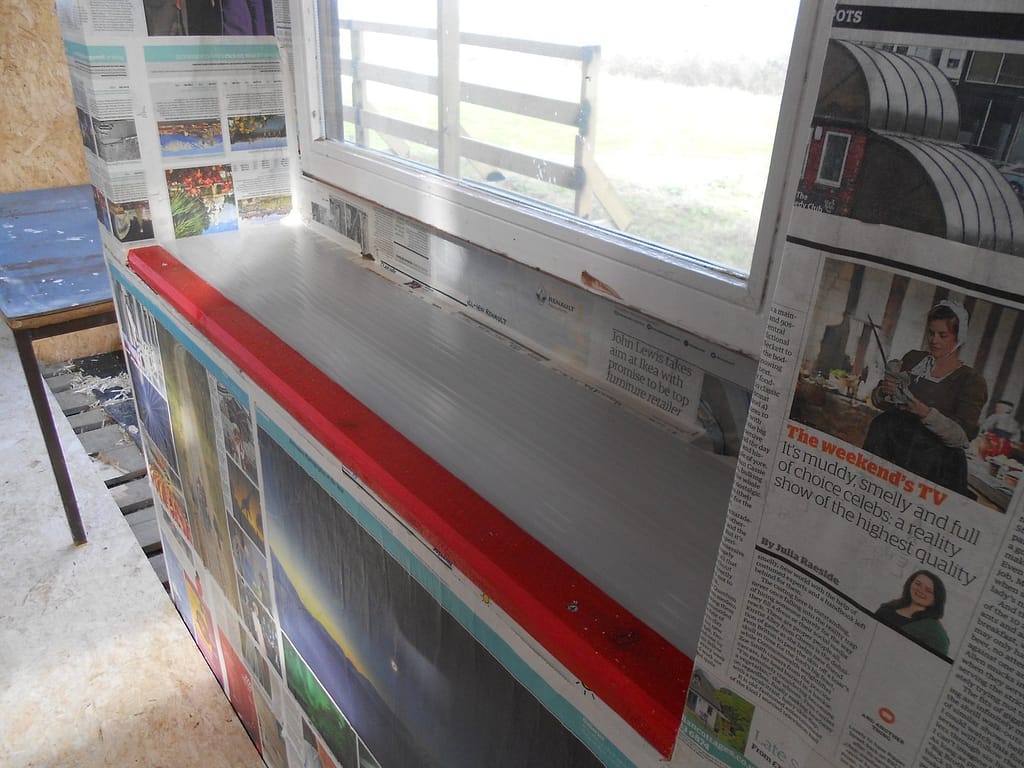
After we had wallpapered the inside, the first thing Holly said when she came in was that newspaper wallpapered windowsills were a complete waste of time for a start because you couldn’t even wipe them with a damp cloth! Since she and Tiff have to do all the cleaning of the accommodation on the farm, as well as run the office and manage everything else, they have to be taken seriously. I had some batten left over from the temporary ridge, and some multiwall poly roofing sheet so that is what the sills are done in.
In the meantime Alex has been using up nearly all of the rest of the patent fencing system to make a cosmetic skirt all round the base which has turned out really well. This stuff has been really great since it did the whole verandah roof, the disabled access, all the steps, and the skirt!
We now have an official finish date of May bank holiday Monday, which we reckon will be OK.
I am off for most of this week because I have wangled myself a speaking slot at Ecobuild which is a big construction industry conference and exhibition at the Excel centre in London. It is apparently attended by the industry’s great and good, and me. I am hoping to be quite rude about why as the sixth richest nation on the planet we seem to be incapable of organising ourselves so that we can provide decent affordable housing to the two million families desperately anxious to mortgage themselves to the hilt with their own money to buy a home of their own. I shall explain that it is largely to do with lack of political balls, and offer a decent suggestion for something they could set about doing about it.
I will let you know how I get on..
Thursday March 24th 2016
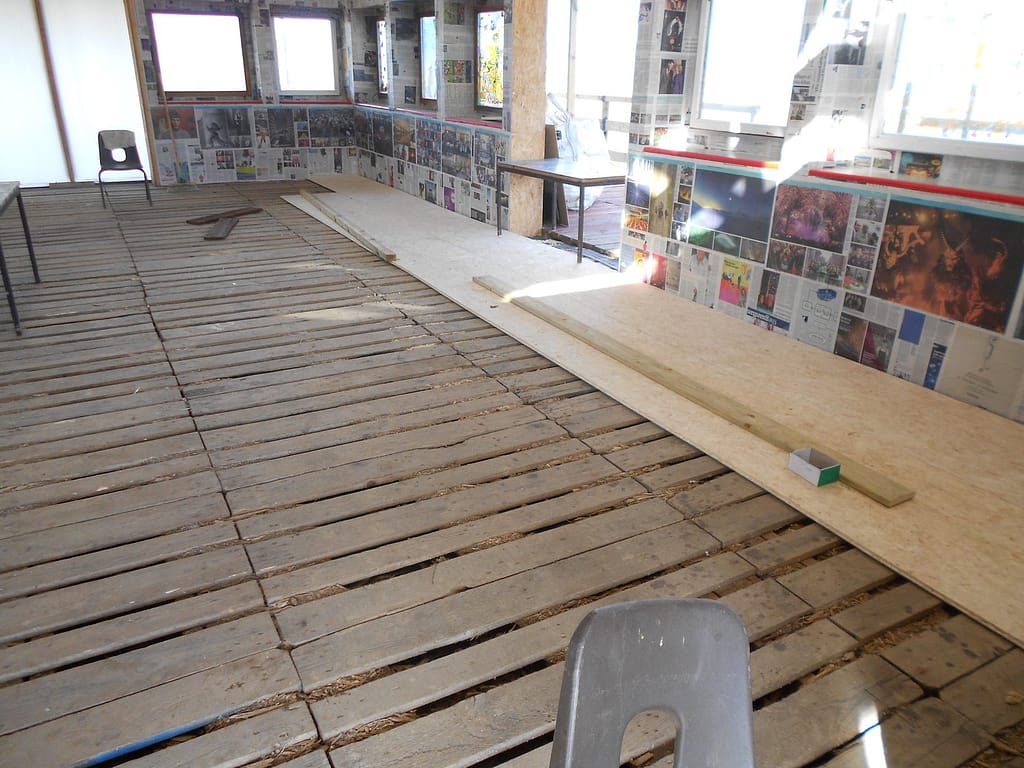
The floor is done, and although the pictures don’t show it the thresh holds are done too so now it is basically just doors.
Doors have turned out to be a more complicated thing than I thought.
I am not sure whether I have mentioned this before but since I can’t instantly find if I did or not, here goes again. Whilst I am not a great worrier about rules and regulations, I am very aware that our classroom will burn with roughly the same enthusiasm as a box of matches. Strangely, building regulations are not too concerned that buildings can burn down. In fact they really don’t care at all if a building burns to a crisp. What does concern them is that everyone can get out safely before it does. So although our classroom appears to start off with the fundamental disadvantage of being made almost entirely of stuff that burns rather well, it does have some basic good points.
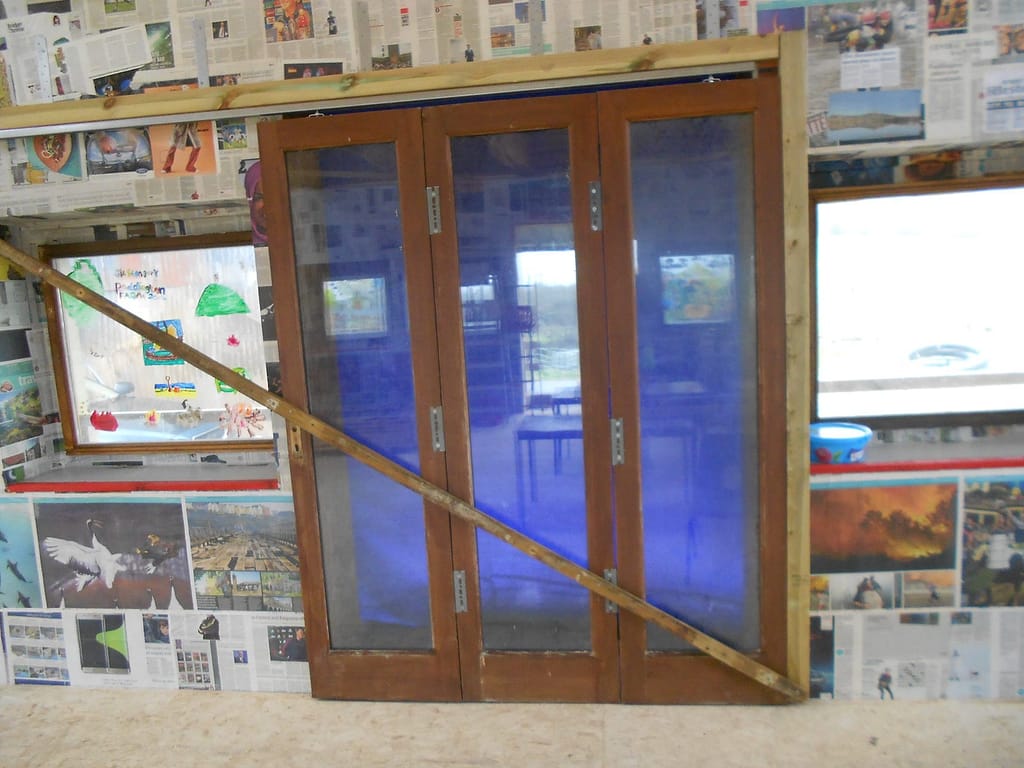
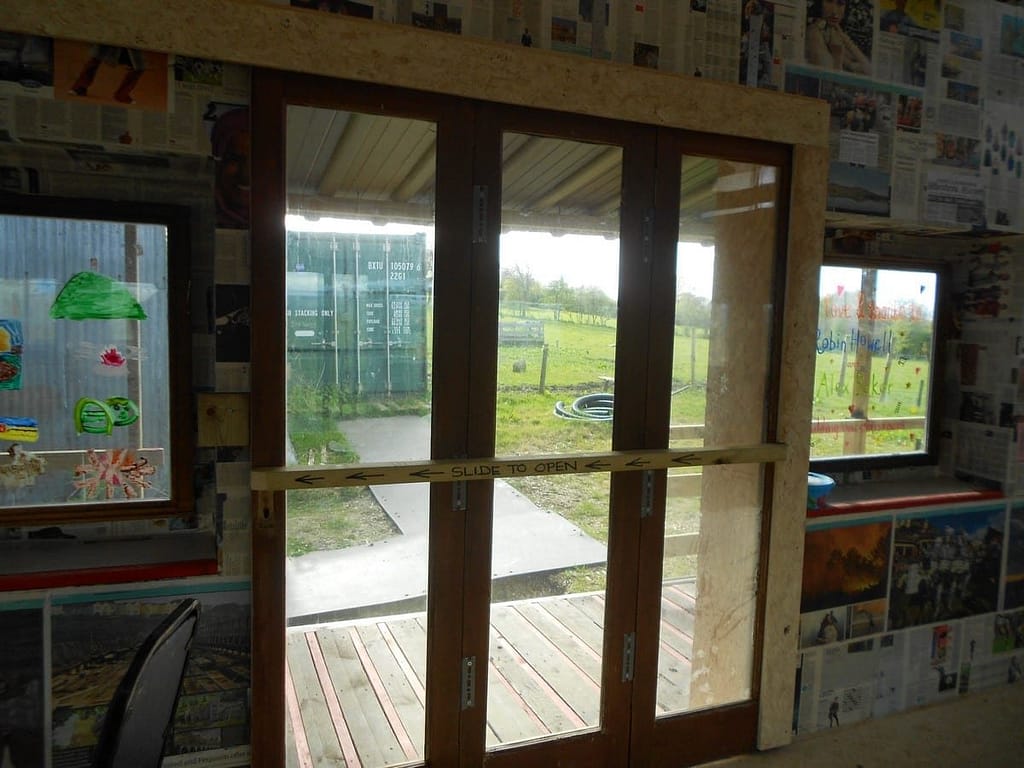
It is a single room, in a single storey building, on the level, with four good wide doorways so that no one can be more than about ten foot away from a way out. I reckoned to use second hand patio doors which with a bit of luck we could get for nothing, like the glass window units.
We had already got one of two pairs which came from Tiff’s Mum’s house, damaged in the Moorlands Somerset floods of 2014. We had already used the other pair in the new camper’s kitchen in the big barn.We couldn’t find any more except for sale on eBay. Then Castle Improvements in Bridgwater offered us a dozen glazed wood frame door panels which I think we can make work as sliding doors so we will start those next week after Easter.
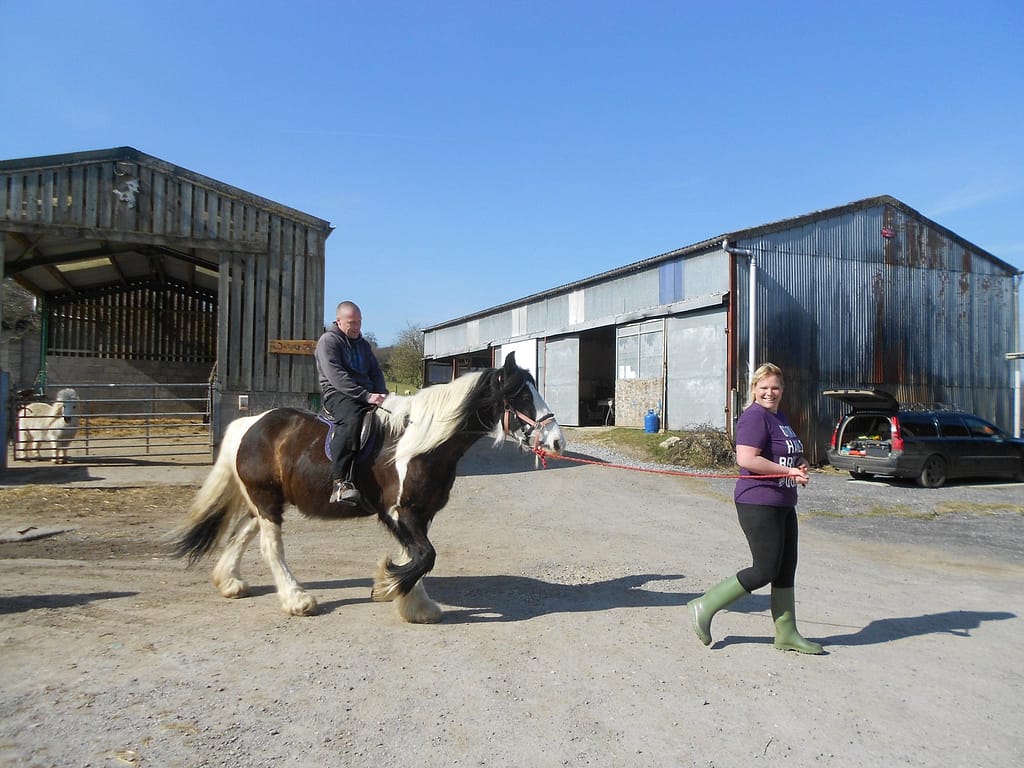
Amy is training Hallow to a saddle so Alex got to be a guinea pig. Hallow takes a bit of a dim view of being asked to do anything except eat, but to be honest it is the least he can do for Alex, who supplies both him and the others with regular treats.
Thursday April 7th 2016
The system for the doors looks as if it is going to work. We got about ten lengths of Dexion angle section at the scrap scheme and it has been really useful. In fact I have now got a “kit of parts” for making up all three sliding doors and got only about three foot left which is good. I have used Henderson sliding door gear. The Husky range looks a bit weedy but will take doors up to 100Kg. Since these weigh about 25Kg each we are well in and they seem to work pretty well. I think I may have a bit of a problem keeping the draught out but I have a couple of ideas, so we shall see..
Saturday April 30th 2016
Well, this is nearly it! The official opening day is Bank Holiday Monday May 2.
It will have taken almost exactly eighteen months which I reckon is about the maximum before “project fatigue” sets in. .
The doors have worked really well and are very simple. They make the best use of the openings and are easy to open.
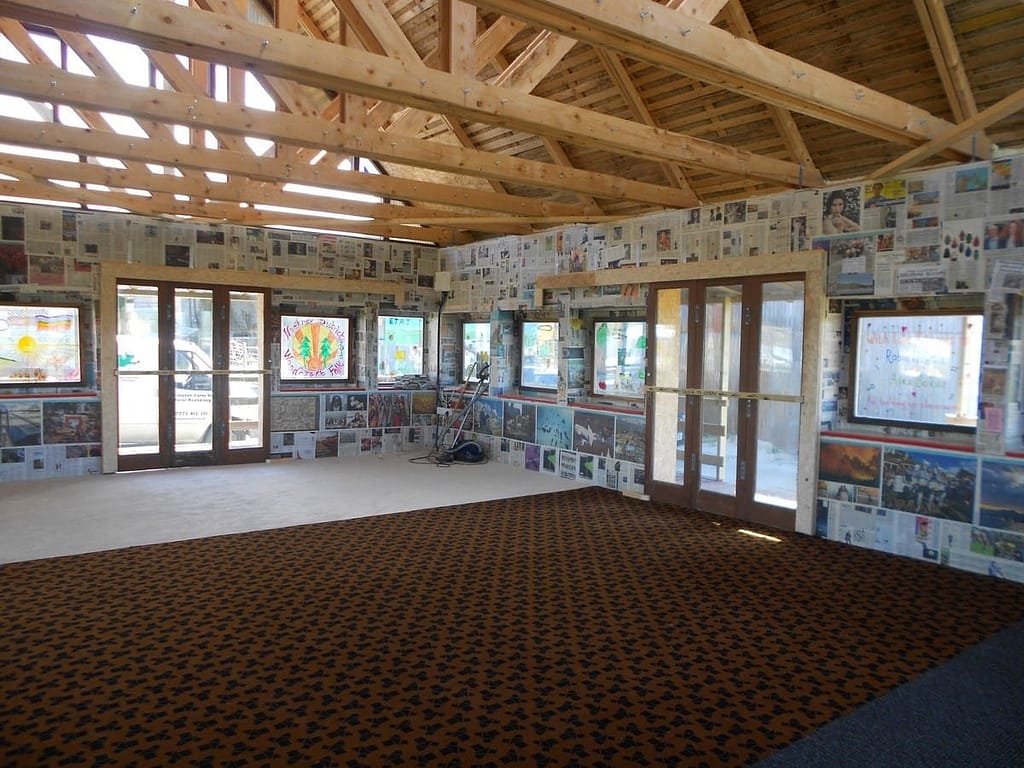
The carpet is a bit of a patchwork but that is partly because it is free! The section at the main entrance by the french doors is “wipe your feet mat” because the classroom is on a farm which means muddy feet. The cream section at the other end is because there wasn’t enough of the brown one. Tanya says the motif on it looks a bit like the sign for nuclear radiation hazard which may explain why it wasn’t a wildly popular pattern. We are incredibly grateful to Mike Bancroft of Bancroft Carpets in Glastonbury. Mike and Sally Bancroft are just the nicest people and do loads of stuff for local good causes.

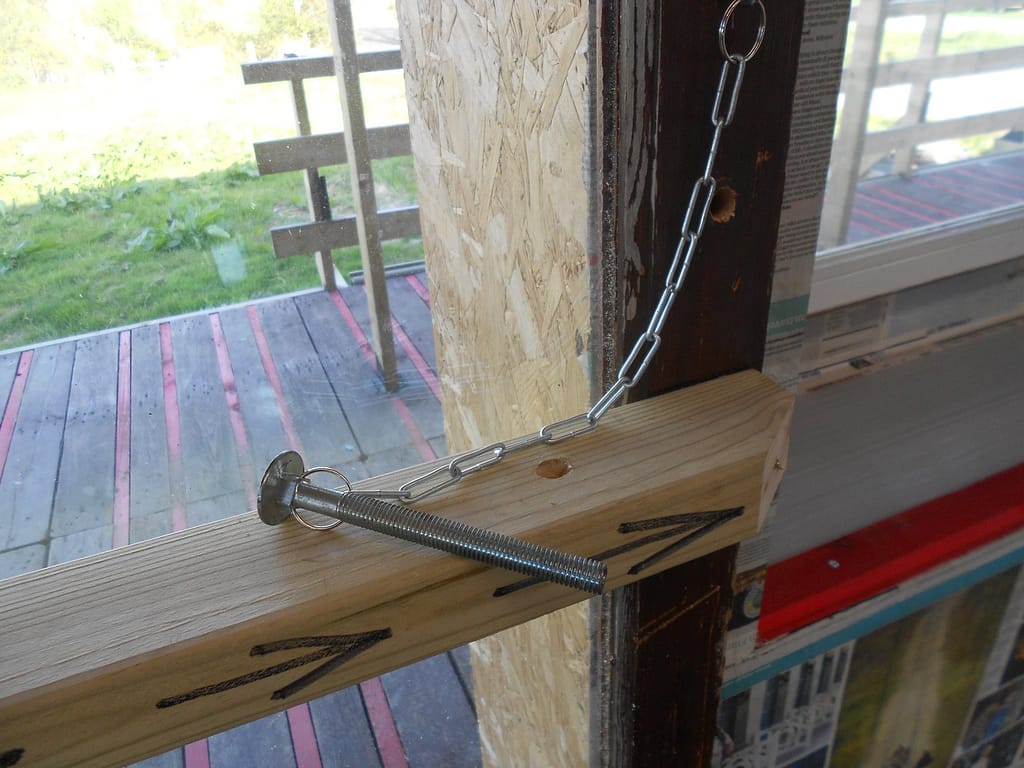
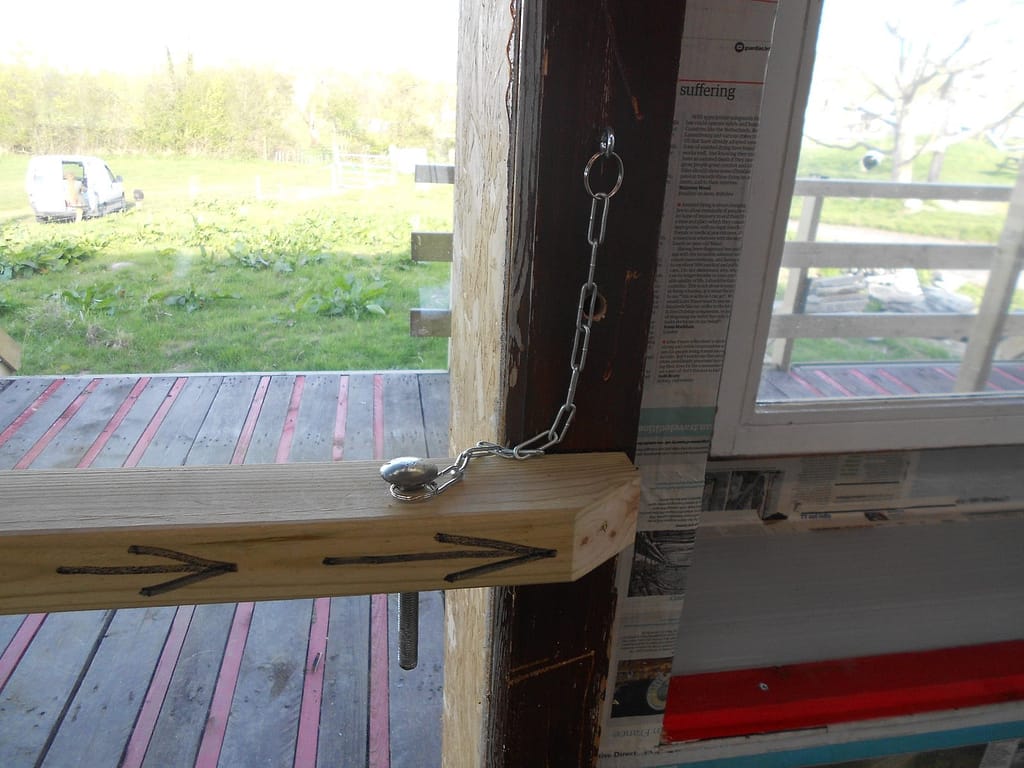
We decided to use a very simple system to lock the sliding doors which consists of a six inch bolt pushed through the door and into the wall when the door is shut. this means it cannot be opened from the outside but can always be opened from the inside. The french doors will be the main entrance and they can be locked from the outside. For fire regs when the room is being used the bolts should be taken out and put in the horizontal bar. I have put a little chain on them so they don’t get lost.
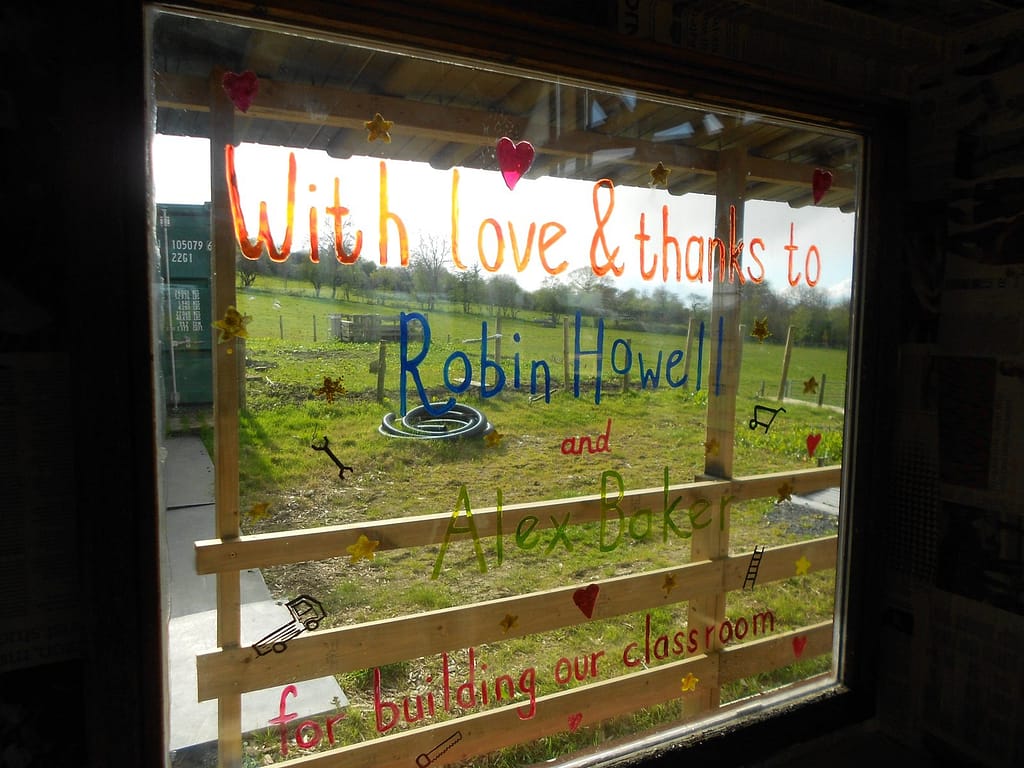
Leela did this window for us from everyone and we are both very chuffed.
Friday May 20th 2016

Well, I suppose that is more or less it! Bit of an anticlimax really. After eighteen months work it leaves a bit of a hole. We had an official opening on Bank Holiday Monday May 2nd, and Tessa Munt cut a ceremonial piece of baler twine, and everyone said nice things and Amanda cooked really nice food and Alex was embarrassed by people saying nice things about him and then we we milled around for a bit and went home!
I am not sure what happens next.
AUGUST 25th 2016
Postscript or extra bit
Although I knew I was going to bunk off once the classroom was finished I had said that I would go back and tidy up the scrap scheme. Also, there were a couple of silly things I wanted to have a go at before I finally abandoned ship.
If you look at the Paddington Farm page you will know about the problems I had making go-karts that would stand to the enthusiastic use they got from the kids and grownups. While we were building the classroom I had managed to rescue some wheelchairs and I had stashed them away behind the container until I had time to play with them. They have turned out to be great. This is mainly because they have solid wheels that don’t get punctures and the wheels and bearings are built to take the weight of adults.
So, as usual they are made by cutting up the frames and bolting bits together so that if you hang on tight you can career downhill and more or less steer. I managed to get the wheelchair brakes to sort of work on a couple of them, but to be honest stopping is mainly a matter of feet and steering uphill when you get to the bottom.
They do provide a huge amount of fun and a few bumps and bruises, which regular visitors seem keen to reproduce within minutes of arriving each time. I managed to get five good ones up and running this year and they have survived the season pretty well with a few repairs.
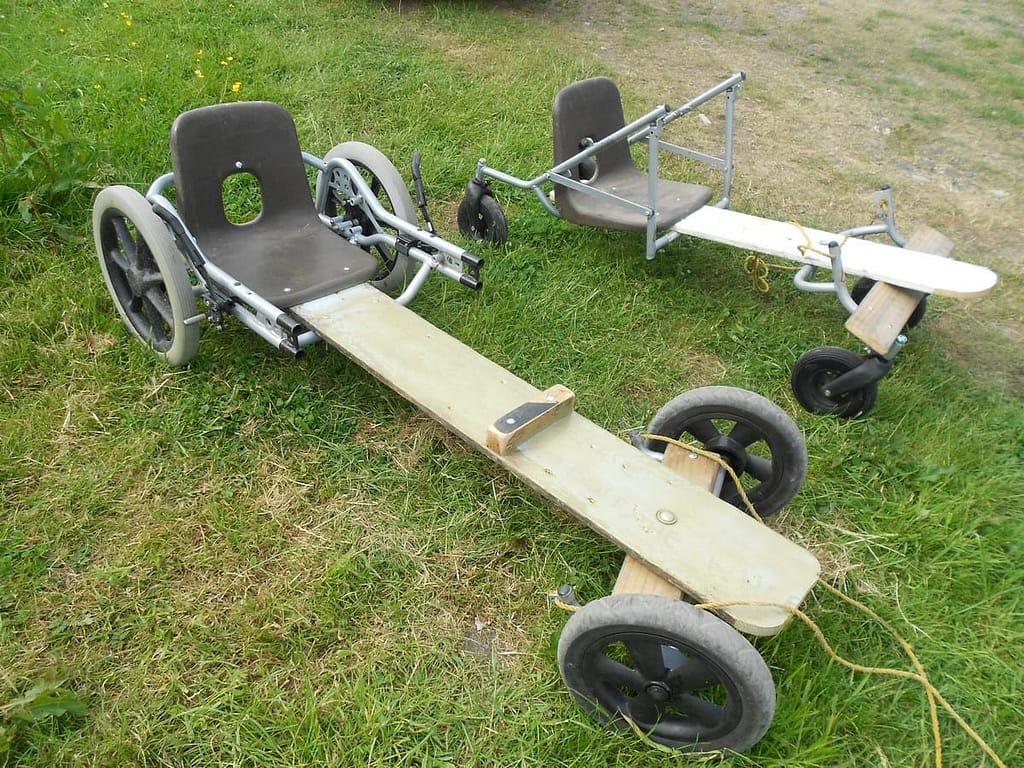
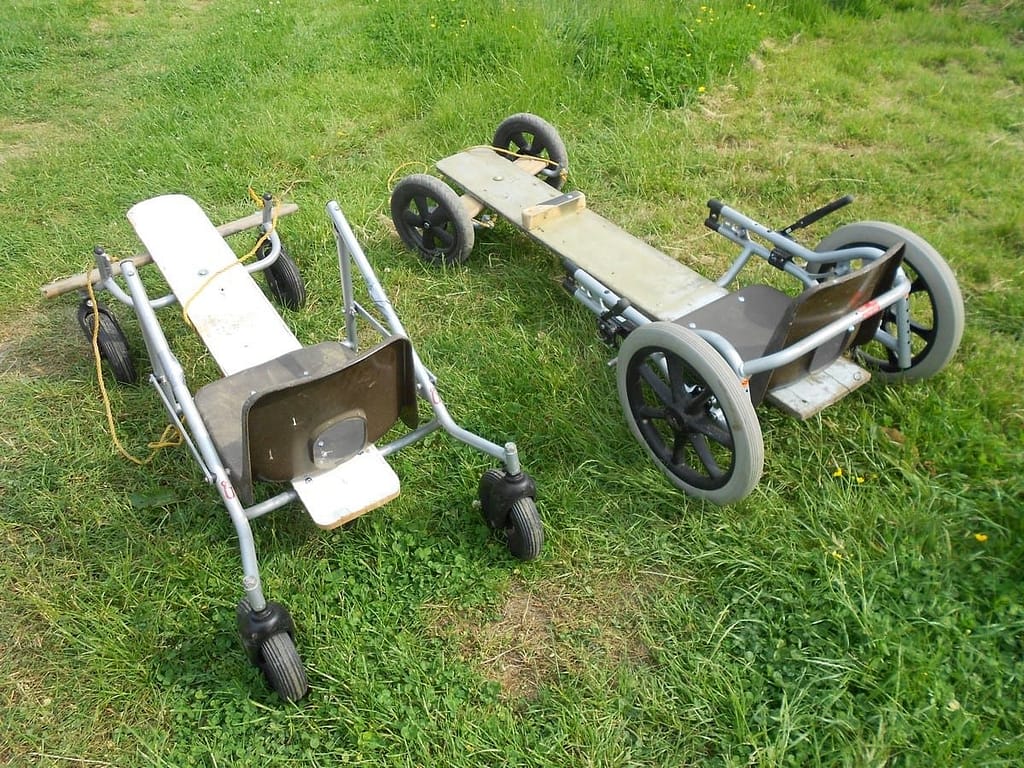
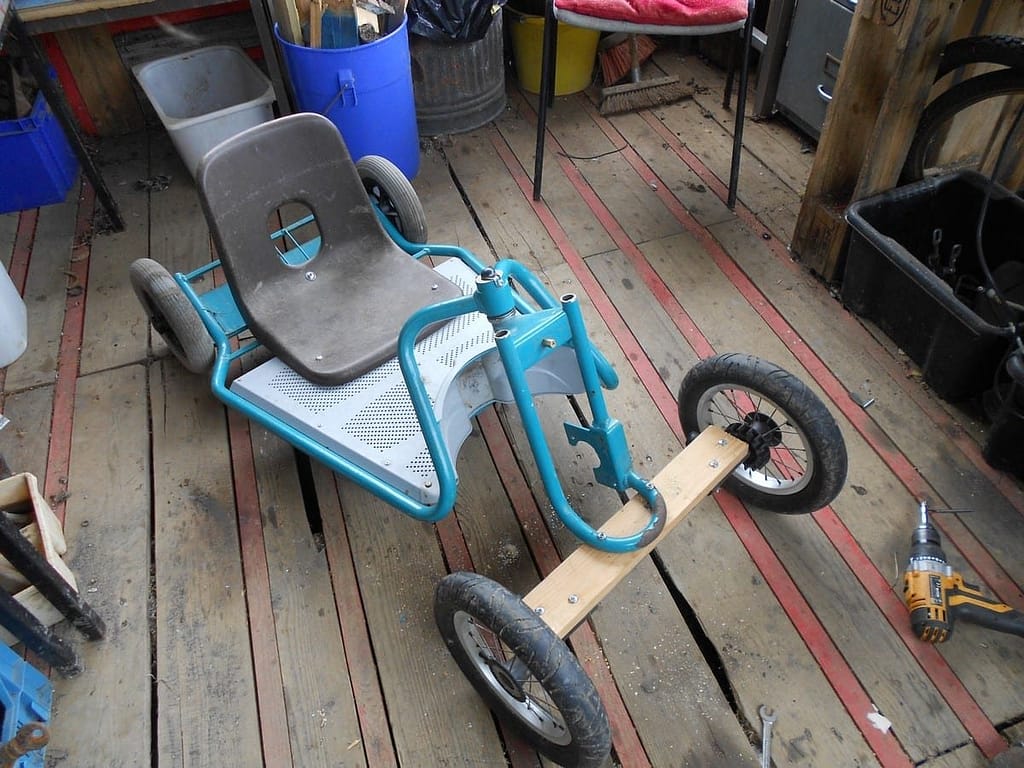
Sunday September 4th 2016
Friday was my last day at Paddington Farm but I am going in tomorrow to hand over some keys and a bit of money and generally talk Tiff through stuff I shall no longer be around to do.
I hope Alex is going to be able to take over a bit and may be Wills will be able to give him a hand which would be great since Alex doesn’t drive.
Below are some pictures of a couple of silly things I did just to show how easy it is and the principle that you can boil a kettle using the sun and that you can make proper electricity by pedalling a bike.
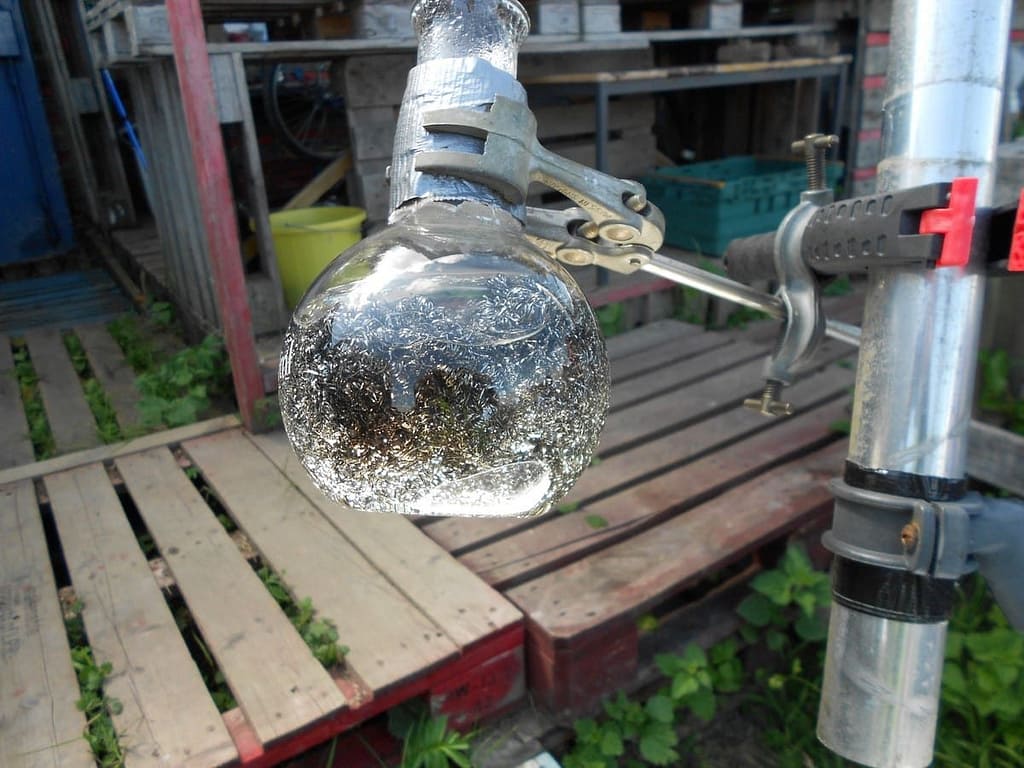
A thrown away satellite dish acts as a magnifying glass if you cover it with mirror foil. The thing is that you need a concave parabolic mirror to do it which is a really hard thing to make but is exactly what a satellite dish is. All you have to do is point it at the sun and get your “kettle”at the focus point.
The easy way to get it point directly is with that little white bolt you can see at the side of the dish. If there is no shadow it is exactly right which makes sense if you think about it. Actually you can see from the photo that I haven’t got it dead right but it shows the principle. It is an idea I got from youtube which is my main research tool for all this stuff. Of course in theory you have to keep ” refocussing” it all the time as the sun moves but in practice once every twenty minutes or so is fine. The wire wool in the flask just helps to diffuse the heat better.
Everyone asks if it would make the tea or coffee taste funny without realising that many kettles are made of stainless steel and often have a stainless steel pad inside to help stop the kettle furring up. Anyway this is the principle and it all works a lot better if you live in California or New Mexico.
The young are much more interested in pedalling to make a smoothie or charge an iphone.
Although I find youtube a massive source of ideas and inspiration much of making these things actually work is down to your own imagination and ingenuity in making the best use of stuff around you. Running the scrap scheme gives me a huge resource in terms of useful bits and pieces but you still need to use your brain a bit to find good ways of sticking them together..
This bike generator is the first one I have tried so it is not that good but it makes the point.
The basic chassis is a cut down upside down PE horse. You can see the other one we got in the background. I cut an old bike frame down, and cut the forks up and put them through upside down and just drilled and bolted it to the chassis.
I fixed a little old fashioned bike dynamo to drive some little led lights and a smoke alarm which makes a lot of noise when you pedal.
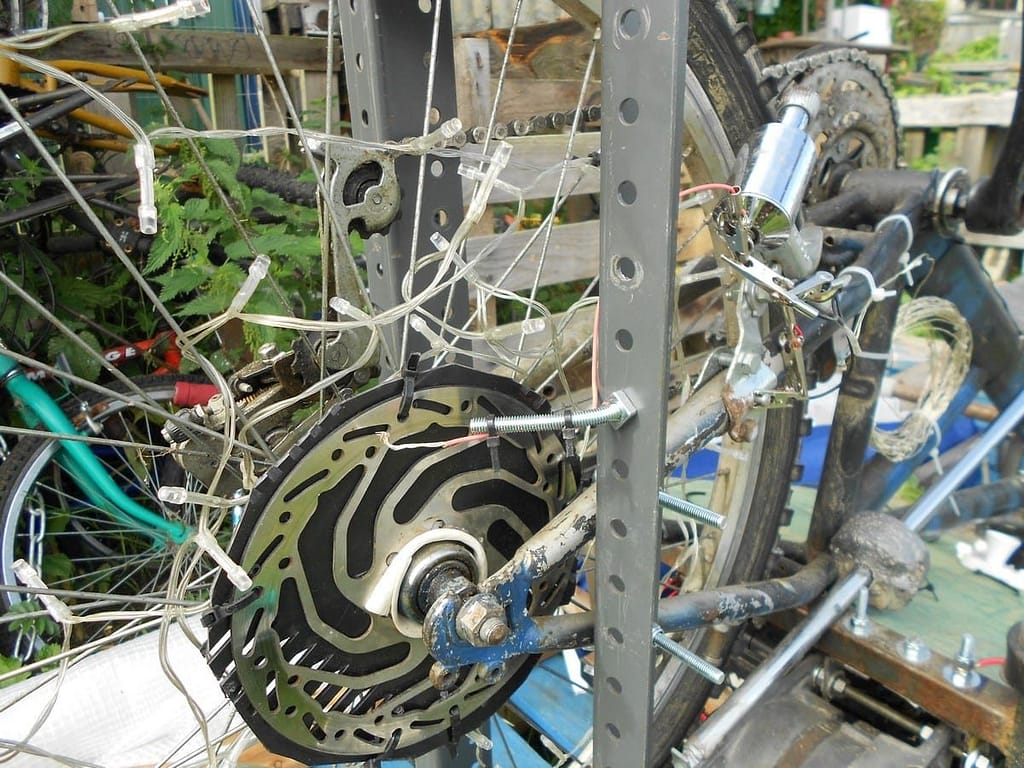
The lights on the wheel work using a bit of wire rubbing on an old brake disc which is insulated from the main bike by a bit of plastic from an old bucket. the principle is the same as works old fashioned dodgem cars at fairgrounds where one terminal was a wire brush thing on a stick at the back of the car rubbing over a wire mesh roof.

This is the smoke alarm which is worked by the bike dynamo. Separately you can see the ignition switch panel for the alternator which you can see in the picture below.
Most of the bike powered alternators on youtube seem to use various indirect methods to drive the alternator. However, Julian at Auto Electrics in Glastonbury who kindly gave me an old one said that if I could get it to run at about 2000 rpm it would be fine, and I can get that direct off the bike wheel. The chain is permanently on the biggest pedal cog and the smallest wheel cog, so that is the highest pedalling gear. Then the fanbelt pulley on the alternator is very small compared with the circumference of the bike wheel which ramps it up again. For our purposes the friction drive works fine. I have used a lever with a sliding weight which is my idea because it is a very simple way to turn it on and off and I can very the “tension” by changing the postion of the lead weight. I made the weight by melting some lead and pouring it into a lager can round a piece of 15 mm plumbing pipe the same diameter as the lever.
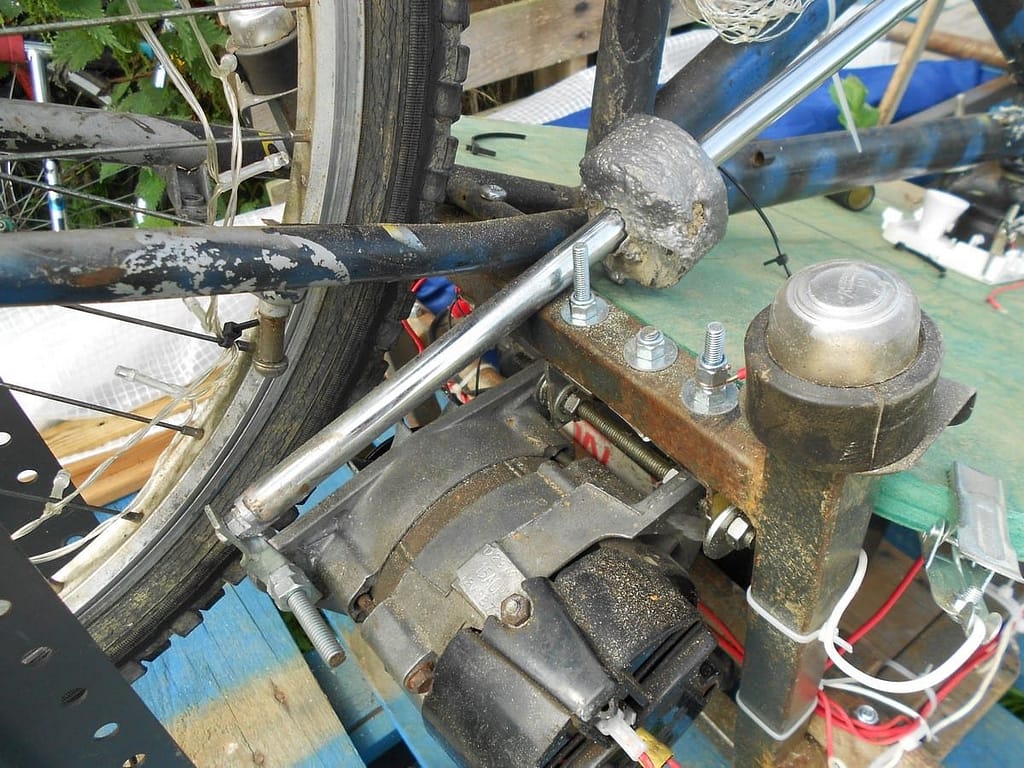

The alternator charges a 12 volt car battery which Julian also gave us which you can see in the background of the picture above. I have got a little trickle charger to keep that topped up, which is a bit of a cheat but it doesn’t get used enough in earnest.
Another bit of a cheat is the iphone charger, but only because it is actually connected to the battery. I make the kids pedal to charge a phone but of course it would work quite happily without them pedalling until the battery ran out.
Nevertheless, it is quite ingenious. The little red thing is a 150 watt AC inverter and costs less than £10 on eBay. It normally plugs into the cigarette lighter socket in a car and has a conventional 3 pin socket and a USB socket that I plug the universal phone socket into. Simples!
OK, this is the last gizmo and much to my surprise and the kids’ delight worked out really well.
I got an old burnt out blender from Cheddar boot sale for a quid. I already had some Dexion bracket in the scrap scheme. I dismantled the blender so I just had the drive shaft sticking out and Steve spot welded an old bike dynamo drive wheel on the end. I was going to use the same lever system to press the blender wheel against the bike tyre but a fairly tight spring nut and bolt on the pivot seems fine. There is only water in the mixing jug because I would have to keep washing up but it shows you can do it. Because the drive wheel on the blender is so small it really does whizz up a drink .